Introduction

15th century fan vaulting in the under chapel at St Winefride’s well. late 15th – early 16th century
On Friday I took advantage of a sunny cold day to revisit St Winefride’s Well and its late Medieval chapels. During the Middle Ages it was a major draw for pilgrims to north Wales, with its shrine, beautiful bubbling spring and the Basingwerk Abbey a few minutes away. St Winefride’s (Welsh Gwenfrewi) shrine and the Holywell (Treffynnon) parish church were granted in 1093 to St Werburgh’s Abbey in Chester for them to manage and from which to derive an income. It was later consigned to Basingwerk Abbey.
Nothing is known about what sort of buildings preceded the late medieval building that we see today, but there are details about Saint Winefride, a list of some of the well’s most notable earlier medieval visitors and details about the measures that were taken to promote the interests of the shrine throughout its history following the Norman Conquest. The role of the abbey in the success of the well can also be seen.

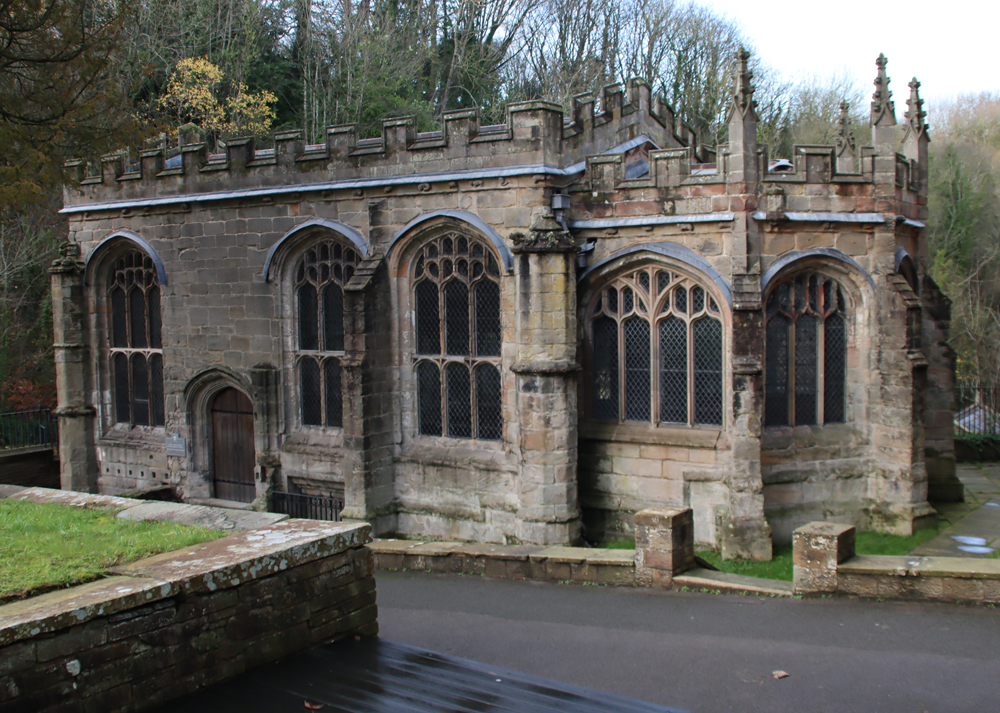
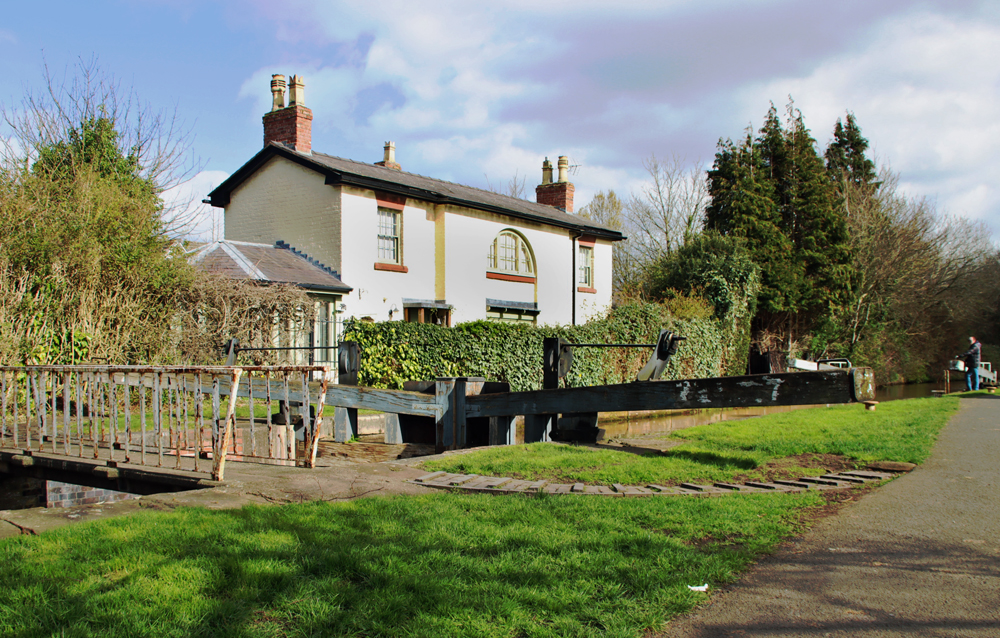
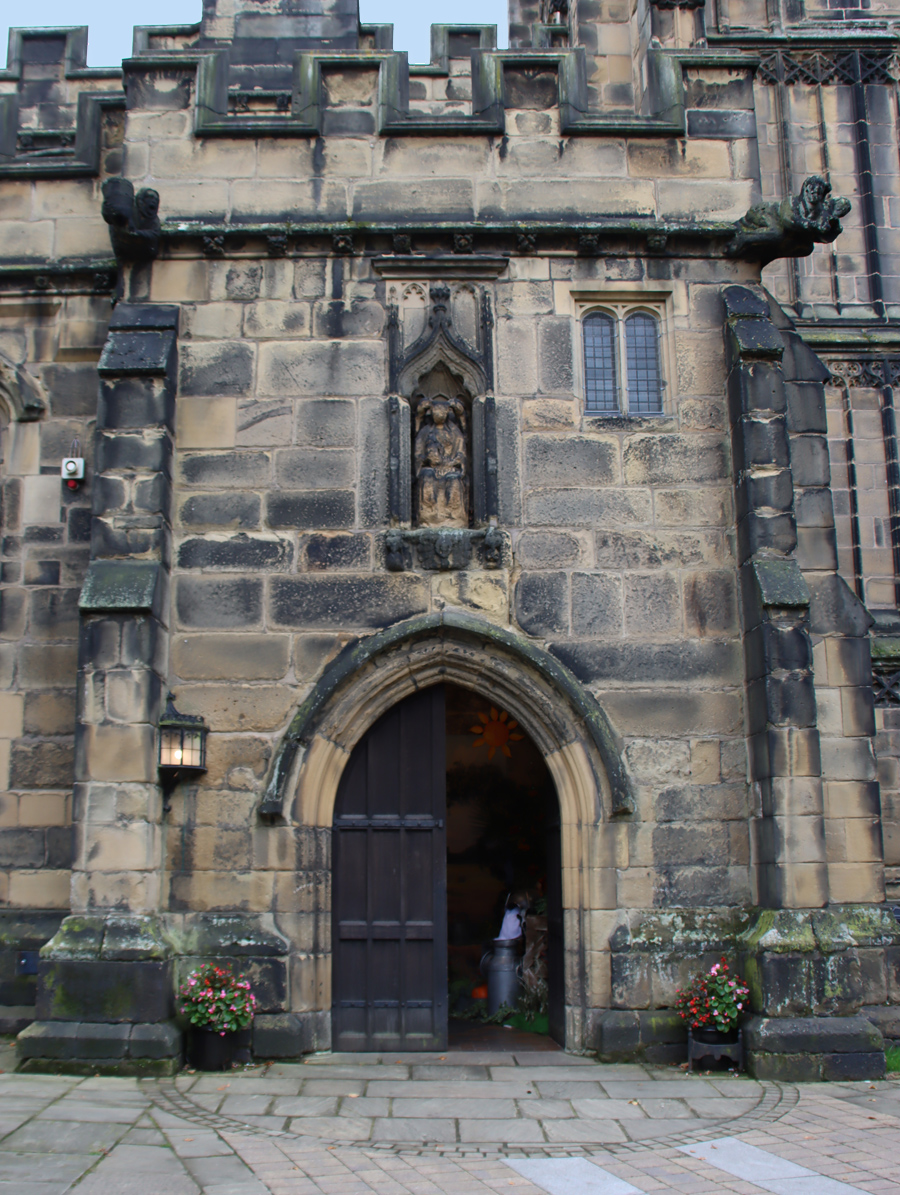
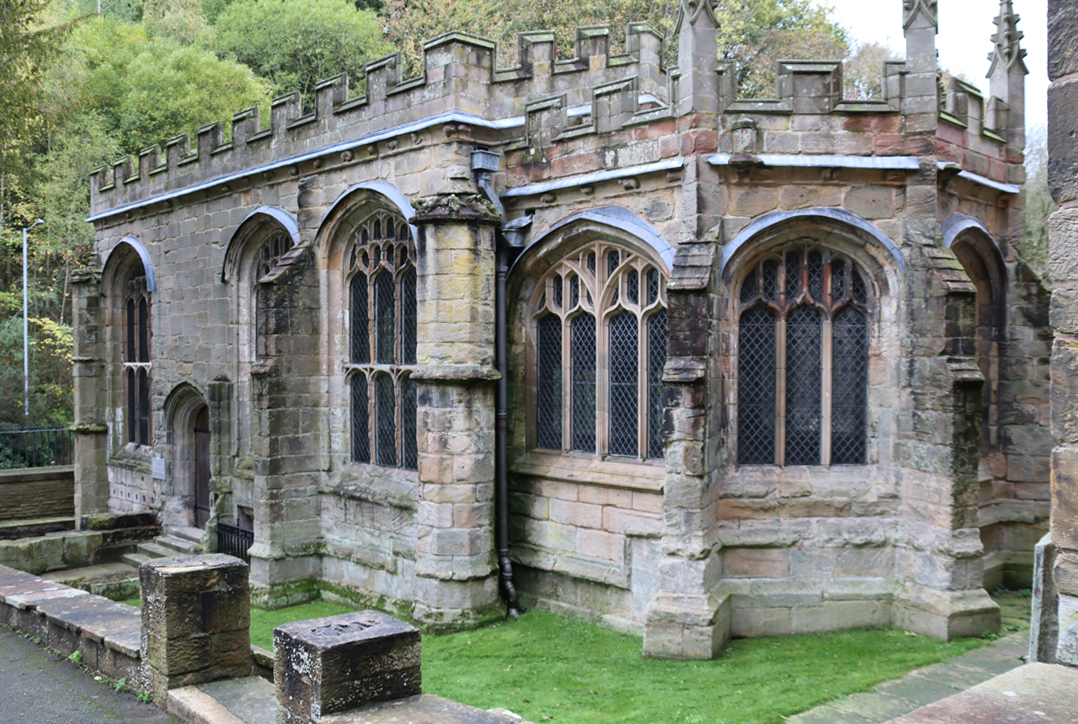
View of the chapel from the south. The chapel is over two floor. The fan-vaulted ground floor has three bays, with the central one containing the well itself. The upper chapel is fully enclosed and its entrance is on the same level as the entrance of the parish church.
An abbey with a pilgrim shrine had a range of opportunities for income generation, and St Winifred’s was famous for its powers of healing and provision of miraculous cures for centuries. In around 1480 a wealthy patron, possibly Henry VII’s mother Lady Margaret Beaufort, invested in the shrine, providing the miraculous spring with a gorgeous, lofty fan-vaulted open-fronted chapel, as well as an enclosed chapel overhead. Today both parts of the chapel are very well cared for, located on the edge of the Green Valley Park, which has a superb industrial heritage trail wending through it (see my earlier post here). There is plenty of parking at both the well and at the abbey, described at the end of this post.

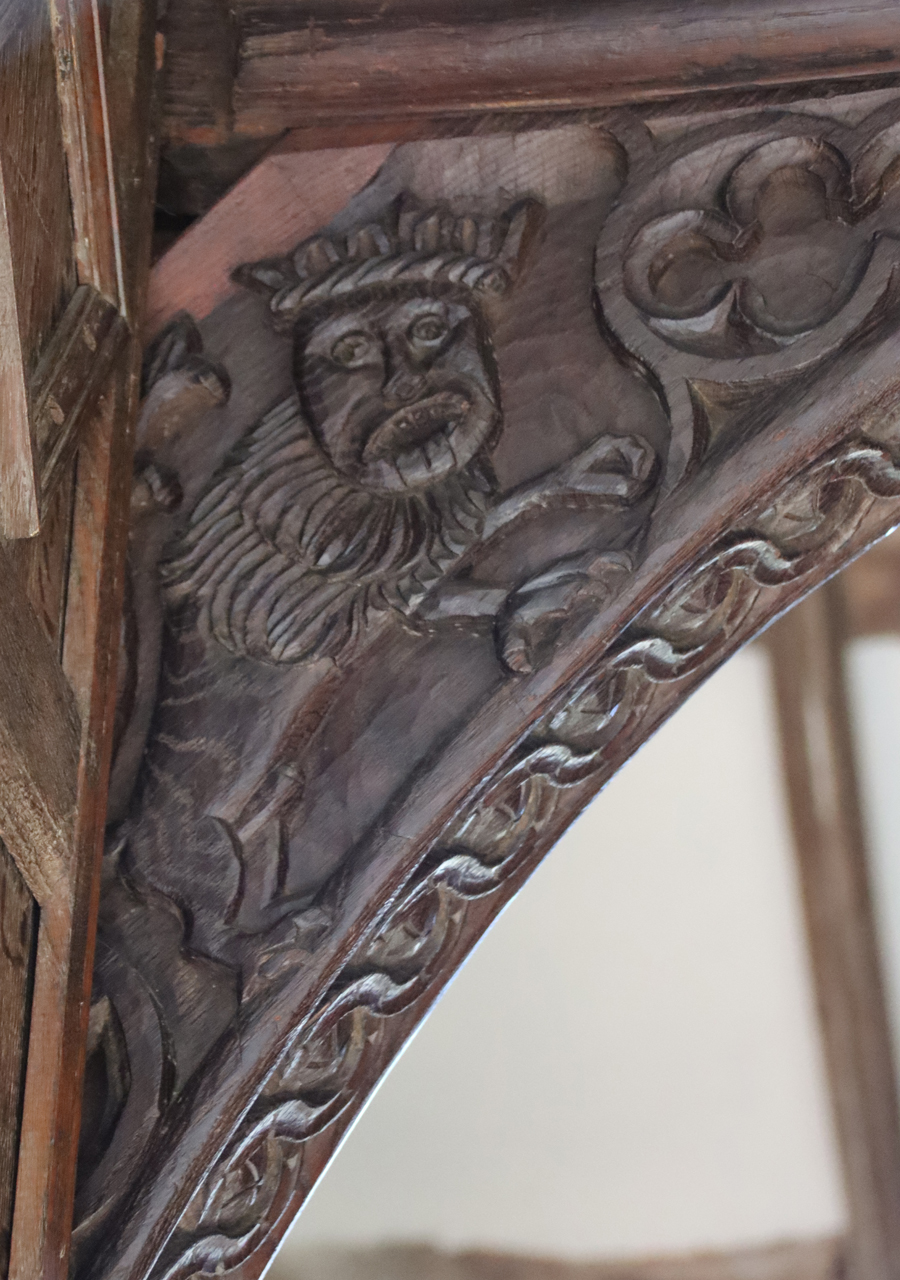
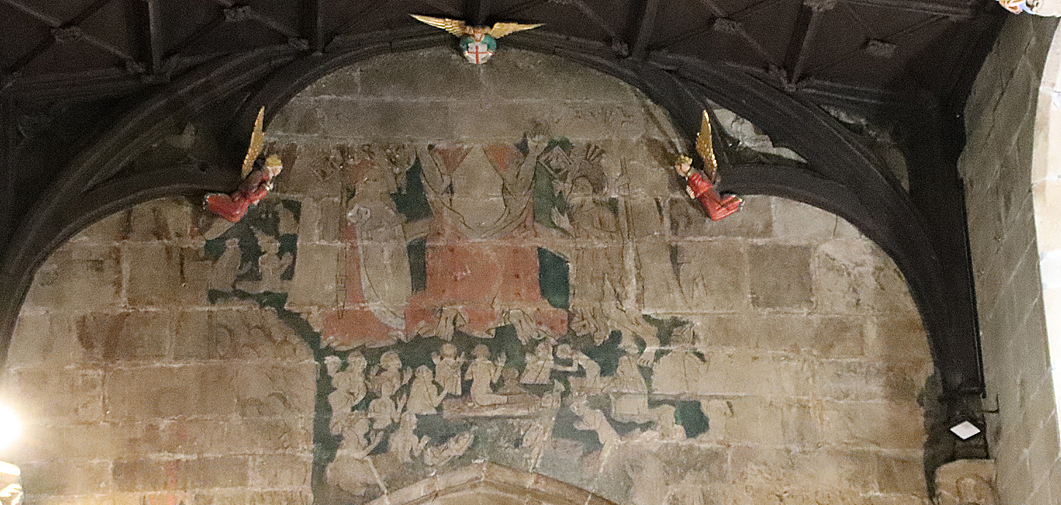
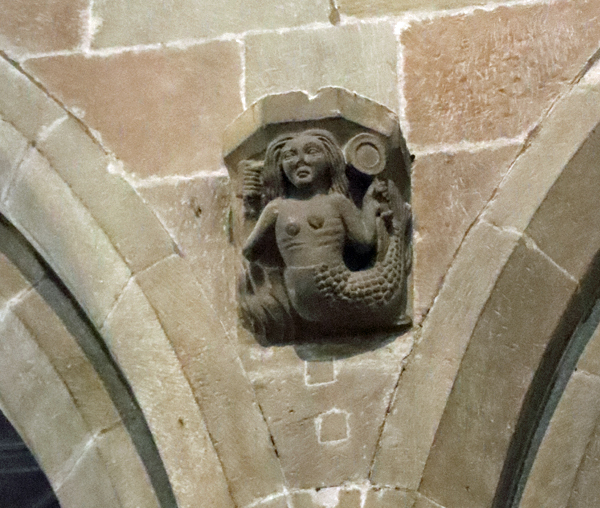
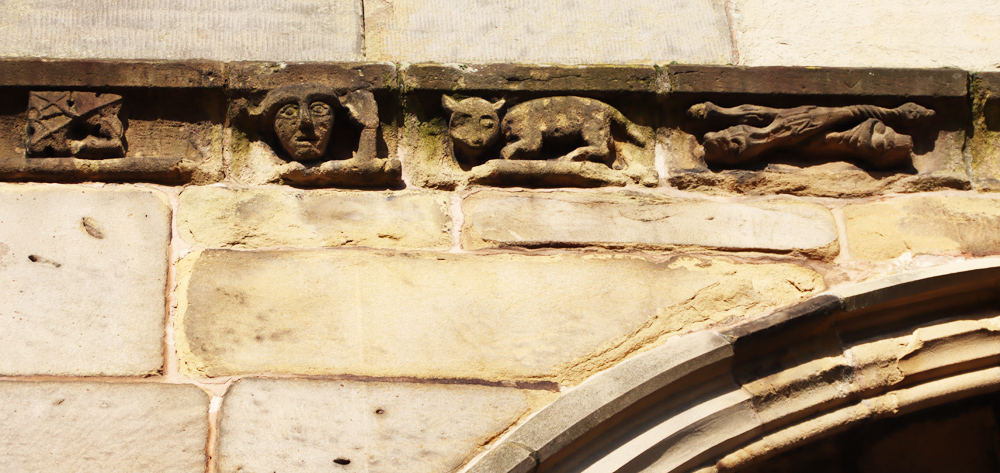
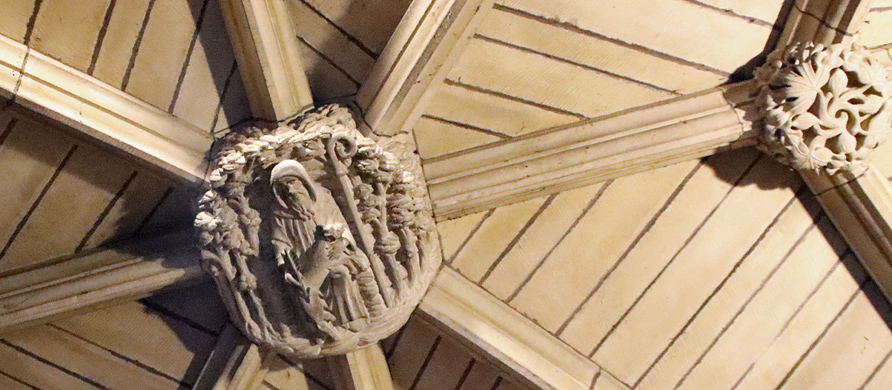
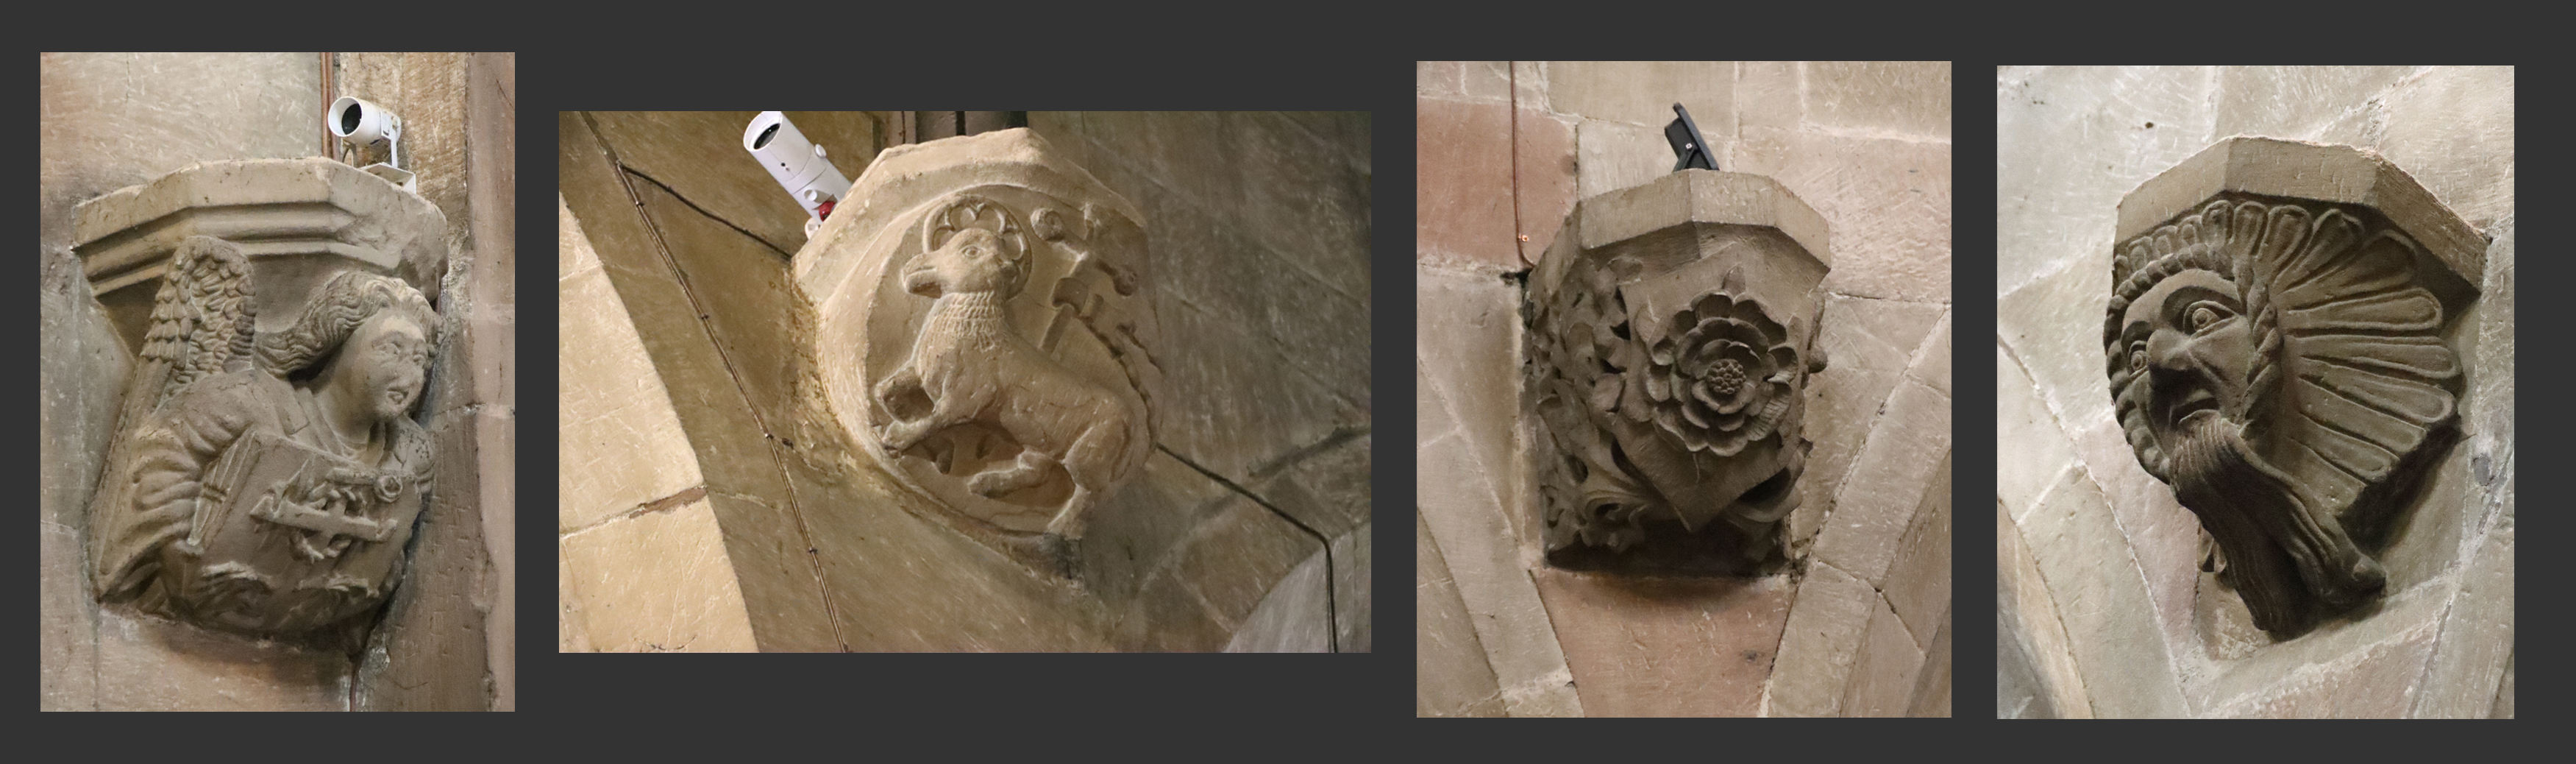
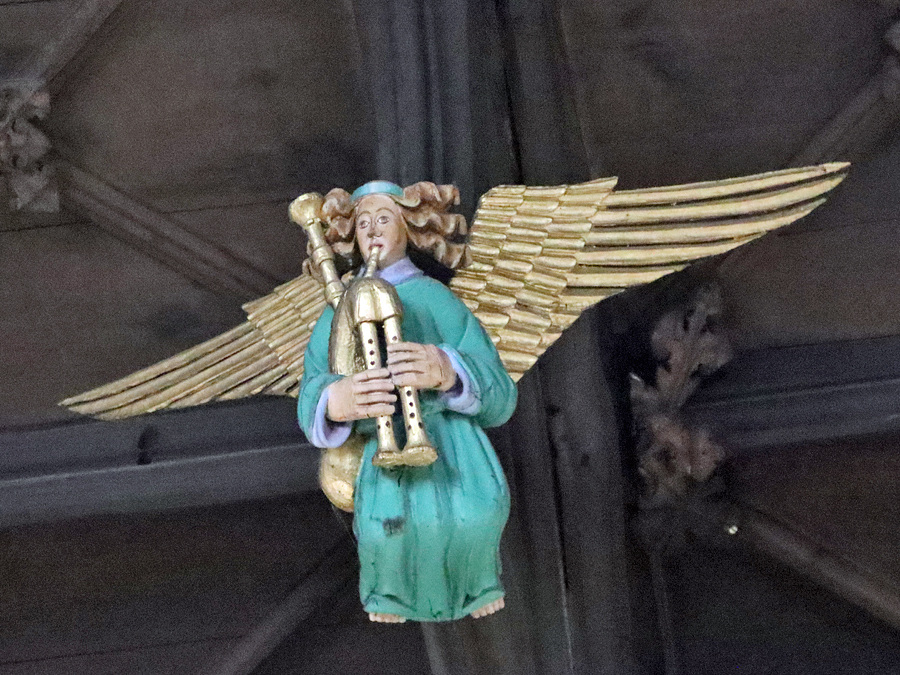
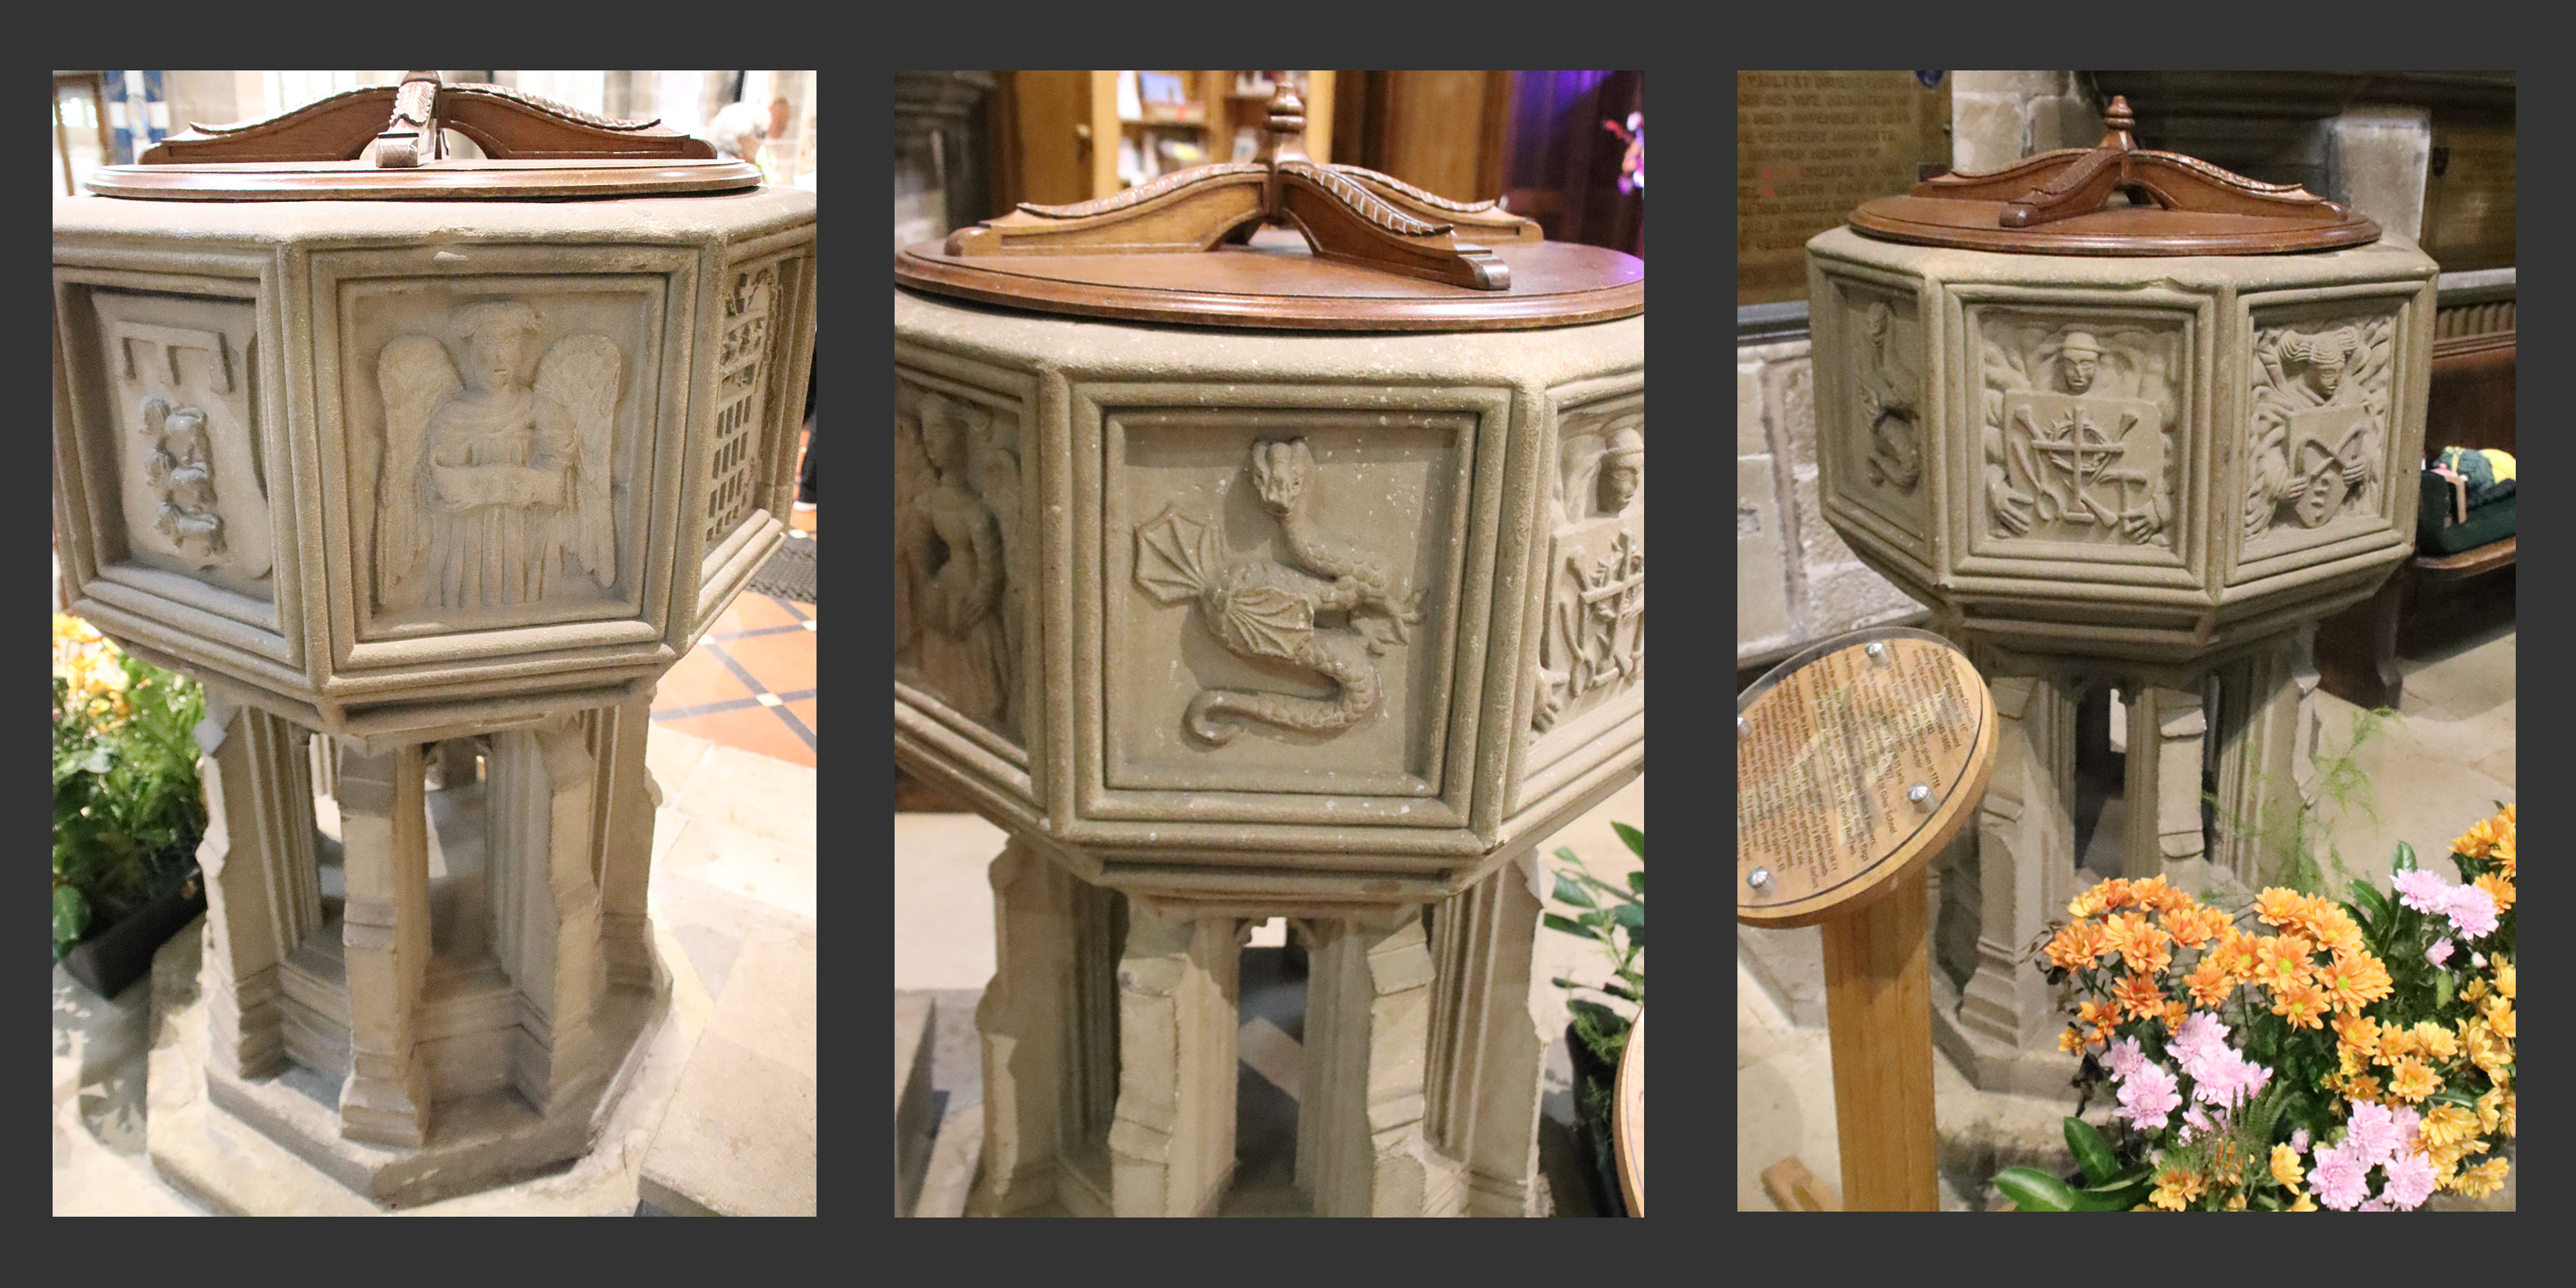
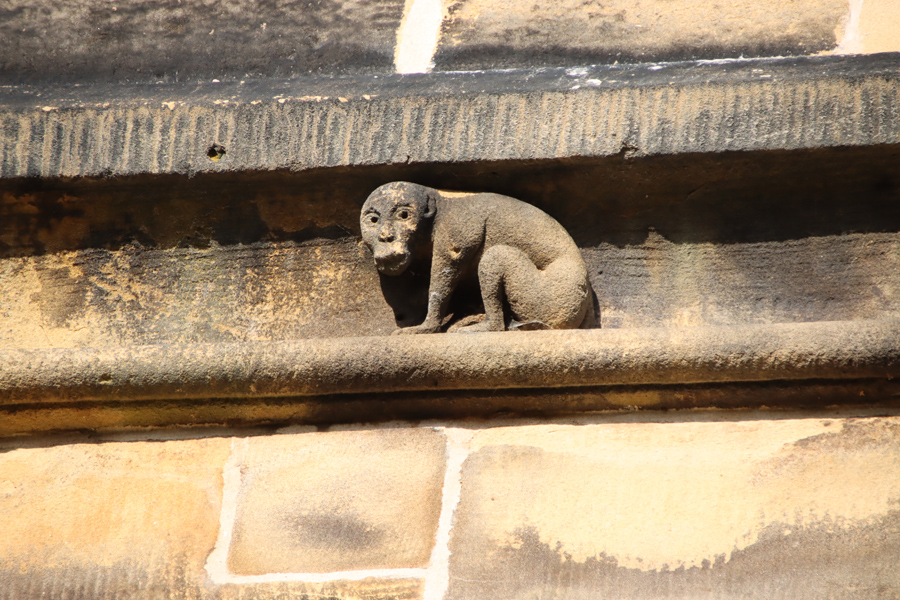
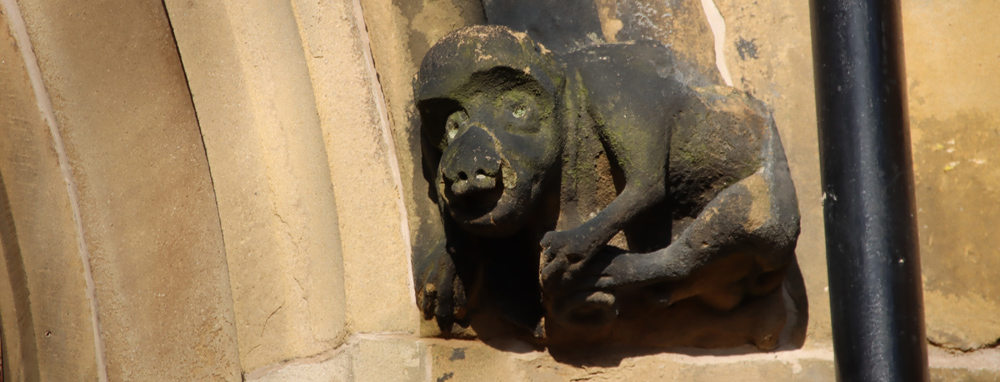
Fan vaulting with roof bosses in the lower chapel. From left to right, the rebus of Elizabeth Hopton (showing a rebus of her name, with a hop plant emerging from a barrel or tun); two monkeys, which may have a number of interpretations; and a fleur de lys (representing chastity, often used for the Virgin Mary but also suitable for St Winefride).
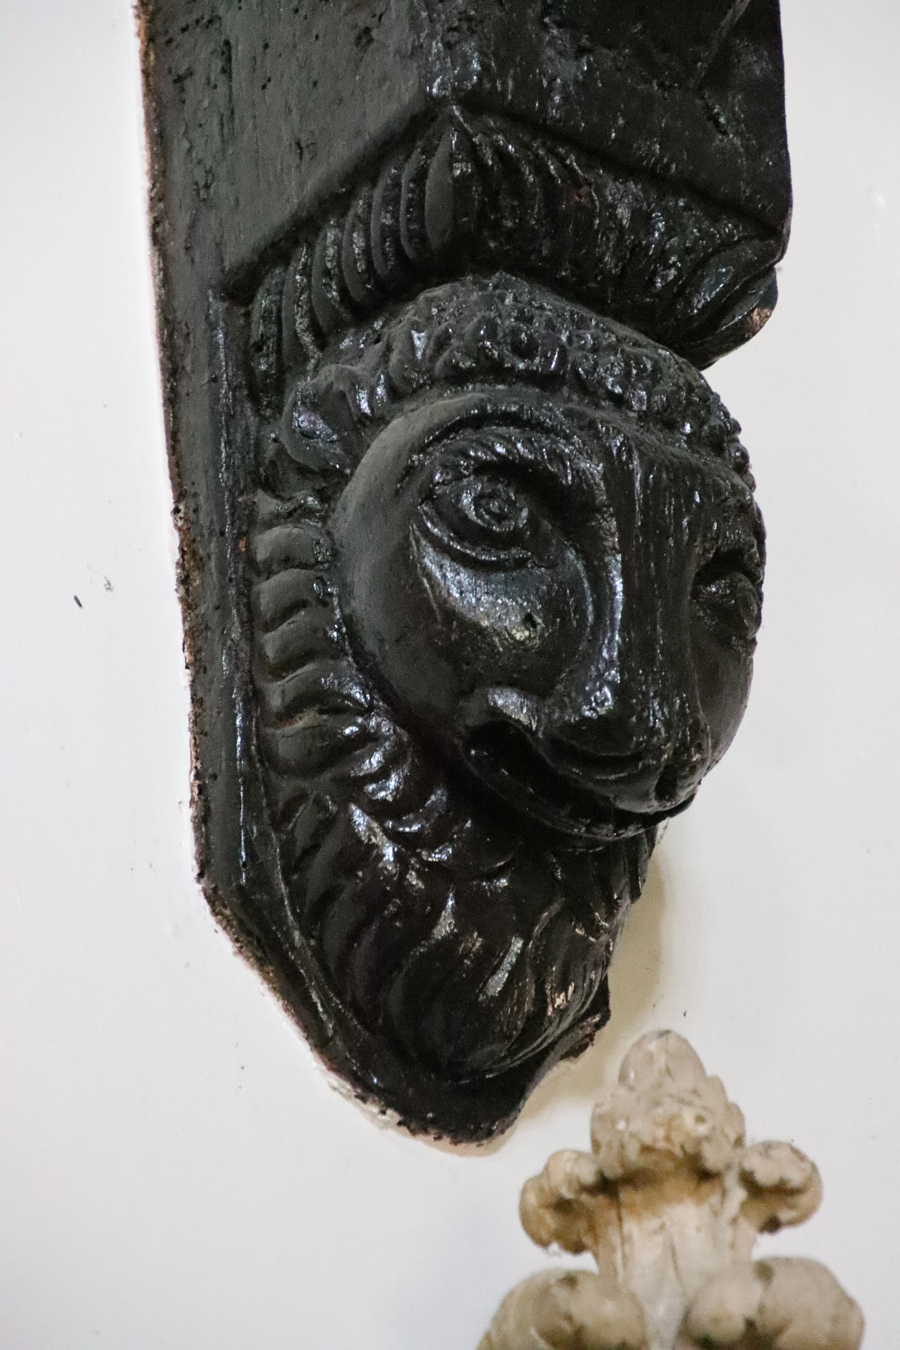
There’s a real sense of this being a costly but personal project, particularly in the vaulted lower chapel, which in terms of elaborate ecclesiastical architecture is tiny, although its height gives a sense of heading heavenwards. Although no documentation survives to say who was responsible for funding the building, the Stanley family’s crests and symbols give an impression of a cherished project and the sheer amount of other imagery are reminiscent of cathedrals and large churches of the period. It manages to be both impressive and intimate, which is quite a trick. The chapel upstairs is more conventional in terms of both its size and its layout. What I missed on my first visit is that the wooden ceiling supports all have sculptural elements sitting on their corbels, as well as more easily visible stone ones lower down. In both upper and lower chapels, as well as the inherent beauty of the architecture, there is humour as well as religious, pagan, family and royal themes in the imagery.
xxx

xxx

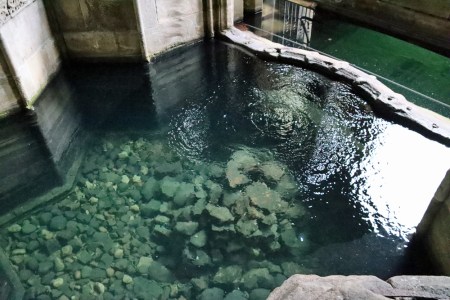
St Winefride’s well, in the star-shaped basin late 15th – early 16th century
St Winefride and St Beuno
There are a number of versions of the story of the miracle of St Winefride or Welsh Gwenfrewi (also spelled Winefred and Winifred), and her uncle and tutor St Beuno. The earliest that remain preserved date to the 12th century, and excerpts have been translated and published by T.W. Pritchard in his detailed 2009 book about the well.

Winefrede and Beuno in the modern stained glass in the little prayer chapel for worshippers today, next to the main chapels. The palm represents the spiritual victory of martyrdom, whilst the crozier (staff) symbolizes teaching, wisdom and guidance.
Winefride was born towards the beginning of the 7th century in the cantref of Tegeingl, in northeast Wales, the only child of Tyfid and his wife Gwenlo, or Wenlo, who were landholders in the area. One of the 12th century accounts says that Tyfid’s estate was made up of four manors.
Winefride had decided to renounce marriage and to dedicate herself to God and the teachings of Christ. Christianity was well established throughout Britain, partly due to missionaries who were often commemorated as saints for their work. One of these was St Beuno, who had moved to the area from mid Wales and was engaged by Tyfid to teach Winefride, in return for land on which to build a church. St Beuo built a church in a valley called Sychnant (dry valley), which is now Greenfield Valley, Holywell, where the well is located.

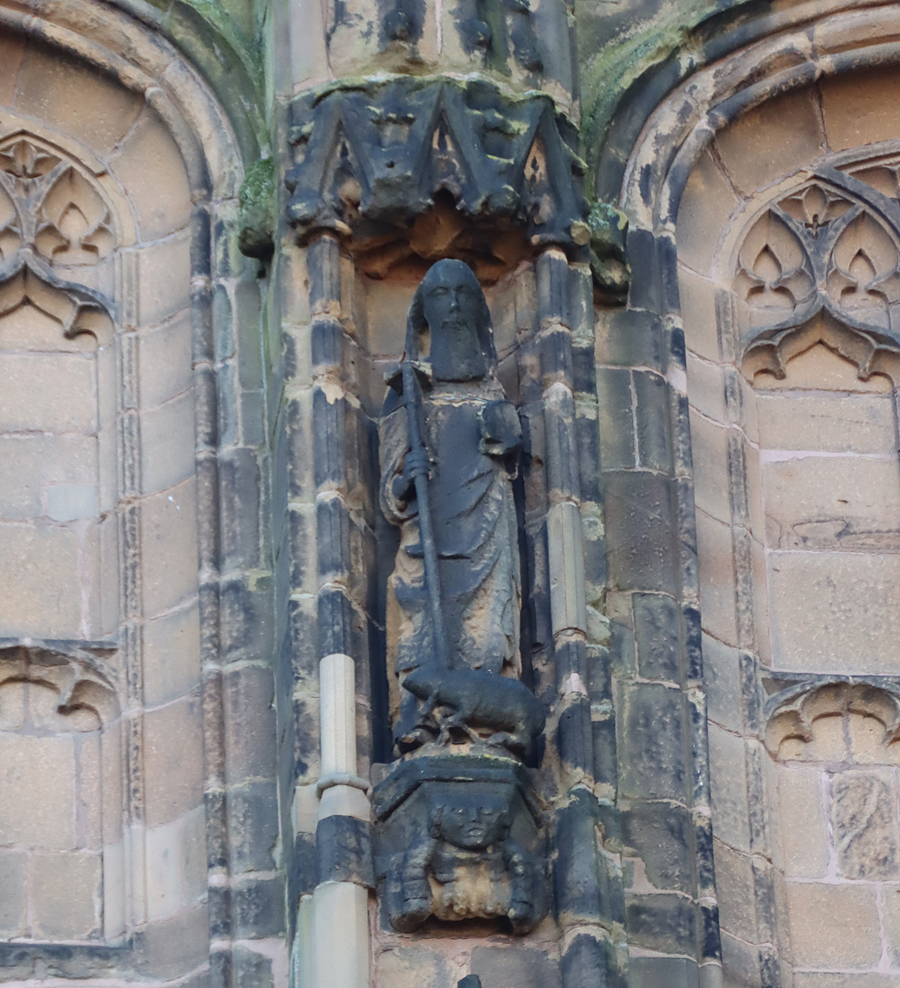
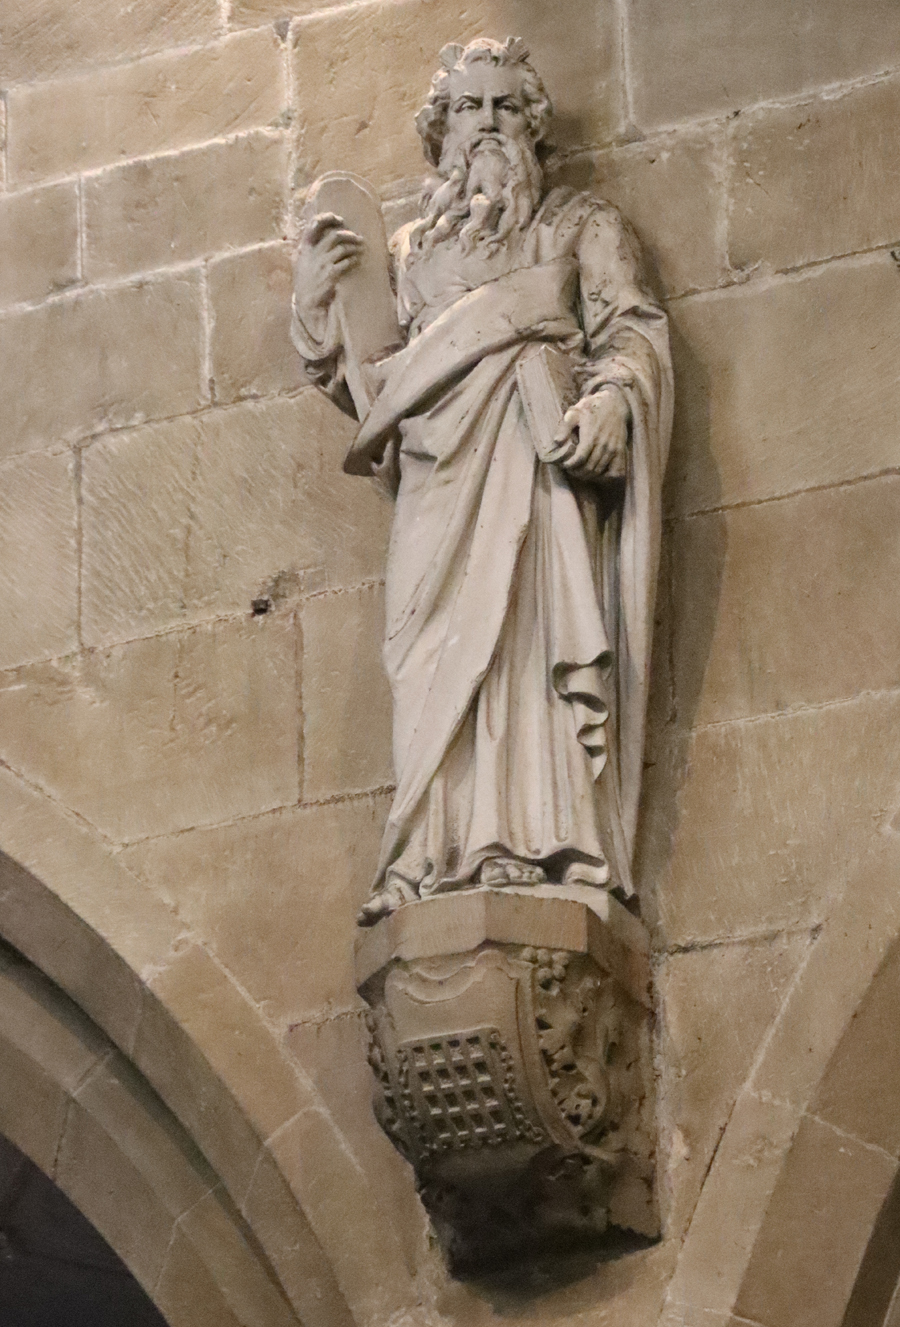
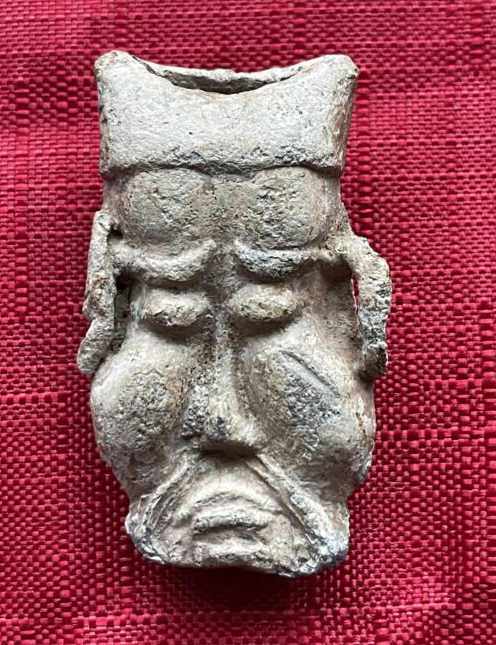
Sculpted figure, possibly St Beuno
One day, Winefride was at home alone whilst her parents were attending mass at the church, and a local prince, Caradog, knocked on the door. She suggested he return later, but he became determined to marry the girl (who was of course beautiful). Pretending to go and get changed, she ran to the church. Caradog, realizing that he had been deceived, set out in pursuit and when he caught up with her near the door to the church, decapitated her in a fit of rage. Beuno, hearing the noise, rushed out of the church and, finding a terrible scene, began to pray for help. His prayers were answered. Caradog melted into the ground, never to be seen again, and Beuno picked up her head and placed it back on her neck. She came back to life, with only a slender white scar showing where the injury had been. Instantly a spring erupted at the spot where her blood had been spilled. The stones in the spring were said to be permanently red, the moss that grew around it had an aroma of incense and the waters produced miraculous cures. The story continues, but the abbreviated version is that Winefride became a nun, moving from Holywell to Gwytherin to oversee 11 nuns as abbess, where she died and was buried.
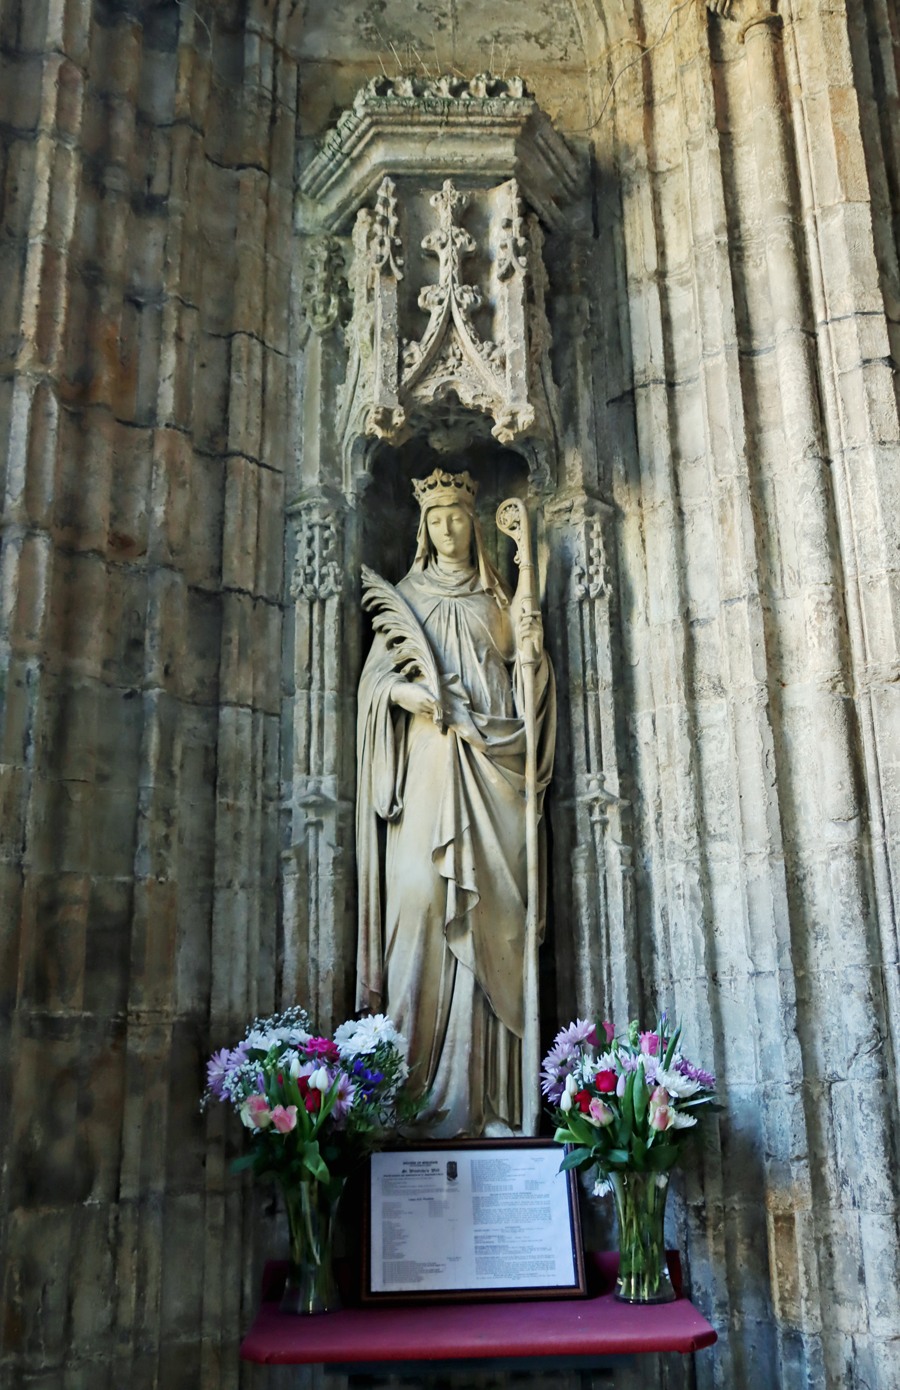
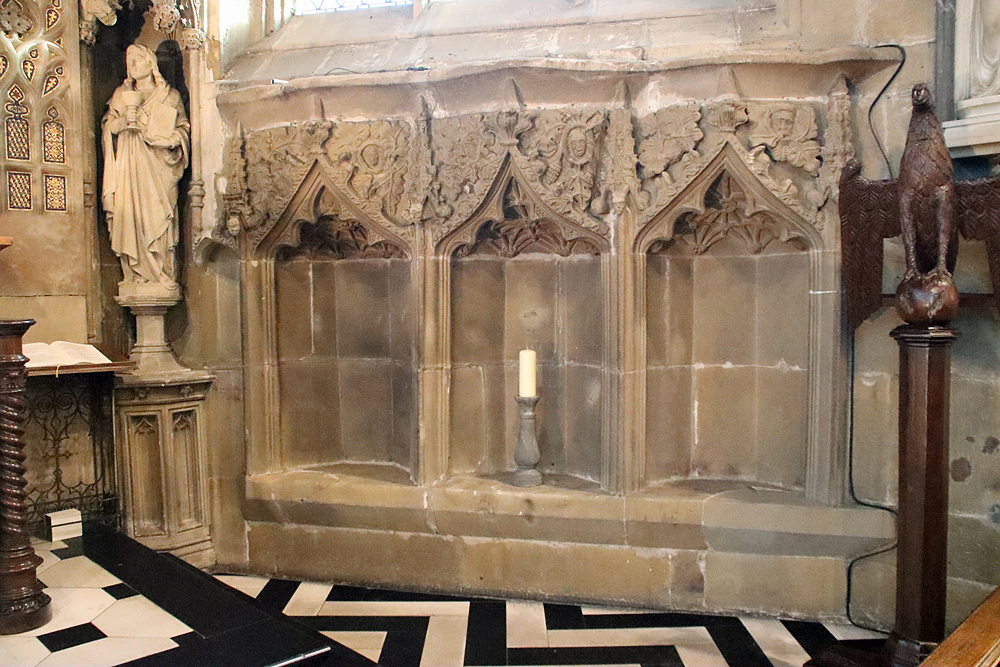
Statue of St Winefride within the lower chapel. The niche with its elaborate and intricate canopy is original, but the medieval statue was lost, and this dates to 1886
The basics of the story, a pure and noble virgin who died rather than surrender her virtue, is a familiar one. The spring, too, erupting where pure blood was spilled, is not unique. When St Paul the Apostle was executed by decapitation his head is said to have bounced three times, and at each place where it touched the ground a spring erupted. The linkage of springs, wells and purity are long established, and the added connection with baptism gave water particular potency in Christian thought. Interestingly, Winefride combined the virtues of a martyr saint and a confessor saint, having first died for her beliefs and then having been resurrected to live for those beliefs and values.
Miraculous events and morality tales of this sort became a form of oral history, a mechanism by which the ideology, morality, values and essential beliefs of early Christianity, were spread and understood. The partly fictional “lives” of saints purporting to be biographies (hagiographies) were particularly popular when distributed after the innovation of printing in England in the 1470s. St Winefride’s story, written down and transmitted via word of mouth, the monasteries, and later by the printing press, became a popular saint and her miraculous healing well became a pilgrim destination.

The remains of the later 14th century shrine to St Winefride, Shrewsbury Abbey showing St John the Baptist at left, St Beuno at right and Winefride in the middle.
In the 1130s an account by one of the monks of Shrewsbury Abbey states that the monks had “lamented that they were very deficient in relics of saints and applied their minds to the problem of obtaining some.” One of the monks, during a spate of sickness, had a dream that St Winefride had appeared to him and said that the monk would be cured if a mission were to be sent to Holywell to say mass at her well. Convinced that Winefride was their patron, they decided to retrieve her bones and take them to Shrewsbury. In 1138, over 300 years after St Winefride’s death, a contingent of monks duly went to Gwytherin. They dug up and translated (transferred) Winefride’s remains from her grave and took them back to Shrewsbury, where a shrine had been built to receive her. Legend states that during the journey a spring appeared at Woolston near Oswestry, where her bier was briefly placed on the ground during the journey (a photo of this is shown further below). A new shrine was built to house her relics at Shrewsbury Abbey in the late 14th century, a fragment of which survives and is shown above. It was destroyed during one of the attacks on the monastery.
xxx

The Shrewsbury Abbey church (the rest of the abbey was demolished, now replaced by a road and a car park)
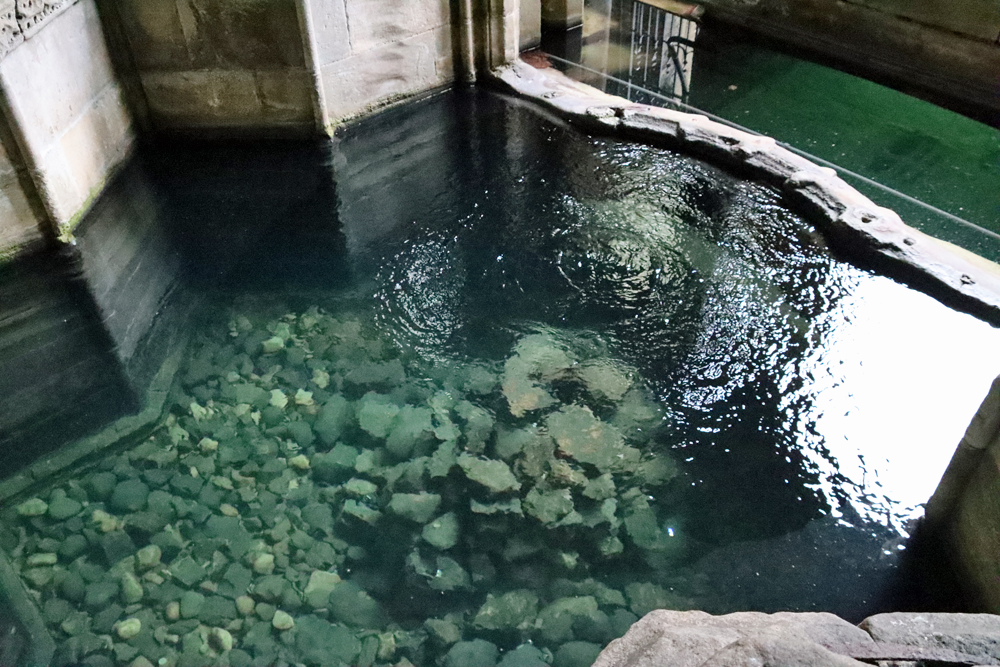
The Spring that feeds St Winefride’s Well
St Winefride’s well is built over the point at which an ancient spring, an underground stream, erupted to the surface, producing a quite dramatic spectacle of fiercely rushing water, particularly after rainfall. That was not the same spring that is seen today.

St Winefride’s well
In 1917 mining activities at Halkyn cut through the stream, causing a change in flow direction so that the stream now emerges at Bagillt on the edge of the Dee estuary, causing both dramatic change to the industries along the valley and to the well itself, which dried up. The current spring water that enters the star-shaped basin beneath the vaulted roof now bubbles delightfully, but this comes from another spring that was diverted for the purpose, and has none of the vigour or volume of the original spring.
xxx
The History of the Well
Hugh Lupus and the Abbey of St Werburgh

Romanesque elements surviving from the first Abbey of St Werburgh
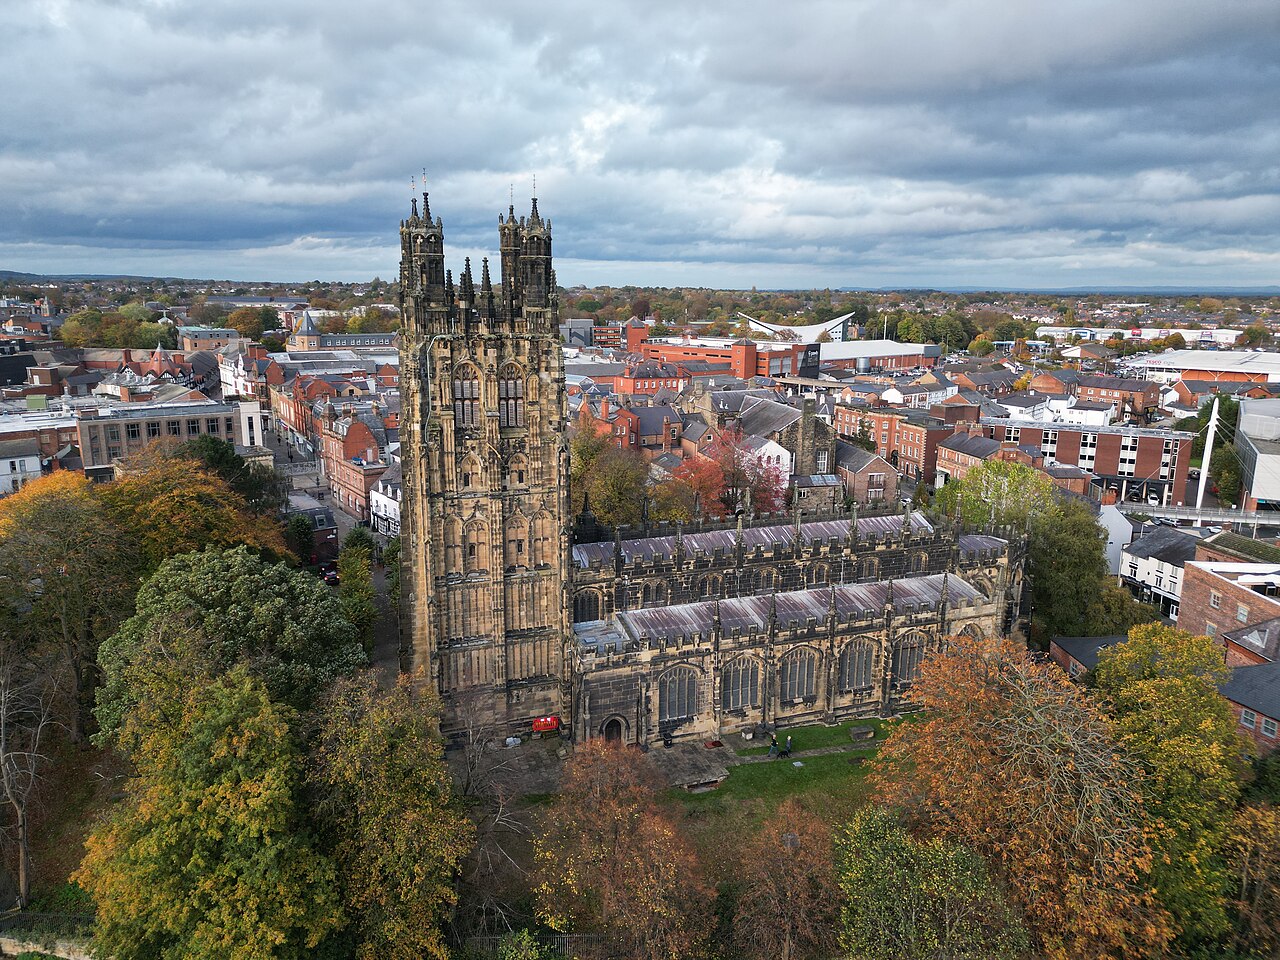
Today Chester Cathedral is a largely Gothic vision, with pointed arches and vaulting with roof bosses, but when it was built as St Werburgh’s Benedictine Abbey in around 1093 it must have been a superb example of the Romanesque curves and rounded arches brought to England by the Normans. The abbey’s founder was Hugh d’Avranches (better known as Hugh Lupus, c.1047-1101), Earl of Chester, who had been appointed to Chester by William the Conqueror.
Holywell, including St Winefride’s Well and the parish church, were part of Hugh’s new territory. Earl Hugh gave Holywell to his wife, Adeliza, and she in turn awarded it to the abbots of St Werburgh’s Abbey. A religious attraction like Holywell, with its miracle-producing shrine and its attached church cold produce a good income for an abbey, which took control of the tithes (a sort of religious tax) owed to the church, and to the oblations (gifts from pilgrims and visitors) to the holy shrine.
Transfer of ownership: Basingwerk Abbey and subsequent transfers

The building that may have been part of the guest quarters at Basingwerk Abbey. Its burned timbers were dendro-dated, giving the roof a date of c.1385
Because it was located in a region that was a territorial bone of contention between the Welsh princes and the English kings during the 13th century, Holywell could be in either English or Welsh territory. When Basingwerk Abbey was founded in 1131 by Ranulf II Gernon, Earl of Chester, it must have been a source of some discontent to the new abbot that such a rich potential source of income was sitting on the doorstep and benefiting a rival monastic order in Chester.
Fortune smiled on Basingwerk Abbey. Holywell was granted to it in the 12th century. It was briefly back in the hands of St Werburgh but in 1196 it was once again assigned to the monks at Basingwerk by the Welsh prince of Gwynedd, Llywelyn the Great (ap Iorwerth, c.1173-1240), who had pushed his frontiers east. This gift was confirmed in 1240 by Llywelyn’s grandson Dafydd ap Gruffudd (and younger brother of Llywellyn ap Gruffudd known as Llywelyn the Last), who in a turncoat deal with Edward I had been given lands in northeast Wales following the Treaty of Aberconwy. Basingwerk then retained Holywell and its religious assets for nearly 300 years until Henry VIII suppressed the monasteries in the 1530s. Although they suffered under Edward I’s final conquest of Wales, Baswingwerk and Holywell survived, which is more than either Llywelyn or Dafydd managed to achieve, being killed in 1282 and 1283 respectively.
It is not known what the Holywell pilgrim shrine looked like throughout the changes of ownership between the two abbeys, as no descriptions or images survive. The shrine and temple would have been built of wood in its earliest years. In one of its doubtless numerous iterations it is quite likely to have looked something like the small pilgrim shrine at Woolston near Oswestry, shown on the left, also dedicated to St Winefride. Wooden buildings were replaced by stone buildings when those buildings began to be well used. The first stone parish church at Holywell is thought to date to around the 14th century, and it is possible that the shrine was revamped at the same time.
Promoting the interests of the Holywell shrine

Statue of St Winefride in a niche in Henry VII’s early 16th century Lady Chapel at Westminster Abbey. Source: Pritchard 2009, p.71
The task of ensuring the continuing success of St Winefride and the holy well, important both for monastic income and the economy of the Holywell, was occasionally given an official helping hand.
In 1253, for example, a request was made to the Cistercian General Chapter (the governing body of the Cistercian monastic order) to allow a “Feast of 12 Lessons” to be held annually on the saint’s Feast Day at Buildwas Abbey in Shropshire, and Basingwerk Abbeys, the two of which had become connected in a hierarchical relationship some time after Basingwerk was absorbed into the Cistercian order. The normal feast was of 9 lessons (prayers and readings), and the fact that this was of 12 indicates the respect in which Winefride was held. The request was authorized, meaning that St Winefride’s Feast was more likely to attract pilgrims to both of the abbeys as well as the Holywell shrine.
In 1398 the annual feast of St Winefride, which had been confined to north Wales and the Marches, was extended to the entire Canterbury area by Archbishop Roger Walden. In 1415 his successor Henry Chichele who had a particular interest in Welsh saints having been Bishop of St David’s, a centre for pilgrimage in south Wales, raised the profile of St Winefride’s cult still further.
Richard II established a chantry (payment to a member of the clergy in return for prayers and the saying of mass for the dead of a particular family) in 1377. This was renewed annually by each subsequent king until the Dissolution, after which chantries and the mass were no longer legal.

An example of an Indulgence, this one dated 1480 and issued in London. Source and details: Essex Records Office.
In 1427 the shrine’s popularity was assured when Pope Martin V granted indulgences over a ten year period for those who made the pilgrimage to the shrine and gave oblations to the chapel. Indulgences were mechanisms for rewarding certain activities, mainly those that generated income for the Church, including pilgrimages, by reducing the time an individual spent in purgatory by a specific number of years and days. In this case the time reduced was a year and forty days. It was a way of trading off human fear of what followed death, but a ruthless way of raising funds, later famously condemned by Christian revisionist Martin Luther in his Ninety Five Theses.
The role of the well in the Middle Ages

North entrance to the under-chapel at St Winefrede’s Well. The barriers detract from the aesthetics but do prevent people falling in.
The well can be understood in a number of ways, all from different viewpoints.
From the point of view of Basingwerk Abbey, which had authority over the well and its shrine, it was both a source of prestige and income. The prestige of having the miracle directly connected with an Anglo-Saxon saint was considerable, giving it a historical validity with real time-depth, with roots in the distant past. Not only was Winefride a miracle-working virgin saint, but she had gone on to become a nun, and then an abbess. Her credit and sanctity were flawless. This status and prestige attracted pilgrims, and with them a source of potentially considerable income. The importance of miraculous places of pilgrimage grew in the medieval period, and pilgrims not only brought donations (alms) but those with money also contributed to the local economy, meaning that the abbey was a contributor to that economy. However, pilgrims could be a double-edged sword, as they also required some management to prevent them becoming a drain on the abbey’s obligation to provide shelter and food under the general heading of “hospitality,” to which the Cistercian order was committed and which included some form of accommodation and the supply of meals.

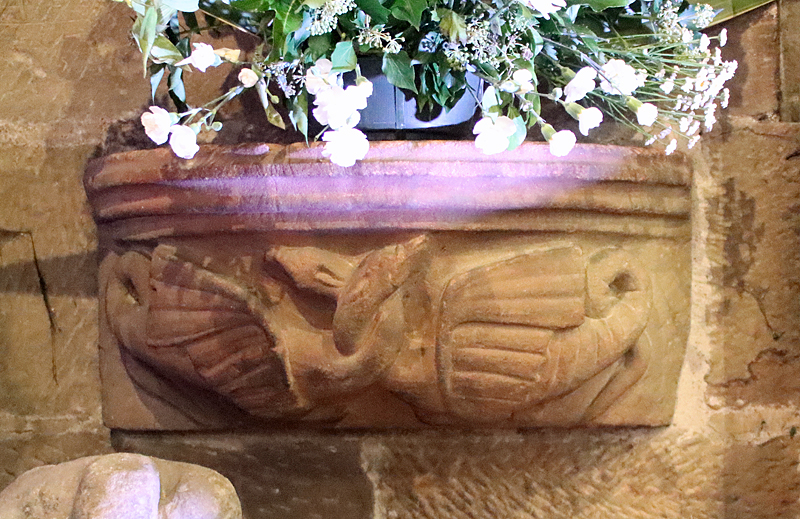
Rebus of Elizabeth Hopton’s last name (a hop plant emerging from a tun, a type of Barrel
From the point of view of pilgrims, miraculous venues offered a range of opportunities, depending on the motives for visiting. The natural spring was said to have miraculous healing properties, and many will have travelled to be cured, whether rich or poor. Others were engaged in a form of spiritual tourism, visiting all the most important shrines and relics either in a given area, throughout Britain and sometimes overseas. Within the Welsh and border areas, Holywell was part of a pilgrim circuit with Basingwerk (with the Holywell shrine), St Asaph (Llanelwy, the church of the 6th century miracle-performing saint), Chester (with the Holy Rood of St John’s and St Werburgh’s shrine in the Abbey), together with other churches and monuments, and this could also be extended to reach the sacred Bardsey Island.

Archway leading to the steps into the well
The medieval world was very concerned with the challenge of how to manage an afterlife that began with the terrors of Judgement Day and Purgatory. Visiting saints’ shrines, or just being in close proximity to them, was a way of gaining proximity, at a little distance, to the divine, with the hope that some of it might, in some mystical way, rub off. Just by touching a shrine, a little of the incredible divine energy could pass into a person; immersion in the spring that emerged from the spilling of a virgin saint’s blood must have seemed like being wrapped in the saint’s divinity. This did no harm to nearby residents, who must have had a sense of the power of the shrine.
Likewise, monasteries that were filled to the brim with those devoted to Christian worship, whose virtue made them next in godliness to saints, were considered to be invaluable assets to those who lived in their vicinity. The wealthy chose to be buried within monastic precincts, as close as possible to the most sacred areas. In churches people wanted to be at the interior east end of churches or, if they were not sufficiently influential to be buried inside, as close outside to the east end as possible. The presence of the abbey so close to the shrine gave Holywell a particular religious vigour.
As well as religious benefits to outsiders, there were economic benefits to the local population. Basingwerk Abbey had various agricultural (mainly livestock) and industrial (including silver mining) interests in the immediate area that would have employed many rural people, but as the medieval period shook off the manorial control that bound people to the land, the Holywell shrine offered potential for new opportunities, including hospitality and, if other pilgrim centres are anything to go by, the manufacture and sale of souvenirs.
Visitors and patrons in the Middle Ages

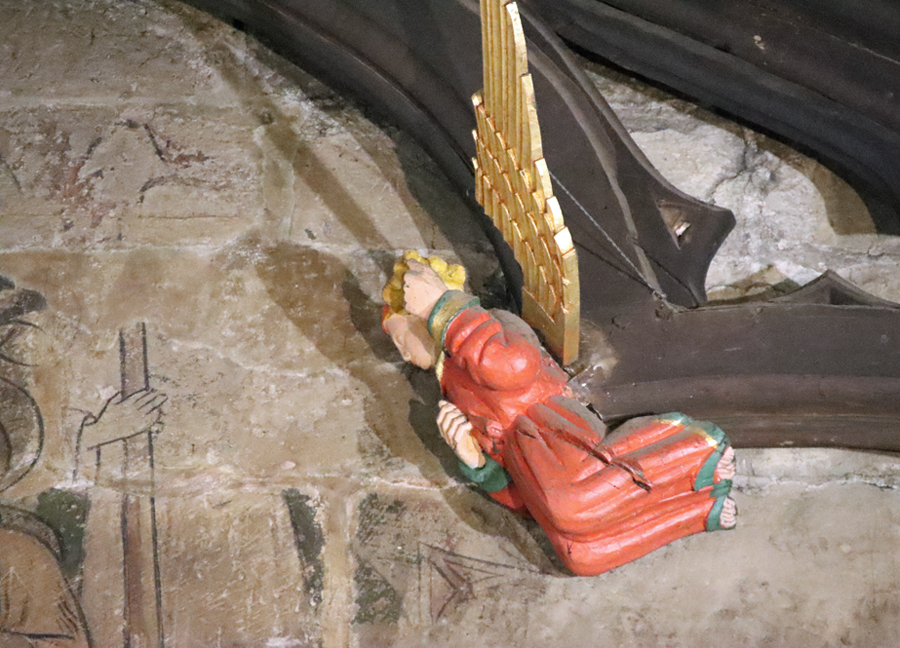
Pilgrim being carried to the healing waters of the spring. The 15th-early 16th century well shrine.
In the Middle Ages there was no clear dividing line between physical and spiritual health. The idea of illness was embedded into the belief that the body was composed of a series of complex components that required balancing what were understood to be the essential fluids (blood, phlegm, black bile and yellow bile) with the elements (air, water, fire and earth) and their key characteristics (hot, cold, wet and dry) as well as astrology. Deficiencies and excesses in any one component might put the entire complex equation for stability and harmony in jeopardy. When attempts to achieve balance these failed, and the person remained sick in body, mind or, for that matter, sin, pilgrimage was often seen as the most logical next step. Pilgrims understood that this was a two-way street and that they would have to make some sort of sacrifice, part of which might be the difficulty of undertaking the journey, but gifts and promises of reform were also part of the negotiation. Pilgrimages were undertaken for many other reasons too, but the healing properties of St Winefride’s shrine were probably the main attraction to most visitors.
St Winefride’s recorded visitors and patrons are a roll-call of the celebrities of the era, the royal and the aristocratic, who were major marketing coups for Basingwerk. Although those few known by name are listed below, the everyday participants along the pilgrim routes were more often ordinary people. Reasons for their travels varied, including seeking to undertake a spiritual journey for personal improvement (perhaps one of many journeys); to offer thanks for prayers that were answered; or to seek divine assistance for problems and maladies by asking a specific saint to intercede for them with God. Some pilgrims also acted for those who were unable to attend themselves, offering prayers on their behalf, and returning home with garlands of the sacred moss or filling small flasks with the miraculous water. These ordinary pilgrims from a wide variety of backgrounds always get lost in documented history, the Middle Ages being just as concerned with celebrity endorsements as the west is today, but were nevertheless the most essential components, the bread and butter raison d’être of a living shrine and the institution that managed it.

Ranulph II, Earl of Chester. Source: Wikipedia
Between 1115 and 1119 the second earl of Chester, Richard d’Avranches, son of Hugh Lupus made pilgrimages to the well. With the shrine of St Werburgh within the Chester city walls, it might have been thought that he would look closer to home, but Richard is thought to have fallen out with the monks of the abbey. In addition, it is not really a pilgrimage if it is only a ten minute walk, and Richard may have felt the need to make more of a gesture. Ironically, a miracle took place during the pilgrimage, when Richard became cut off from his forces and his constable in Wirral prayed for assistance but as St Werburgh had been chosen rather than St Winefride, this was chalked up to a win for the Chester abbey.
In 1131 Ranulf II Gernons (1099-1153), fourth earl of Chester, founded the new Savignac (later Cistercian) Basingwerk Abbey somewhere in the area, presumably made of wood. It is thought that it was moved to its current location in around 1157 to be rebuilt in stone, and this new location was very probably influenced by the presence of the nearby holy well, even though it was at that time part of the landholding of St Werburgh’s Abbey.
It is said that in 1188 or 1189 Richard I, the Lionheart (ruled 1189-1199), made a pilgrimage to Holywell. Quite where he would have found the time is anyone’s guess.

Flint Castle on the Dee Estuary, construction having begun in 1277
There is no record of Edward I (reigned 1272 to 1307) making a pilgrimage, but he presumably had no need to put himself to any real effort to visit either the abbey or the shrine, as by the 1270s he was already in the area. In 1277 he began to build Flint Castle 6.9km/4.3 miles down the road from Basingwerk. Whilst the castle was under construction it seems reasonable to assume that Edward was a frequent guest at the nearby monastery, and that he took the opportunity to visit the shrine. In fact, Edward’s castle in Flint may have resulted in a busy time all round for the abbey, the church and the shrine, as the 100s of workers at the castle would have had at least some downtime and would doubtless have sought out a powerful religious shrine so close by.
 In 1282 Edward’s armies returned to northeast Wales to engage with the Welsh princes once again, doing substantial damage to monastic lands in the process. It is recorded that part of Holywell was burned, but it is not stated whether this was the village, the shrine or nearby buildings. The abbey estates were certainly harmed, with the lost of crops and livestock, and Edward found himself compensating both Basingwerk and other Welsh abbeys that had come under fire during the fighting. Pilgrims were presumably rather short on the ground at this time, but Edward and his armies probably formed part of the narrative of the abbey told to future pilgrims.

Miniature of Henry V, c.1411. Source: Wikipedia
According to chronicler Adam of Usk, Henry V (reigned 1413-1422) visited in around 1416, following his success at Agincourt, to give thanks, walking on foot to Holywell from the Shrewsbury abbey to which Winefride’s remains had been translated (moved) in 1138 from where she was originally buried in Gwytherin. I have not found any reason why Henry would have singled her out to request support in battle, but apparently he prayed to her for assistance and his pilgrimage was an offering of thanks, which created a considerable stir. Perhaps he had encountered the shrine as Prince of Wales during the military campaigns against Owain Glyndŵr that began in his father’s reign and which he ultimately suppressed.
The Earl and Countess of Warwick made gifts to the shrine in the 1400s there is is not stated that they ever visited.
Henry IV Bolingbroke (reigned 1399-1413) took the throne from Richard II (reigned 1377-1399), with Richard surrendering to Henry at Flint Castle in 1399. It is possible that whilst he was in the area, Edward took the opportunity to visit St Winefride’s shrine, probably connecting with the monks at the same time.
 In 1461 the Welsh bard Tudur Aled wrote that Edward IV (reigned twice in 1442-1483 and 1471-1483) had visited the shrine, but quite why is unclear. He was a member, by descent, of the Mortimer family who had extensive properties in the Welsh Marches, in Chirk and Denbigh. There was, in fact, considerable resistance to Edward IV in areas of north Wales, including the rebellion of Owain Glyndŵr. There is nothing in general events of that year that would seem to account for him being in Holywell, although Pritchard suggests that it might be connected with renewing the royal chantry, which seems like the most plausible reason.

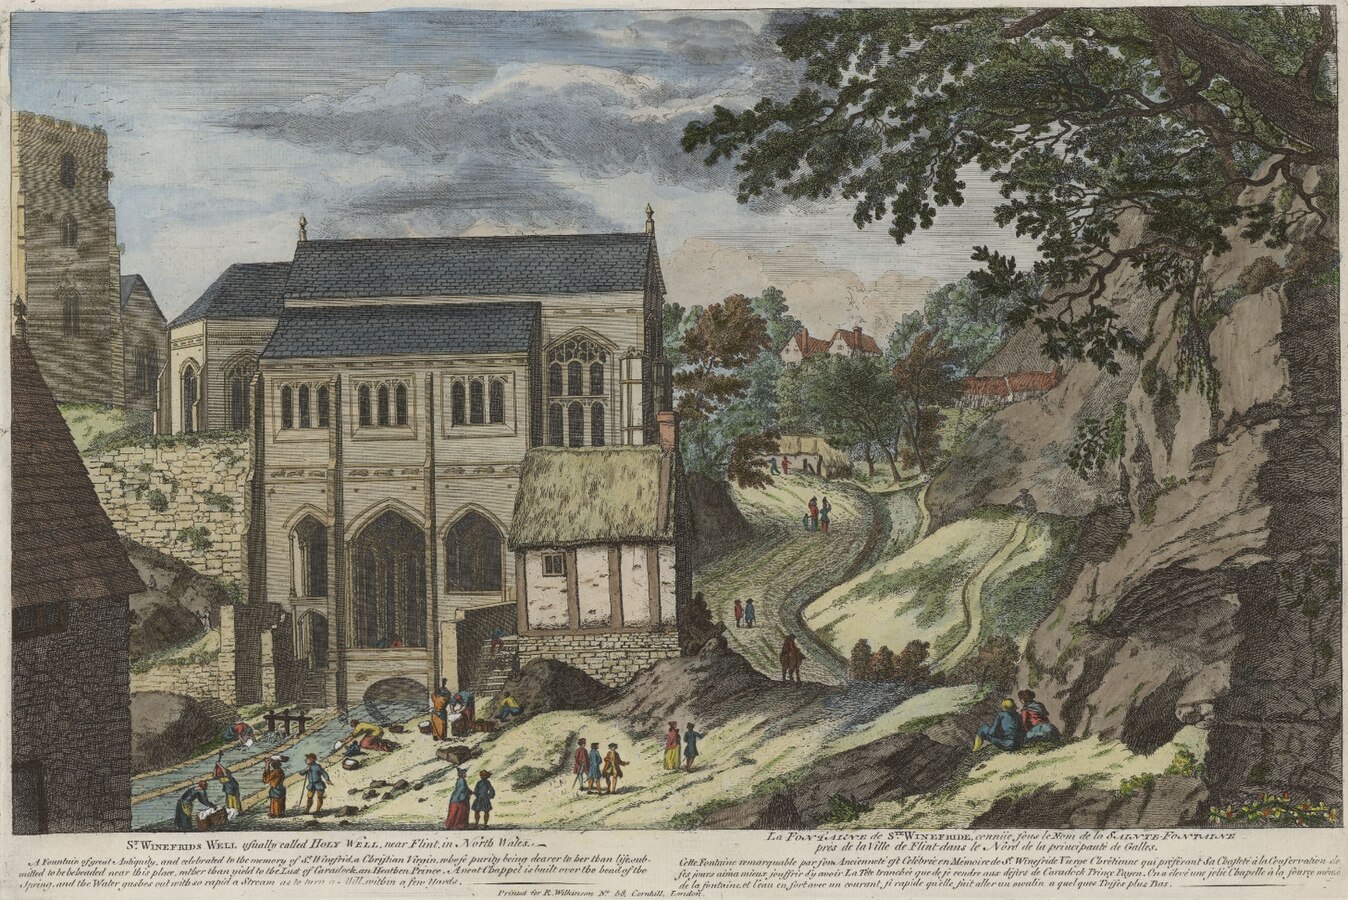
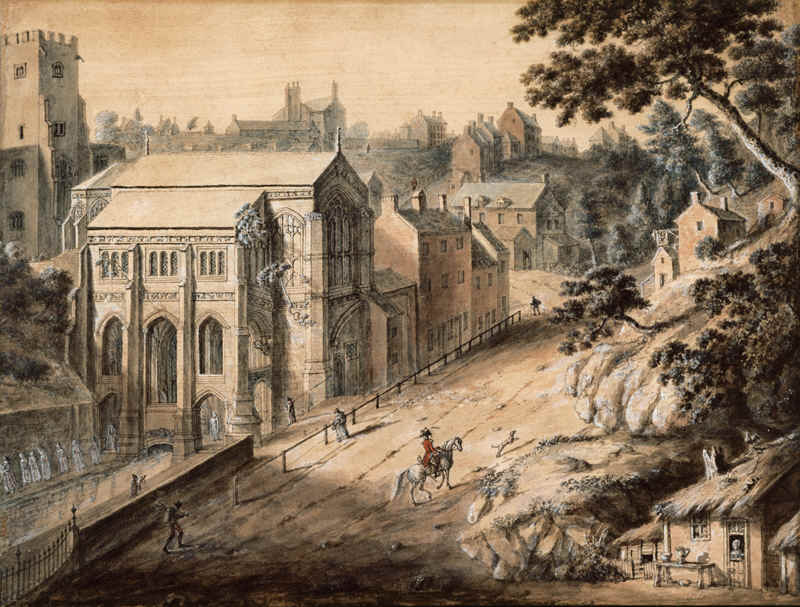
St Winefrede’s well by John Ingleby (1749-1808) showing crutches slotted into the stonework above the spring. Note the gallery at the left, and the mill wheel through the doorway. Source: National Library of Wales via Zone47
Whether royal, aristocratic or of more humble origins, pilgrims continued to visit throughout the medieval period, and pilgrims continue to visit continue today. As well as the sculpture on the left in the well chapel, showing a pilgrim being carried to the spring on an other man’s back (one in need, the other showing compassion) the visitor centre has examples of later wooden crutches that were apparently discarded after miracle cures had been received. In 18th and 19th century engravings crutches are shown slotted into the stone structure of the pilgrim shrine presumably as a record of successes and gestures of thanks (see the John Ingleby coloured engraving towards the end of the page).
For visitors to Holywell and the shrine in the post-medieval periods, which are not covered here, see the Early Visitors in Wales page dedicated to Holywell.
The late Gothic chapels
The patrons of the new chapels

Ceiling boss in the lower chapel allegedly showing Lady Margaret with her husband Thomas Stanley, the Earl of Derby
It has passed into tradition that the founder of the chapel that we see today was Lady Margaret, née Beaufort. Lady Margaret was the mother, by her first husband, of the future King Henry VII who was the founder of the fan-vaulted Lady Chapel in Westminster Abbey, designed by Robert Vertue. Lady Margaret, born 1443 had married three times by the time she died in 1509, her last husband being Thomas Stanley, Earl of Derby, a member of an important and wealthy local family in the Wrexham area. She is thought to have patronized St Giles in Wrexham, St Mary the Virgin in Mold and St Chad’s in Farndon. She sponsored two publishers, both of whom (possibly at her suggestion) published lives of St Winefride. The involvement of the Stanley family, whether Lady Margaret was involved or not, is suggested quite strongly by the number of relevant carvings in the chapel, including:
- A sculptural portrait thought to represent Lady Margaret and her husband Thomas Stanley (1435-1504), Earl of Derby (although with very little data, if any, to substantiate the identification)
- Over the outside of the door to the gallery there is a the portcullis emblem that Henry VII (reigned 1485-1509) derived from Lady Margaret
- The arms of Sir William Stanley (died 1495), brother of Thomas Stanley showing a wolf’s head enclosed in a garter (rewarded by Henry VII for his role in the Battle of Bodsworth of 1485 but executed in 1495 for conspiracy)
- The arms of Sir William Stanley’s wife Elizabeth Hopton (died 1498) showing a barrel and a plant, forming a rebus – hop and tun – of her name
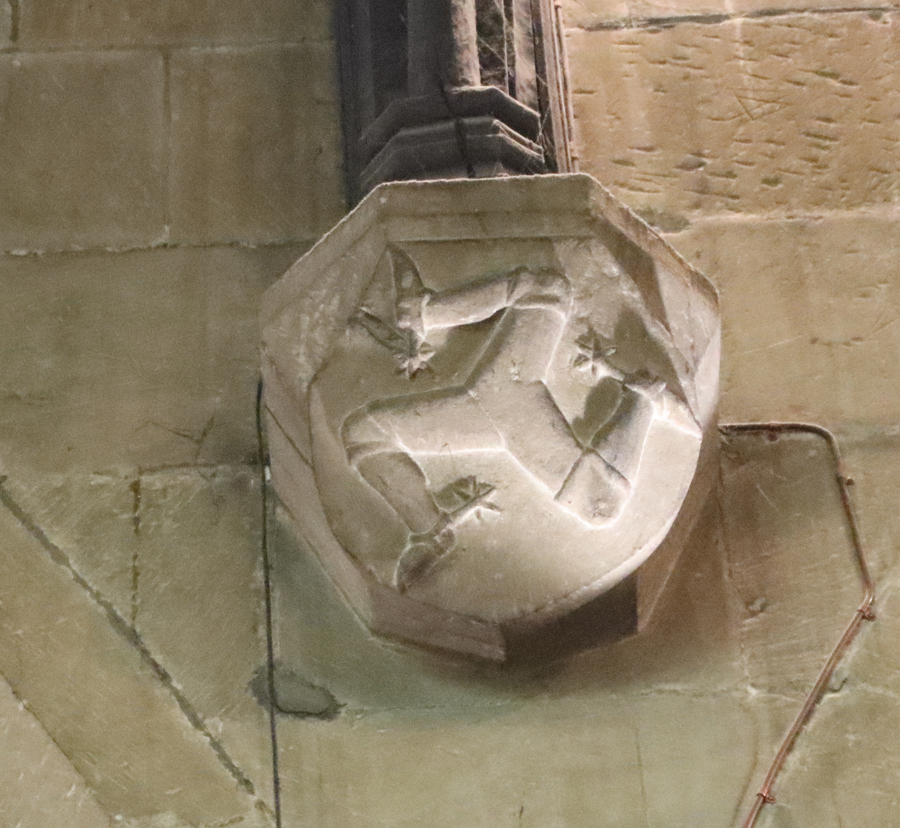
- The 3-leg symbol of the Isle of Man reflects Sir John Stanley’s new title of Lord of Man, gifted to him in 1405 by Henry VII for his support during the War of the Roses
- Other Stanley emblems including a stag’s head and eagle’s legs
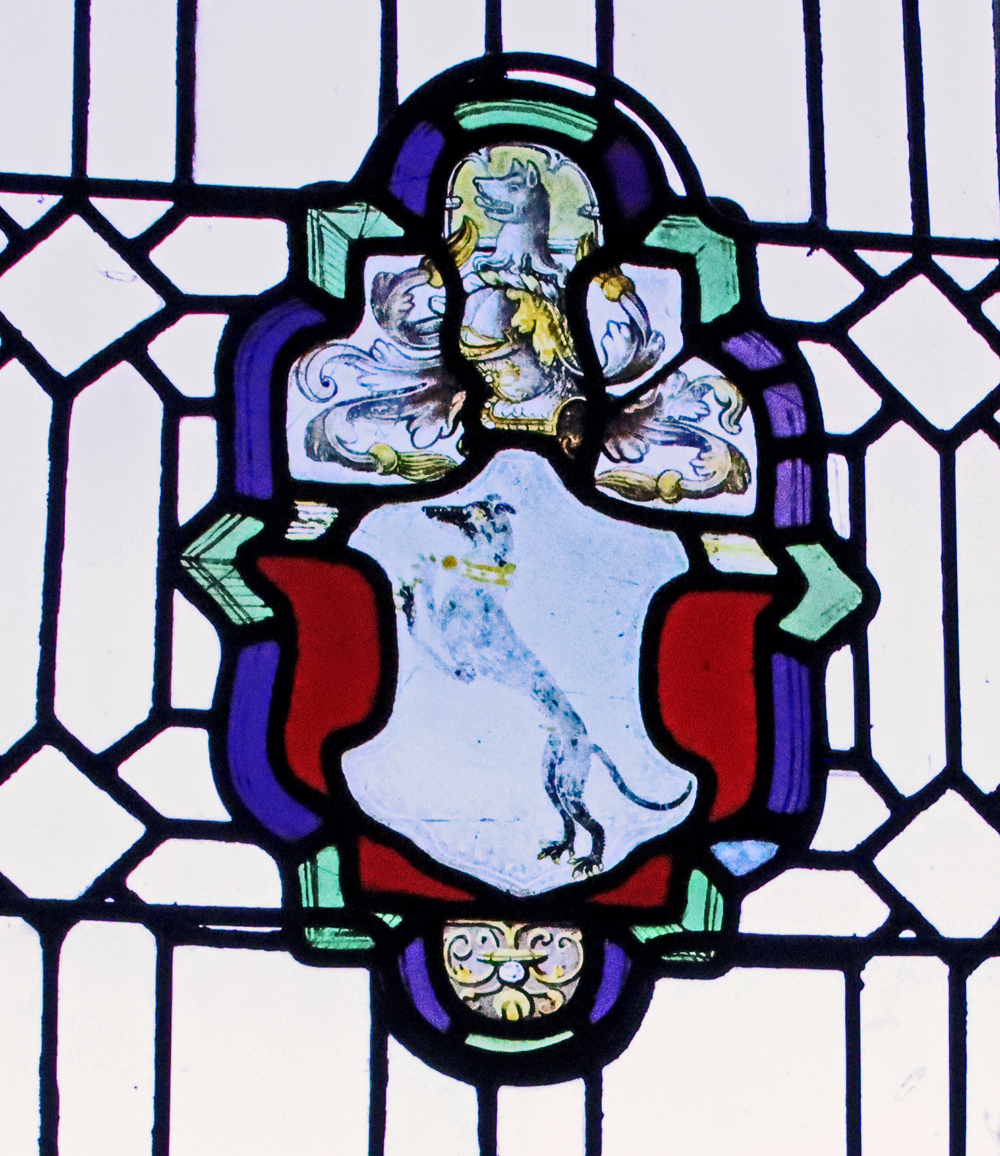
- Tudor emblems, including the dragon and greyhound in the spandrels of one of the doorways
- The Royal arms of England and Wales at the end of the pendant ceiling boss over the spring
- The coat of arms of Queen Katherine of Aragon (1485-1536), the wife of Henry VII’s son Arthur before Arthur’s death in 1502, featuring three pomegranates topped with a crown. Lady Margaret was her grandmother-in-law, dying in the same year as Katherine’s marriage to Arthur’s brother Henry VIII (reigned 1509-1547) in 1509
In addition, Henry VII chose to include a statue of St Winefride in a niche in the north apse of his own Lady Chapel in Westminster Abbey. She is shown with her head on her shoulders, but there is also a small head on its side at her feet, sitting on the top of the well.

Lower chapel roof bosses. Clockwise from top left: Arms of Katherine of Aragon; Wolf-head shield of Hugh I or Richard d’Avranches (probably the latter); Either St Winefride or the Virgin Mary, very battered but originally two angels placed a crown on her head; the base of the pendant boss shows the royal arms of England and Wales whilst the pendant itself shows scenes from the life of St Winefride (very worn); the legs of the Isle of Man, off centre; greyhound and to its left dragon, both symbols of the Tudors (on opposing doorway spandrels).
xxx

St Winefride’s Well c.1790. NLW 1129695. National Library of Wales via Zone47 Zone47.
The construction of the two chapels, above and below, seems to have been overseen by Abbot Thomas Pennant of Basingwerk, who held the abbacy from 1480 – c.1522. T.W. Pritchard has argued that there is evidence form contemporary Welsh bardic-style poetry to assign the patronage and building to Abbot Thomas, but the weakness in this interpretation is that the bards connected with, and often living at, monastic properties were often effusive, fulsome and sycophantic, and not necessarily truthful. The poets were making no attempt to capture history, creating a highly partial view of the world as they experienced it in hyperbolic language as an art form. Nor is it at all clear whether Abbot Thomas would have known of the fan vaulting style, or where he would have found an architect to produce it. On the whole, given that I have seen no argument that the above family-related topics were added at a later date, the data seems to favour the Stanley family as the creators of the chapel, with Abbot Thomas managing the build locally, and perhaps investing in some of its creation. Without documentary data this remains uncertain.
The concept

Plans and elevations of St Winefride’s Well, lower and upper chapels. Source: Journey to the Past (a collaboration between Bangor University, the University of Wales Centre for Advanced Welsh and Celtic Studies (CAWCS) and the Royal Commission on the Ancient and Historic Monuments of Wales)
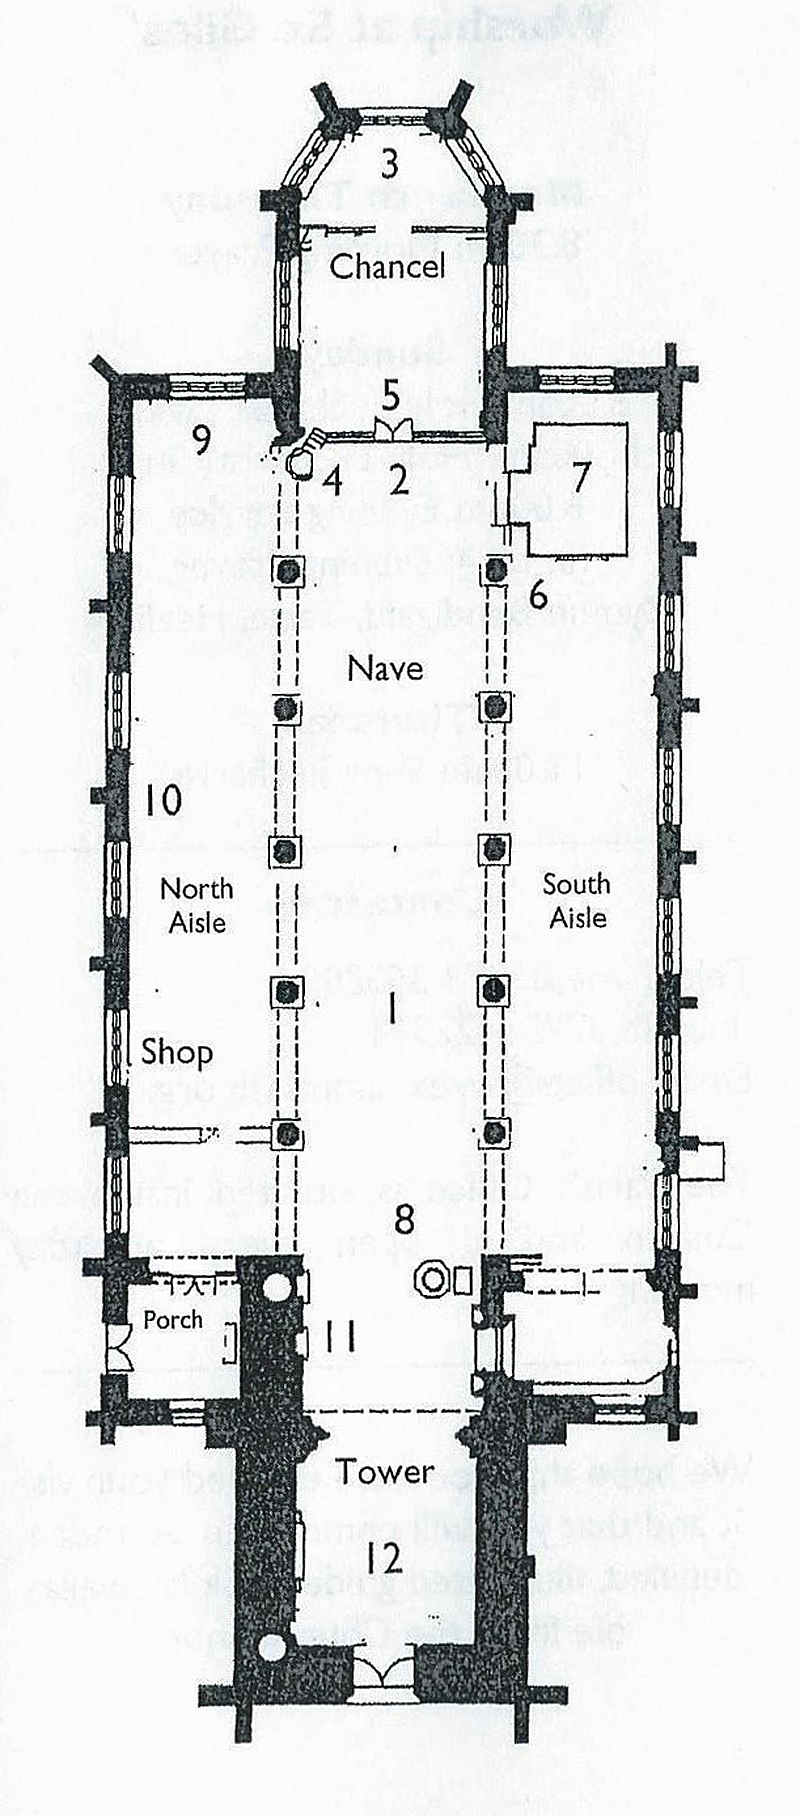
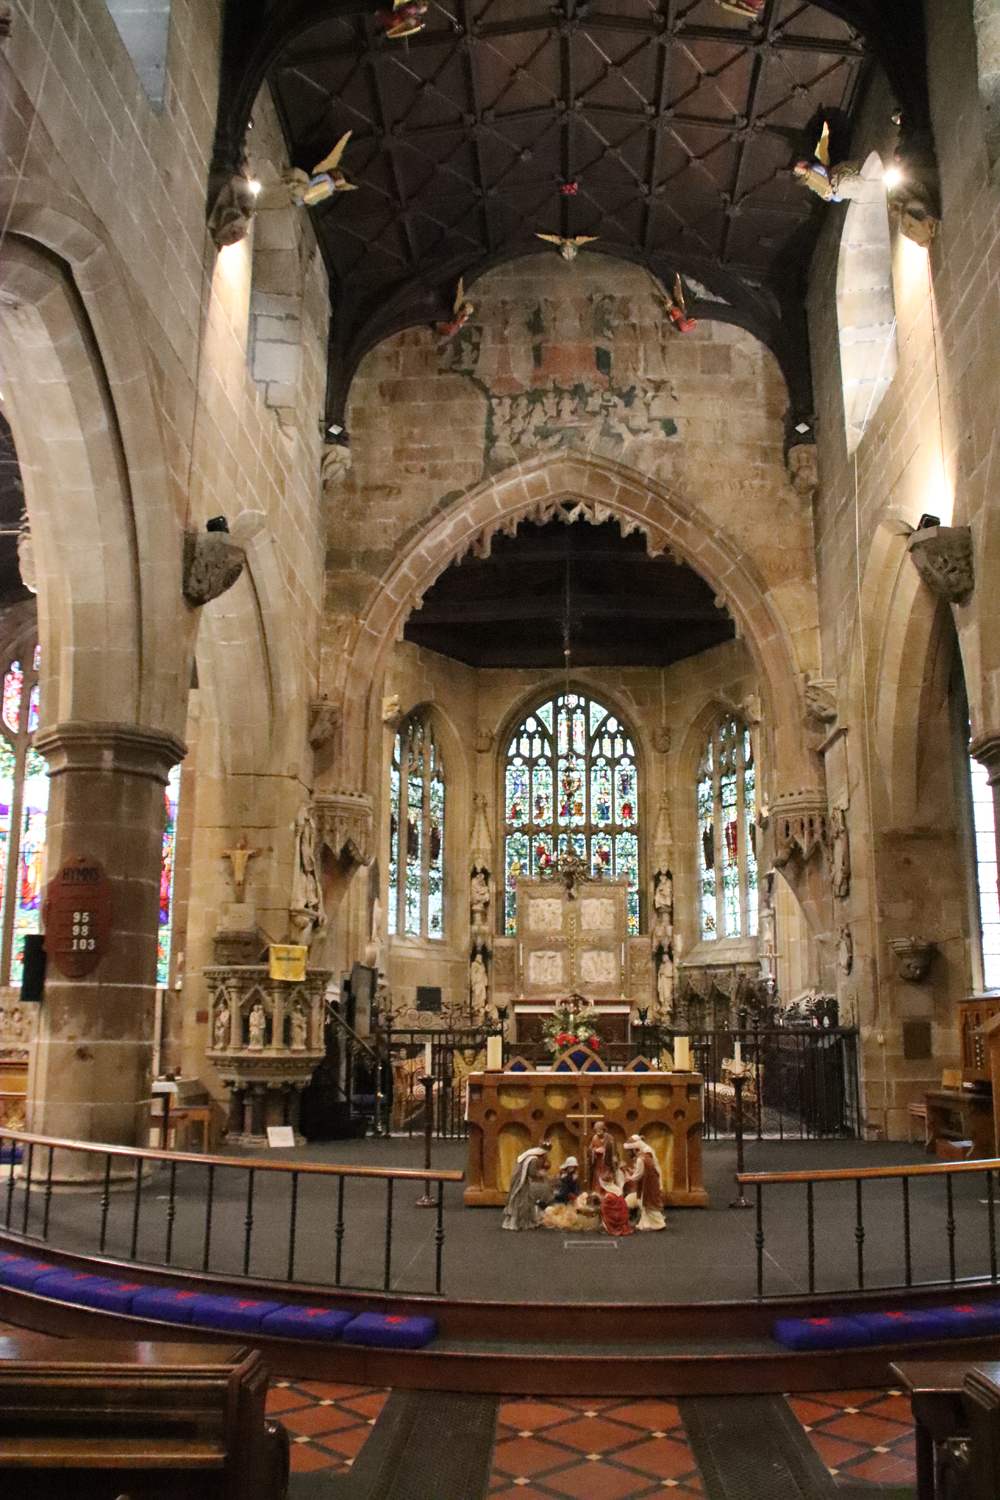
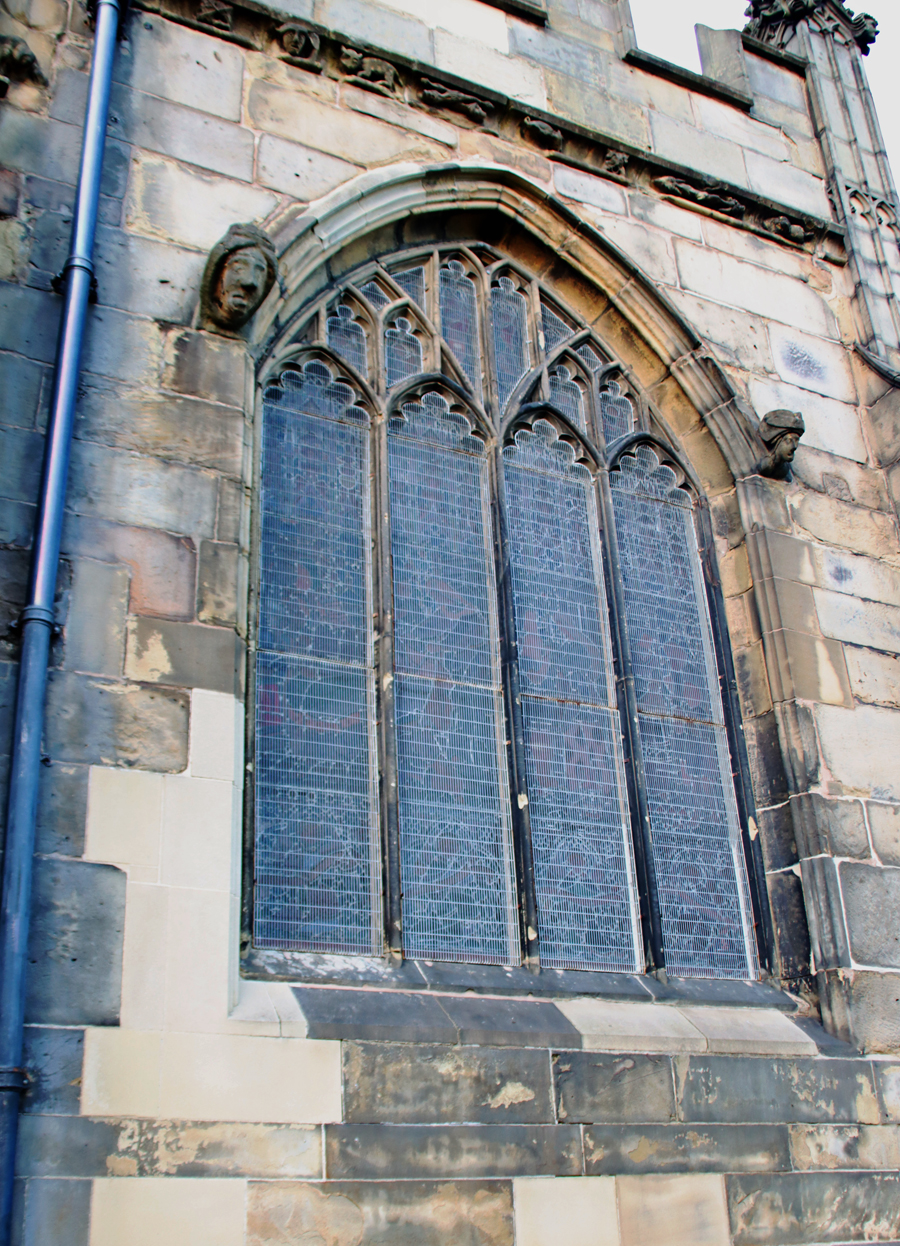
The late Gothic buildings that we see today came late in the well’s medieval history. The style, late Perpendicular, comes towards the end of the 15th and beginning of the 16th century, only a couple of decades before Basingwerk Monastery was suppressed in Henry VIII’s Dissolution, shortly after which Edward VI began a policy of suppressing Catholicism. It is not know what the chapel and well looked like before this time, because there are no images or descriptions, but the new architectural conceptualization design, consisted of two parts, the lower fan-vaulted well chapel, and over the top of this a more conventional church-like structure with a nave, side aisle, chancel and stained glass windows, with more sculptural elements. These are discussed further below.

The parish church on the right and the upper chapel of St Winifride’s Well on the left, showing their proximity
The design was governed by how pilgrims used both the well and the neighbouring church. Pilgrims would arrive in Holywell at the abbey. Some of them would take advantage of the abbey’s hospitality. In the late medieval period the abbot was responsible for new stone-built accommodation for visitors, but there must have been provision previously, perhaps built in wood. For those who wanted to stay elsewhere, the late medieval town would have offered alternatives.

The upper chapel, looking west
For pilgrims staying at the abbey, a walk to the holy well would have been guided by a monk who would lend monastic authority to the event. On arrival at the shrine, pilgrims would have been taken up to the chapel to pray and receive guidance before they could proceed to the shrine itself. The upper chapel was designed to hold large numbers of people in a church-like layout and environment. It was only a few steps away from the parish church where visitors could also attend services. The placing of the upper chapel over the top of the well was a clever way both of making the most of the steep hill, and of linking the well with the parish church. The design of the three bays of the shrine took pilgrims in a procession that entered through one entrance, proceeded around the shrine and lead either out the other side. There were steps down into the well itself.
Lower Chapel

The well with the ceiling pendant boss overhead, which showed scenes from the life of St Winefrede around it, and the Royal arms of England and Wales at its base.
At the level of the spring is a tall, narrow open-fronted well chapel, with a lofty fan-vaulted ceiling on slender compound piers over three bays of which the middle, encompassing the well, is the largest. The chapel defines a processional area where people could enter at one side, circle the star-shaped basin where the spring emerges, and light candles before and leaving at the other side. One theory is that the almost star-shaped well represented the Pool of Bethesda. A staircase led to a gallery where people could look down into the well. A rectangular pool received the spring waters outside, in a similar way as it does today, but images from the 18th century suggest that the much greater volume also allowed it to run out of the other end of the pool as a strong stream flowing down the hill.
The fan vaulting had sculptural roof bosses wherever there were joints. The opportunity was taken with nearly all of them, big and small, to create sculptural elements, some of which are shown below. The main pendant roof boss, suspended over the centre of the spring well, has the royal coat of arms of England and Wales on the base, whilst the sides shown scenes from the life of St Winefride. The columns around the well are now broken, the remaining stumps at two levels shown in the photograph above, but once formed an intricate screen, with filigree-style details in the spandrels. The string-course of decorated stone along the top of the well was also decorated in the same way.
The entire effect must have been very like a tiny, sublime cathedral in rural northeast Wales.
xx

xxx

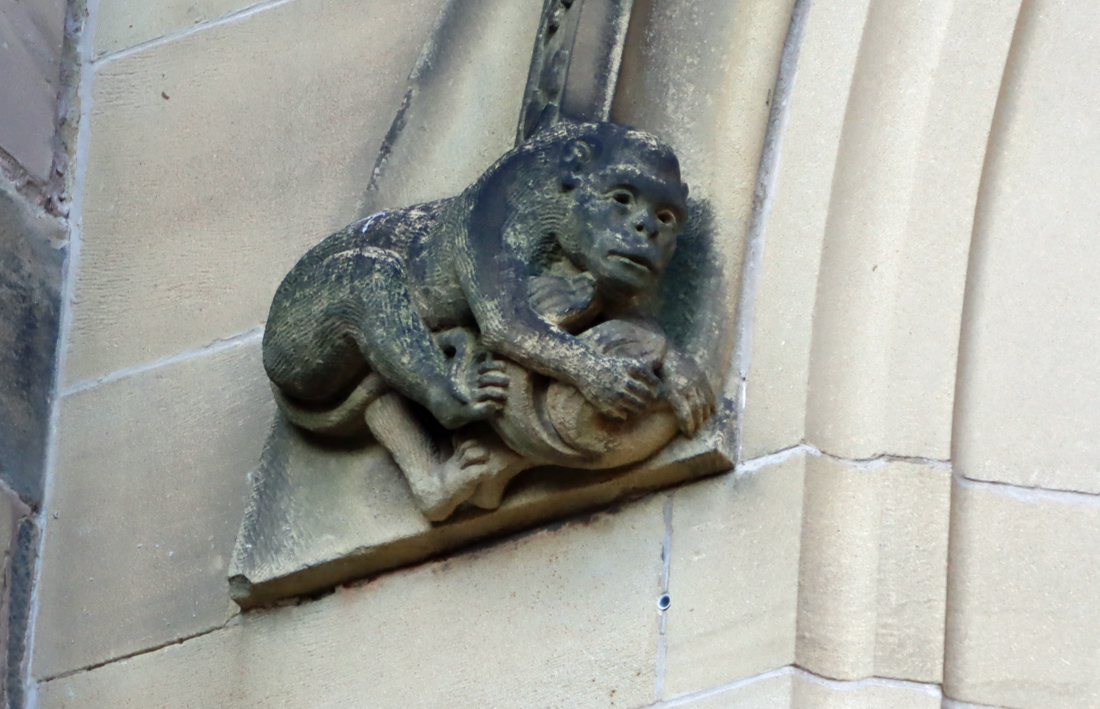
The themes on the ceiling bosses and other areas of the lower chapel show some interesting choices. As well as the heraldry relating to the Stanleys listed above, there are some ceiling bosses relating to Winefride, Beuno and other religious themes, other families, and plant and animal motifs.
Upper Chapel
The upper chapel
xxx

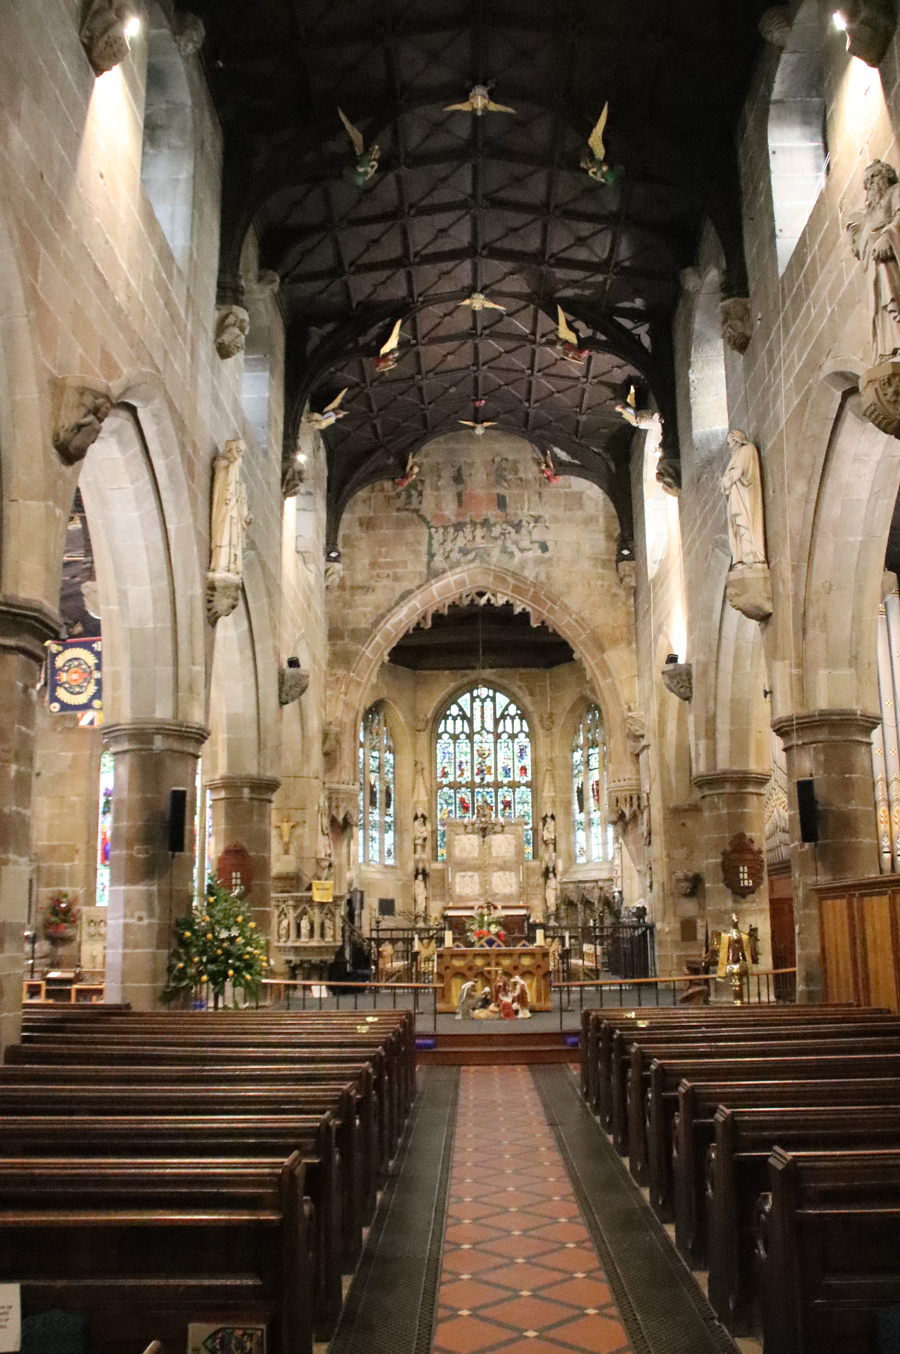
The upper chapel, looking east to the chancel
Over the top of the lower well chapel was an enclosed chapel, designed with a conventional nave and chancel, with one truncated side aisle, to which pilgrims could proceed following their experience at the spring to worship and hear services. The design of window openings and arches is Perpendicular with wide, flattened arches and tall mullioned windows that allow plenty of light into the space. side aisle sits directly over the well, whilst the chancel at the east end extends beyond the space enclosed by the lower chapel.

The north aisle, over the top of the well and overlooking the pool. Only one aisle was built.

The camber-beam roof over the nave
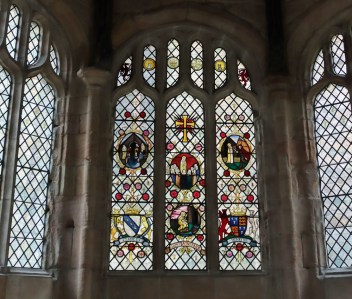
Modern stained glass window in the chancel
xxx
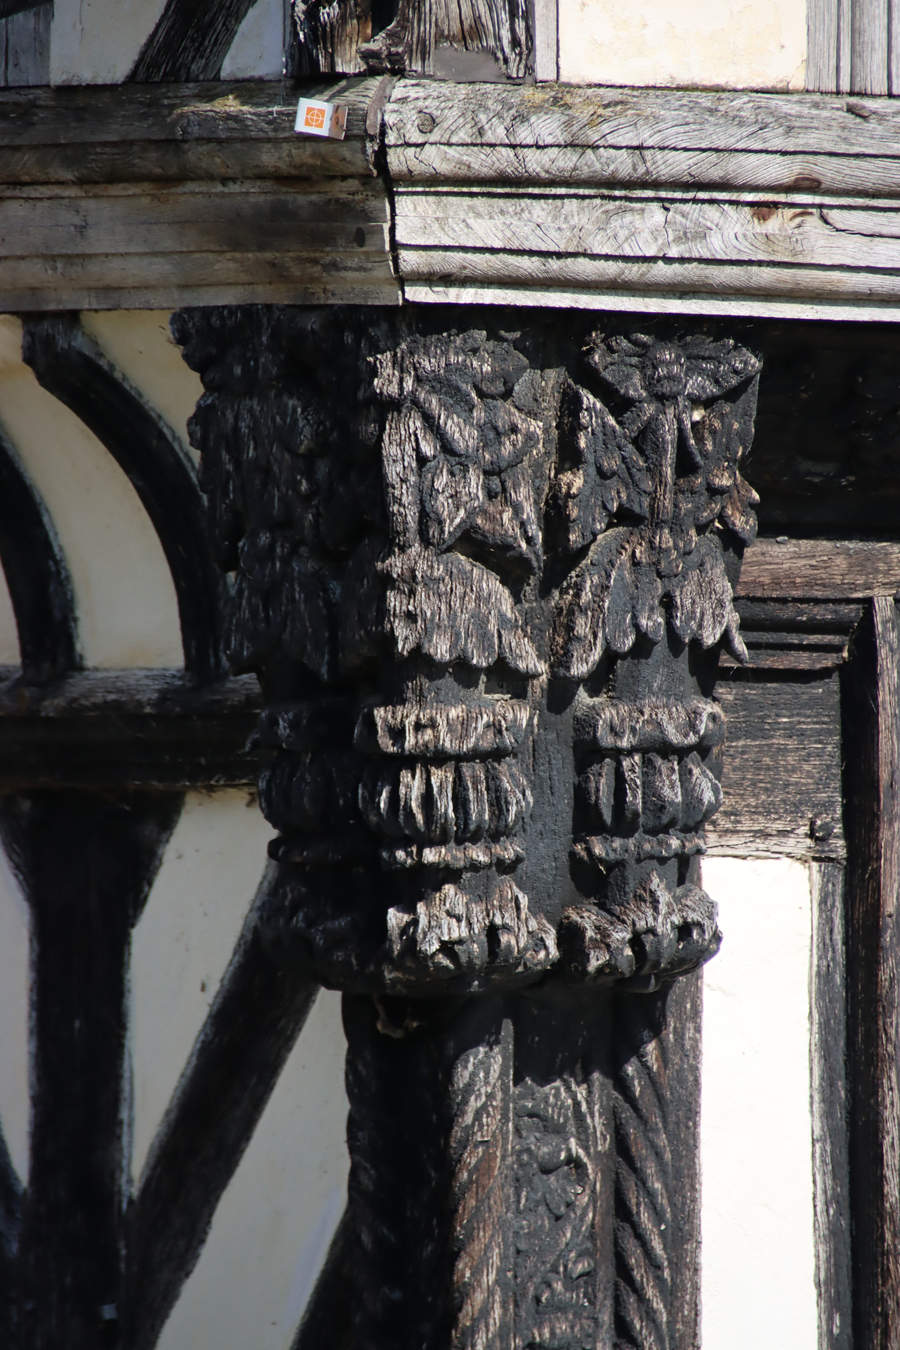
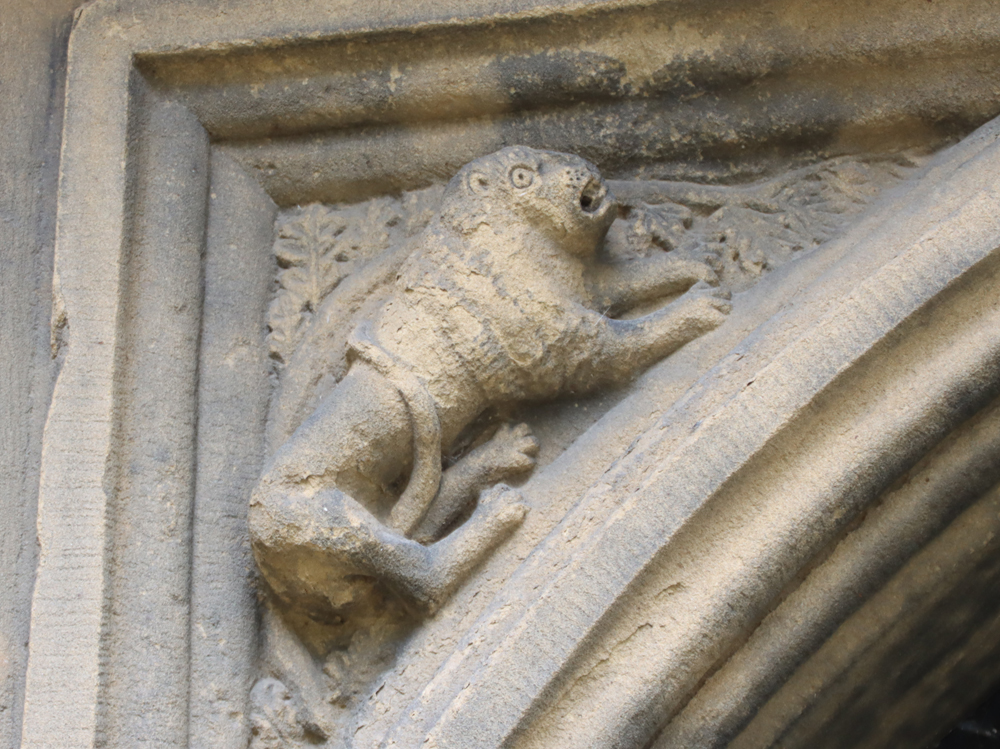
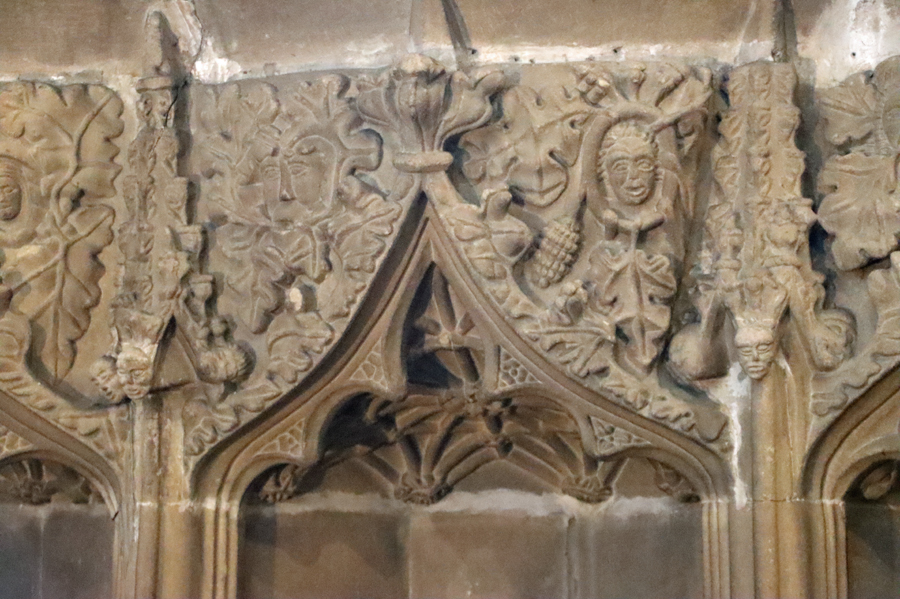
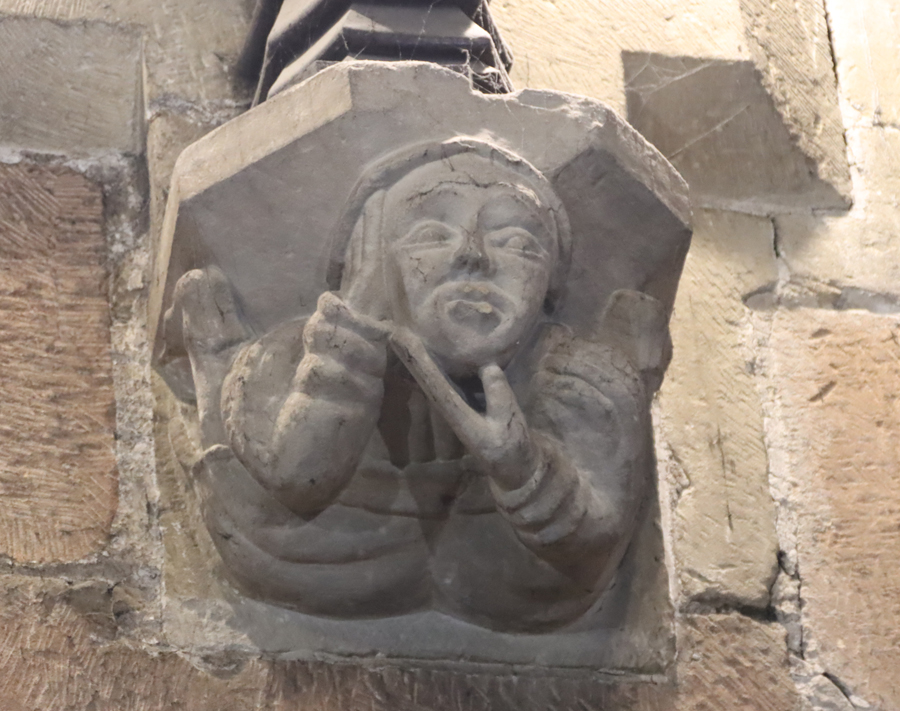
 As with the lower chapel, the upper chapel has some rather wonderful sculptural elements, with much less emphasis on family symbolism, and much more on the sort of themes that are found in the margins of illuminated manuscripts, on misericords, and in the roof areas of churches. They include scenes of everyday life; pagan, mythological and religious motifs; and two humourous grotesques. The wood carvings, high in the chancel and the nave on stone corbels are difficult to see due to their height and the lack of light. The stone carvings, which are lower down, are quite easy to make out.
My photos of the wood carvings were frankly diabolical. I couldn’t actually see what I was photographing in the chancel, so just pointed the camera and hoped for the best. Even after applying Photoshop, in some cases I am still none the wiser. Apologies, therefore, that there are so few of them. A torch would be a handy accessory if you are thinking of visiting.

Sculptural elements from the upper chapel.
The chapel was considerably altered in the 1700s but has since been restored to something close to its previous appearance.
xxx
The Dissolution of the Monasteries
The opening page of the Valor Ecclesiasticus, which valued each of the main monasteries, showing Henry VIII. Source: Wikipedia
The suppression of the monastic houses from 1535 was Henry VIII’s multi-pronged strategy to gain a divorce from Katherine of Aragon, denied to him by the Pope (Katherine was fortunate enough to retain her head); to escape the authority of the Pope and the bishops and place himself as the head of the Church; to strip monasteries and priories of their valuables to raise funds for the Crown; and to release estates from formerly powerful monastic landholders, which enabled him to redistribute land, wealth and power, which he could use to generate money and to negotiate for long-term political support. In order to assess the value of the nation’s monastic holdings, his hench-man Thomas Cromwell ordered the Valor Ecclesiasticus (a an assessment of the income and assets of each monastic house) and assessors were duly sent out to all parts of the kingdom. All of those worth less than £200.00 were immediately suppressed, which included all the Welsh houses. The remaining monks and nuns were dispersed, willingly or unwillingly. They were often granted reasonably generous pensions if they left without a fight. Abbot Nicholas Pennant, the last abbot of Basingwerk, clearly gave no trouble to the administrators because he left with a pension. Monastic properties were sold, gifted or broken up and otherwise disposed of by Henry’s administrators.

All that remains of the monastic church at Basingwerk today
The impact on St Winefride’s Well was felt both immediately and incrementally thereafter. With the loss of the abbey, the shrine no longer had monastic support and oversight. Whatever funding, maintenance and care the shrine received were withdrawn. The shrine would now be the responsibility of the church and the village. Pilgrims were deprived of monastic hospitality. With no monastic guidance to the shrine when they arrived, a lot of the ceremony and sense of a special occasion were removed, perhaps making a pilgrimage less attractive and rewarding. Certainly the oblations (pilgrim donations) began to decline significantly. At the same time, political and religious instability may well have deterred pilgrims. The loss of the monks as managers of the abbey’s landholdings and industrial properties may not have been felt immediately, but whatever processes were in place may have required a new approach to estate management by those actually working the land and this may have had an impact on the local economy, particularly Holywell itself, undermining the economic stability and prosperity of the village at least for some time afterwards.
XXX
After Henry VIII

Splendidly evocative depiction of the Devil selling Indulgences, from a Czech illuminated manuscript called the Jenksy Kodex, c.1500. Source: Wikipedia
Quite what Henry VIII planned for the future of the new Church of England is not clear. He probably had very little strategic idea himself, but it is certain that the Archbishop of Canterbury, Thomas Cranmer (1489-1556), an advisor to Henry, had plans, which included maximizing his influence has the clerical head of the Church of England. One of Henry VIII’s particular obsessions was the destruction of all traces of the veneration of St Thomas Becket. For Henry VIII, Archbishop of Canterbury Thomas Becket (1119/20-1556) had been the ultimate Church challenge to “royal supremacy” in which the king rather than the Church held ultimate authority. Becket was murdered over the question. The horror with which Becket’s murder was received forced King Henry II to back down and make the peace with a powerful clergy who were backed by the papacy and who had ultimately won the day. In Henry’s similar battle with church supremacy, with the Pope refusing to condone the annulment of his marriage to Katherine of Aragon, Becket was the embodiment of Church interference with royal right to rule without challenge. There are only a few representations of Becket today in churches.
After Henry VIII died, Archbishop Cranmer had great influence over Henry’s young son, Edward VI (reigned 1547-1553) during Edward’s six-year reign. The result was a Tudor clamp-down on Papism, its rules and its traditions, including indulgences, the veneration of saints, and the worship of icons, a policy that went through phases of persecution and lapses of energy. Edward was not pulling his punches, as this excerpt from Edward VI’s Royal Injunctions of 1547, demonstrates, commanding
. . . that they shall take away, utterly extinct and destroy all shrines, covering of shrines, all tables, trundles or rolls of wax, pictures, paintings and all other monuments of feigned miracles, pilgrimages, idolatry and superstition, so that there remain no memory of the same in walls, glasses, windows or elsewhere within their churches or houses. And they shall exhort all their parishioners to do the like within their several houses. [See University of Michigan in Sources]
 The instruction to erase all reminders of the recent religion, focusing specifically on objects, is an impressive measure of Edward VI’s understanding of the power of objects and how they mediate people’s ideologies, beliefs and sense of both security and identity. The enormous destruction of objects and art during the Reformation was a strategy to systematically erase the tangible links between people and their beliefs, suppressing in every sense the way in which people understood, expressed and experienced their sense of the connection between the physical and spiritual world in which they lived and which defined their existence. The result was often exactly what Edward VI would have wanted. It is astonishing that St Winefride’s chapels were able to escape.

St Winefride’s Well with Holywell in the background, 18th century. Watercolour by John Ingleby. Source: People’s Collection Wales
After the Dissolution the well began to become the focus of Catholic (specifically Jesuit) sedition. In Holywell, Basingwerk Abby had now been stripped of its roof lead, always the beginning of ruin, and although part of it is thought to have been occupied as a house for a while, it was ultimately abandoned. However, the well and the accompanying church continued to be an illicit focus of Catholic devotion, and St Winefride’s chapel continued to be maintained and visited, often at enormous risk to both residents and visitors, sometimes resulting in imprisonment or execution. Perhaps directly linked to this illicit expression of devotion, and a way of bonding with the shrine, are many, many carved pieces of graffiti, mostly alphabetic, some dates and a few unexplained pictograms. That’s all another story, and a really interesting one for another day, but it is really quite remarkable that the shrine survived centuries of religious intolerance to eventually experience a revival of pilgrim and tourist attention in 18th and 19th centuries, at which time the buildings underwent restoration.

Lead repair of stonework along the side of the well
Final Comments

Ceiling boss in the lower chapel
St Winefrede, a 7th century saint, is one of the best known saints in Wales. The miracle-working shrine with its gushing natural spring became so popular and important throughout the medieval period that in the late 15th or early 16th century it was provided with a brand new pair of chapels, upper and lower, that provided a building of late gothic splendour to frame the well and provide spaces for experiencing the spring and for worshipping in a church-like environment. It welcomed pilgrims, was an asset to its owners and contributed to the economy of Holywell itself.
The site was awarded the status of a National Shrine in 2023. It continues to be a significant draw for both pilgrims and tourists, and makes for a very attractive day out when combined with both Basingwerk Abbey and the industrial heritage park, continuing to make its presence felt.
Visiting
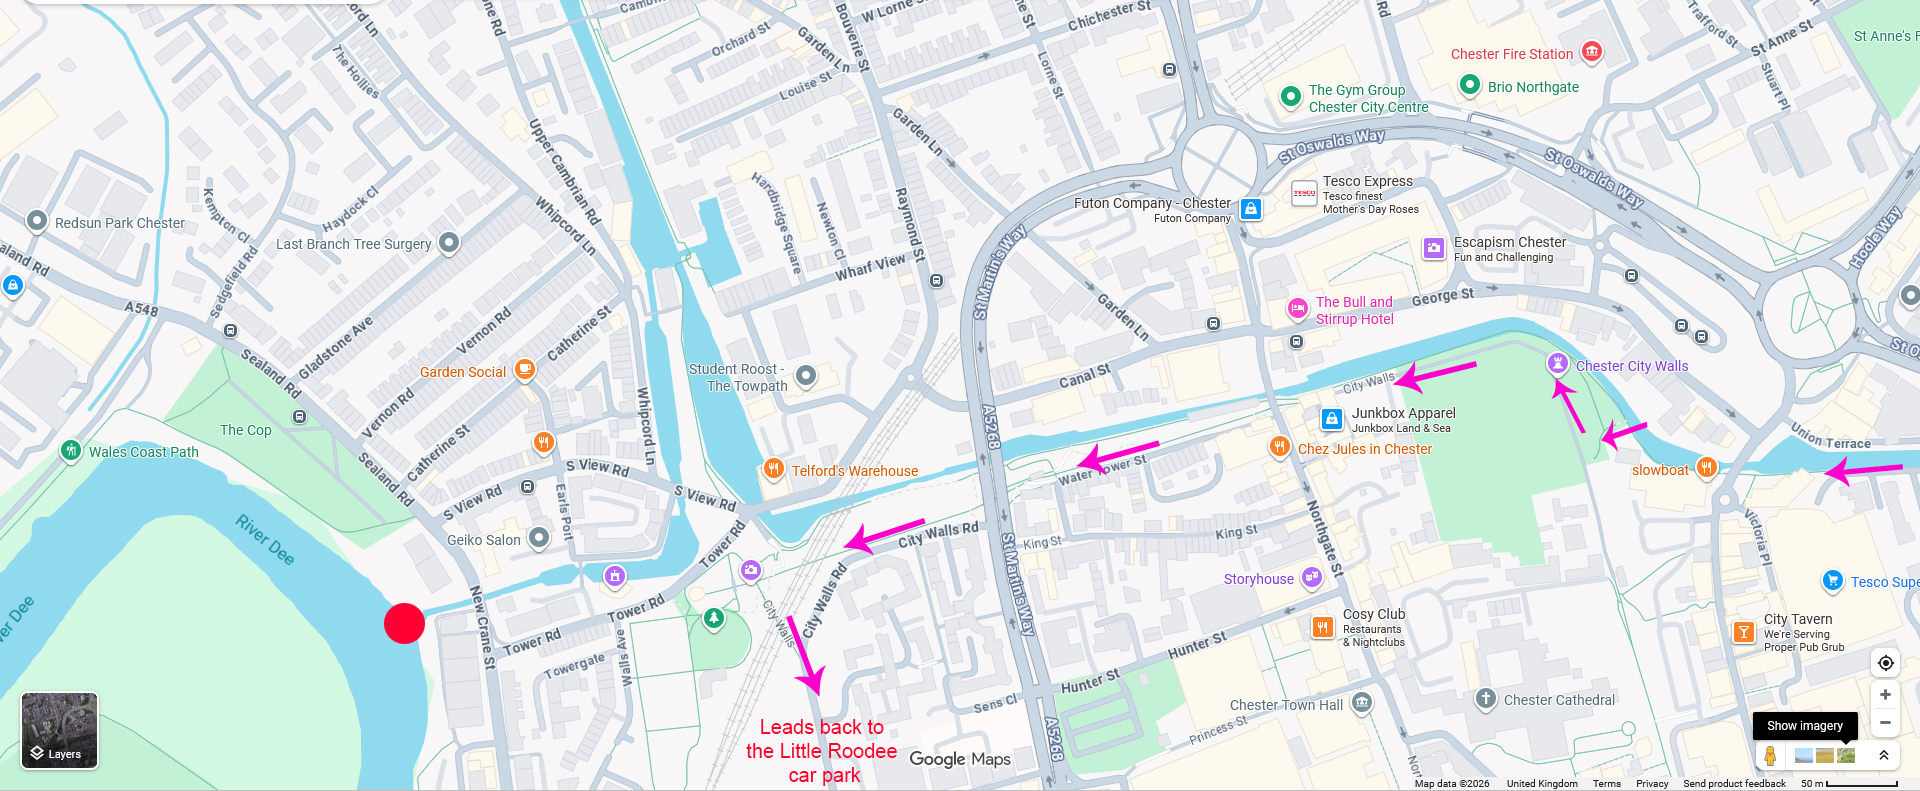
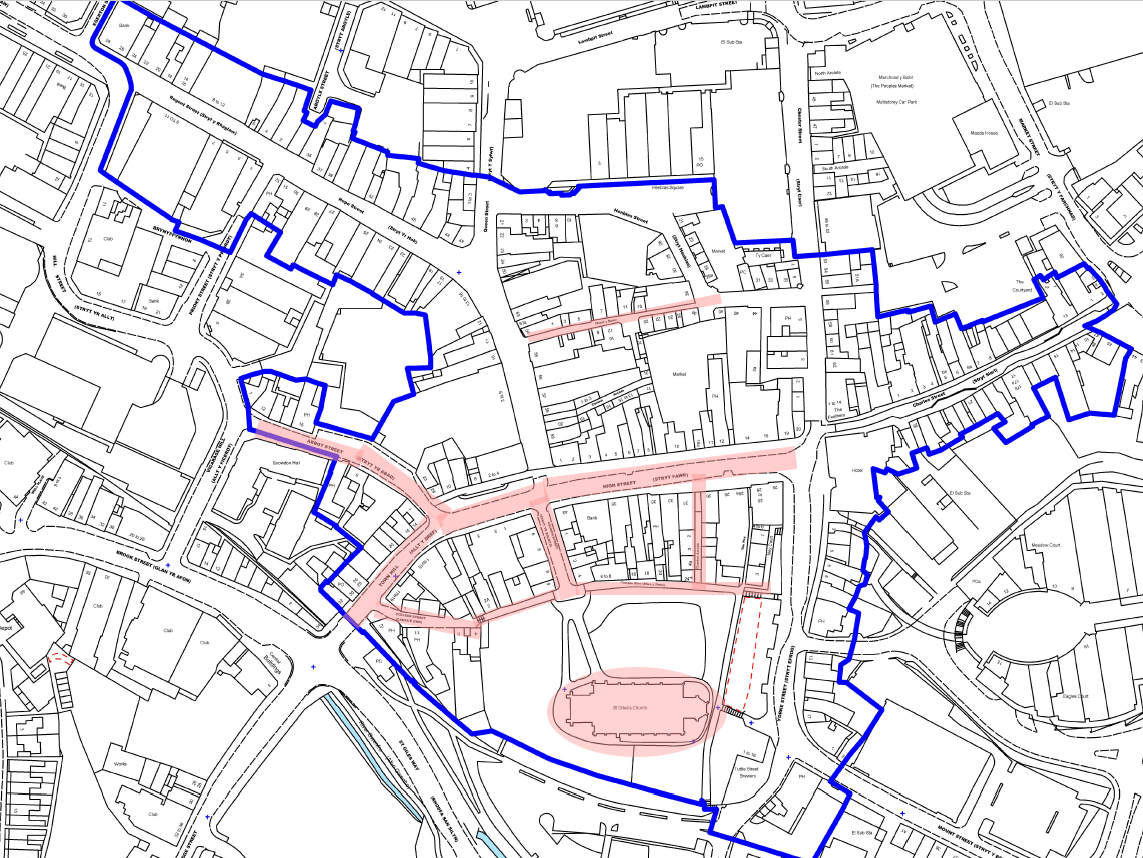
With parking nearby, a visit to St Winefride’s Well can take no longer than an hour or so to visit, but it can be combined with the Greenfield Valley Heritage Park to make a full day out, particularly when the small town at the top of the hill is included in the trip.
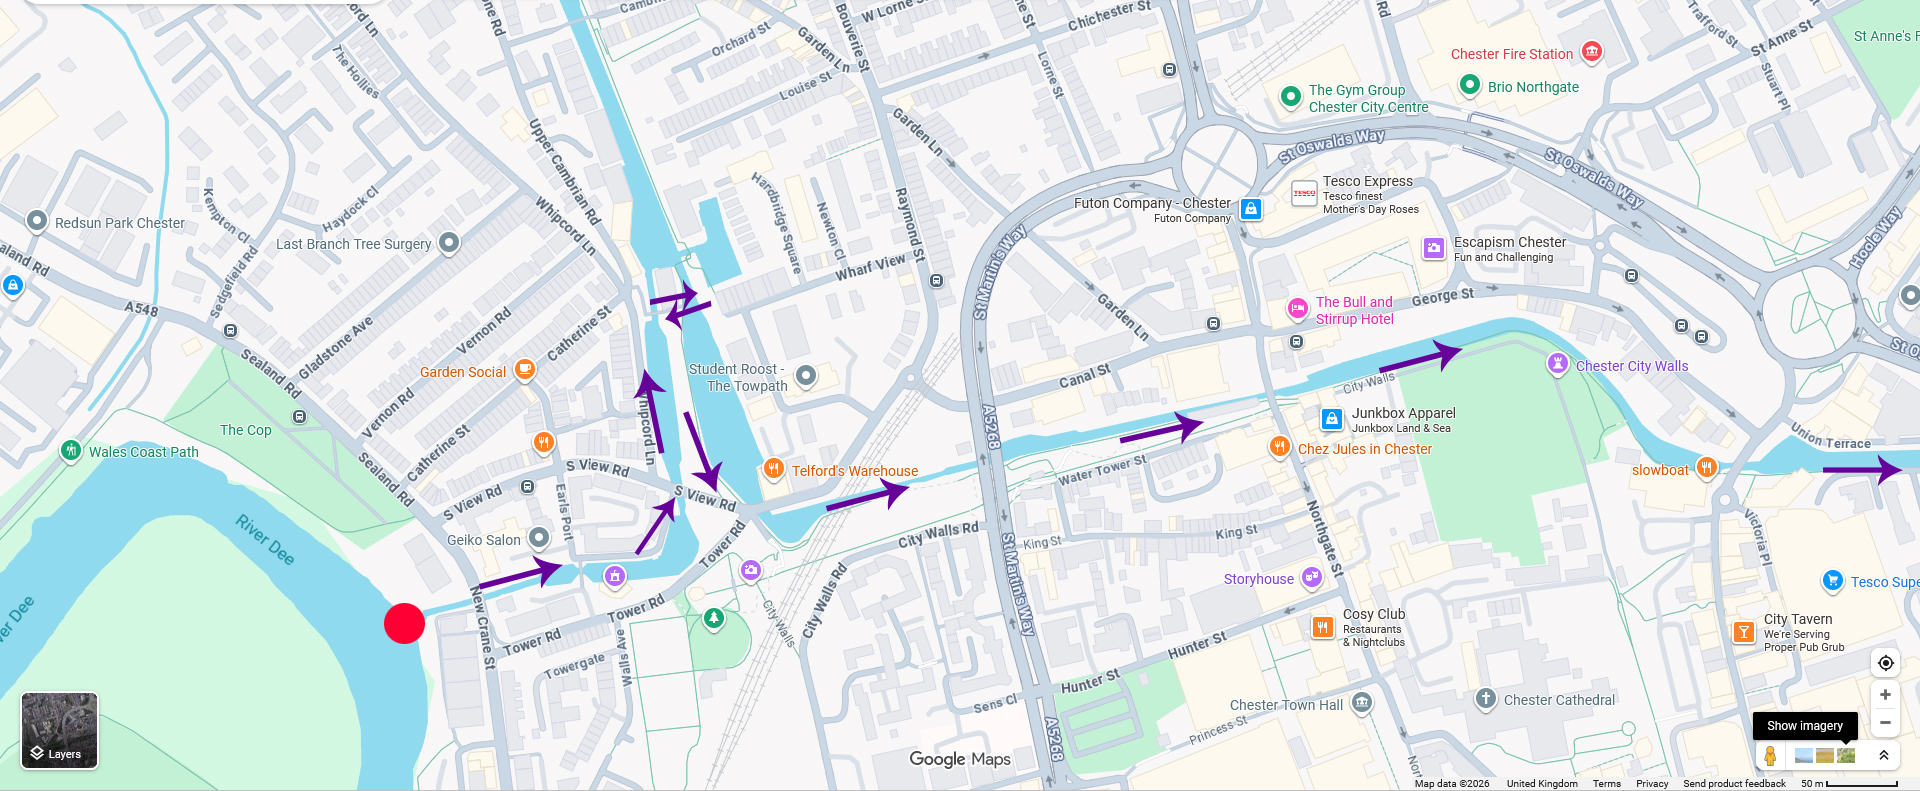
 On the map of Greenfield Valley to the right, the Holywell spring and chapel are at the very top (the car park is just down the hill at the What3Words address ///scanning.smarting.brisk or a lay-by just up the hill at W3W ///fidgeting.grain.nail). Alternative parking is at Basingwerk Abbey at the very bottom of the park, bigger than that for the chapel, at W3W ///assess.origin.flicks). There is also plenty of parking in the town at the top of the hill.
The other sites on the map shown here are described on the post about Greenfield Valley’s industrial heritage. The church of St James has been closed on the three occasions when I have visited, but it lies behind the chapel, just uphill from it. There is a cafe next to the abbey, on the bottom right of the map, but check the website listed below, because at the time of writing it is under refurbishment.
The Visitor Centre, ticket office and souvenir shop are on the left as you enter the grounds, and it is from here that you collect the key for the upstairs chapel as well (they ask that you leave your keys as a deposit). The Visitor Centre is a single large room, with some excellent interpretation boards and some original objects on display (note that there is a sign saying that it is not permitted to take photographs in the Visitor Centre).
 The spring and the fan-vaulted well chapel are on the same level as the Visitor Centre via a door to the left of the ticket office. The overhead chapel, which sits over the top of the well chapel, is a little way uphill, on the footpath along the road. To reach it you need to go back out of the Visitor Centre and turn left up the road. Turn left again along the path that leads from the road to the church. The door faces uphill.
There is a free leaflet with a map, which you can collect from the ticket office. I have scanned it and posted it here for download as a PDF, but note that the leaflet was longer than A4, so I’ve split it up and arranged it in portrait rather than landscape to fit it on two pages. My version is not a thing of beauty, so it would be much better to pick up the leaflet when you visit!
 I strongly recommend that if you don’t have a telephoto lens or very good zoom function on your phone, you take binoculars so that you can get a much better view of the carvings on the ceilings in the lower shrine and on corbel tops in the upper chapel. A powerful torch would certainly help too, particularly in the upper chapel.
Finally, do note that this is still a place of pilgrimage and prayer, and you may run into people having a quiet moment in front of the statue of Winefride within the lower chapel, or even having a dip in the outer pool. A lady did so when I was last there on a freezing cold day, and after drying off she went pray in front of the statue just inside the entrance of the lower chapel. I carried on with what I was doing, but gave her space.
xxx


Sources
Books and Papers
Joseph Mallord William Turner, Holywell: The Interior of the Cloisters, St Winifred’s Well 1799. Source: The Tate
Baker, Nigel 1998. Shrewsbury Abbey. A Medieval Monastery. Shropshire Books.
Barraclough, Geoffrey 1988. The Charters of the Anglo-Normal Earls of Chester c.1071-1237. The Record Society of Lancashire and Cheshire, vol. CXXVI
Bartlett, Robert 2013. Why Can the Dead Do Such Great Things? Saints and Worshippers from the Martyrs to the Reformation. Princeton University Press.
Burne, R.V.H. 1962. The Monks of Chester. The History of St Werburgh’s Abbey. SPCK
David, Christopher 1969, 2002 (2nd edition). St Winefride’s Well. A History and Guide
Farmer, David 2011 (5th edition). The Oxford Dictionary of Saints. Oxford University Press
Given-Wilson, C. (ed.) 1977. The Chronicle of Adam Usk 1377-1421. Clarendon Press
https://archive.org/details/chronicleofadamu0000adam/page/n5/mode/2up
Garland, Lisa M. 2005. Aspects of Welsh Saints’ Cults and Pilgrimage c.1066-1532. Unpublished PhD, King’s College London
https://kclpure.kcl.ac.uk/ws/files/2935809/420753.pdf
Gray, Madeleine 2007. Welsh Saints in Westminster Abbey. Transactions of the Honourable Society of Cymmrodorion 2006, New Series, 13 (2007), p.5-30
https://www.cymmrodorion.org/wp-content/uploads/2017/07/2_Welsh-Saints-in-Westminster-Abbey.pdf
Hubbard, Edward 1986. The Buildings of Wales: Clwyd (Denbighshire and Flintshire). Penguin
Pritchard, T.W. 2009. St Winefride, Her Holy Well and the Jesuit Mission, c.650-1930. Bridge Books
Tait, James 1920. The Chartulary or Register of the Abbey of St Werburgh. Chartulary of Chester, part 1. Chetham Society
Turner, Rick 2019. The Architecture, Patronage and Date of St Winefride’s Well, Holywell. Archaeologia Cambrensis 168, p.245-275
https://archaeologydataservice.ac.uk/archiveDS/archiveDownload?t=arch-3493-1/dissemination/168-2019/10-Arch_Camb_168_Turner_245-275.pdf
Webb, Diana 2000. Pilgrimage in Medieval England. Hambledon and London
Williams, David H. 2001. The Welsh Cistercians. Gracewing
Websites
Based In Churton
Basingwerk Abbey
https://wp.me/pcZwQK-2Ju
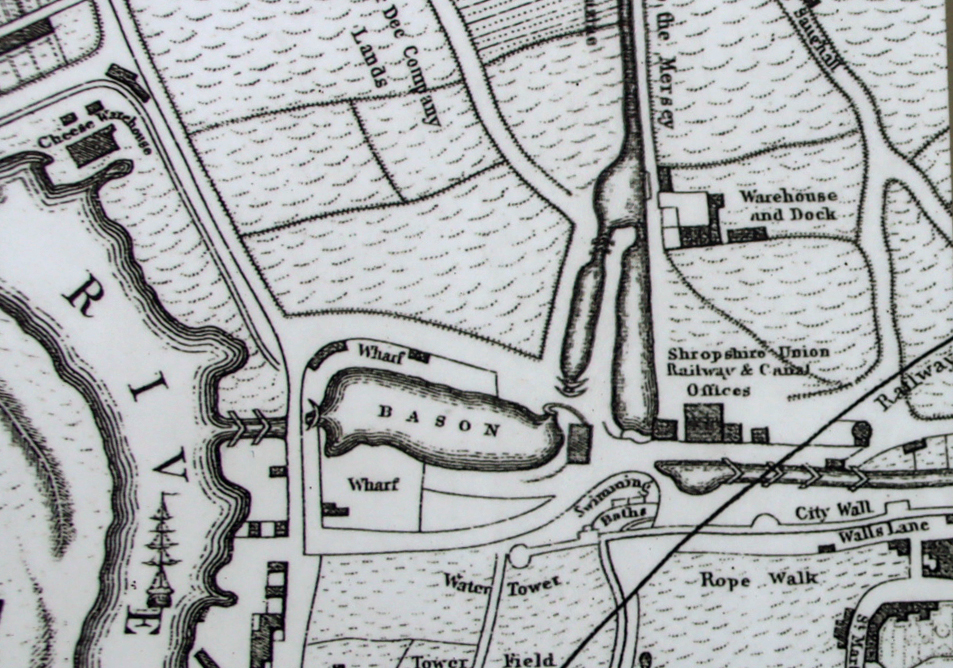
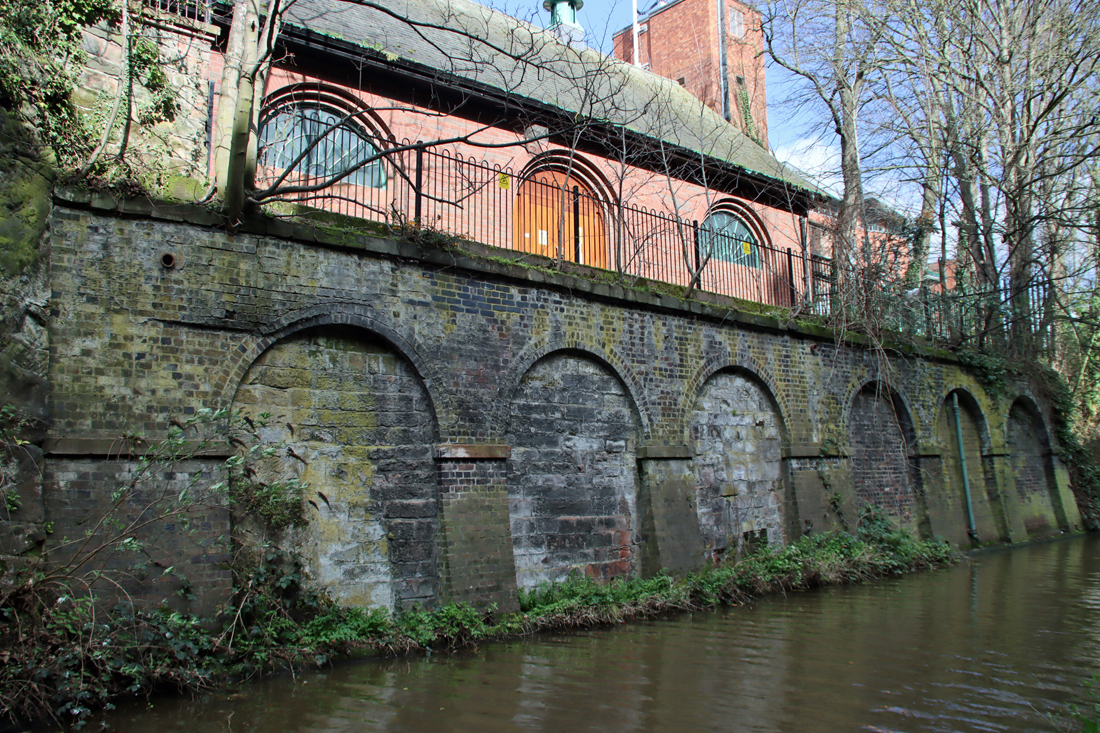
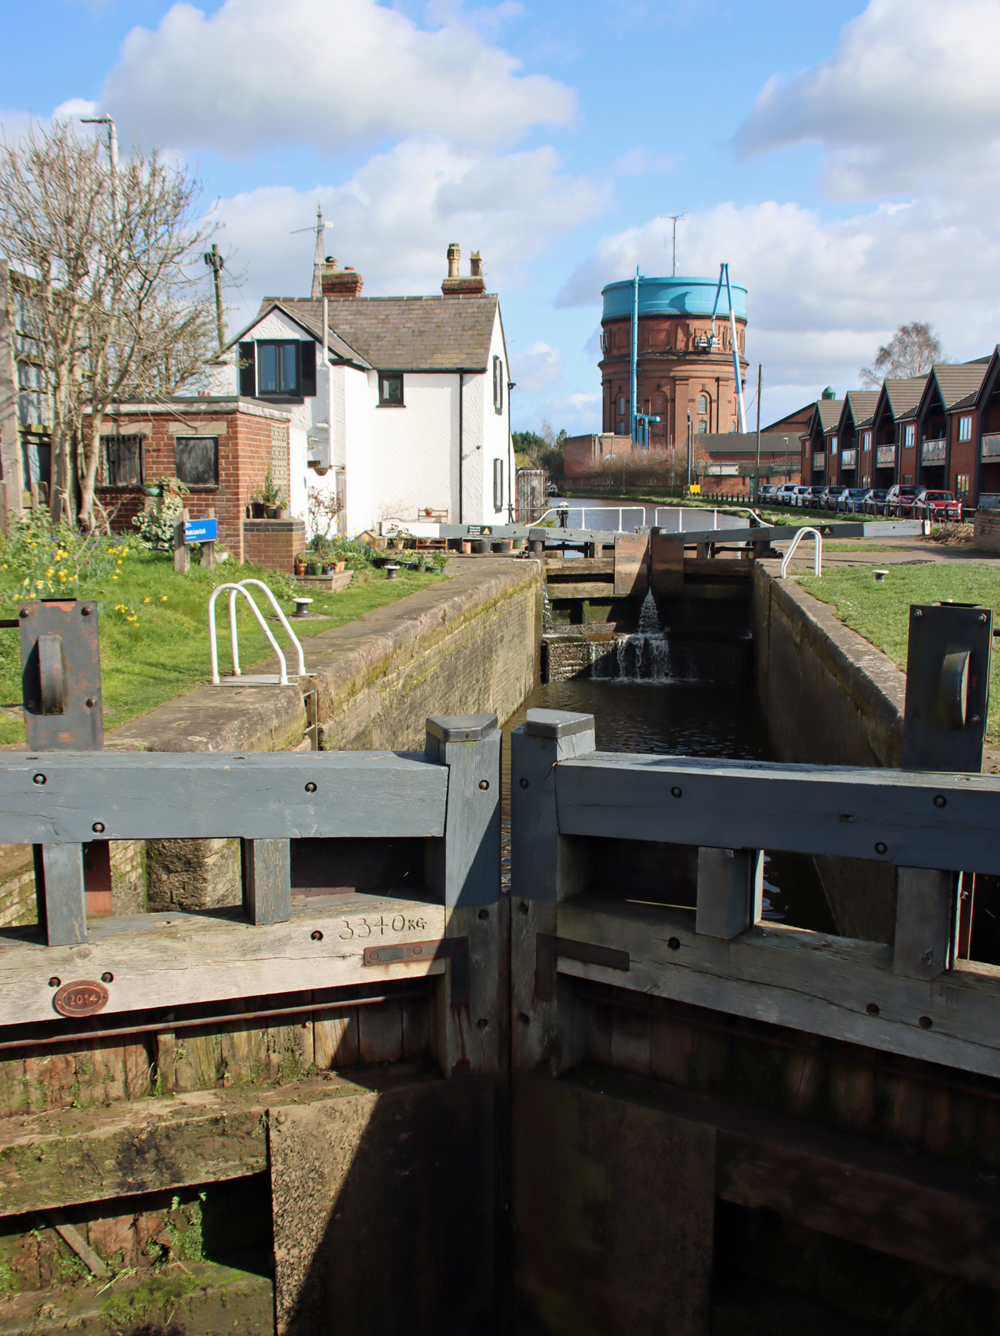
Greenfield Valley (industrial heritage)
https://wp.me/pcZwQK-3eL
St Werburgh’s Abbey (multiple posts)
https://basedinchurton.co.uk/category/chester-cathedral/
A roof boss of Thomas Becket in the Abbey of St Werbergh (Chester Cathedral)
https://basedinchurton.co.uk/2023/07/14/a-ceiling-boss-in-chester-cathedral-the-murder-of-thomas-becket/
Early Tourists in Wales
Holywell and St Winifred’s well
https://sublimewales.wordpress.com/attractions/2231-2/
Essex Record Office
Salvation for sale
https://www.essexrecordofficeblog.co.uk/document-of-the-month-august-2017-salvation-for-sale/
Greenfield Valley Heritage Park
https://greenfieldvalley.com/
Greenfield Valley Café
At time of writing closed for refurbishment – check link below
https://greenfieldvalley.com/visit/greenfield-valley-cafe/
Heneb
Holywell
https://heneb.org.uk/archive/cpat/ycom/flints/holywell.pdf
Landmark Trust
St Winifred’s Well (Woolston)
https://cms.landmarktrust.org.uk/globalassets/3.-images-and-documents-to-keep/history-albums/st-winifreds-well-2025.pdf
Shrewsbury Orthodox Church
Saint Winefride (Gwenffrewi) (with a photograph of the St Winefrede chapel and spring at Woolston)
https://shrewsburyorthodox.com/local-saints/saint-winefride-gwenffrewi/
streetsofsalem
Monarchs and Monkeys
https://streetsofsalem.com/2014/03/26/monarchs-and-monkeys/
St Winefride’s Shrine and Visitor Centre
https://www.stwinefridesshrine.org/blank-1
University of Michigan – Digital collections
A collection of articles injunctions, canons, orders, ordinances, and constitutions ecclesiastical: with other publick records of the Church of England; chiefly in the times of K. Edward. VIth. Q. Elizabeth. and K. James. Published to vindicate the Church of England and to promote uniformity and peace in the same. And humbly presented to the Convocation.
https://quod.lib.umich.edu/e/eebo2/A79649.0001.001/1:7?rgn=div1;view=fulltext


Statue of St Winefride outside the shrine

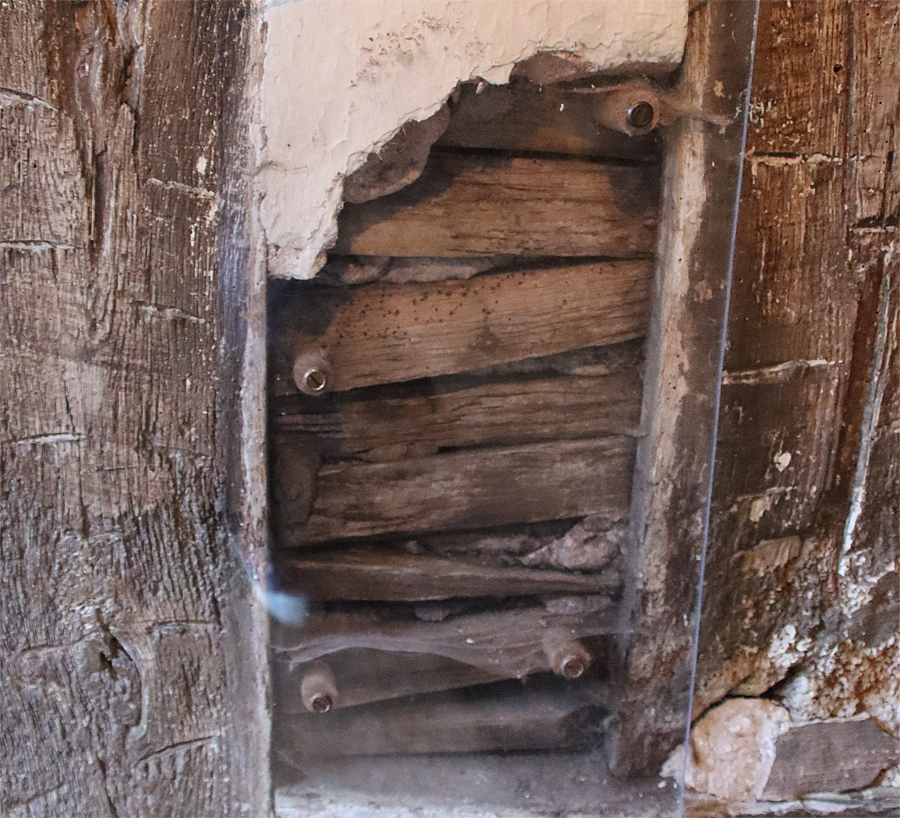
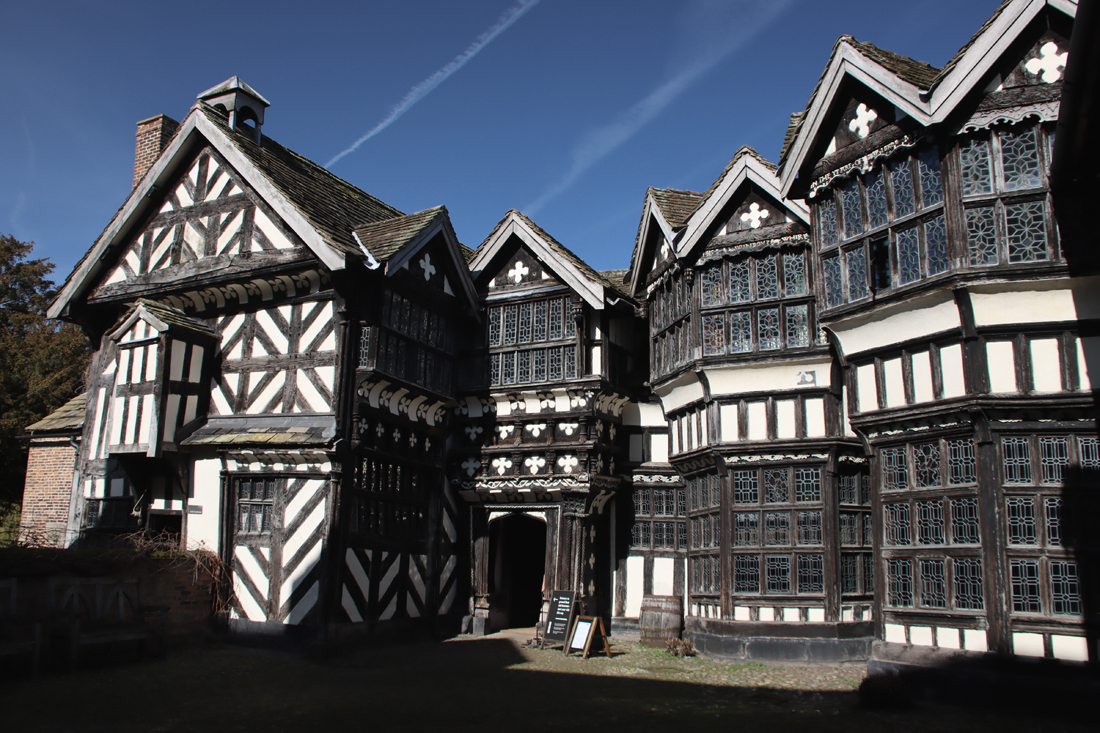
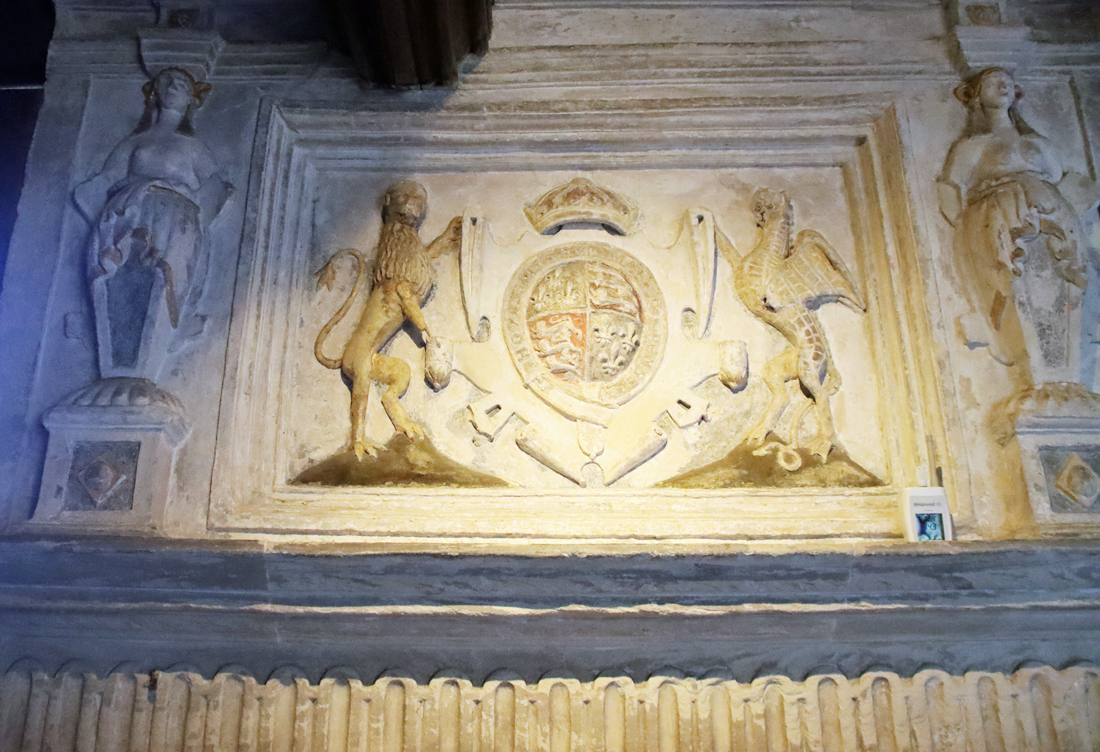
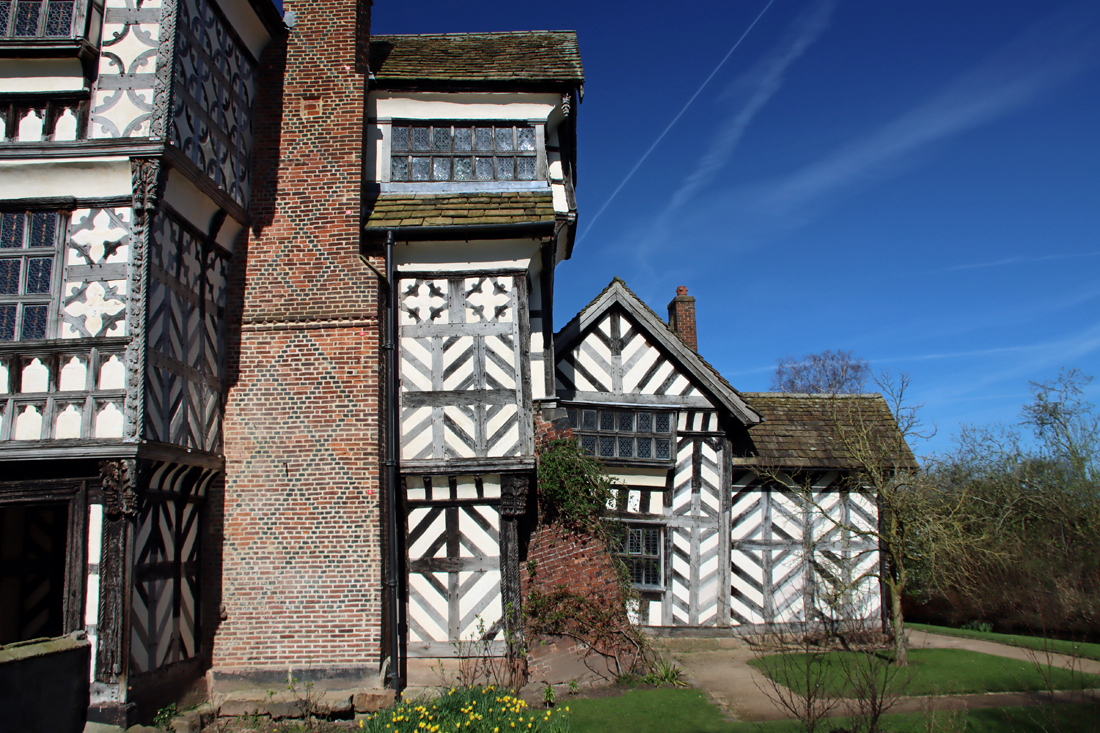
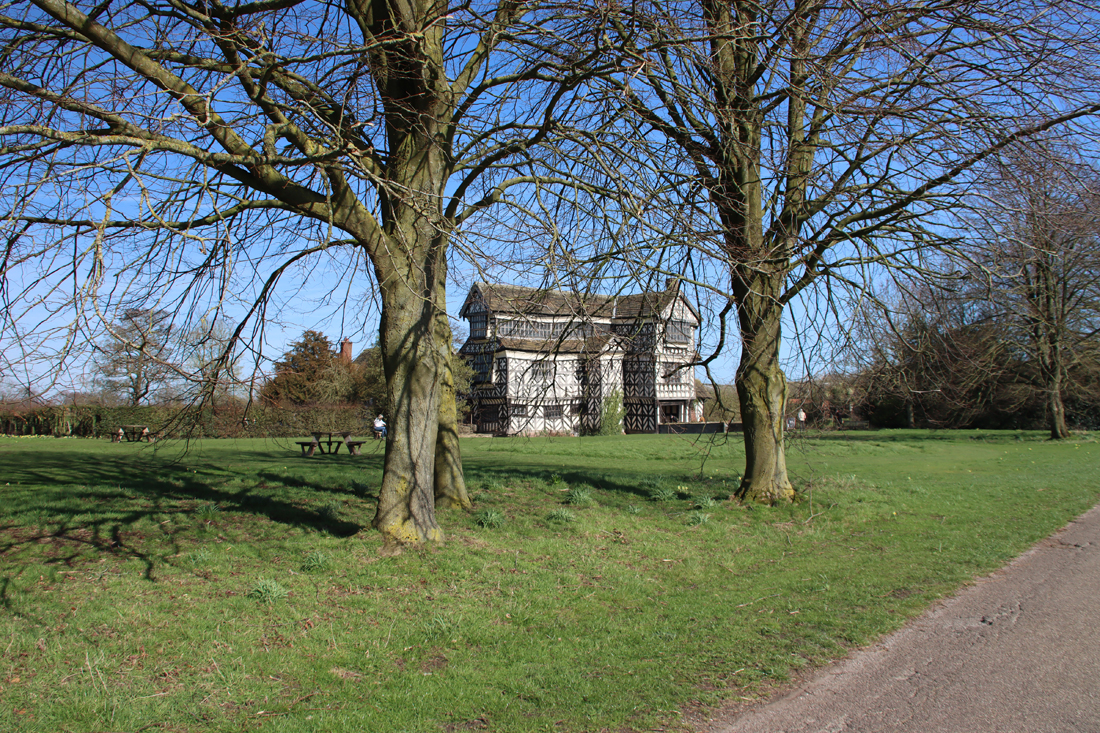
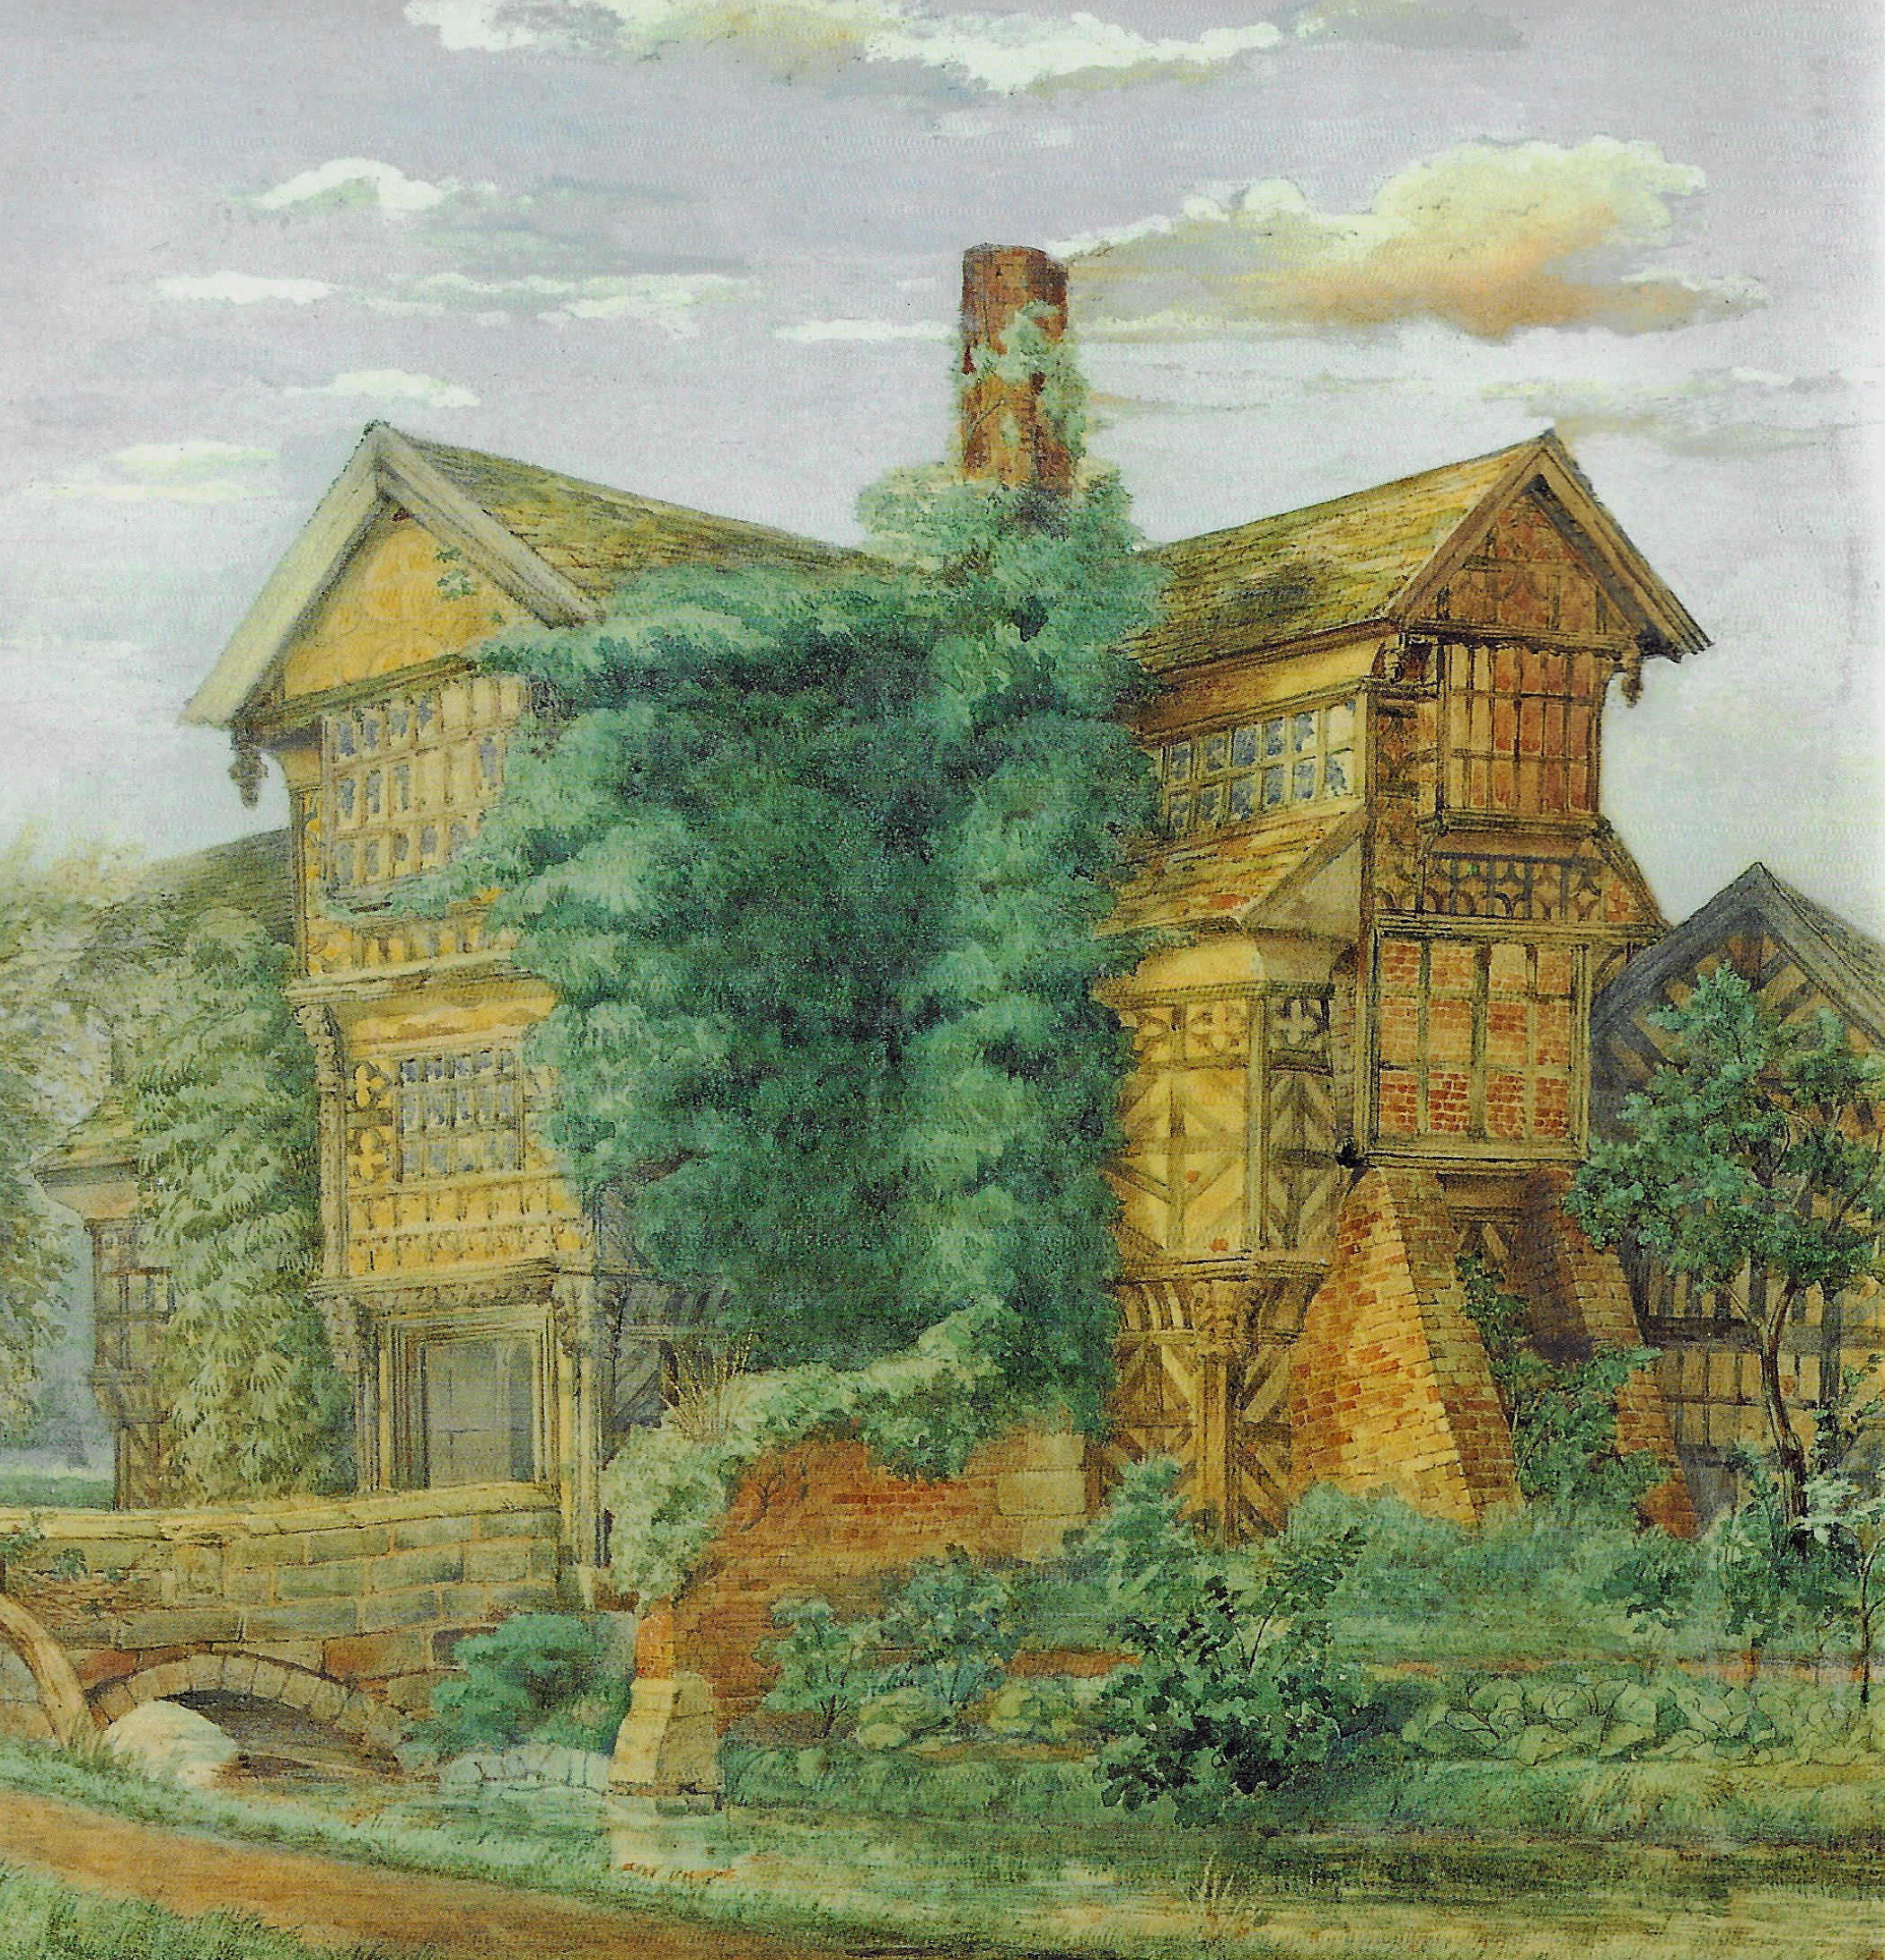
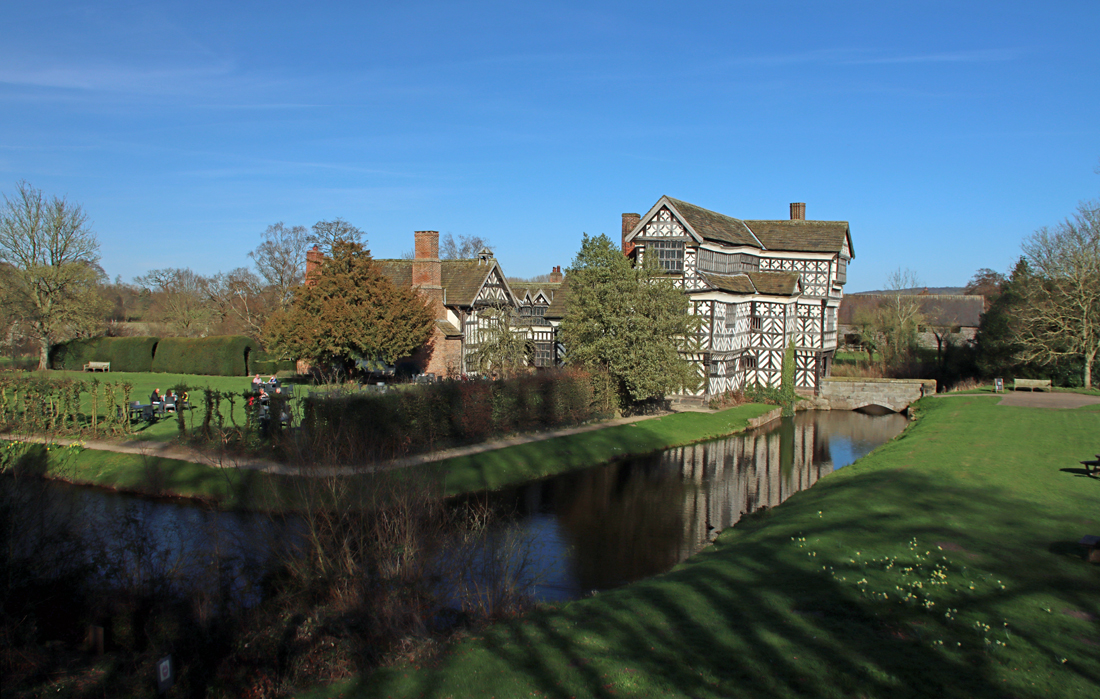 The half-timbered moated Little Moreton Hall shows to particular advantage against a blue sky, and with spring daffodils and violets dotted around its gardens, and a neatly clipped knot garden, it was looking particularly fresh and sparkling on Wednesday last week. It seems more than a little miraculous that it is still standing, as parts of it tilt away from other parts, and there are bends and kinks where no building should have them. But at the same time it is so beautifully cared for that it looks pristine, as though it was designed to be like that. As the guide book says, it looks as though it is defying gravity. The impression is misleading and it has taken many different phases of restoration work to keep the building in once, secure piece.
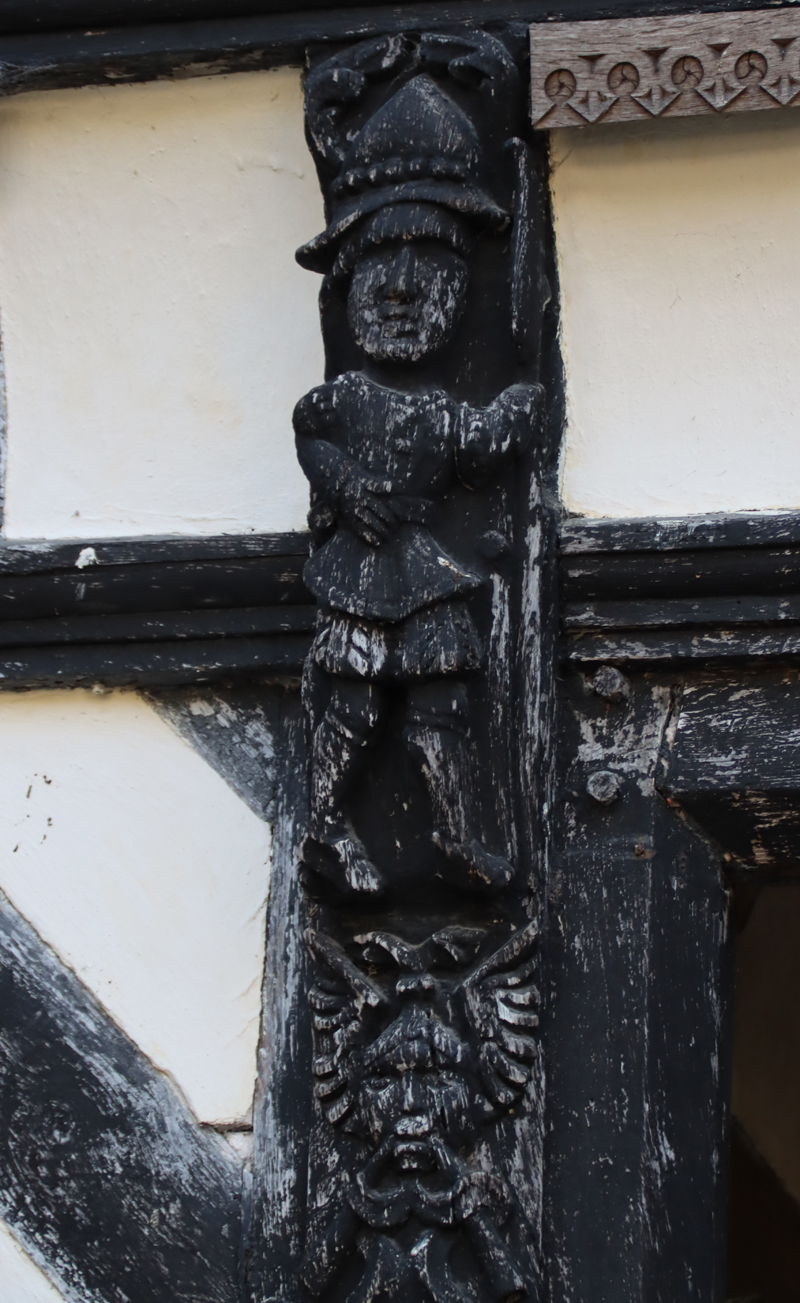
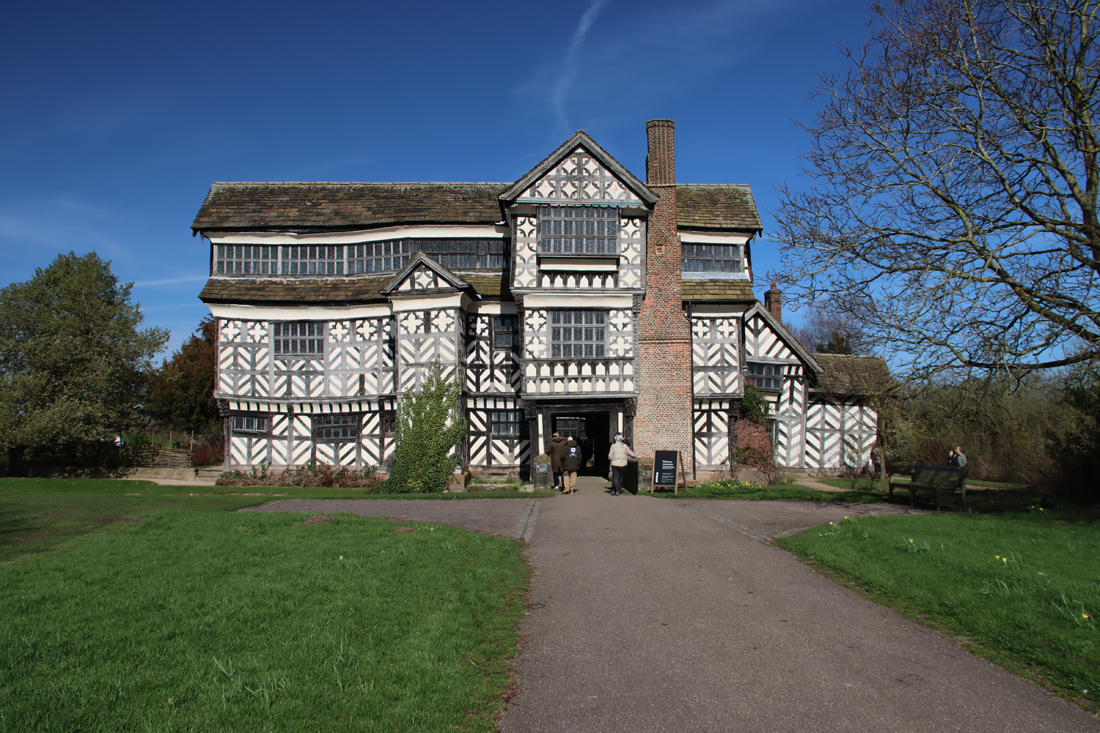 The visit to the house is self-guided and is split between the ground floor, entered on one side of the courtyard, and the first floor, via the staircase opposite. The house is entered via the bridge across the moat, which leads through the first set of buildings into the courtyard. The courtyard itself is a multi-textured vista of architectural features, carvings, mouldings, decorative shapes and tiny panes of window glass known as quarries, all forming different, mind-bending geometric patterns. There is so much to take in that it is difficult to know where to start looking.
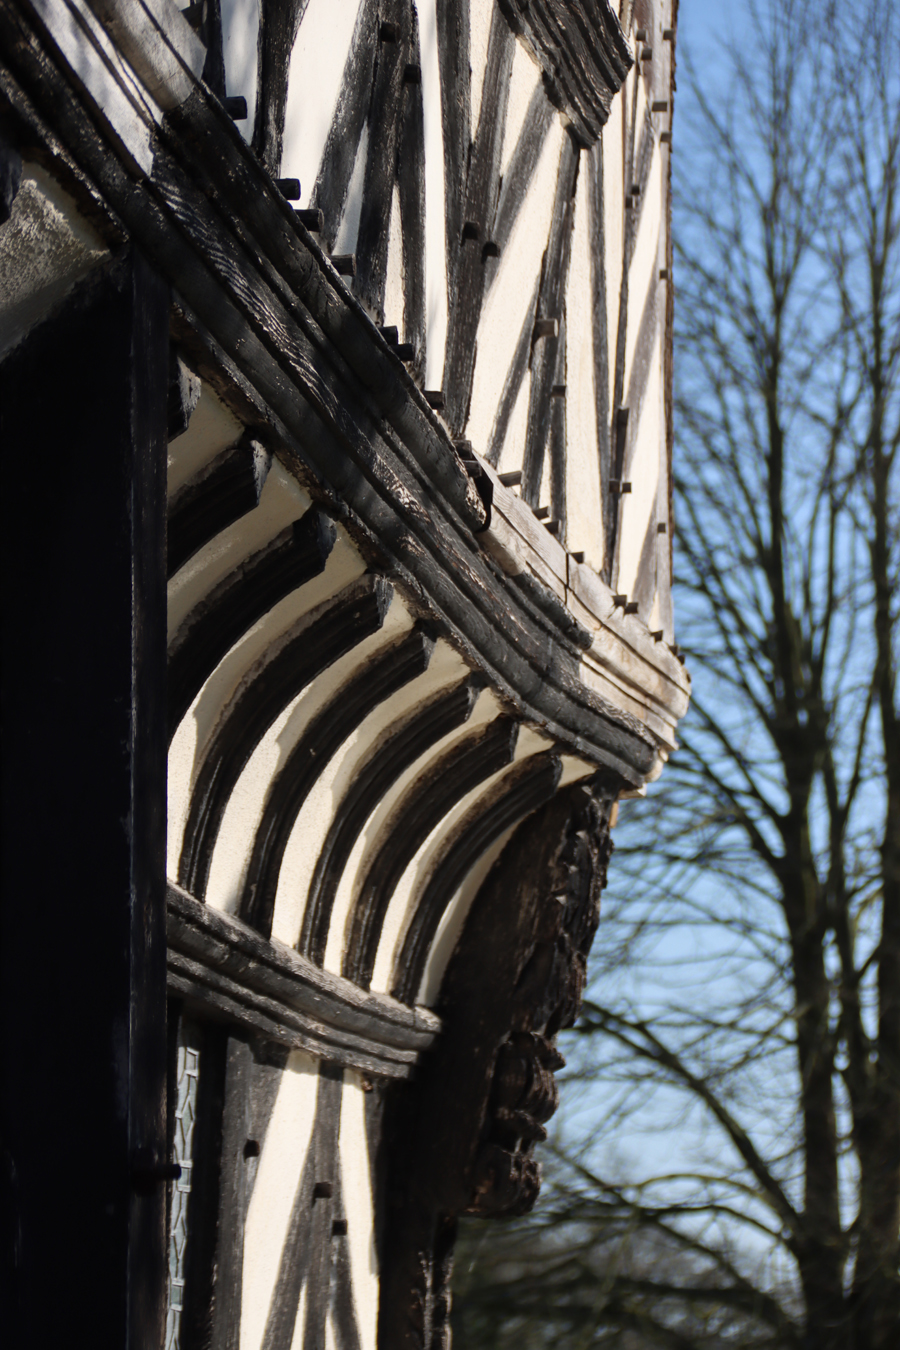 The Tudor reigns produced a wide variety of architectural styles, and the half-timbered manor house was a particular feature of this part of the world, with good examples still remaining at, for example, Speke Hall in Liverpool, Pitchford Hall in Shropshire and the smaller Churche’s Mansion in Nantwich. Today the oak timbers are usually painted black, but this was not how they would have appeared in the Tudor period, when the oak would have been allowed to fade to a silvery colour. It was a Victorian idea that the timbers should be preserved that led to them being painted black.
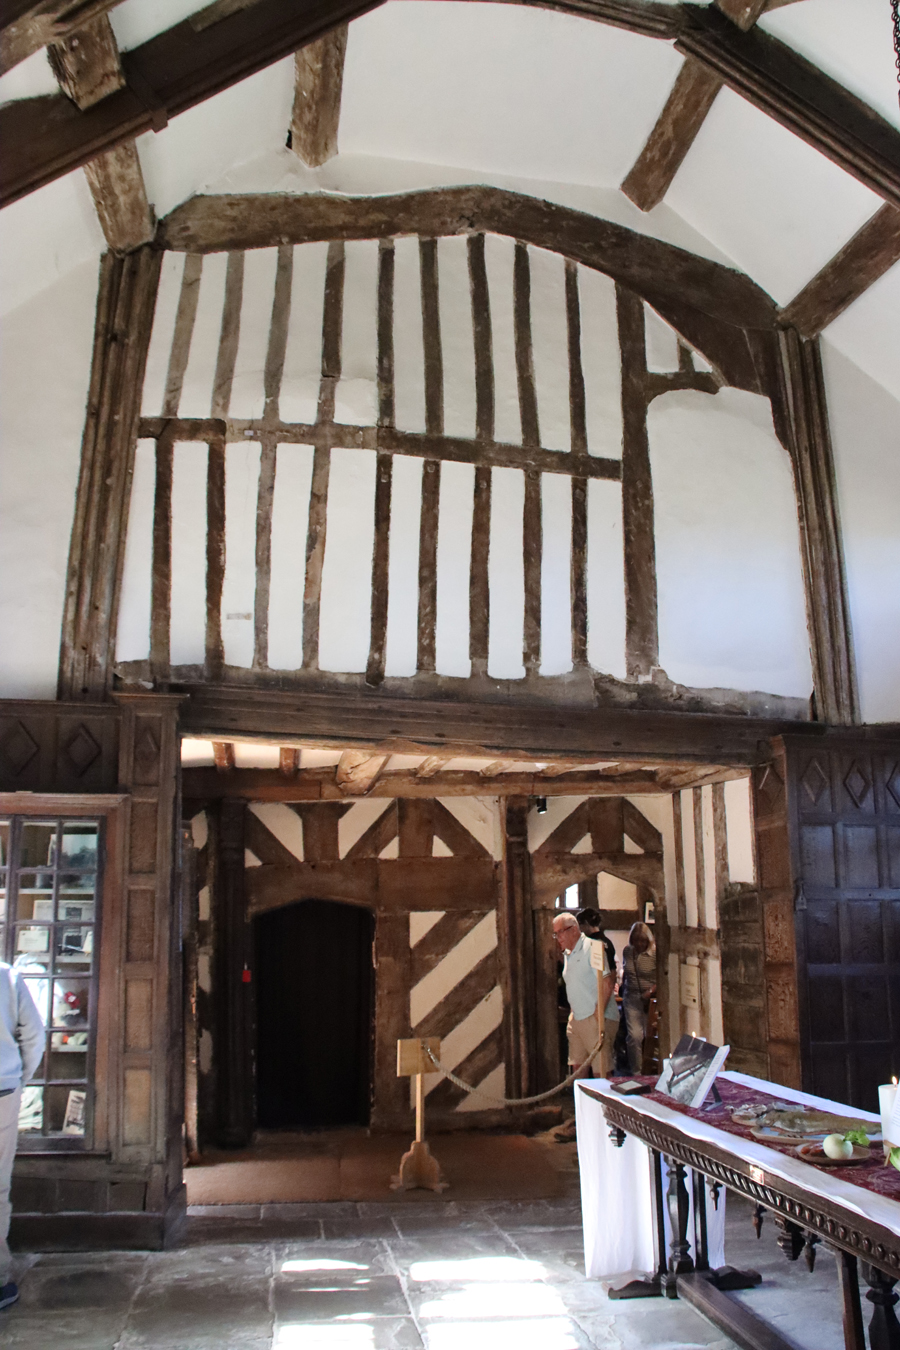

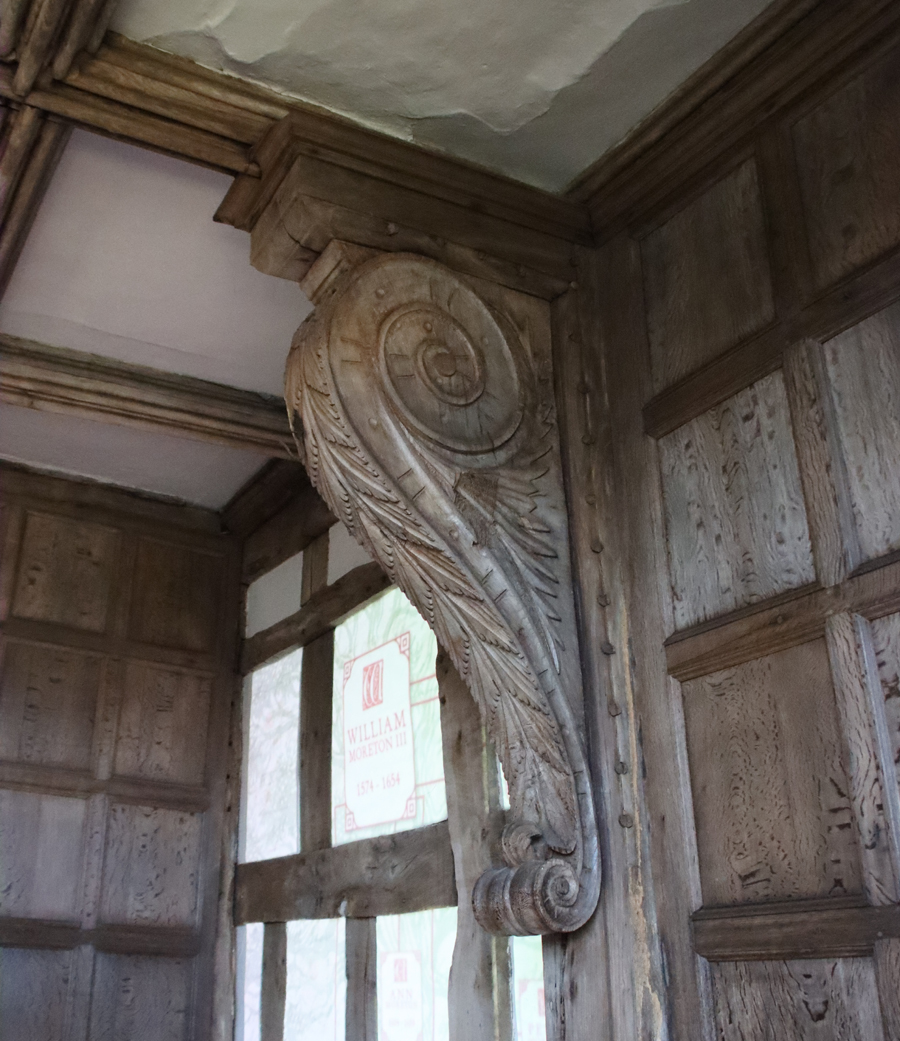
 William Moreton III’s (1574-1654) contributions were more prosaic, adding the brew and bake houses. He seems to have lavished most of his income on members of his extended family. He was arrested during the Civil War and although he was released, his estate was confiscated in 1643 to be used as occasional billeting for the Parliamentarian soldiers and horses. With their finances in tatters and their home deteriorating, the house remained in the family, but they no longer lived there and chose instead to rent out it out. In the 18th and 19th centuries the house became an object of curiosity, visited like so many other distinctive and ruinous buildings by artists looking for romantic subjects.
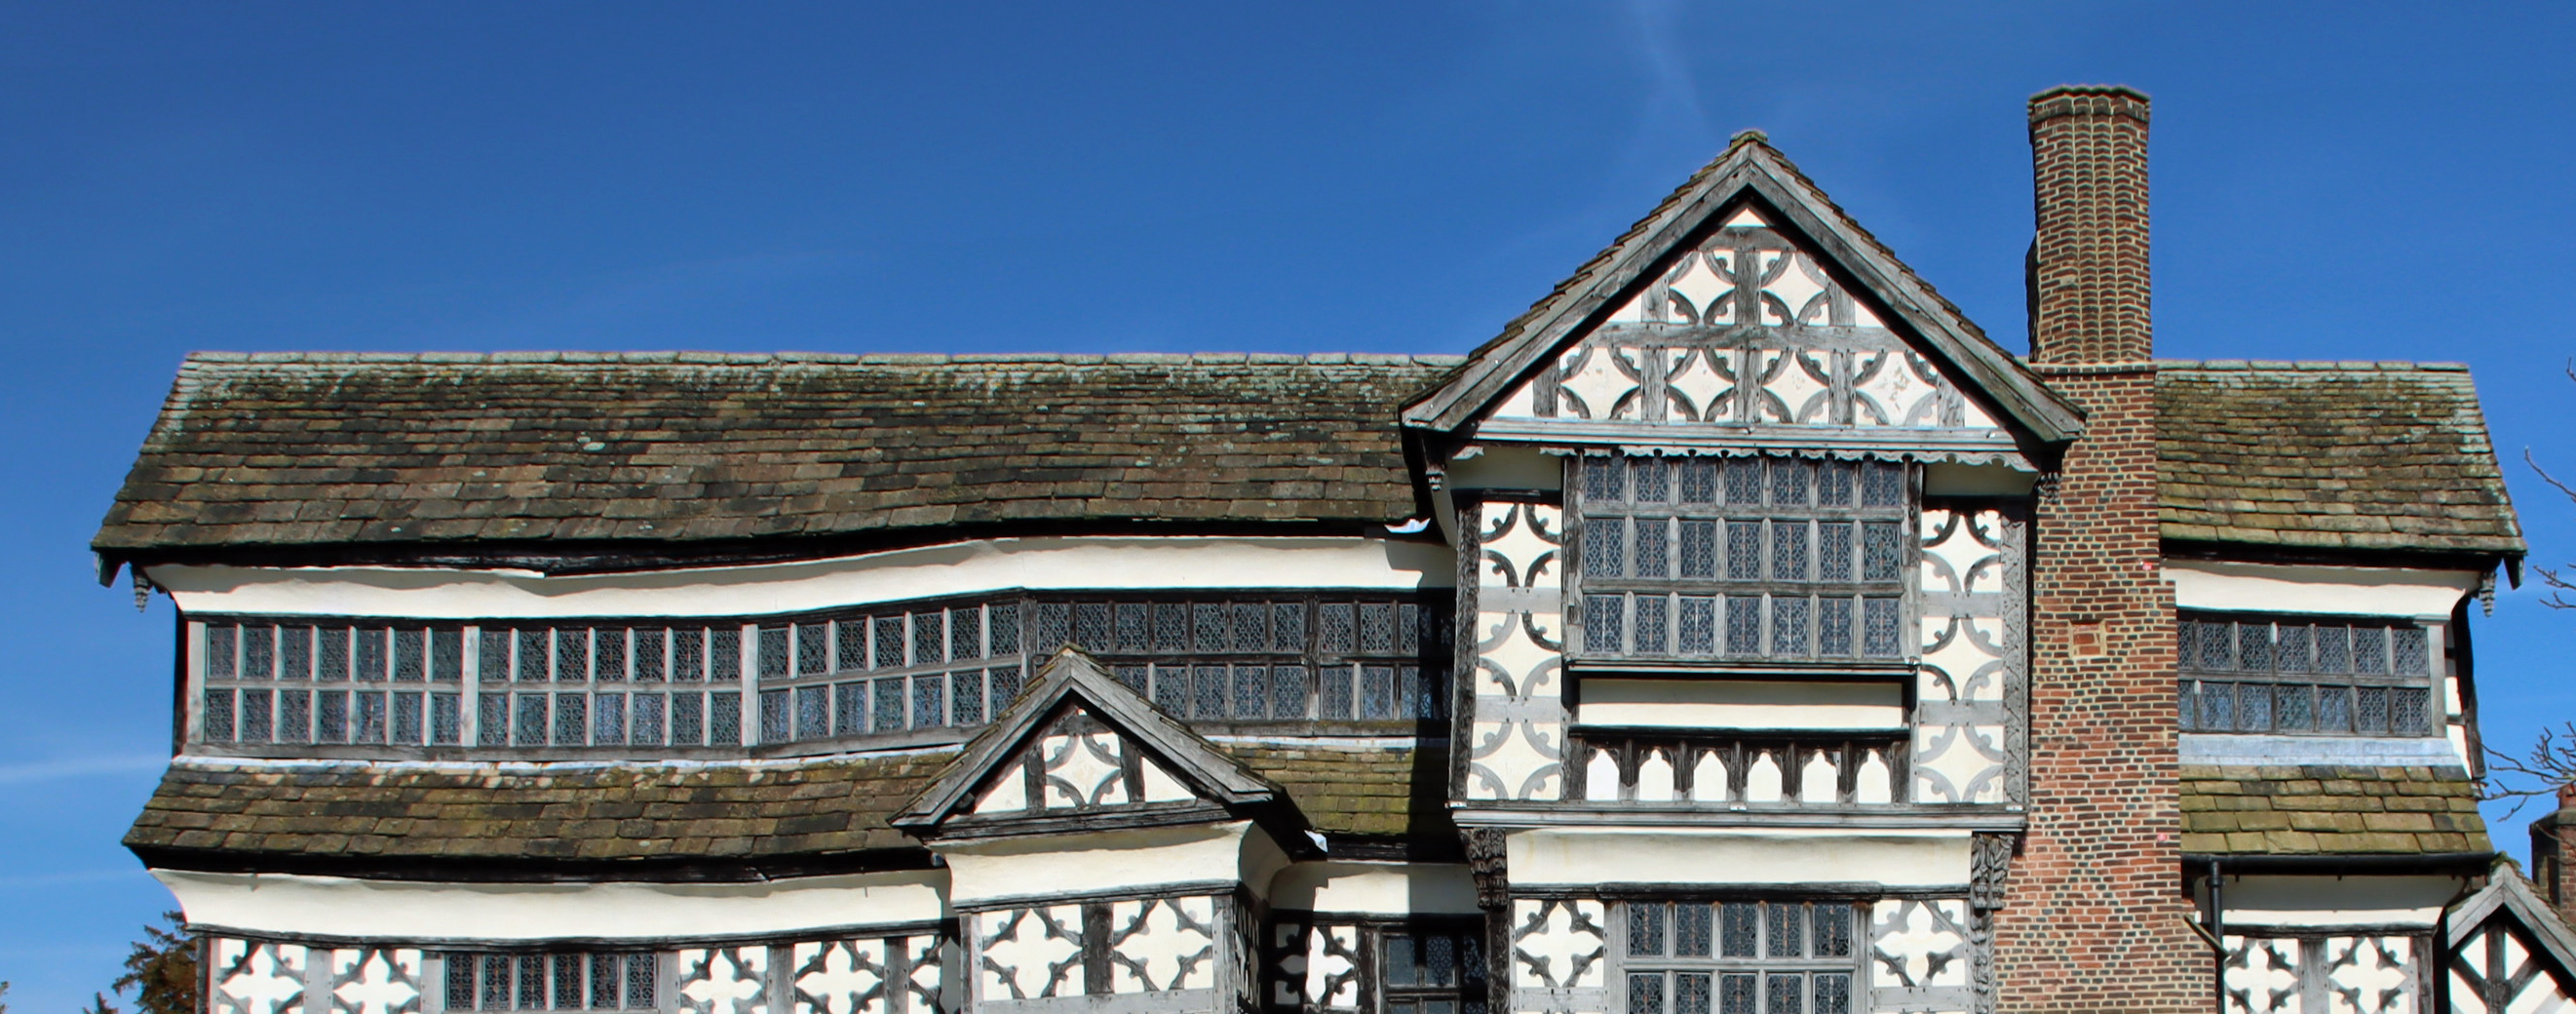

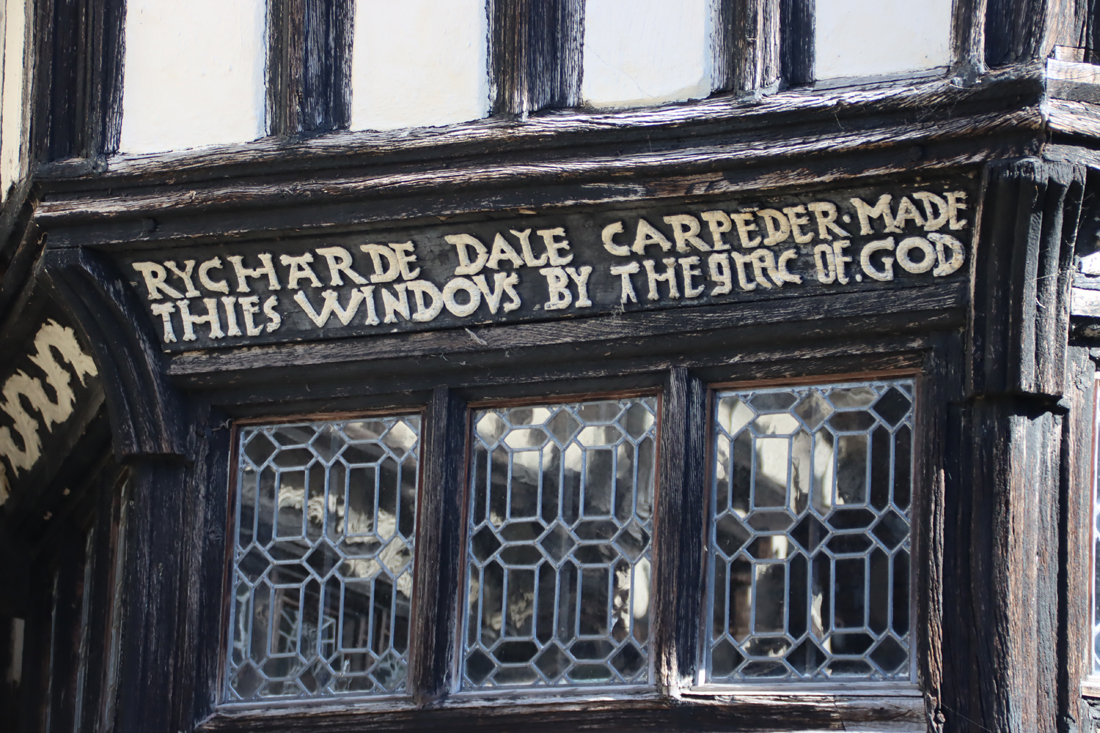
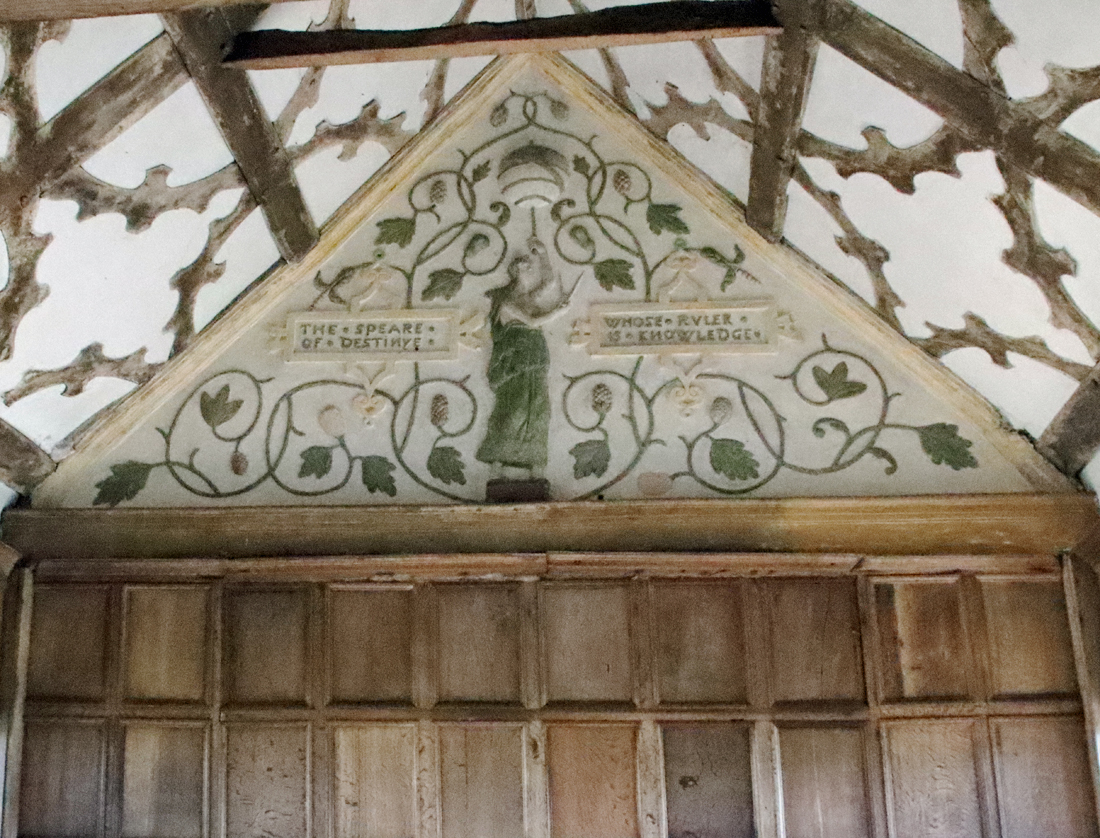
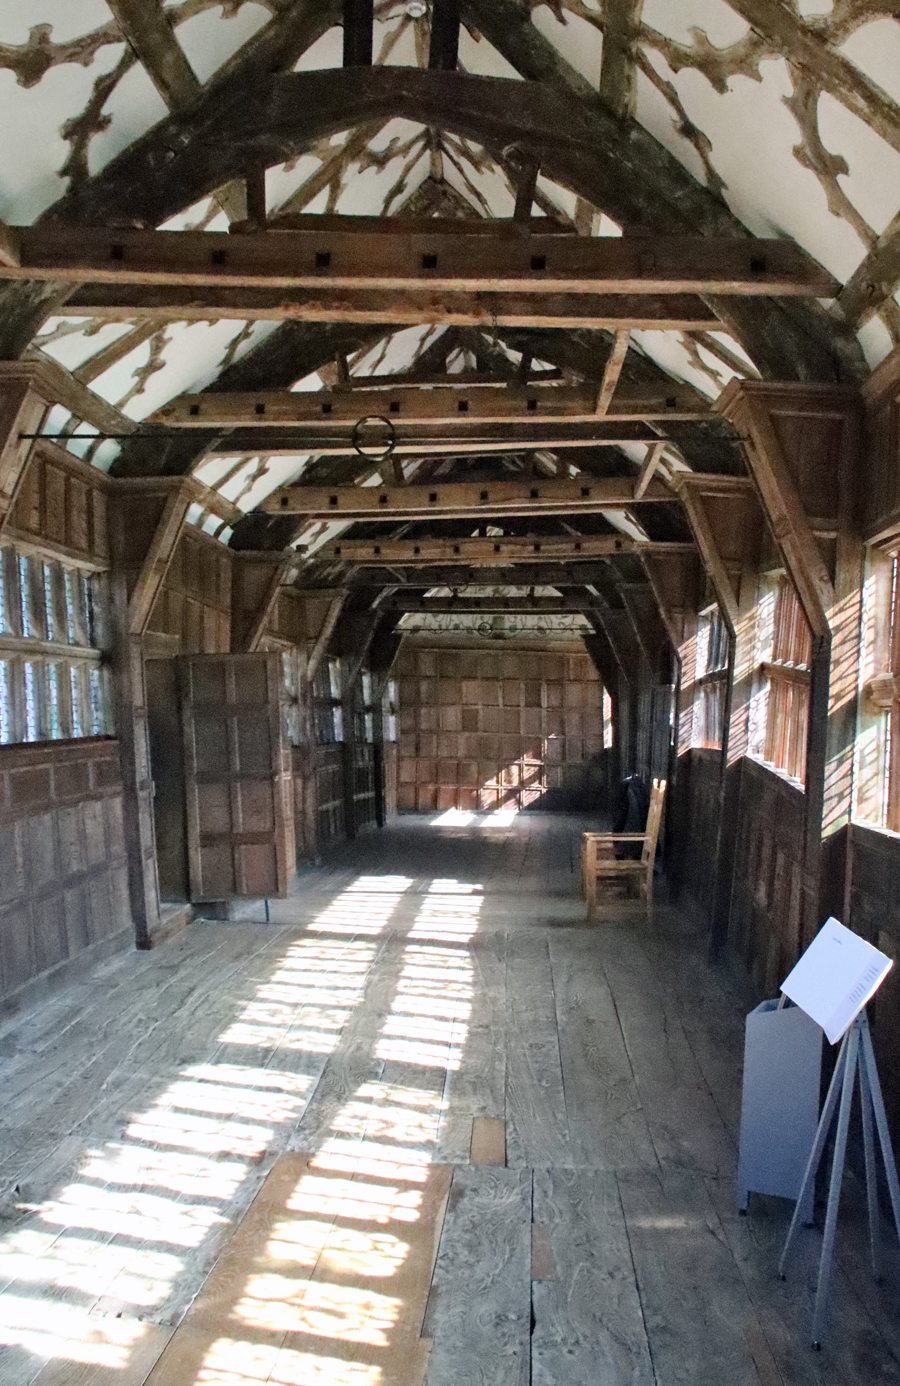 An inventory of 1601 suggests that it was build before that date. A casual glance at it from the outside shows that it has a dog-leg part way along, implying that it has slumped. The problems lie in the way in which it was built contrary to the convention of placing an upper room directly over the frame of the room below, ensuring that the existing structure provided the new level with as much support as possible. The gallery, however, is much narrower than the room beneath, perhaps to give provide a greater impression of length. The result is that it has no direct support and is additionally weighed down by the stone slabs that cover the roof. Repairs began almost as soon as it was built. In the 1890s iron tie-rods were added and in the late 1970s and 1990s steel was used to improve the structural stability. It is a glorious feature, with panelling, decorative woodwork in the ceiling, cross beams and banks of windows with tiny quarries. At each end is a painted plasterwork frieze showing excerpts from The Castle of Knowledge.
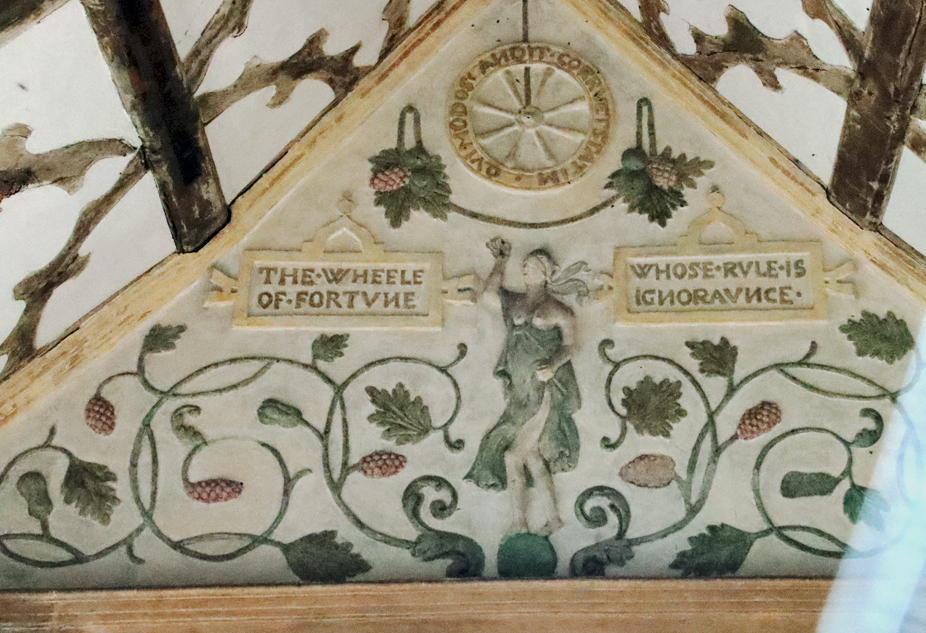
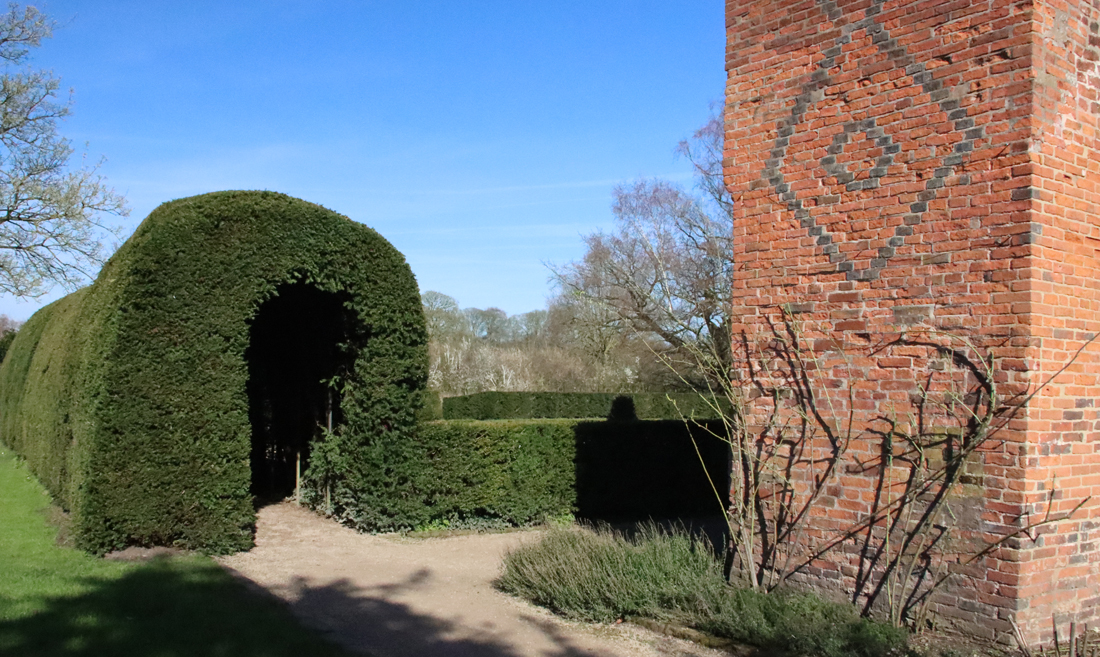
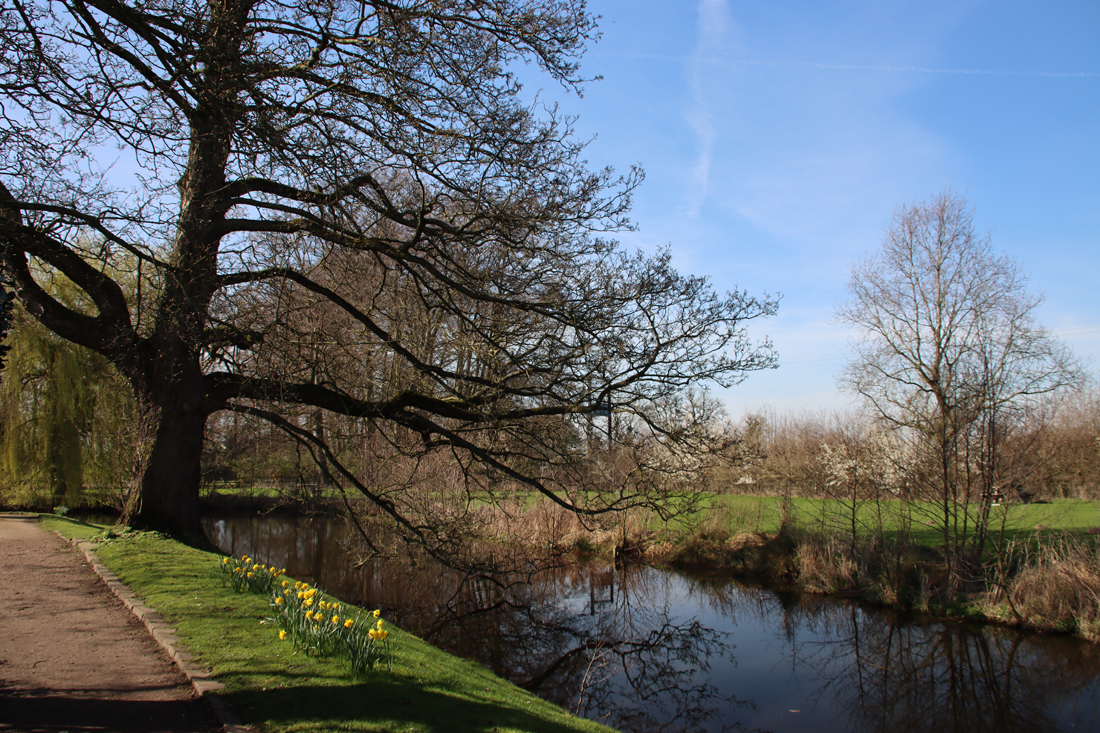
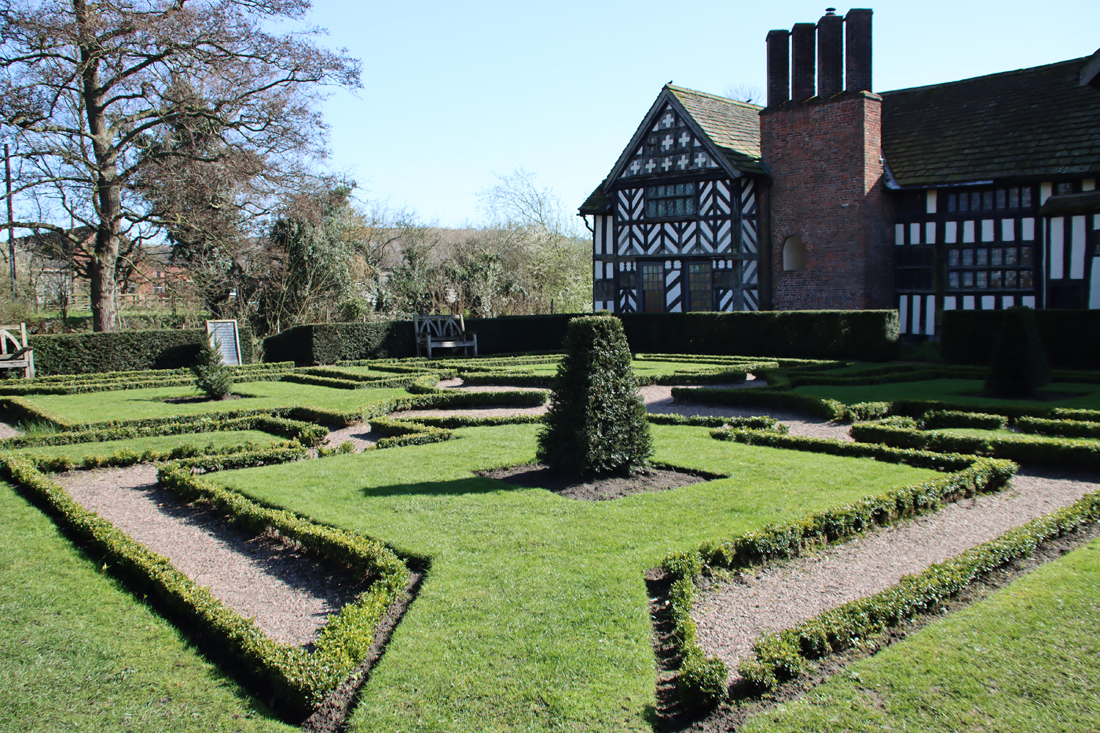 The home farm was established at the same time as the house, just across the moat in a neighbouring field, complete with the surviving cruick barn, as well as structures that are now lost, including stables and a dovecot. At the rear of the house the knot garden, based on a 17th century design and planted in 1972, is flanked by a gorgeous yew tunnel. To the side of the house, tables and chairs provide a lovely location for café users (excellent coffee and a fab bacon bap). A walkway follows the line of the towpath from one side of the bridge to the other. The plants in the garden have been chosen to reflect Tudor choices – many of them not only ornamental but useful too. I had never heard of skirret (a white fleshy root vegetable like parsnips, a favourite of Henry VIII. I had also never come across tussey musseys – posies of flowers and herbs carried as protection against disease. Wild strawberries were not merely delicious but were used to treat cuts and bruises.
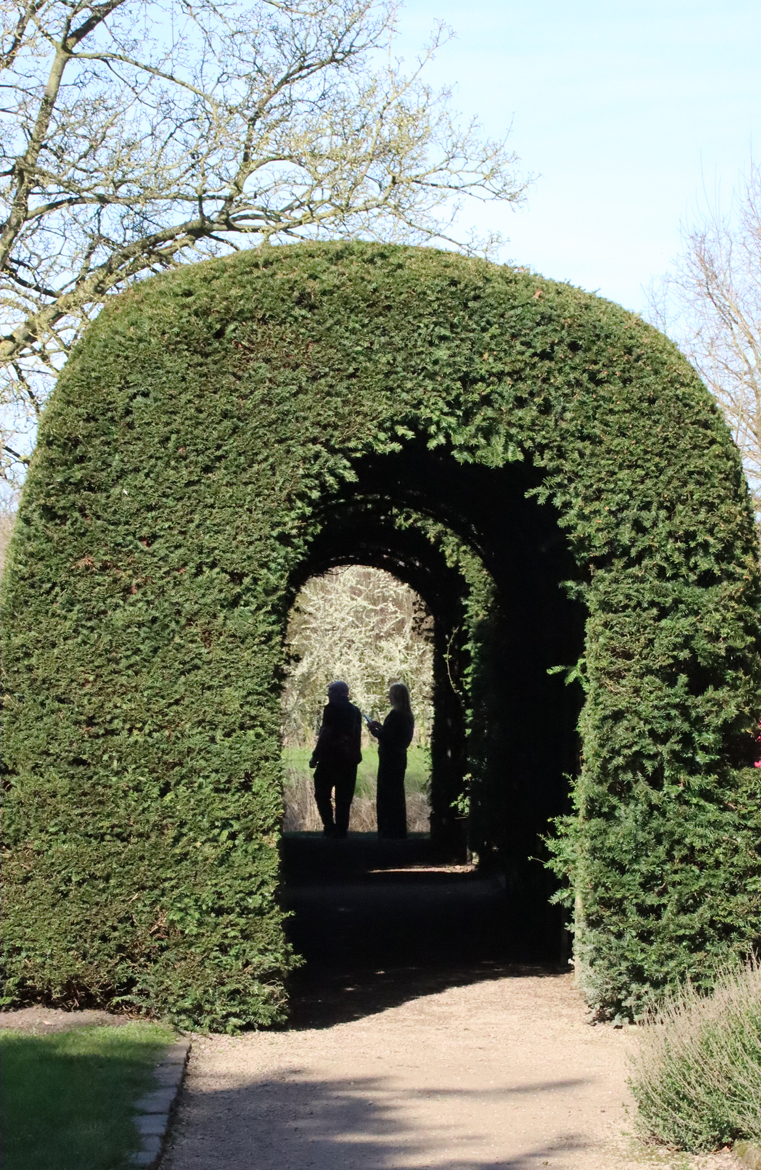


