The Chapel of St Nicholas on the Cholmondeley Castle estate
If you visit Cholmondeley Castle Gardens be sure not to miss the chapel dedicated to St Nicholas. I was at the Castle Gardens with a friend for the Summer Plant Fair during the week, and we took in the lovely gardens and the chapel at the same time. I have posted about the gardens, with a map, on a previous post here, but at that time I was unaware of the chapel, so it was lovely to see the signs pointing visitors towards it, and to stroll along the lane for a visit.
Cholmondeley Castle, built 1801-c.1830, replacing the 1571 half-timbered Tudor building
Following the signs you will pass through the former gatehouse, and over a delicious little stone bridge before you eventually reach the chapel, around 15 minutes from the main gardens along a traffic-free lane.
The gatehouse
Looking back at the elegant bridge towards the Lodge
One of the views from the bridge
Looking across the sun-parched Capability Brown style estate on the way to the chapel, actually executed by one of the famous park designer’s followers, William Emes, who was successful in his own right
One of the ornamental gates into the chapel precinct, and the equally ornate banisters of the chapel, gently echoing the elaborate front gates leading into the castle.
The red-brick chapel with its slate roof looks typically Georgian, but according to Historic England it was originally late 15th century, was altered internally in 1655 and the exterior was rebuilt in brick in 1717. The transepts were added in 1829. Pevsner and Hubbard say that the 17th century furnishings are “the most complete of their date in Cheshire,” with the chancel screen dating to 1655, and elaborate Elizabethan-Jacobean style of wood panelling in the chancel with plenty of ornamental strapwork. The small stained glass roundels in the windows are from the Netherlands, again probably dating to the 17th century. The Cholmondeley family pew, a remarkable feature with a staircase leading up to it and surrounded on three sides by highly coloured hatchments, is at the west end of the chapel, facing to the chancel in the east, looking down over both congregation and high altar. Humility was obviously not perceived as a fundamental requirement. Box pews and ordinary pews sit mainly at floor level, with one paired set of box pews being a little above the rest but far below the level of the Cholmondeley family pew in front of which it sits. The whole thing is truly extraordinary. xxx
Chapel interior showing the raised family pew
Chancel roof
Chancel
Box pews
If you want to know more about the history of the house, the chapel and the family there are interpretation boards hanging on the wall to one side of the door. A shame that it hasn’t been turned into a leaflet, because a lot of people wanted to see them and it was impossible to fit everyone in behind the pews where they are hanging on hinges on the wall.
Dovecote spotted on the way back to the gardens from the chapel
The parkland was looking very dry, but although a few of the plants in the gardens were suffering from the drought, overall the garden team have done a marvellous job of maintaining the flowering borders, the rock garden and the rose gardens. The levels of water in the ornamental ponds were surprisingly high, and the water lilies and surrounding water-loving species were very fine and lush.
I was amazed that neither of us came away with any of the tempting and very reasonably priced plants for sale in the Plant Fair area along the long edge of the field acting as a car park, with a great selection including some very unusual specimens, many of which would have been very suitable for the drought conditions currently being experienced. Most visitors there were draped in every possible type of foliage, which they were taking back to their cars before visiting the gardens. It reminded me of the witches’ prophecy that “Macbeth shall never vanquished be until Great Birnam Wood to high Dunsinane Hill shall come against him.” There was also a small selection of decorative garden features for sale, and of course there were several food, drink and ice cream outlets. Keep an eye out next year if you missed it this year.
Sources:
Pevsner, Nikolaus and Edward Hubbard 1971. The Buildings of Cheshire. Penguin.
I’ll start with a time alert. Very sorry for the ridiculously short notice, but if you want to see the Georgia O’Keefe exhibition, a touring exhibition from the Hayward Gallery in London’s South Bank complex you will need to take a trip to Birkenhead before the exhibition closes next Saturday, the 25th July. Make haste! The O’Keefe exhibition is part of the Small Wonders. Reimagining British Art exhibition, also curated by the Hayward Gallery, and also on until Saturday 25th. The three in-house exhibitions are The Garden As A Muse also on until the 25th, Beyond the Brotherhood: The Legacies of the Pre-Raphaelites, on until 7th November, and Echoes of the Floating World on until 6th February 2027. All the exhibitions are free of charge and all are very well worth visiting.
If a Georgia O’Keefe exhibition comes to a local gallery it is a matter for celebration, and the Memories of Drawing exhibition offers 21 small pieces drawn by O’Keefe between 1915 and 1963 and prepared for publication with her agent and friend Doris Bry. Photogravures are images created by a sophisticated and highly accurate printing process. They are a complete delight, like fabulous little sound-bites, and it is wonderful to see them all together in one room. O’Keefe is best known for large, delicately rendered paintings and drawings of flowers, seashells, animal skulls and desert landscapes, which are so inherently vital and dramatic that they often appear to be in the process of metamorphosing into something much less easy to define. The photogravures display the concentrated essence of O’Keefe’s work, containing all the gorgeous draughtsmanship, the organic, the semi-abstract and sometimes wholly abstract, and each one is all the more fascinating for being so small and minimalist. All but two are in graded shades and textures of black and grey, and all share the sense that at any second they might shape-shift in tiny, imperceptible ways.
Georgia O’Keefe’s Drawing No.9 (1915)
O’Keefe’s work is always dynamic and frequently seems to be alive; the photogravures capture that beautifully. The depth of O’Keefe’s dedication to the development of her artwork is demonstrated by “Blue Lines” (1916) of which she commented “It was in the fall of 1915 that I decided not to use any colour until I couldn’t get along without it and I believe it was June before I needed blue.” Her humour comes across vividly in “Drawing No.9” (1915 – shown right) about which she said “Well, I had the headache, why not do something with it?” From the barely-present representation of a seashell, “Drawing No.40” (1934) to the spiky, stark lines of a New York skyline “The City – New York Rooftops” (1930s), she is able, with real elegance and understated drama, to convey the complexity of both natural and unnatural worlds. My photos do absolutely no justice to the detail and texture in each image. You just need to see them for yourself. The exhibition is a treat – don’t miss it!
As if Georgia O’Keefe on her own was not enough, there is another visiting exhibition and three temporary mini-exhibitions drawn from the Williamson’s own collections.
The Echoes of the Floating World exhibition, in one room focused on Ukiyo-e was a particularly lovely surprise. As the Williamson website says, “[t]heir motifs of flat perspectives, high vantage points, and bold colour distinctions, were a radical influence across European art” and the premise of the exhibition is to show the 19th century woodblock works juxtaposed against artworks that were influenced by the Japanese art. It was interesting to see the more modern artworks, with the surprising range of ways in which composition, colour and subject-matter were adopted and transformed.
Of course the real stars were the Japanese works, with some very contrasting pieces chosen for the display. From almost monochrome examples, to highly coloured pieces, the exhibition managed, in a confined space, to give a very good sense of range of the style and expression produced by the woodblock artists. The oldest example of Ukiyo-e in the Williamson’s collections is a lovely depiction of a man and woman coloured only in mid-blue and black, dating to before the wider palette of colours became available. Images in full colour included rich and vibrant pigments, which complemented scenes that were full of motion and narrative intensity, as well as those that captured intimate moments of everyday life in subtle and delicate shades. A lot of people, right now in all this California-type weather, will relate to the splendid row of ladies with their parasols standing on a bridge over a river to help them cool down.
The Garden As a Muse exhibition “traces how artists across time have interpreted gardens not merely as physical spaces, but as symbols of creativity and solace. From delicate, nostalgic studies to immersive and grand paintings, these pieces reveal how gardens can function both as sanctuaries and laboratories of artistic experimentation.” As a thoroughly committed gardener I very much enjoyed this insight into different perceptions of what gardens can or should be. Sentiment was unsurprisingly present, but there was a thorough mix of styles and there were some very unexpected pieces too. I was particularly amused to find myself staring at Tolstoy who seemed improbably relaxed, although very dour. The two Arthur Lee textile designs, produced at their Birkenhead factory and mapped out with precision on graph paper were fascinating to see, ready to be converted into tapestry, embroidery and even printed fabrics. Sian Martin’s fabric-based abstract representations of such contrasting horticultural arrangements as seed beds and vegetable patches were incredibly effective. The entire ensemble of images was both witty and engaging, and nicely drew attention to the British fascination with garden places.
The Beyond the Brotherhood: The Legacies of the Pre-Raphaelitesexhibition presents some of the original works produced by the Pre-Raphaelite brotherhood but also introduces some of their followers, who built on their legacy to create works of their own in the same broad style. This included examples from the so-called Liverpool School of landscape painters as well as elaborate pieces by the sculptors of Birkenhead’s Della Robbia Pottery Company, some locally produced stained glass, and it was delightful to find some William de Morgan tiles on display.
The Small Wonders exhibition was the most difficult to describe, mainly because I found so little about it relatable, which is unusual for me. It is a travelling exhibition curated by London’s Hayward Gallery, and brings together work by fifty artists, to provide a snapshot of British art over the last 45 years. I have been visiting and enjoying modern and contemporary art for decades, but although there are always some pieces that leave me cold, I found this was more frustrating than usual. Before I go on, I should say that I may be alone in my response to what is clearly a popular exhibtion.
One piece, which for me was engaging thought-provoking, was a video with a voice-over, but the rest were all static, framed artworks, although most of the artists, according to their biographical data, work in various forms of media including including 3-D installations and cinematic work. Perhaps the artists are better understood in other media but for me most of the artworks failed to engage me either emotionally or intellectually. I could see that there is technical skill and creativity, and found some of it visually attractive, but a lot of it was very derivative of previous styles and although the multicultural mix was a positive element, I found none of it deeply gripping. Apart from Saskia Olde Wolber’s video artwork “Centrifuge,” which was compelling for both its narrative and its constantly evolving organic semi-abstract imagery, there was nothing with sufficient depth for me to sink my teeth into, and I came away longing to have had a teachable moment, something from which I could have learned, or which had at the very least moved me to empathy, laughter, annoyance or simple admiration. But of course, to each their own. Having said all of that, I am sincerely grateful for being given the chance to see a London exhibition without having to travel to London to do it.
The Williamson is a splendid resource to have for the Wirral and so near to Chester. I very much admire their policy of retaining part of the museum for their permanent collection and the other, larger part for temporary exhibitions. It means that local people can always expect to come in and find something new to see, whilst those of us driving from elsewhere find that the trip is more worthwhile when there are new artworks to see from the Williamson’s own stores. You can find out more about the Williamson’s events on their web pages. I signed up for their newsletter after my first visit and that is an excellent prompt not to miss anything. You can sign up for it at the end of every page.
On my previous post about the Williamson’s permanent and temporary collections I mentioned the café. It is comfortable and spacious, with excellent coffee and some good-looking lunches being produced in large numbers, and as you imbibe you can enjoy more art because the walls of the café are used as additional hanging space for art works, and these too had changed since our last visit. And don’t forget to visit the model ships, which are stunning. Who wouldn’t want to cross the Mersey on a ridiculously curvaceous Art Deco ferry like this one? Bliss.
Because of that big yellow sun and the vast acres of blue sky, we opted for The Harp Inn at Ness, parking at Denhall Quay, both of which I posted about last week, and here too there was much loveliness to be enjoyed across the acres of green marshes reaching towards the Welsh foothills and Moel Fammau, with a fabulous breeze coming off the estuary. We were both ravenous, so ordered one haddock and chips with garden peas and one cheese and ham ploughman’s (the latter, mine, was absolutely huge and truly heavenly). It was a really super way to round off a superbly satisfying morning.
One of the most mellow, blue-skied and sunny afternoons that I have enjoyed in a long time was a sublimely relaxed and chatty visit to The Harp Inn on the Dee estuary, just outside Little Neston. It is a super little pub dating to the 1700s with lovely views over the marshes towards the impressively long line of the Welsh foothills. The pub’s official opening time is 12 noon, but we arrived to find it open at 1145 because due to queues outside their doors at 12 they are currently opening at 11. Very gratifying! The beers and ciders change from time to time (just check their website), there are plenty of soft drinks on offer and the lunches that were being paraded past us as the afternoon advanced looked gorgeous. The staff are lovely, and the atmosphere is great. There are lots of tables perched on the grassland at the edge of the lush green estuary, and on a stiflingly hot day, a wonderfully warm but cooling breeze came off the Dee to make the peaceful, endless vistas a delectable place to linger, interrupted only by birdsong. The breeze was so perfect. I do love the heat, but it is lovely to be able to sit in the sunshine without dripping like a tap. Update: We went back the following week to have lunch after a visit to the Williamson Art Gallery and Museum in Birkenhead, and the food (haddock, chunky chips, tartare sauce and garden peas for one of us and an enormous ham and cheese ploughman’s with all the trimmings and more for the other) was just as good as it had looked as it was passing us on trays the previous week.
Most of the photos taken on my aged iPhone. Enlarge at your own risk!
View from The Harp
Denhall Quay
According to the pub’s website, the building has stood there since the 1750s, when it was originally built as three coal-miners’ cottages, before being converted to an inn in 1780 to serve the expanding coal-mining community at Ness. This segues nicely into the second major benefit of the pub, which is its location a stone’s throw from Denhall Quay, an intriguing and picturesque line of wall, made of massive red sandstone blocks, that stretches out into the marshland, and is clearly the remaining echo of a substantial structure. In fact, the wall is what remains of a long pier that served the Ness Colliery, built in 1839 to replace an earlier quay in the same location. The wall was much deeper than it is now, its lower tiers lying beneath 200 years of silt accumulation, but it it sufficient to give an idea of how impressive the structure originally was.
This was not the most obvious location for a quay because the river did not run past the colliery, veering towards Wales just before Little Neston, meaning that a channel had to be created to link the quay to the main river, which became known as the Colliery Gutter. It was not ideal, as vessels often had to wait for two tides to turn before being able to navigate all the way to the quay, forcing colliers to beach on the muds in the interval between tides.
Denhall Quay c.1839 showing the quay, with its distinctive shape, surrounded by subterranean tunnels. Source: Annakin-Smith “The Neston Collieries, 1759-1855” 2019, p.170, fig.10.6
There were two collieries at Ness: Ness Colliery, which opened in 1759, and Little Neston Colliery immediately to the north, which opened in 1820. Most people, myself included, would not automatically associate coal mining with the Wirral, although it is a very familiar industry from North Wales. Fortunately, Anthony Annakin-Smith wrote an excellent book on the subject in 2019, which I read shortly after its publication, and he gave a really enjoyable lecture about the collieries at the Festival of Ideas this year (July 2026). The Wirral coal seams are an extension of the Welsh ones, but although a slither of the seams can be found on the Wirral landmass itself, most of them lie under the estuary, and it was here that most of the mining took place. A whole network of tunnels was built below the estuary, and subterranean canals were added to help remove the coal in long narrow vessels called “starvationers.” Both the tunnels and the canals lead back to shafts where the coal was hoisted to the surface. It was a dangerous and sometimes tragic business. Once extracted and processed the coal was transported to ports in Britain, Ireland, France, Spain and as far away as America and even Barbados.
A “starvationer” of the sort used in the canals beneath the Dee estuary, now in the National Waterways Museum at Ellesmere Port (my photo)
The two collieries were located either side of a border dividing land between two different family interests. The original colliery, Ness, owned by the Stanley family, handled the arrival of the new colliery very badly, and its owner, Sir Thomas Stanley, who sounds like an absolute monster of a man, pursued a course of aggression that eventually, on several occasions, erupted into blatant sabotage, including destruction of machinery, flooding of their rival’s tunnels and, on one particularly violent occasion, an attempt to use explosives to completely obliterate the opposition. The collieries were both closed between 1845 and 1855 due to silting of the estuary, but they were revived in 1875, and the last coal was worked in 1927.
It is difficult to assess just how the collieries initially impacted local people, because most of the coal miners were brought in from North Wales and Lancashire, with Wirral residents only working in minor and administrative roles. But both the collieries and the miners became part of the community, and Denhall Quay is an important reminder of the unexpected industrial and social heritage of this small corner of the Wirral.
The Harp Inn, on Quayside in Little Neston, is at the end of a residential lane, Marshlands Road, turning left along the Quayside, before it eventually becomes a track and then a footpath. There are three main parking areas, first just as you round the bend to turn left from Marshlands Road onto Quayside (What3Words ///regarding.solving.mirroring, about a two minute walk, heading in the same direction), then at the pub itself where there is parking for about 10 cars (What3Words ///when.grumbling.kicks), and finally at Denhall Quay (///bike.outcasts.tarred, about a two minute walk back to the pub).
If you are interested in finding out more about the Wirral collieries I sincerely recommend Anthony Annakin-Smith’s The Neston Collieries, 1759–1855: An Industrial Revolution in Rural Cheshire published by the University of Chester Press (a second edition was released in 2023), and also check out his website at https://www.nestoncollieries.org.
At the entrance to Denhall Quay there are two helpful information boards that are faded but still just about legible, covering the earlier and later colliery phases, and you can walk out into the marshland along well-worn paths (dry in a hot summer, but probably not as foot-friendly in the autumn and winter).
I must have driven past Hampston’s Well several times without noticing it, although when I mentioned an earlier visit to the RSPB Burton Mere, a friend mentioned that there was a well somewhere in the Burton village area. I was not quite sure what to expect when I remembered it on the way to Ness Gardens, and tapped it into the SatNav. On a sunny day, the light filtered through the dense woodland leaves, creating an enchanting dappled effect.
The well is a natural spring now in a stone container with a wooden lid that is easily removed. From here it trickles elegantly down a channel into a big pool, surrounded by radiating lines of block paving. The well has been restored by the Friends of Hampston’s Well, who also maintain it. It is on the south side of Station Road, where there is parking for around two to three cars. The What3Words location is: ///professes.outsmart.deflate.
A flight of steps leads down from the road level, at the top of which there is a bench, some very faded information posters in a noticeboard display, and two prone sandstone columns with plaques containing information about the well.
According to an entry on Facebook (but otherwise unverified) a dedication document for the well in 1975 stated that the sandstone columns are cores from the sinking of another well nearby. Here are the plaques:
There is some more information on the OldWirral.net website, with some photos of how it looked before restoration.
On one of those days last week when I had a list of a hundred other things I ought to have been doing, and when the sun was blasting down from the heavens like an impending judgement, I jumped in the car and went to Ness Botanic Gardens on the Wirral. Even on a seriously hot day, there was a breeze coming up off the Dee estuary, there were plenty of shaded and wooded areas to enjoy, and Ness is notable for the sheer quantity of seating and benches available throughout. I was there for three hours, so taking water was essential, but if you forget to bring any with you, the shop is well stocked with bottled water.
My previous visit, during rhododendron and azalea season, was only six weeks ago, but the change was absolute. The brightly coloured floral effusions of shrubberies, woodland edges and wending pathways had gone over for the season, but in their place both sun- and shade-loving extravaganzas had emerged and were doing a fabulous job of ornamenting large areas of the gardens. Water features are a significant aspect of Ness, and even though drought conditions were in play, the ponds and wending channels were looking good, supporting numerous water-adapted plant species, some of them with leaves as large as parasols, as well as dragonflies and damson flies. The herbaceous borders in the big open expanse below the main building are being re-done and were not the extravaganza of colour I had been expecting, and the rose border had gone over, but what I learned on this visit is how much there is to see beyond the core areas. The gardens extend into shaded wooded areas with winding trails and great views over the Dee and the north Wales coast, and there are extensive wildflower meadows.
There is plenty of parking. Visitors are provided with a map of the site with the entrance ticket. Ness has a nice, well attended café which does excellent coffee and a good range of sandwiches, hot food and cold drinks, with both indoors and outside tables available. There is a small plant sales centre outside the shop, with excellent quality plants that are kept well-watered (mine are doing well in their new homes), and a shop indoors selling gifts. The Ness Botanic Gardens website with full visitor details is here.
On 17th June 1860 the fabulous S.S Great Eastern left Liverpool and set sail on her maiden voyage for New York. She arrived there this day, 28th June. Her designer and architect was Isambard Kingdom Brunel whose pet name for the ship during construction was “Great Babe.”
There is a nice nod to Great Eastern on the Chester City Walls, where the length of the ship (692ft) was carved quite deeply into one of the coping stones at Kaleyard, near the pigeon coop, preceded by an engraved anchor. It is also the measurement between that point and the King Charles Tower, also known as the Phoenix Tower. You can see a photograph of it at the end of this post.
I have written previously about the Great Eastern and her relationship with the Mersey, and above is a splendid engraving from the 21st July 1860 Supplement of the Illustrated London News showing her June arrival in New York.
Great Eastern shortly before launch in 1858 by Robert Howlett. Source: Wikimedia
With a capacity for 4000 passengers, she left Liverpool on her maiden voyage with only 35 passengers and 8 company overseers, both of which were far exceeded by a crew of 418. She was equipped to run under sail or steam, via paddles or propeller, had four decks, and could carry 15,000 tons of coal. Sadly she was never given the opportunity to meet the long-distance goals of India, China and Australia intended for her by Brunel and her builders and investors and was never competitive on the busy cross-Atlantic passenger service to which she was initially confined.
The fortunes of Brunel’s astonishing S.S. Great Eastern swung between greatness and near-disaster like an enormous, record-breaking pendulum. She was all too often something of a gigantic white elephant, but she became an invaluable resource for laying cables across the Atlantic, and was always a great public attraction.
Painting by Charles James Lewis of the Atlantic Telegraph Expedition landing of the cable in Hearts Content Cable Station in Newfoundland, Canada, on July 27 1866, which he witnessed. Source: PK Porthcurno
After a traumatic roller-coaster of a career, the enormous ship was sold to be broken up in 1889, the work to take place on the Mersey.
Great Eastern, beached in advance of being broken up on the Mersey in late 1888, Wirral side. Source: Liverpool Echo
Throughout her history, Great Eastern was the subject of curiosity and fascination, and people lined up to buy souvenir pieces of the ship before the breaking work began on 1st January 1889. The photograph above shows her beached on the Mersey, ready to be broken up, and she continued to challenge even after the breaking work began. Not only was it a very sad episode for posterity but also, as it turned out, for the ship breaker. The company directors had estimated that it would take 200 men to break up the ship in a year, but she was so well built that it took nearly two years, requiring the costs of ongoing labour and additional machinery, including much more substantial wrecking balls, to finish the job. Substantial profits had been anticipated from her scrap value, but she was broken up at a considerable loss. Brunel had built her to last.
One of Robert Howlett’s famous photographs of Brunel with Great Eastern in 1857 prior to launch. Source: Wikimedia
Brunel had died in 1859 whilst the ship was still undergoing sea trials and had suffered an engineering accident during which five stokers died, and although the consensus is that the emotional stress of the ship’s construction and the difficulties of her launch undoubtedly contributed to his death, he was already suffering from a debilitating kidney disease.
It is perhaps thankful that he did not live to witness this drawn-out demise of his grandly imagined, fabulously realized and much-loved “Great Babe.”
Great Eastern was such a colossal, record-breaking chunk of maritime, industrial and national heritage that I find it more than slightly difficult to forgive the universe for allowing her to be broken up.
Infographic comparing ship sizes, in chronological order from left to right. Click to expand. Source: JF Ptak Science Books.
The length of Great Eastern carved into the City walls in the 19th century. Source: Geograph. By John Turner, CC BY-SA 2.0
The watercolour of Great Eastern, shows her beached on the Wirral side of the Mersey for repairs, although the painting is very sadly not on display. It was painted three years after the illustration at the top of the post, in 1863, by William Gawin Herdman (1805-1882).
Great Eastern watercolour showing the ship on the gridiron for repairs just off the Wirral on the Mersey in 1863. By W.G. Herdman (in the collection of the Williamson Art Gallery, not currently on display). Source: Williamson Art Gallery Collection at Birkenhead.
My third visit to the RSPB nature reserve at Burton Mere on the southwest Wirral was made particularly remarkable by the unprecedented and indeed record-breaking levels of heat in late June. Thankfully, Burton Mere offers an excellent balance of sunny board walks and leafy pathways and tracks, as well as cool hides, and there was a slight breeze from the Dee even where other areas locally were perfectly still. The reed beds and woodland walks were delightful on such a hot day, and there were two different types of wild orchid in flower, which were something of a treat. There were plenty of birds to see cooling down in the water, with the furthest hide, Border Hide, as busy with a wide range of wading birds as it had been on both my earlier visits. Apologies for the wildfowl photographs, which are at the absolute limit of the range of my camera lens. A full daily list of what has been spotted is always posted on the RSPB Burton Mere’s Facebook page to give an idea of what to look out for. I was particularly glad to see the avocets with their upward-curving beaks and distinctive black and white plumage. Avocets had become extinct as residential breeding birds in Britain prior to their reintroduction in 1947. According to the RSPB website, over half of those breeding in the UK today are still on managed wetland reserves. There were plenty of them at Burton Mere this week.
There were only a few other human visitors, and when I paused at the welcoming café on my way out, for a delicious latte and an ice cream at an outside table in the shade, I was in splendid isolation, accompanied only by a small jackdaw, which eyed my ice cream with all the optimism of one who is regularly fed by visitors. The heat has clearly deterred many visitors, but it was easy enough to avoid extensive periods of exposure to the sun. Because of the heat, taking water is a strongly recommended precaution, but if you forget to take your own the café sells bottled water as well as other cold drinks.
Visiting details can be found on the RSPB Burton Mere website here. If combined with the Ness Botanic Gardens, only 10 minutes away, this could make a good day out. Both have cafés for lunches and other refreshments, and both have plenty of parking.
My previous post about RSPB Burton Mere, with much better photographs of the bird life, is on the blog here.
Bee orchid
Southern marsh orchid
View across the marshes to Burton Point, where the purported hillfort is located on the RSPB land (look out for the sign posts)
My somewhat shaky video of the view from the Border Hide at Burton Mere, taken on my camera balanced on one of the Border Hide window sills. I love the cacophony of bird calls (just under 2 minutes long).
The Grade I listed collegiate church, established by Sir Hugh Calveley in the 14th century, is listed in the Simon Jenkins book “England’s Thousand Best Churches”, and has a very distinctive personality. I also wanted to find “The Chantry House,” having read about it in Clare Dudman’s recent article in the Chester Antiquary. It is a half-timbered Tudor period building, Grade II* listed, later the home of John Bradshaw of Stockport, born 1602, died 1659, described by Clare as “regicide and President of the first Council of the State of the British Commonwealth (1649-1651).”
St Boniface himself, whose birth name was Winfrith, was a late 6th-century to mid-7th century English Benedictine monk, becoming a missionary in Germany and Frisia under the authority of the pope. He became an archbishop under Gregory III before going on to introduce reforms to the Church of France.
The church is perched on the side of the small valley of the river Gowy. It sits within a neat roughly rectangular stone-built boundary wall, which is most impressive on its western side, enclosing a rambling churchyard, which flows gently downhill. The Gowy that runs at the base of the valley is a fast-moving stream at this point, which wends its way northwest before emptying into the Mersey.
As with many medieval churches in the area, there is speculation that an Anglo-Saxon building preceded St Bonficace, made of wood, on the same site; and there is evidence, in the form of fragments of decorative stonework, of a Norman church preceding the early 14th century building.
The earliest phase of the medieval St Boniface’s Church was in 1320, when the Normal church was rebuilt in the Decorated style, but a large part of the church was rebuilt in 1385-6 when Sir Hugh Calveley established the church as a chantry to ensure that the canons’ prayers would reduce his time in Purgatory. As a nobleman Sir Hugh was a knight and a warrior and, already in his 60s, he had survived not only warfare, but also the devastating famines and plagues of the 14th century.
The current Church of St Boniface was established as a collegiate church, the first one I have visited in this area. The name “college” derives from the Latin word collegium, and translates roughly as “appointed or chosen together.” In other words, it is an official community of some description, not confined as it usually is today to an educational establishment. A collegiate church sits somewhere between a parish church and a monastic establishment. Instead of a single parish priest overseeing the church and congregation, the college of canons was a Christian community, but unlike a monastery was not secluded, did not follow a specific set of rules of the sort followed by monastic communities and did not require a life-time vow of commitment to the collegiate church. Most importantly, the church was just as much a community resource as any parish church and the canons, ordained priests with specific additional roles, were involved in parish life. Collegiate churches tended to be rather better financed than the average parish church, at least when they were initially established, because they were usually founded by wealthy donors like royalty, bishops or the aristocracy, whilst others were attached to university colleges. Some of the collegiate churches were dissolved following the Reformation following Henry VIII’s appointment of himself as the head of the new Church of England.
St Boniface’s was one of a number of churches that were also established as collegiate chantries. Chantries were intended to safeguard the soul, an ongoing financial investment to ensure prayers for the souls of specific individuals for eternity, thereby reducing a soul’s time in Purgatory. The most prestigious chantries were established in monasteries, where monks ordained as priests could carry out mass on behalf of those who had set up chantries, but any individual could set up his or her own church for the purpose of chantry.
Although the overall appearance of the church is coherently gothic, a great many changes were made during its life. The main styles are earlier Decorated gothic and, dating to Sir Hugh de Calveley’s investment, later Perpendicular remodelling. The nave and aisles were remodelled in c.1490. In the 1700s upper galleries were added to the nave. The church was substantially modified during the Victorian period. The 18th century galleries were removed, restoration work included the Late Perpendicular Ridley Chapel, which was in ruinous condition and the chancel floor was tiled. None of the medieval stained glass survived in any part of the church, partly due to the nave windows being fitted with iron casements in 1840. A clerestory was added above the windows, adding more light. The oak-panelled ceiling dating to the 1950s. The present stained glass is either 19th/early 20th century or modern, although small fragments of surviving medieval glass have been incorporated where possible. xxx
Simplified plan of the Church of St Boniface
The exterior
The first impression of the church exterior, as you do a circuit, is that the north side of the church has a massive and costly expanse of regimented windows, which together with the clerestory fill the church with far more light than a medieval church would normally have experienced, even with stained glass in place.
Although both sides of the nave consist of eight bays, you will notice that the north and south sides are different from one another. The north side, with a much smaller concentration of graves in the churchyard, has a much bigger bank of windows than the south side, making a remarkable first impression. Above them is an unusual balustrade that is not echoed on the south side. On both sides of the church are battlements and many pinnacles (some of which have fallen and can be seen in the churchyard) and do look out for gargoyles and grotesques, because there are some good examples.
The main gateway through the boundary wall, leading up two steps towards the tower, is 18th century. The medieval west door into the tower, used today as the visitor entrance, would have been used only for ceremonial occasions. Apart from the buttresses that support it, the tower is incorporated into the body of the church itself. A small door is located on the north side was opened during baptisms, whilst the congregation would have entered via the elaborate Decorated style south porch in the churchyard, retaining its original medieval doors, effigy of St Boniface and its clear views over the valley.
The south porch
x
The interior
The tower and nave
Instead of standing beyond the nave, as with most churches, the tower is incorporated within the nave, with both aisles running along its sides (now blocked off for use as storage at the west, tower end). The base of the tower sits on sandstone bedrock and dates to Sir Hugh’s rebuild, with walls nearly 2m thick.
As well as the west and south entrances, there is also a small north door without a porch, but this was used only during baptisms, and was known as “the Devil’s Door.” During the ceremony it was left open to ensure that any evil spirits that escaped the child during baptism would exit the church. The frame of the doorway is original but the door itself dates to 1630.
View down the nave towards the chancel
The tower opens into the nave, which consists of a tall central section with views to the chancel at the east. The nave is flanked by two very elegant aisles. The aisle arcades are in Perpendicular style, replacing earlier aisles in the Decorated style, and are supported on particularly slender columns, giving an additional impression of space and height.
The remarkable bank of windows, particularly on the north side, provides the nave with much more light than it would normally have experienced, all in the style of the gothic Perpendicular. As all of the windows would have contained stained glass, there would have been much less light penetrating the interior than today, and the impact must have been spectacular. A 19th century clerestory is set above the windows, adding more light. The tall nave is topped with an oak-panelled ceiling dating to the 1950s. At the join between walls and ceiling there are angels holding painted shields representing local families who donated funds to ongoing care and modification of the church. The minimal amount of supporting wall between the windows has an impact on other aspects of the interior, as there is much less wall space than usual for memorial sculptures.
Immediately on your left as you enter the nave, underneath the window, is a statue commemorating Jane Johnson who died at the age of 24. It was found buried under a yew tree in 1882. The reason for this ignominious fate was apparently because the incumbent vicar in the 1760s found the large breasts too disturbing for an ecclesiastical context. On the far east end of the nave, in an aisle on the north side (left as you walk from the the tower towards the chancel) there is some fine medieval floor tiling under a communion table, with some grave stones laid into the floor. The tiles were found elsewhere in the church and moved here to preserve them.
Above the communion table is a short row of carved medieval stone sculptures, most of which represent excellent examples of grotesques, the remains of a former reredos. Grotesques are also set into the tops of the walls, particularly in the south aisle. On the opposite side of the nave, below the organ pipes, is a faint painted medieval altarpiece showing Christ rising from the tomb, flanked by important attendants, one of whom may represent St Boniface. Both the communion table and the organ pipes are located where chapels were once located at the east ends of each aisle.
The font dates to 1663, the medieval font apparently having been damaged during the Civil War. Behind the font in the south aisle are two lovely sets of painted wooden parclose panels showing images of saints, dating to c.1420-1450.
A brass chandelier dates to 1776.
The chancel
The 1921 Fred Crossley screen
Sir Hugh de Calveley with a calf shown on his suit of armour, his head resting on a sculpted calf and a third concealed in this photograph by his arms
The large chancel has been less radically modified than the nave. The walls were raised to a new height in 1520 but the rest of the chancel remains largely unchanged since the 1380s. It was originally divided from the nave by a rood screen, but the current screen, with its delicate carvings, was designed by Fred Crossley and dates from 1921. The size of the chancel was due to its role as a chantry. According to the St Boniface church’s online history leaflet, “The chancel in Sir Hugh’s collegiate church was designed to provide room for a chantry staff of eleven – a master, a submaster, five chaplains, two chanters, and two singers” in order to pray for the souls of the king, Sir Hugh and their ancestors and families. Sir Hugh died in 1394, unmarried.
The east window, apparently moved here from another church, was in the Decorated style, dating to the 14th century, its lovely tracery described by Pevsner/Hubbard as “uncommonly fanciful” and unique in Cheshire in terms of its flowering tracery. Much of the church’s medieval stained glass survived into the 19th century but the east window was blown out during a storm in the 1700s, and this window now has modern stained glass. Finds of glass beyond the east end show that it originally depicted the Jesse tree.
Sir Hugh himself is in pride of place in the centre of the chancel, with his 7ft long effigy sitting above a chest tomb, all in expensive alabaster, with many traces of paint still surviving on the chest tomb. It is surrounded by the original spiked railings. The three calves of Sir Hugh’s family shield are present on parts of his effigy, and a lion sits at his feet. The niches of the chest tomb would have contained weeping figures, now lost. The graffiti belongs mainly to the 17th century, carved by Civil War prisoners. Whether Sir Hugh is actually buried here is unknown.
Within the altar rails at the north side of the chancel is the colourfully elaborate effigy and tomb of Sir George Beeston, restored in 1937. He was a descendant of Sir Hugh de Calveley, and served in the Royal Navy as Admiral of the Fleet under four monarchs. Opposite it, also behind the altar rails on the south side (right) are the three seats of the sedilia, where the clergy sat during services, along with a small piscina, a basin for holy water, which drained into the churchyard, all attractively ogee-headed.
Unlike most churches, where an organ was slotted into an aisle of the nave, the 1895 organ at St Boniface was installed in the chancel on the southern side, facing into the south aisle.
The Ridley Chapel
The 1527 Ridley Chantry Chapel was built by Sir Raufe Egerton, a soldier rewarded for his loyalty by Henry VIII with a village near Bunbury. The endowment was much more modest than that of Sir Raufe’s ancestor Sir Hugh, employing two chantry priests employed to pray for his own soul, and those of his family. He built a house in which the priests resided, still standing today and discussed briefly below.
The chapel sits on the south side of the chancel, accessed through a substantial stone screen via a pair of very unusual carved doors, different on the chancel and chapel sides. The doors have a unique interlaced trellis topping and, on the chancel side, linenfold carving. On the chapel side the doors have and have the monograms of Sir Raufe and his wife Mary carved into the lower sections.
The screen dividing the chancel from the chapel has, on its interior face, some Renaissance paintwork, the earliest known in the region.
Until the Civil War, Sir Raufe’s marble chest-tomb stood, like Sir Hugh’s, in the centre of the chantry chapel. The chapel remained unfinished at his death and although some work continued, according to the detailed instructions left in his will, the dissolution of the college churches and chantries in 1548 led to the abandonment of the work, and it was in a highly ruinous condition by the mid 19th century, when restoration was undertaken.
After 1548
The church’s chantry college was dissolved during Reformation in 1548 and the church became Crown property before the tithes (the income of the church) were sold by Elizabeth I.
Beeston Castle
Although efforts were made to keep Cheshire out of the Civil War (1642-1659), with the Bunbury Agreement signed to this effect, the county was nevertheless dragged into the hostilities. Royalist forces had taken up position at Chester in 1642, using it as a base to provision themselves from the Dee, which was still a working port with river access via the Dee to the Irish Sea and Liverpool Bay. Shortly afterwards, Parliamentarians established themselves at Nantwich. Beeston sat right in the middle of the two opposing bases, and the parliamentarians installed a garrison at the castle in February 1643, under the control of Captain Thomas Steele, who oversaw repairs to make the castle defensible. St Boniface’s was used by Parliamentarians who were garrisoned at Bunbury to house Royalist prisoners who had been taken in the fighting at Beeston Castle and other local battlefields.
In the 1700s galleries were added to the nave, but these were removed in the 1860s during a period of Victorian alterations, which also removed the plaster covering the walls, the wall paintings and the traditional box pews. The tiling on the floor of the chancel dates to this time.
Electric light was not introduced until 1931. Sadly in 1940 a land-mine inflicted serious damage on the church, partly because the 1840s alterations to the windows had badly undermined the structural integrity of the church.
Today the nave has a feeling of timelessness that is very difficult to pin down. This may be due to the mass of light that the main windows and the clerestory produce, combined with the lofty ceiling on slender columns; the absence of traditional blocks of pews in favour of backed benches; and the minimal amount of memorial clutter on the walls, all providing the nave with a faint and attractively unusual hint of modernity. The chancel is much more traditional, but the centrepiece provided by Sir Hugh’s effigy and chest tomb, the painted tomb of Sir George Beeston and the addition of the Ridley Chapel are all truly compelling features. The amount of paintwork in the church is unusual, and although much of it was restored in the Victorian period, it gives an excellent idea of how much more colour would have been present in a pre-Commonwealth church. This venerable church, established to provide chantry services for Sir Hugh de Calveley, is distinctive in both look and feel, outside and in, and has a lot of very unusual features to offer the visitor.
The Chantry House
The village surrounding the church is very attractive, with multiple styles of building dispersed along the lines of several lanes, one of which dips down to the Gowy and climbs steadily beyond. Most of the village’s core dates back as far as the Tudor period, with fine historic buildings from other periods, all surrounded by an interrupted ring of more modern homes.
One of the interesting personalities in the village was Thomas Aldersey who in 1565 purchased the tithes (church income) from Elizabeth I. He was a contemporary of Sir Raufe Egerton, and as well as being a Member of Parliament, he was affiliated to the Company of Haberdashers, a powerful London Puritan guild, and appointed them as his trustees in 1590. This was significant because it gave the guild authority over the church, and their involvement lead to Bunbury becoming a centre for non-conformism and, in the 17th century, became the home of Cheshire’s first Methodist society. Even more interesting is that a census of 1640 showed that the parish housed some 112 illegal Catholics. Unsurprisingly, the two factions were often in conflict. This non-conformism lasted into the 19th century when there were two non-conformist chapels in Bunbury, the Wesleyan Trinity Chapel established in 1806, and a Primitive Methodist church on College Lane built in 1876.
John Bradshaw by George Perfect Harding. Source: Wikipedia
At the foot of the dip alongside the Gowy is The Chantry House, built by the same Raufe Egerton responsible for the Ridley Chapel, as a home for his chantry priests. It is a domestic half-timbered property dated by Historic England to roughly 1527, some 200 years after Sir Hugh Calveley had been sufficiently terrified by the prospect of Purgatory to finance a new incarnation of the church. Like many other buildings in Bunbury, The Chantry House has a rich history of its own and in 1594 was donated by Thomas Aldersey to the school’s master (the school has since been demolished). It was here that John Bradshaw is thought to have lodged as a child to attend the neighbouring school, growing up to become a jurist, judge, lawyer and politician. As a Chief Justice in Chester and North Wales, he presided over a number of witch trials. In 1649, he was made Lord President of the parliamentary commission that was established to put Charles I on trial, signed the death warrant on January 29th 1649, and subsequently held senior positions in the Commonwealth. Although he was buried in Westminster Abbey with his wife, on the reinstatement of the monarchy under Charles II they were both later disinterred, put on show, and then posthumously executed by beheading.
The Chantry House
As Clare Dudman’s article highlighted, the centuries-old line of sight between the house and the church was under threat recently, when a proposal was submitted for a new building development in the meadow that lies between Chantry House (and the River Gowy), and the slope up to the church. The planning permission was recently refused in favour of retaining the open meadow. Here’s an excerpt from the Decision Notice (Application No. 25/3509/PIP) refusing planning permission:
The river Gowy
The proposed development is located within the Open Countryside and does not meet
any of the exceptions noted for development within Open Countryside. Furthermore, the
proposal would not integrate into the rural surrounding context and would erode the
existing distinction between the settlement boundaries and the wider open countryside
which contributes to the character of Bunbury. Furthermore, the development would
impact on the important local views and vistas and would have a conspicuous
urbanising effect that would fail to respect the intrinsic rural character of the wider
landscape, which would be harmful to the verdant rural character, appearance and
qualities of Bunbury contrary to Policies PG6.
Common sense, good taste and support for the retention of rural elements within the village prevailed in the end. A footpath through the field gives good views of both The Chantry House and the church.
There are no details of opening times for St Boniface either on the website or at the church, but it was open on both visits, and appears to have an open door policy. It is worth checking the website to ensure that you don’t accidentally arrive when a service or a church event is being held. For those using satnav, the church is on Bowe’s Gate Road and the What3Words address is ///dollar.papers.currently. There is no official car park but there is plenty of on-street parking in the immediate vicinity of the east end of the church.
If you are more organized than I was, you can download a PDF of the history of the church from the St Boniface website before you visit here. I recommend doing so because there are no pamphlets to pick up or purchase at the church to learn about its history, although on a cupboard top on the right-hand side, just before you enter the nave, you can open a copy of the book England’s Thousand Best Churches by Simon Jenkins to see the one-page summary, and next to it there is a framed sheet of A4 with a potted history of the church. Other sources are listed below.
The Chantry House is a private residence and not open to the public.
If you go for a wander around the village, do take care to stand well back for the traffic, because there are no footpaths on most of the lanes, and delivery vehicles and through-traffic tend to travel at some speed, in spite of the narrow and bendy roads.
Sources:
Books and papers
Cook, G.H. 1959. English Collegiate Churches. Phoenix House Ltd
Aerial photograph of the half of the Chester amphitheatre that is visible. The rest lies beneath derelict buildings and car-parking. Image source: Environment Agency via Wikipedia
Partly as a result of the Gladiators of Britain exhibition last year and the Chester Amphitheatre – An 8000 year Story exhibition this year (closes 12 July 2026), both at Chester’s Grosvenor Museum, there has been a lot of recent interest about the development of the Chester amphitheatre. The Gladiators project focused attention on the Roman period but the current exhibition looks at 8000 years of how the chunk of land on which the amphitheatre sits was used from early prehistory onwards. Of these various periods of use, one of the most interesting is the discovery of a section of an Iron Age settlement and field management, representing a number of phases of the Middle and Late Iron Age. These phases were found, together with earlier prehistoric material, during the last of three seasons of excavation that took place between 2004 and 2006, included in volume 1 of the amphitheatre publication produced by Tony Wilmott and Dan Garner in 2018 (see Sources at end). xxx
The challenges of locating the Iron Age in West Cheshire
Artist’s impression of Maiden Castle on the mid-Cheshire Sandstone Ridge. Produced by the Habitats and Hillforts Project 2008-2012. Image source: Sandstone Ridge Trust
The Iron Age in West Cheshire was first recognized at hill-top sites known as hillforts in Britain, characterized by banks and ditches surrounding an internal space, but it has been amply demonstrated in other parts of the country that lowland settlements, some enclosed with a bank and ditch, formed the settlement focus of farming livelihoods. It has always been difficult to identify such lowland sites in the West Cheshire area, for reasons discussed below, although the presence of six hillforts on the mid-Cheshire Sandstone Ridge strongly implied that there must be corresponding lowland sites on the land to east and west.
Hillforts on the mid-Cheshire Sandstone Ridge. Image source: Garner 2012, p.4.
In 1982, in response to this absence of known lowland sites in the fields around the hillforts on the Sandstone Ridge, James Schoenwetter used proxy botanical data from nearby waterlogged contexts to search for evidence for agricultural activity contemporary with the hillforts. He found evidence that strongly suggested that lowland agricultural settlements must have been present in the vicinity of Peckforton Mere, near the Sandstone Ridge. However it was was not until 2001 that the nearest settlement to the mid-Cheshire sandstone ridge was found at Bruen Stapleford near Tarvin, during the laying of a Transco gas pipeline. Since then a small number of sites have been surveyed and/or excavated across West Cheshire and the Wirral, with other possible sites awaiting survey and excavation. The Iron Age levels at the Chester Amphitheatre, were revealed in 2006.
Quite apart from the urban and suburban sprawl of Chester and the Wirral on what was once rural land, finding the lowland sites in West Cheshire has been complicated by the composition of the soil in the Cheshire Basin, the nature of the archaeology itself, and the reduction of funding for research archaeology over the last few decades.
Aerial photography has been of great value for identifying sites in some parts of the country, but the moisture-retaining boulder clays deposited across the Cheshire lowlands by the last glaciation mean that the outlines of structures and enclosures, which show up in other areas as crop-marks, cannot always be seen in this region. It is only during periods of drought that crop marks are likely to put in an appearance.
VCP rim-sherd found in one of the roundhouse (Building 1) gullies at the amphitheatre, on display at the Grosvenor Museum
Field-walking (the survey of ploughed fields on foot, collecting all artefacts found) also faces serious challenges. The boulder clays of the Cheshire Plain boulder are acidic, meaning that organic materials (plants, bone and antler, foodstuff, textiles, leather etc) and metals have often disintegrated in the past and are only very rarely found today. Field-walking tends to rely on pottery and stone artefacts, and although both often survive in local conditions, by the time of the Iron Age smaller stone tools were no longer in use, with only larger stone items like querns and pounders (grain and pigment grinding objects) and anvils (for metalwork) remaining in use. It is also a problem that the Iron Age in the West Cheshire region is largely aceramic. Pottery often present at other Iron Age sites in Britain, is usually absent in this immediate area, with only a particular type known as Very Coarse Pottery (VCP), used for producing and transporting salt from the East Cheshire brine springs, consistently found in the region.
Composite image of two maps showing the distribution of Iron Age sites in northwest England and northeast Wales. Sourced from Ritchie 2018 and Nevell 2025 (click to enlarge)
Because of these challenges, individual objects found in the area are most often found by metal detectorists who report their findings to the Portable Antiquities Scheme. The last time I checked there were 43 findspots dating to the Iron Age in West Cheshire, although not all can be dated with precision.
Most of the Iron Age lowland sites discovered have been the result of developer-led watching briefs and funding for excavation and publication. This simply means that instead of excavation being guided by archaeological research projects and survey activities, sites are usually found when, for example, new buildings are erected, cables or pipelines are laid down and new quarries are opened. Archaeologists are assigned to maintain watching briefs on such projects, funded by the developer in question, in case archaeological features are identified. Watching briefs have been responsible, for example, for the Late Prehistoric discoveries at Bruen Stapleford near Tarvin (where a gas pipeline was due to be laid), Saighton Camp at Huntington (in advance of a new housing estate), and Puddington Lane sites 129 and 154 at Burton on the Wirral (where sections of an offshore power cable were being laid). A 2026 article in British Archaeology (the publication of the Council for British Archaeology) by Sarah Wolferstan states that nearly 98% of UK archaeology is now developer-funded.
Large scale evironmental and heritage conservation projects are few and far between, but in this region included the Heather and Hillforts project that first oversaw the exploration, survey and excavation of both the uplands in northeast Wales in the early 2000s, and in a later phase the mid-Cheshire Ridge between 2008 and 2011, with the archaeological work overseen by Dan Garner, resulting in two main publications made available in 2012 and 2016.
Chester Amphitheatre under excavation in 2004. Source: Wilmott and Garner 2018, fig 26, p.24 (Kindle edition)
The Chester Amphitheatre Project was a special project. Unlike the above examples, the Chester Amphitheatre was the focus of a very welcome three-year project that was initiated for research purposes. In 2000 it was deemed that the deteriorating state of the amphitheatre needed to be addressed, and English Heritage issued a call for tenders to produce a conservation plan together with costings. Discussions between English Heritage, Chester City Council and a number of specialists resulted in the Chester Amphitheatre Project in 2003. Excavations took place between 2004 and 2006, led by Tony Wilmott and Dan Garner and funded by English Heritage and Chester City Council. xxx
Settlement features in the West Cheshire Iron Age
The structures that make up Late Prehistoric settlement sites in Britain, enclosed and unenclosed, are usually round-houses and four-posted (or “four-poster”) buildings. In West Cheshire none have produced evidence of enclosures (banks and/or ditches) surrounding the settlements, but none of the sites has been fully excavated meaning that whether or not any of them were enclosed is currently unresolved. The remains of field systems, sealed beneath early Roman levels, are of great interest, providing clues to the agricultural activity that formed the basis of Late Prehistoric livelihoods.
Reconstructed Iron Age roundhouse on private land at the site of an excavation on the west side of the river Dee at Poulton, south of Chester. Source: Cootes et al 2020 (see Sources at end of post)
Roundhouses in the area are defined by circular gullies or ditches, sometimes single and sometimes double (concentric). The largest roundhouse in this area reach was Bruen Stapleford’s Structure 3, with a diameter of c.19m but smaller examples are more usual, with the smallest clustering around 7.5-8m, with the amphitheatre roundhouse measuring c.8.4m diameter. Gullies can either be complete, leaving a gap for one or more entrances, or interrupted. Outer gullies are often interpreted as drains or eavesdrips to collect rainwater run-off from the roof. The inner gully is often a foundation trench for posts or stakes, which will have performed the job of anchors for the walls, which may have been made of wattle-and-daub (long slender branches woven together and then coated with clay or equivalent), planks, or an alternative construction material that has so far not been observed, such as turf. Alternatively, the outer gully may hold the walling material, whilst the inner gully may hold weight-bearing posts to support the roof timbers. The interior may have additional features, such as hearths or shallow pits. The activities that took place in roundhouses are still not well understood in spite of including “house” in their names. Whilst some may well have provided accommodation for group/family members (depending on how family and social units were defined and organized), others are likely to have have been used for a number of other activities related to farming, craft and/or community activities.
Moel y Gaer Rhosesmor hillfort, phase 2, showing both roundhouses and four-posters. Image source: Graeme Guilbert 2018, Internet Archaeology Journal
Four-posted buildings are even more elusive in the West Cheshire and Wirral areas, but happily two phases of one four-poster was found at the amphitheatre, and another was as at the Chester Business Park excavation in Huntington, another lowland site. They are also represented at the upland Beeston Castle hillfort. A particularly good example outside the immediate area is Moel y Gaer Rhosesmor hillfort (phase 2) in Flintshire. these structures are often described as “possible granaries,” but this is only one possible interpretation of their role within a given site or region. They are usually quite small, and either square or rectangular around 3.5 x 3.5m or 3.0 x 3.5m on average, and although they may well have stored cereal grain, particularly where there is sufficient evidence to suggest this purpose, they could also have stored other goods such as animal hides, wool and textiles, salt, and preserved foods, and some may not have been used for storage at all. For example, Janice Kinory suggests that one possible interpretation of for four postholes is that some of them could have been hanging frames, rather than buildings, used for maturing slaughtered and/or cuts of butchered livestock. Adrian Chadwick raises the possibility that some of them could have been excarnation (exposed funeral) platforms. As with roundhouses, they may have had multiple roles and it is only by excavation of the organic and inorganic remains associated with them that the uses of these buildings will continue to be clarified and refined. fdf
The Iron Age beneath the Chester Amphitheatre
Because Late Bronze Age and Iron Age lowland sites are elusive, it is always exciting when a new one is discovered. The Chester amphitheatre is one of Chester’s best known landmarks, and the 2004-2006 excavations (Wilmott and Garner 2018) were expected to provide information primarily about the Roman and post-Roman uses of the site, so the 2006 discovery of Iron Age activity underlying the Roman amphitheatre, a short distance from the river Dee, provided a very welcome insight into the Chester area and environs prior to the arrival of the Roman legions. Most significantly, the Iron Age finds included not only structural evidence and a small number of artefacts, but also two distinct phases of field system, providing information about the development of field-management methodologies in the region. The source of the amphitheatre’s Iron Age data used in this post is in Part 2, Before The Amphitheatre, in the 2018 publication by Tony Wilmott and Dan Garner (see “Sources” at the end of the post). Some of the images shown on this post have also been taken from the Kindle version of the same publication. See image captions for details of all image sources.
Mesolithic stone tools and cores from the amphitheatre site, Phase 1a on display at the Grosvenor Museum’s “Chester Amphitheatre – An 8000 Year Story” exhibition, found during the Wilmott and Garner 2018 excavation
The amphitheatre site had been surveyed and excavated several times previously, beginning in the early 1930s, discussed in detail by Wilmott and Garner 2018, but this was the first of the amphitheatre excavations to produce evidence of Iron Age occupation underlying the Roman levels.
The amphitheatre site has been divided into a number of periods, phases and sub-phases, of which Period 1 represents all the prehistoric phases, of which phase 1a consists of ephemeral data from the Mesolithic to the Early Bronze Age (not included here, but extensively described and illustrated in Wilmott and Garner 2018, providing an important contribution to the understanding of earlier prehistoric presence in the area); phases 1b and 1c, which date to the Middle Iron Age and include structural elements and evidence of ard cultivation respectively; and phase 2, which produced evidence of Late Iron Age cord-rig cultivation. Later periods, not listed here, describe the history of the Roman amphitheatre.
The phases of Period 1 (Prehistory):
Amphitheatre Period 1 (Prehistory) phases, with radiocarbon dates indication that periods 1b – 2 covered the period c.400BC to the pre-amphitheatre Roman period.
Phase 1b (Middle Iron Age, 400-200 Cal.BC)
Part of the roundhouse under excavation. Source: Grosvenor Museum’s “Chester Amphitheatre – 8000 Years of Stories” exhibition, from the Wilmott and Garner 2018 excavation
Phase 1b includes the only Iron Age settlement features found during the excavation, consisting of a single roundhouse (Building 1) and a four-posted building that was built in three phases (Building 2).
Building 1, was defined by two concentric gullies that made up part of a curvilinear structure that would have been about 8.4m in diameter if it had been complete. The inner gully was probably a construction trench for the walls of the house. A rim-sherd of VCP was found in one of the gullies. A shallow pit was found towards the centre of the building measuring c.1m x 0.75m and 0.07m, its function unspecified. Plant remains were collected and sampled, containing very few cereal remains, representing hulled barley and a glume base of spelt wheat. Buttercup, sheep’s sorrel, and vetches and other wild species. may have been used as floor covering, animal fodder or bedding.
The Chester Amphitheatre Iron Age, part of Buildings 1 and Building 2. Image source: Wilmott and Garner 2018, fig.33 p.44 (Kindle version)
Building 2 comprised three postholes representing two sides of what the excavators interpreted as a four-posted building, erected in two phases as shown on the illustration above. It is only the second example of a lowland site with four-poster identified in the West Cheshire area (the other is at the Chester Business Park site). In Phase i of Building 2 the structure measured 3.5×3.5m. The postholes suggest that at least two of the posts were around 0.4m diameter and most of them had stone packing material to support the posts. Plant remains were found in all three of the main postholes, including remains of spelt wheat, a small amount of emmer wheat, and low amounts of barley. There were also abundant weed seeds, plenty of small grass seeds, a sloe stone and charcoal containing oak and lesser amounts of alder and hazel. Charcoal in Building 2 postholes, which is also found spread elsewhere on the site, suggests Building 2 appears to have been destroyed by fire in phase i, either deliberately (which has been proposed at, for example, the Iron Age roundhouse at Prestatyn) or accidentally. In Phase ii the four-posted building had shifted position, suggesting that phase ii was a replacement building, its footprint overlapping with the older structure. It also had three postholes, but is thought to have been rectangular, measuring c.3.5 x 4m. Postholes from phase ii (again with processing waste dominating over actual grains) contained spelt wheat, emmer wheat, grasses and charcoal dominated again by oak with smaller quantities of alder and hazel. In this phase the post packing material was so disturbed that it is suggested that the building was deliberately dismantled by the removal of the posts, something seen at other sites in Britain possibly including Prestatyn, where it was thought that the roundhouse was probably deliberately dismantled (before being set on fire).
Phase iii of Building 2 is far less easy to understand. It consists of a sub-circular cut that truncated posthole 3. It appeared to be lined with red clay, and although showed no signs of burning, a later fill was charcoal-rich, suggesting a hearth. The plant remains were dominated by the by-products of spelt wheat processing. Features that could not be connected to the structure included a pair of stake-holes and a single posthole, with another stake-hole nearby.
All the Building 1 and Building 2 levels were sealed under Period 1’s, Phase 1c, the ard-marked soil. xxx
Period 1, phase 1c (Middle Iron Age)
Amphitheatre cultivation and ard marks Phase 1c. Image source: Wilmott and Garner 2018, fig.34 p.46 (Kindle version)
Phase 1c, the lower level of cultivation at the site, represents patches of Middle Iron Age cultivation, with marks in the ground thought to have been made by an ard. An ard is a predecessor of the plough, also known as a scratch-plough, a simple tool, usually pulled by livestock, that carves a shallow line into the soil rather than turning and lifting it like the later and more sophisticated plough. The marks are associated with a number of different patches of cultivated land within the amphitheatre that post-date the Phase 1b round-house and 4-poster, and are not associated with known structures.
Period 1, phase 2 (Late Iron Age)
Cultivation soils and cord-rig earthworks of Period 1, Phase 2, with features of the Roman Phase 3. Image source: Wilmott and Garner 2018, fig.36, p.48 (Kindle version)
Phase 2 consists of an upper level of cultivation soils showing a distinctive cord-rig arrangement of parallel low banks and shallow furrows, providing raised rows for planting, and ditches for drainage, over an area at the north of the site some 15 x 6m in area. An east-west alignment of 11 ridges was recorded, c.0.64m apart. These undulating earthworks “are a dramatic archaeological discovery, and represent the evidence for arable cultivation immediately prior to the construction of the first amphitheatre, in the last phases of the pre-Roman period” (Wilmott and Garner 2018, p.47).
The Chester Amphitheatre cord-rig is the first to have been recorded south of Northumberland. To the southwest another type of earthwork consists of a pair of circular depressions, the function of which remains unknown. Burnt vegetation, including possible turves, may be indicative of land clearance and digging the burnt material back into the soil to be cultivated. sdfds
The Iron Age livelihood at the Amphitheatre
The occupants of the settlement located themselves very close to the river Dee, with access to both water and an excellent route for communication and travel. One roundhouse, two phases of a four-poster and two phases of field management data do not necessarily represent a full settlement and farming system. Because the excavation was limited to the amphitheatre itself, It is possible that beyond these boundaries, either destroyed by later roads and buildings or lying beneath them, a more extensive community settlement could have existed.
Photograph of the excavation showing a section of Iron Age cord-rig field system ( photograph from the “Chester Amphitheatre – an 8000 year story” exhibition, from the Wilmott and Garner 2018 excavation)
Field systems, many of them enclosed, were an increasingly familiar aspect of Late Prehistoric landscape management throughout Britain. The presence of a clear chronological sequence of field management approaches is particularly helpful, suggesting improved efficiencies and the desire or the need to apply new techniques to improve output, marked by the replacement of Middle Iron Age ard-marks by Late Iron Age cord-rig earthworks. Burnt plant rhizomes and possibly turves in phase 2 may have been turned into the ground to help fertilize the field, and heat-cracked stone that found on cultivation levels, mentioned below, may also have been part of general refuse spread on fields as fertilizer.
The plant remains at the site include cereal grains and chaff (the inedible parts of the plant), and together with the field-working marks indicate that this was agricultural land. The best represented of the cereal remains was spelt wheat, which became increasingly popular over emmer wheat during the course of the Iron Age, perhaps due to its greater tolerance of poor, marginal soils, cold and damp conditions, its ability to do well without large amounts of fertilizer and its resistance to pests and diseases. Other types represented are emmer wheat and hulled 6-row barley in smaller amounts, as well as indeterminate remains. As well as grains, the chaff produced during processing could be used for, amongst other things, animal fodder and fuel. There is also evidence of quantities of brassiceae, (the mustard and cabbage family). Weeds suggest a broadly grassland environment, some of which may have been used for roofing, flooring and animal fodder as well as other uses. Wood found at the site, invaluable for buildings, fencing, fuel, tools, weapons, handles, containers and a variety of other objects and furnishings, mainly includes oak, alder/hazel and willow.
Red sandstone saddle quern piece. Image source: Wilmott and Garner 2018, fig.42, p.63 (Kindle version)
A broken red sandstone fragment of Middle Iron Age saddle quern is a nice find (shown above), also relating to agricultural activities. It was found in a post-hole in phase 1b, with its grinding surface worn to a characteristic shallow dish-shape. Similar fragments have been found at other sites in the region, with a whole example found at Beeston Castle hillfort. Querns were traditionally used for grinding cereal grain and seeds, but could also be employed for working pigments into powder. As suggested below for the VCP, it is possible that fragments of tools and equipment were inserted into structural features as tokens of some sort. A quern fragment from the Chester Business Park site was found, for example, in what has been interpreted as a former Iron Age well.
The farming year: a reconstruction based on evidence from settlements at Iron Age Danebury (Hampshire) and region. Source: Cunliffe 2005, p.419, fig.16.5. Click to enlarge.
Even though domesticated animal remains have not been found at the amphitheatre from prehistoric phases (although they are plentiful in the Roman phases), they would have been necessary to provide fertilizer for the crops, and evidence at other sites in the region have usually been seen as indicative of a mixed cultivation and livestock herding strategy. At Poulton near Rossett (30km south of Chester) for example, where preservation has been much better than any other Late Prehistoric sites in the area, the trifecta of cattle, sheep/goat and pig is indicated by the animal bones, which could have been employed not only for meat and fertilizer and, in the case for cattle and sheep/goat for dairy products, but also for hides for tanning and sheep’s wool for textiles. Sheep and goat are very difficult to distinguish archaeologically, but both would have been viable. A dog burial at Poulton suggests that at least that particular animal had value in everyday life.
Chester Amphitheatre VCP sherd. A particularly nice piece with a decorated rim. No complete VCP vessel has been found in Britain, but sufficient sherds have been found to show that it has a relatively narrow base and a flaring rim. Displayed at the “Chester Amphitheatre – An 8000 Year Story” exhibition
Pottery was generally not found in West Cheshire and Wirral sites from the Iron Age, although it is found in Late Bronze Age levels, and has been found north of the Mersey. The exception to this is Cheshire Stony VCP, Very Coarse Pottery, which is found in varying quantities in the area. A particularly nice single piece of VCP rim sherd, with “pie-crust” decoration and 71 body sherds, were found at the amphitheatre, with the rim sherd shown above found in the gully of Building 1. VCP was used in the region for transporting salt, and may be indicative that the people at the amphitheatre settlement were importing salt from the salt brine springs in the Middlewich area. In her 2012 study of VCP Janice Kinory, building on the work of Elaine Morris, suggests that sometimes both single and more numerous sherds deposited in post-holes or gullies could have had a symbolic function, indicating the importance of salt itself, the value of social connections with salt producers, or the importance of the pottery itself to families and/or communities. The piece of VCP with “pie crust” decoration along the rim is similar to an example found at Poulton in Structure 2.
Corroded spearhead. On display at the “Chester Amphitheatre. An 8000 Year Story” exhibition at the Grosvenor Museum
The single, highly corroded iron spearhead is sadly the only metalwork to be found in Period 1, and there is no evidence to suggest that any metalworking took place. It was originally leaf-shaped, an elegant design that was common in the early Roman period as well, but this spear-head was found securely stratified in phase 1c in the lower of the two cultivation levels.
Fired clay, which is often found at Iron Age sites, was found in small quantities, of two locally available clay types, but its purpose at the amphitheatre is unknown.
Heat-shattered stone is a feature common on the local sites, and the amphitheatre produced 56kg of it from prehistoric levels, mainly local sandstone. Some dates from a Phase 1a (early prehistory) pit, but the main concentrations were in the cultivation areas during phases 1c and 2. At other sites in the area it is generally found within settlement structure features, but that may well be a reflection of the fact that only at Saighton Camp at Huntington has an excavation of a contemporary field system taken place in the West Cheshire area. The function of heat-shattered (or cracked / affected) stone has been much debated, with a number of plausible suggestions, including use for heating up or boiling water for various activities including tenderizing meat and cooking. Their presence on cultivated levels may suggest that, as with fields in other regions, they could have been spread on fields along with other refuse as fertilizer. xxx
Final Comments
Excavations exploring the amphitheatre environs in the Grosvenor Park are ongoing. Image Source: CAER blog 2019
As with most excavated sites dating to Late Prehistory in the West Cheshire and Wirral areas, the amphitheatre has added more invaluable data to the slowly accumulating knowledge regarding the period in this region.
Although most archaeological and historical evidence in Chester is from Roman and medieval periods, the presence of Iron Age predecessors in the city suggesting that this may have been a farming locale before the arrival of the Romans, is an exciting find. The site was used both during the Middle and Late Iron Age periods, a period of up to 400 years, during which field management techniques improved.
There is always the possibility that as parts of Chester’s built environment are replaced with new planning developments, such as the upcoming Northgate 2 housing project, other Iron Age remains will be found beneath Roman levels. The ongoing excavations in Grosvenor Park, to the east of the amphitheatre may eventually reach the lower levels contemporary with the amphitheatre finds. With more excavated sites within the region there is also the hope that it will be possible to assemble sufficient data to characterize the Late Bronze Age and Iron Age periods in West Cheshire and the Wirral, and to differentiate more fully between this and other regions in the Northwest and further afield.
Sources
Books and papers
Blockley, Kevin 1989. Prestatyn 1984-5. An Iron Age Farmstead and Romano-British Industrial Settlement in North Wales. BAR British Series 210.
Brück, Joanna 2008. Chapter 11. The Architecture of Routine Life. In Joshua Pollard (ed.) Prehistoric Britain. Blackwell Publishing, p.248-267
Cunliffe, Barry 2005 (4th edition). Iron Age Communities in Britain. Routledge
Fowler, P.J. 1981, 1983 (2nd edition). The Farming of Prehistoric Britain. Cambridge University Press
Garner, D. (and contributors) 2012. Hillforts of the Cheshire Sandstone Ridge. Habitats and Hillforts Landscape Partnership Scheme. Cheshire West and Chester Council. https://www.sandstoneridge.org.uk/lib/file-234636.pdf
Garner, Dan 2024. Chester Business Park 2003: A summary of the excavation of a late prehistoric and Roman rural site. Journal of Chester Archaeological Society 94, p.63
Johnston, Robert 2008. Chapter 12. Later Prehistoric Landscapes and Inhabitation. In Joshua Pollard (ed.) Prehistoric Britain. Blackwell Publishing, p.268-287
Kinory, Janice 2012. Salt Production, Distribution and Use in the British Iron Age. BAR British Series 559.
Morris, Elaine L. 1983. Salt and ceramic exchange in Western Britain during the first Millennium B.C. University of Southampton, Doctoral Thesis https://eprints.soton.ac.uk/437245/1/Morris.pdf
Nevell, Mike 1994. Late prehistory pottery types from the Mersey Basin. In Peter Carrington (ed.) From Flints to Flower Pots. Current Research in the Dee-Mersey Region. Chester City Council, p.33-42.
Wilmott, Tony and Dan Garner 2018. The Roman Amphitheatre of Chester. Volume 1, The Prehistoric and Roman Archaeology. Oxbow [available on Kindle, although not all of the tables of data are fully legible – page numbers cited in the text refer to the Kindle version]
Wolferstan, Sarah 2026. Oral and performance storytelling for archaeological engagement and research. British Archaeology, July – August 2026, p.51
Quite why I felt the need, on the hottest day of any May in UK records to dig a series of large holes around my garden for plants parked temporarily on the patio is anyone’s guess. Right at the end of the garden, in a spot that has challenged the valiant attempts of any plants to thrive under the darkness of the overhanging conifers and the resulting dry ground, I dug a particularly massive hole for a particularly massive shrub, and lo! a Barcelona FC mini-football emerged, still almost fully inflated, and bounced down the lawn. It was a bit dusty but otherwise largely dirt-free.
This was the most surprising find in the garden so far and, after a bit of Internet leg-work, the most recent of the interesting finds. Fourteen of the other interesting ones are listed on the Everyday Objects in my Garden page here, but this was the only one to make me feel genuinely nostalgic.
Nou Camp in the 1970s, before it became one of Barcelona’s built-up areas
Many of my teenage years were spent living in Barcelona. After school (a splendid pink villa with palm trees in the garden) I spent many early evenings at the ice rink that shared a compound with the Barcelona FC football stadium, Camp Nou, also known locally as Blaugrana, referring to the blue (blau) and burgundy red (grana) colours of the football team. We kids were all fans of Barça, and because we were coming and going so frequently, we were on shy and starry-eyed waving terms with the football team as the players ran the streets in the vicinity of the stadium as part of their fitness training. Unthinkable from a security point of view these days. Barcelona, a port on the far west of the Mediterranean, sits under a line of hills, with the suburbs rise gently on the lower slopes, with wonderful walks along the footpaths of the hillsides above. When a home goal was scored, the hills became an echo chamber, and the entire south end of the town is filled with the colossal sound of cheers and joy that blasted upwards and outwards like an explosion. Unforgettable. I have the official beanie hat, the official hoodie and the official waterproof. And now, thanks to someone losing it in my garden, I have an entirely unexpected mini-football.
The striped ball has a circumference of 38cm (a diameter of c.12cm). It is still bright with its original blue on all sides, but the dark red has faded to light red on one side and yellow on the other, indicating that one side was exposed to light for much longer. The fame of the football team meant that its local moniker, Barça, became indelibly associated with its success story, and this is printed on both sides of the ball, together with the club’s launch year, 1899, along with the club’s shield and a set of player signatures printed as part of the design. Initially I could only make out one of the signatures, which was thanks to him having printed as well as signing his name: “J.Alba 18.” Jordi Alba was a famous landmark of the club, a left-back who played for Barça between 2012 and 2023, and whose shirt number was 18. The others that I could eventually make out were goalie Ter-Stegen, and players Pedri, Kessie, and Lewandowski, and the only season in which all these players were together was in the 2022-2023 season.
It seems, therefore, that my ball is only about three years old, which is no great surprise, and means that one of my neighbours must have lobbed it there and couldn’t be bothered to come and ask for it back. A shame really, as it would have been nice to know why Barcelona rather than one of the local or national UK teams.
I didn’t want to spend a long time on it, having already wasted a good 15 minutes on the Barcelona FC site trying to match the player names with the correct squad, and a quick Google search failed to produce a ball exactly like this, even using the ball’s barcode which produced one without the signatures, but they must sell in their 1000s and are low-value items, like everything else emerging from my garden. A nice find, and it was particularly appropriate to dig it up on a sunny spring day that was competing with Mediterranean temperatures.

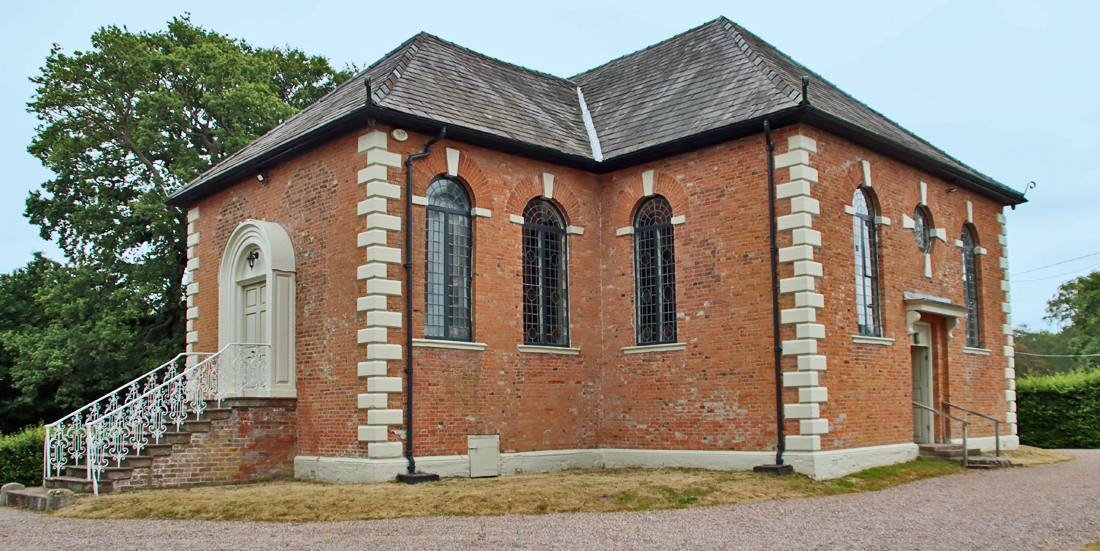
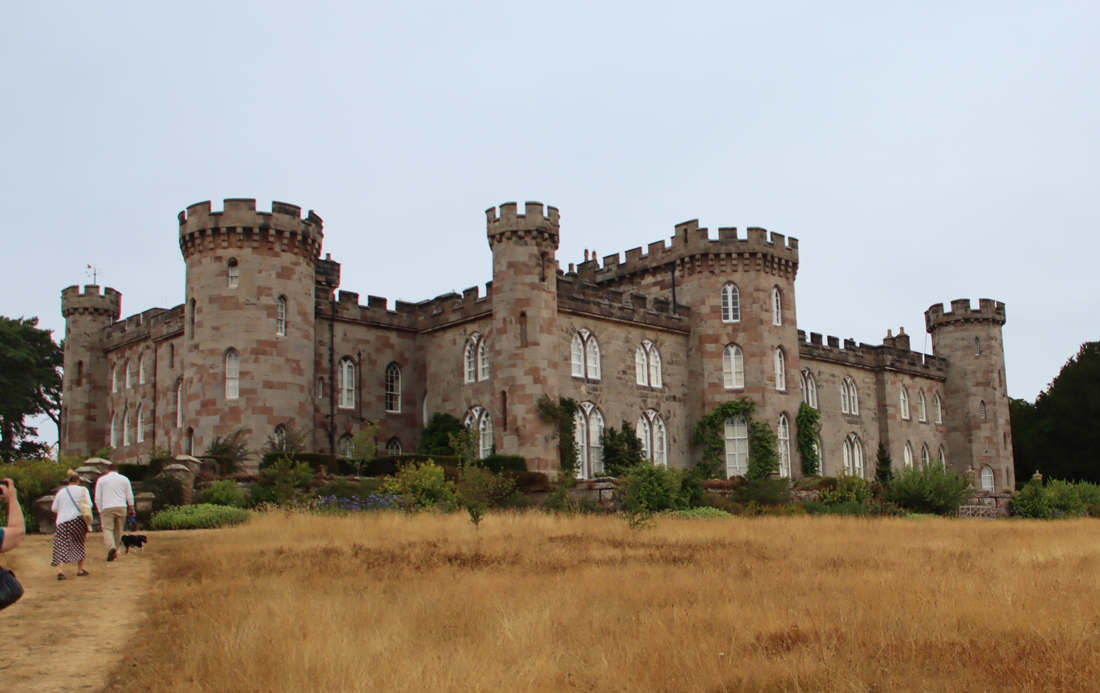
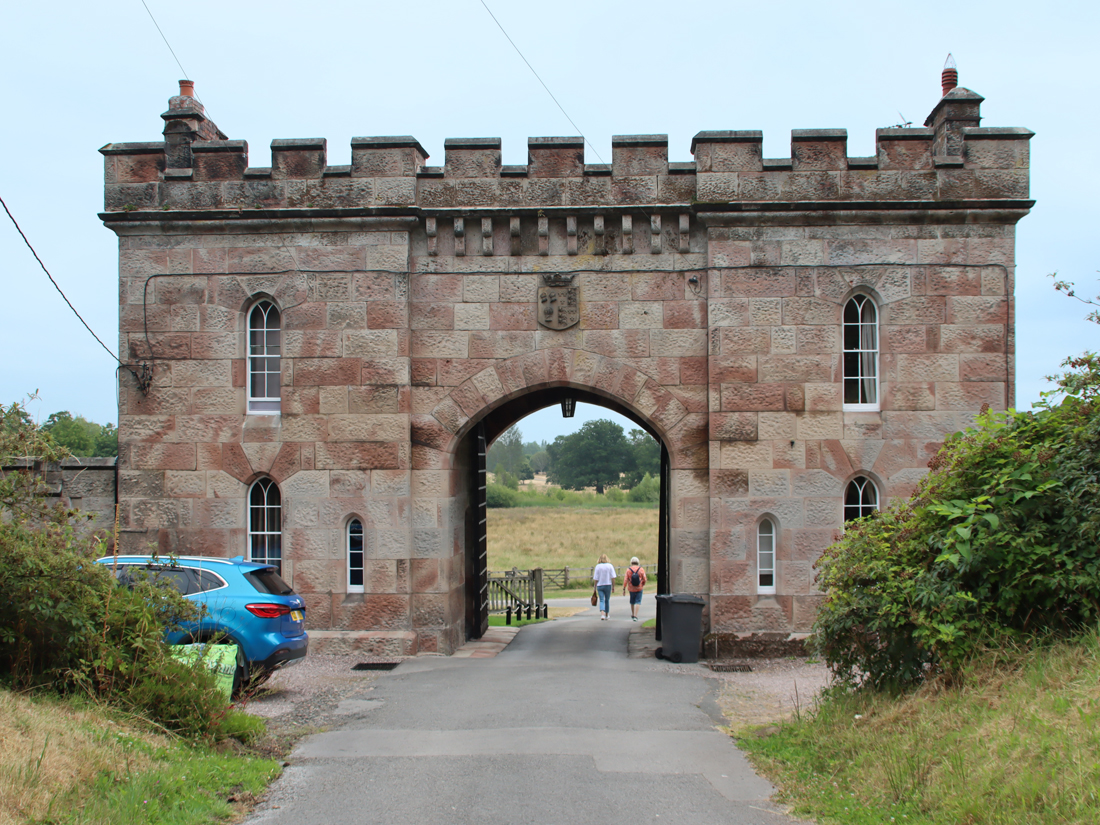
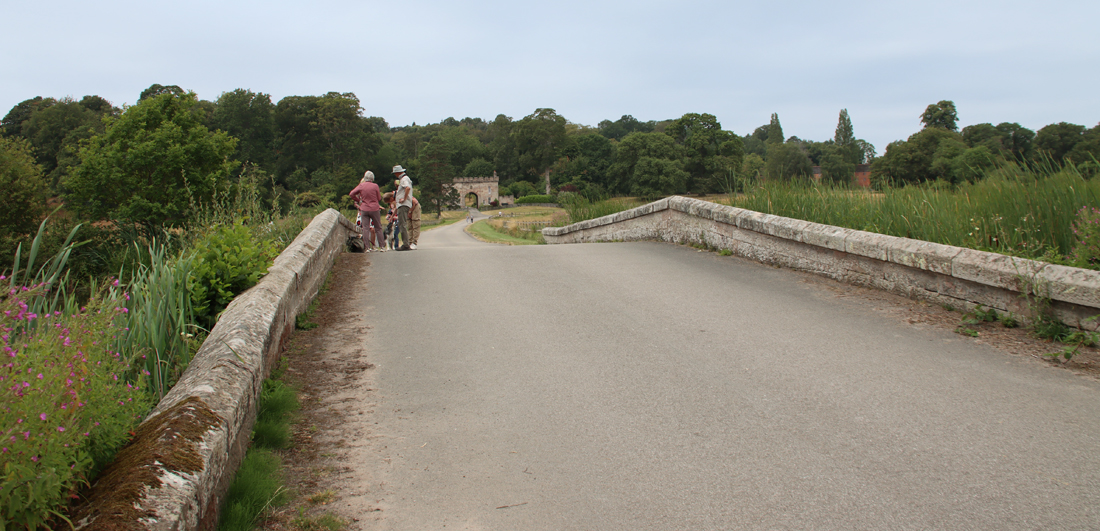
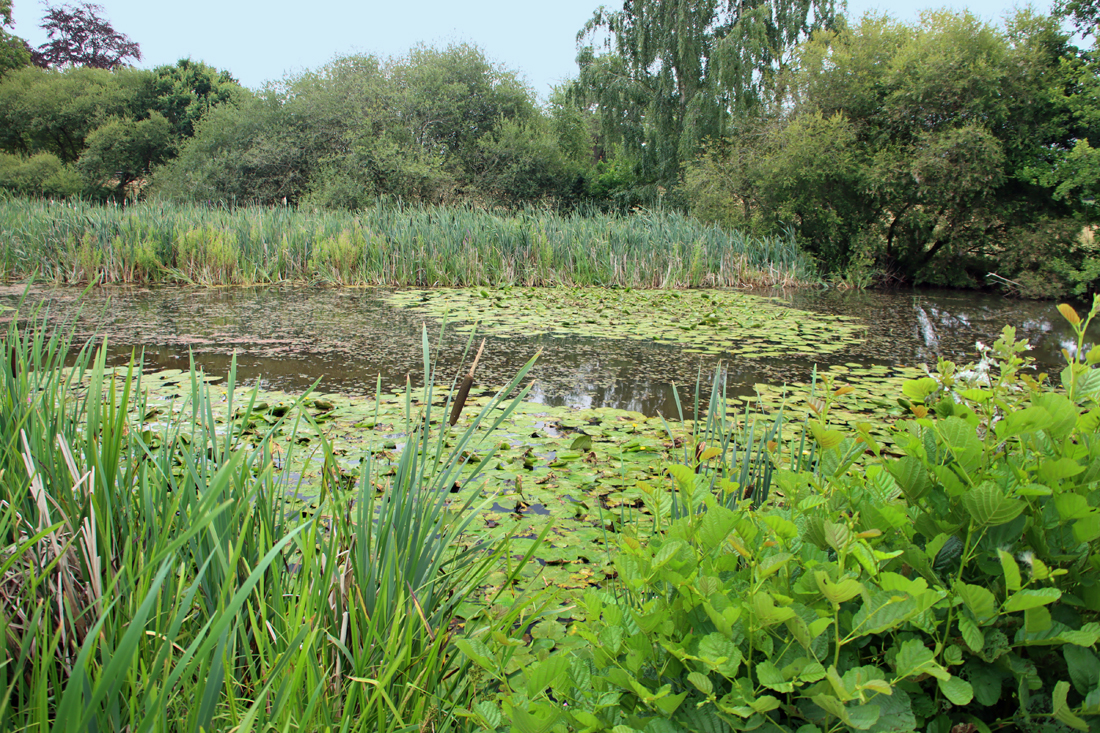
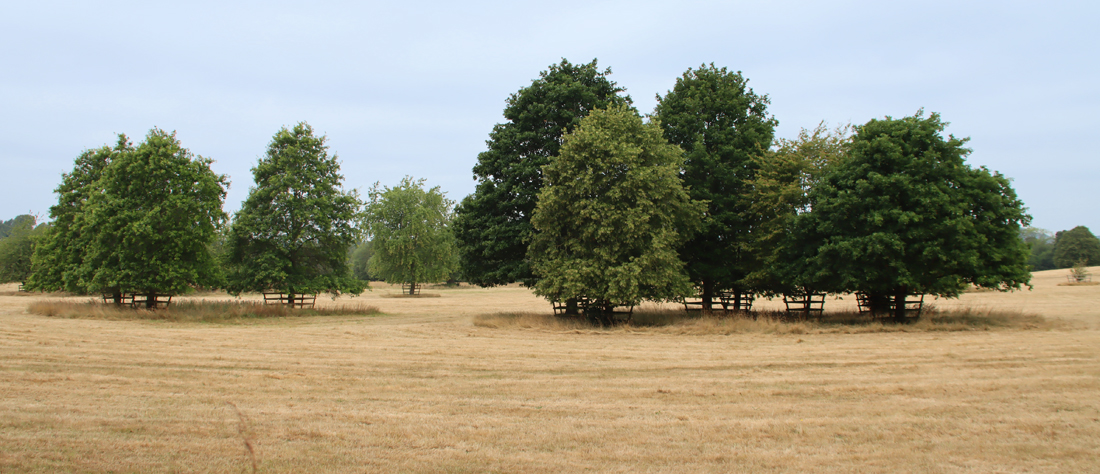
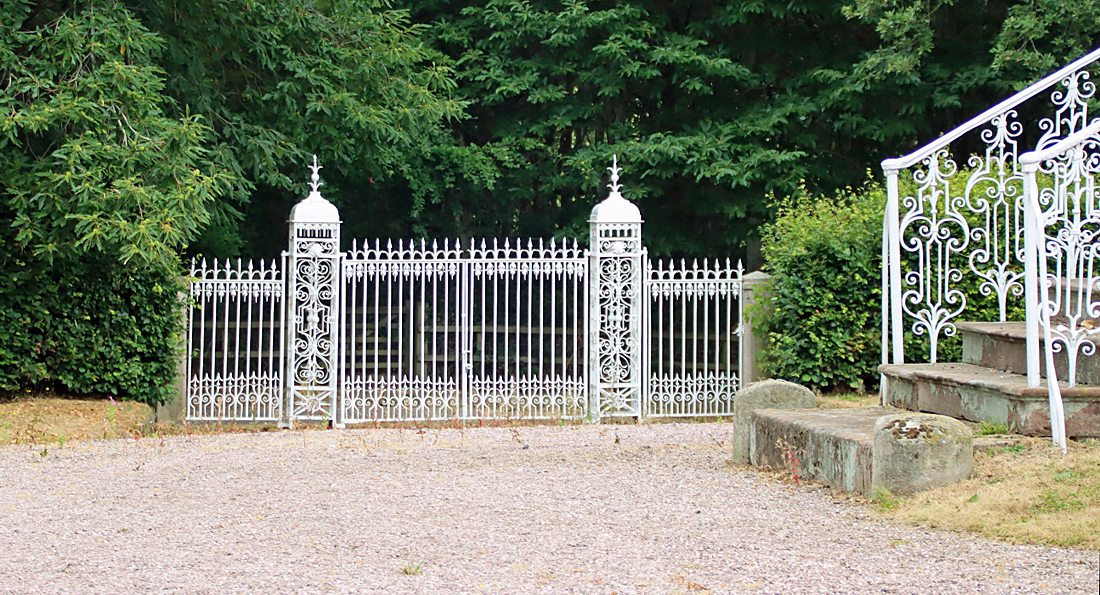
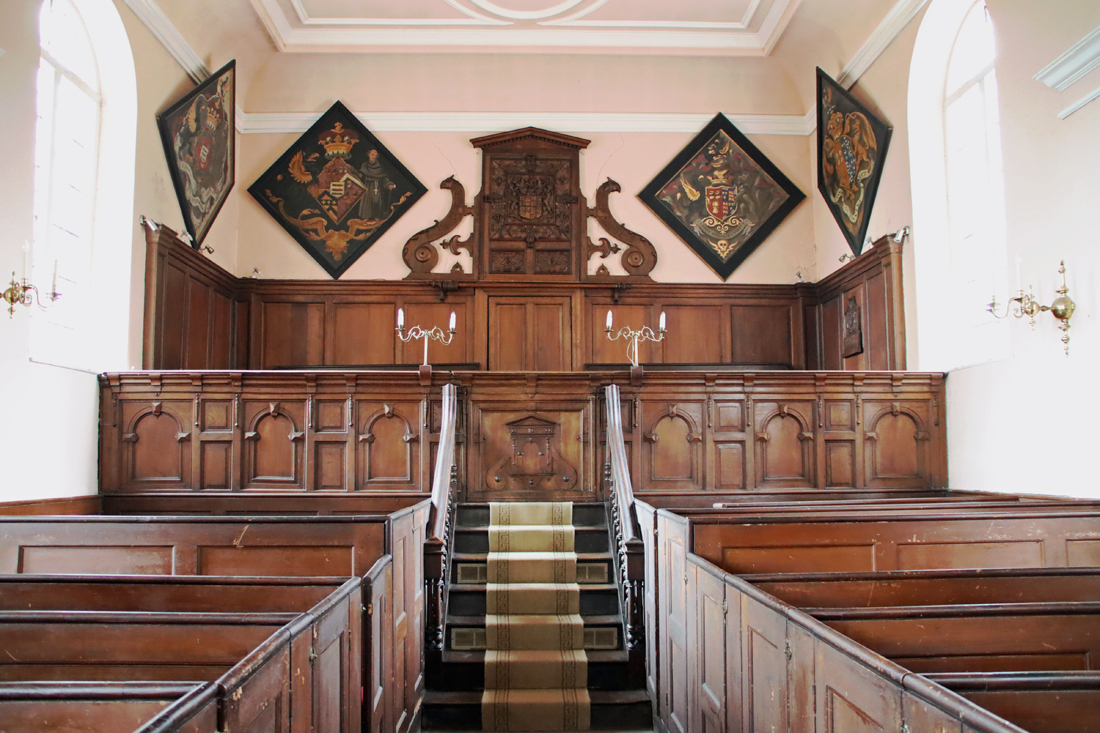
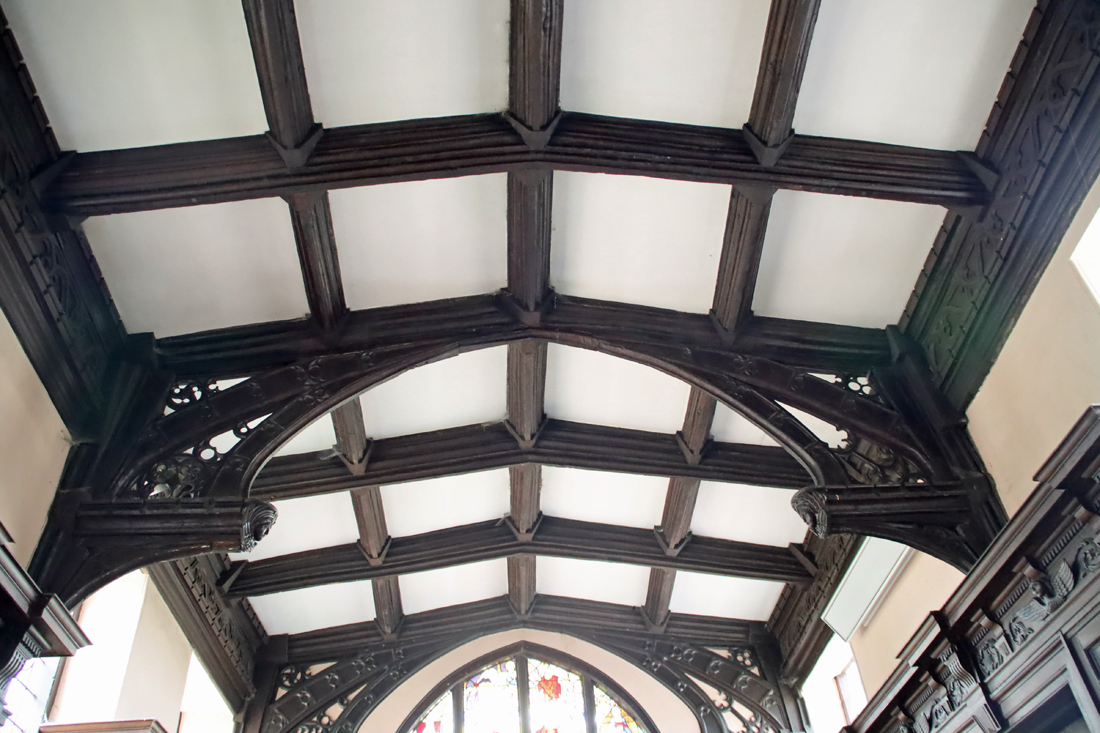

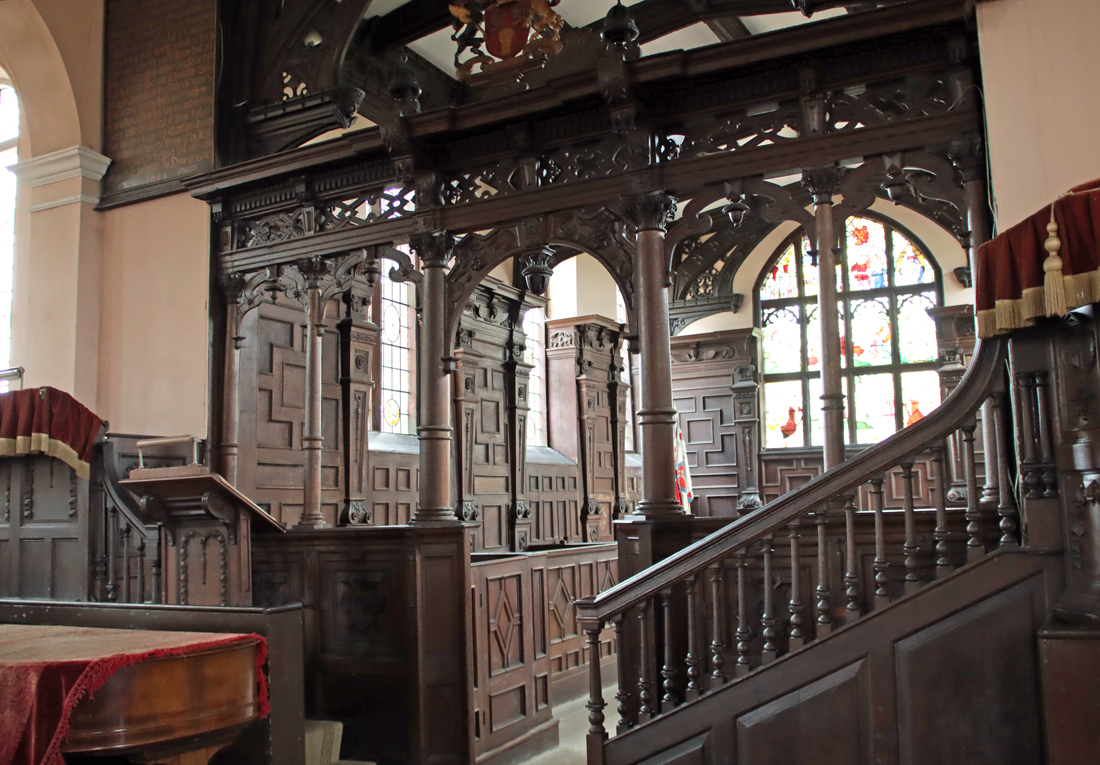
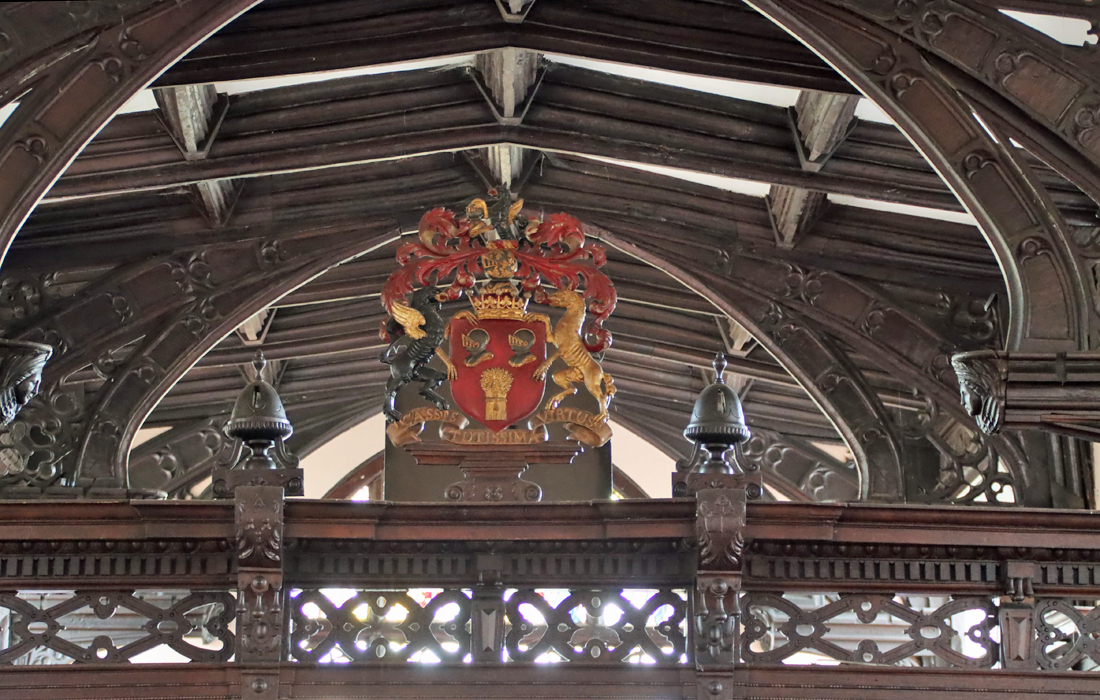
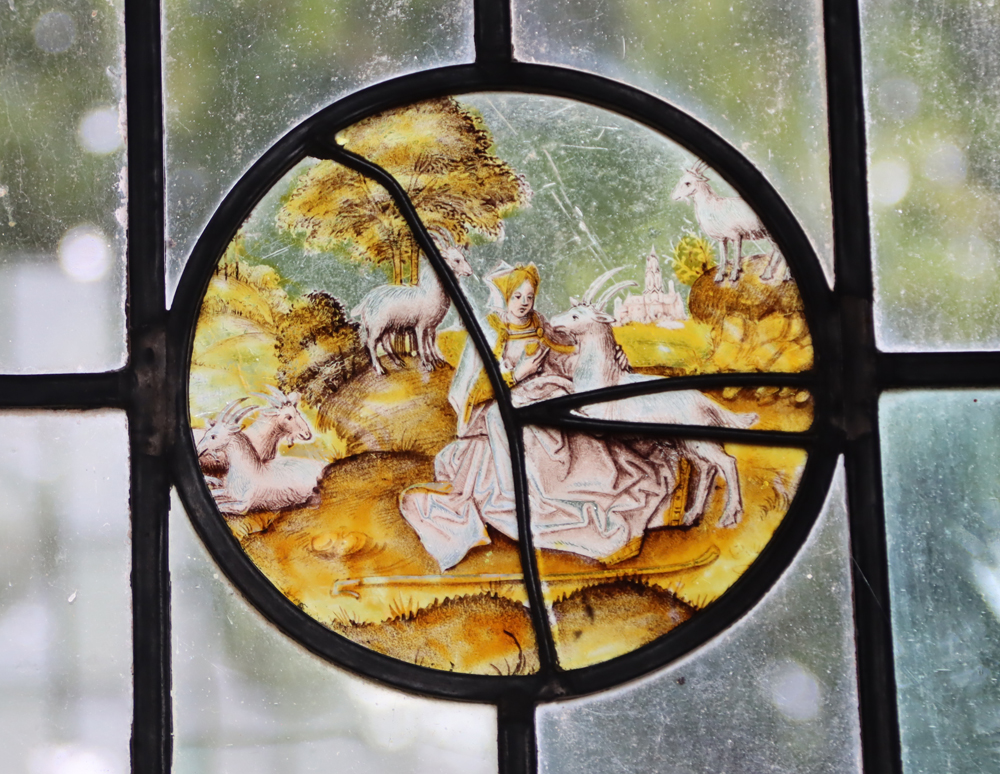
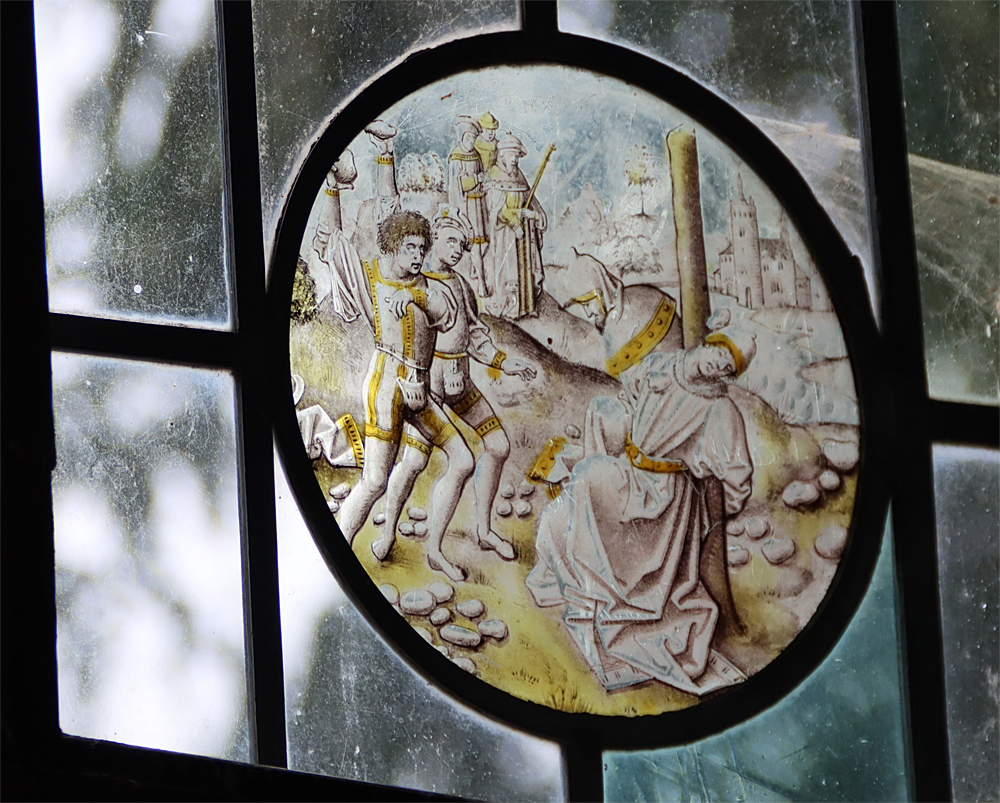
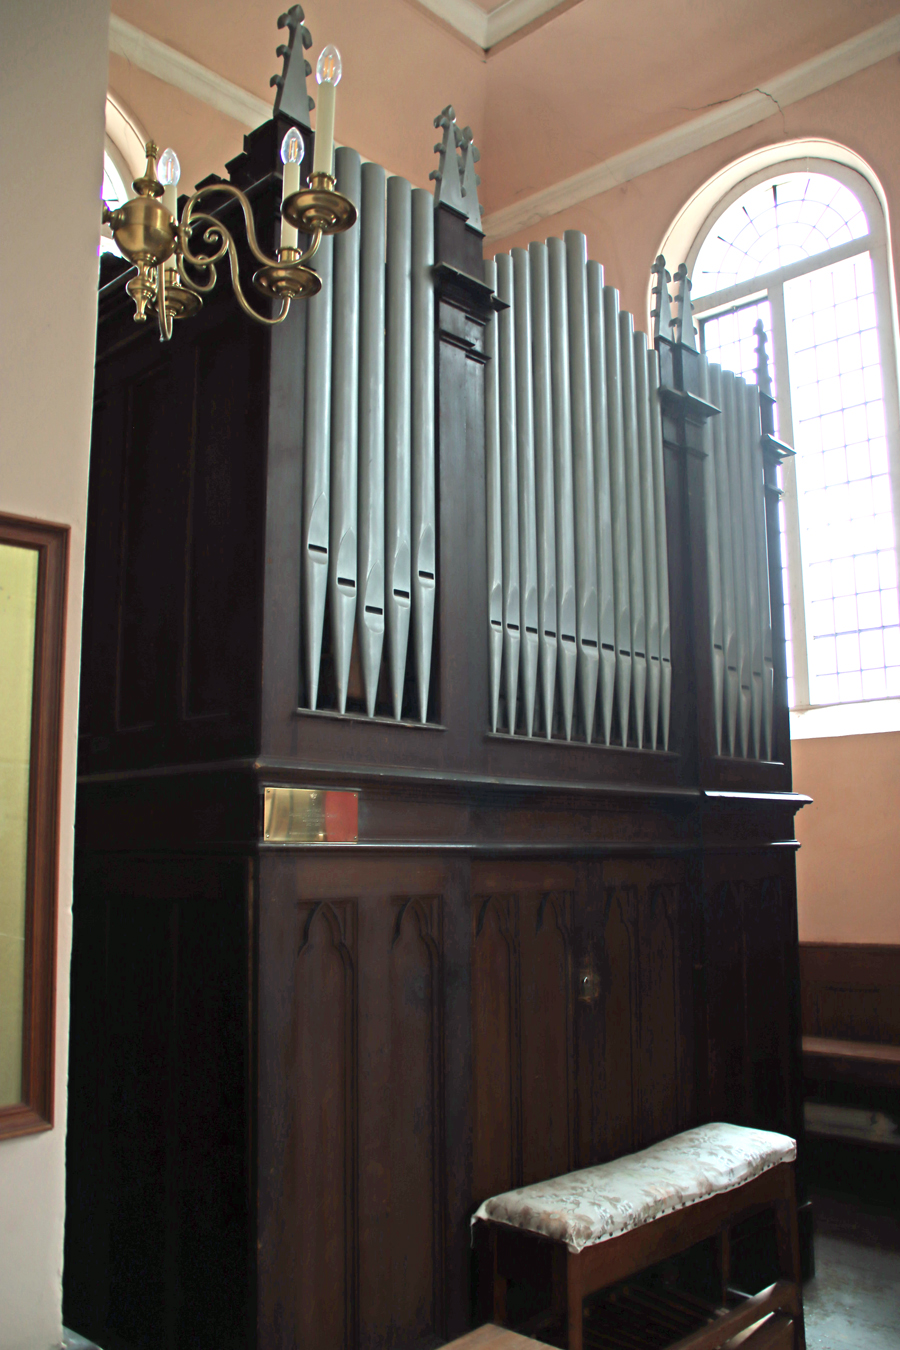
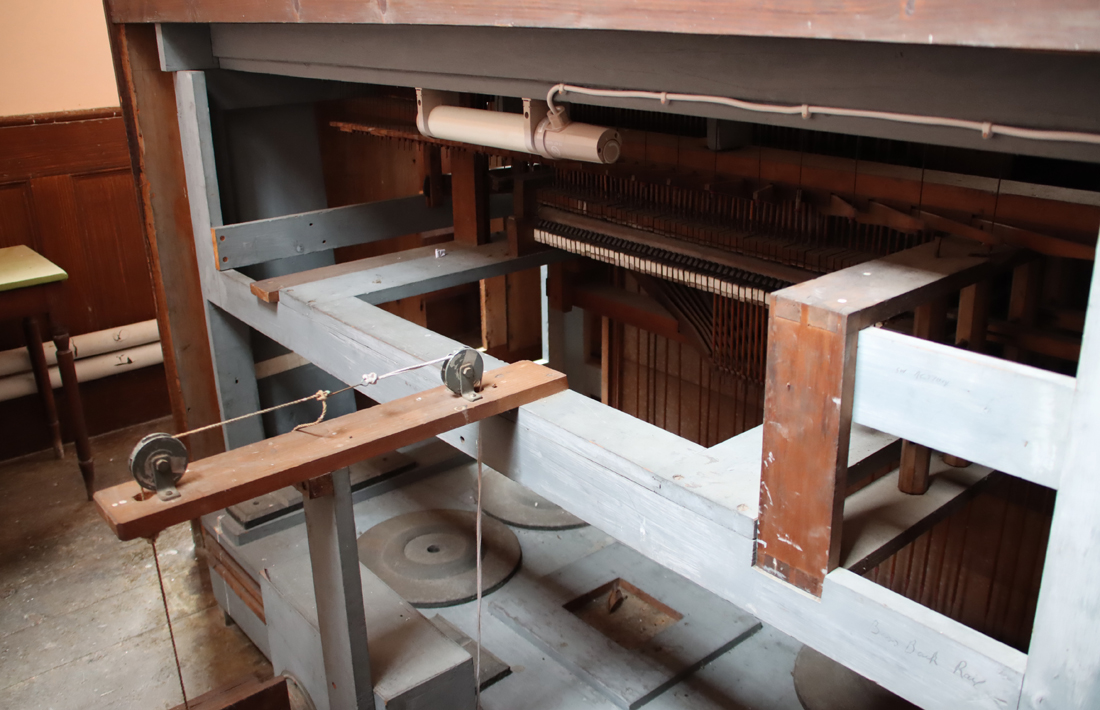

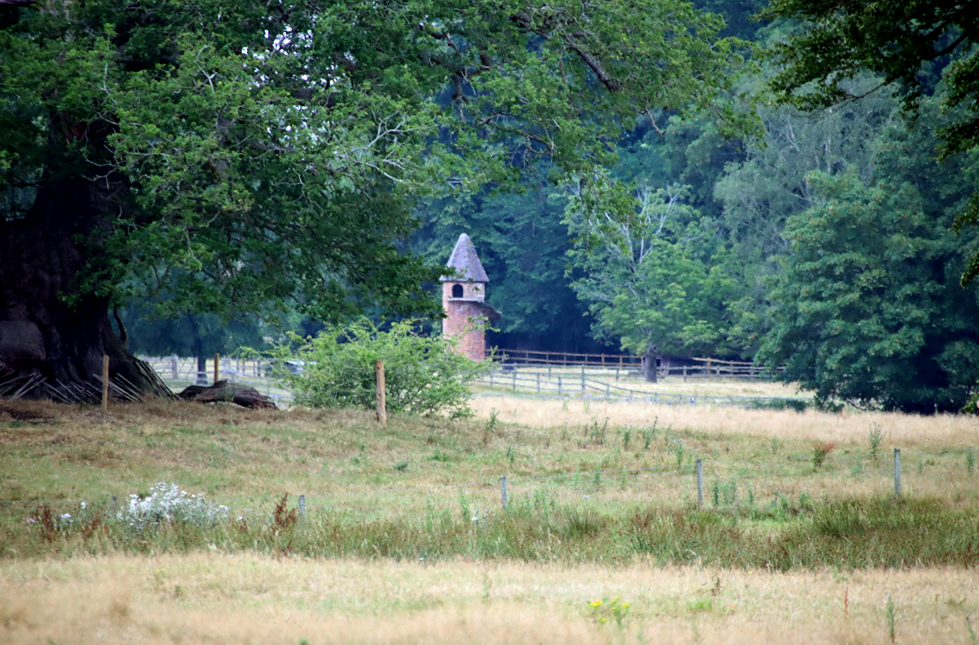
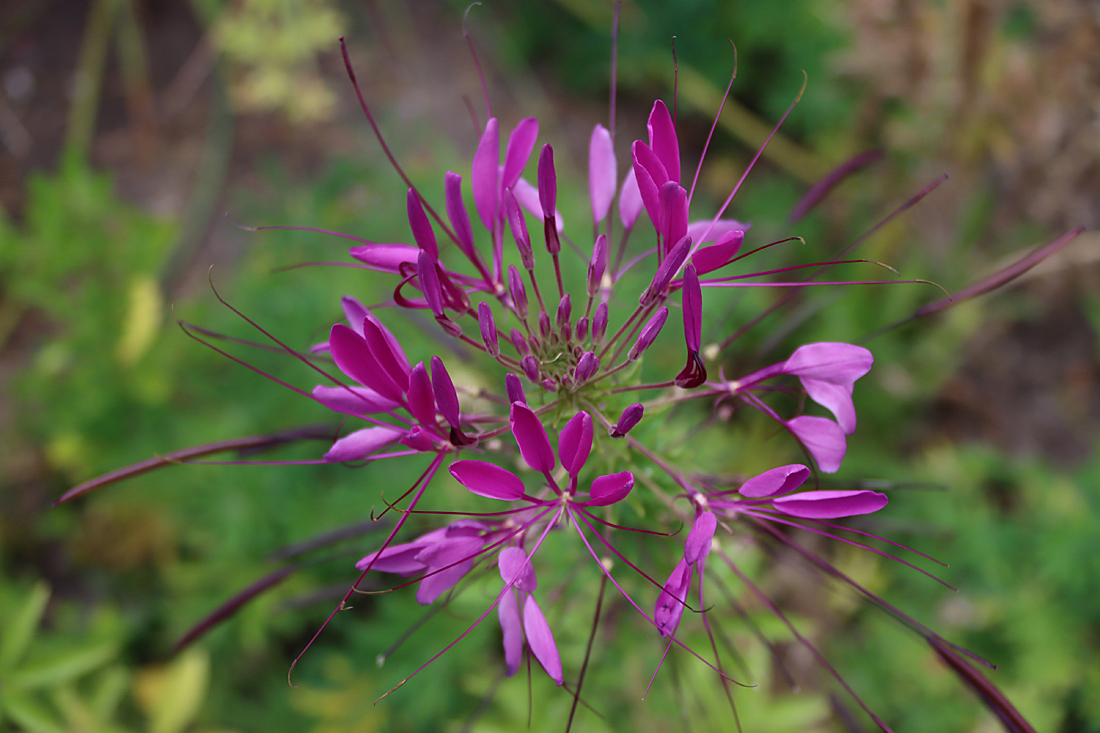
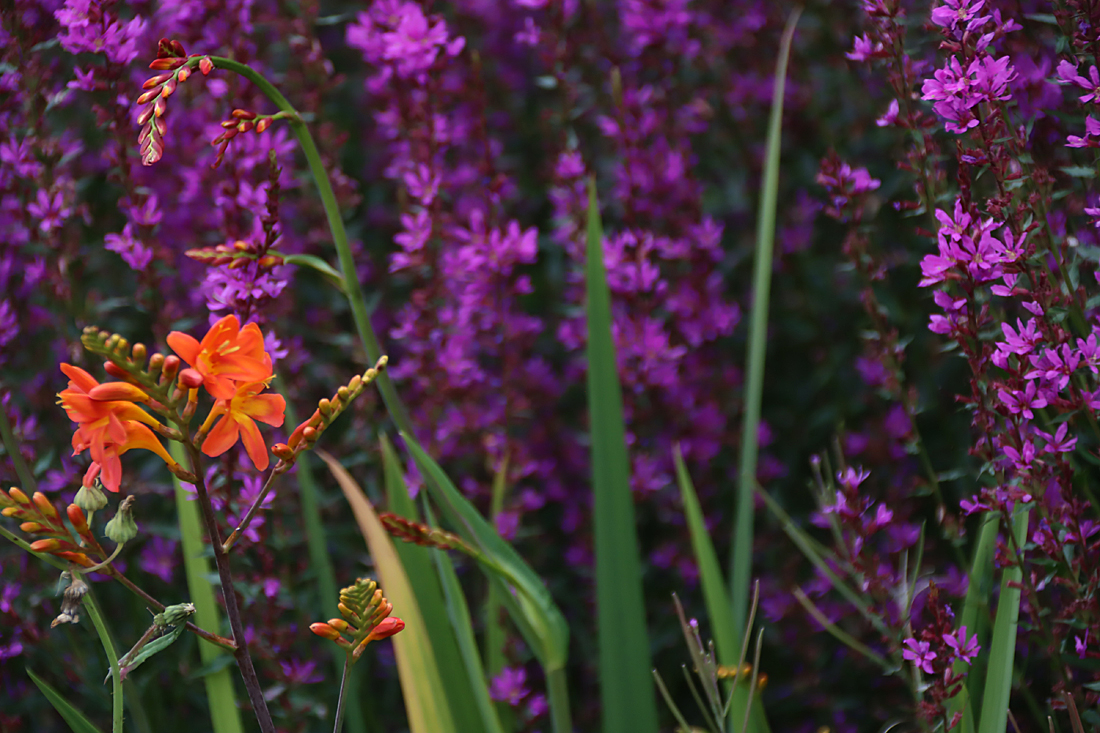

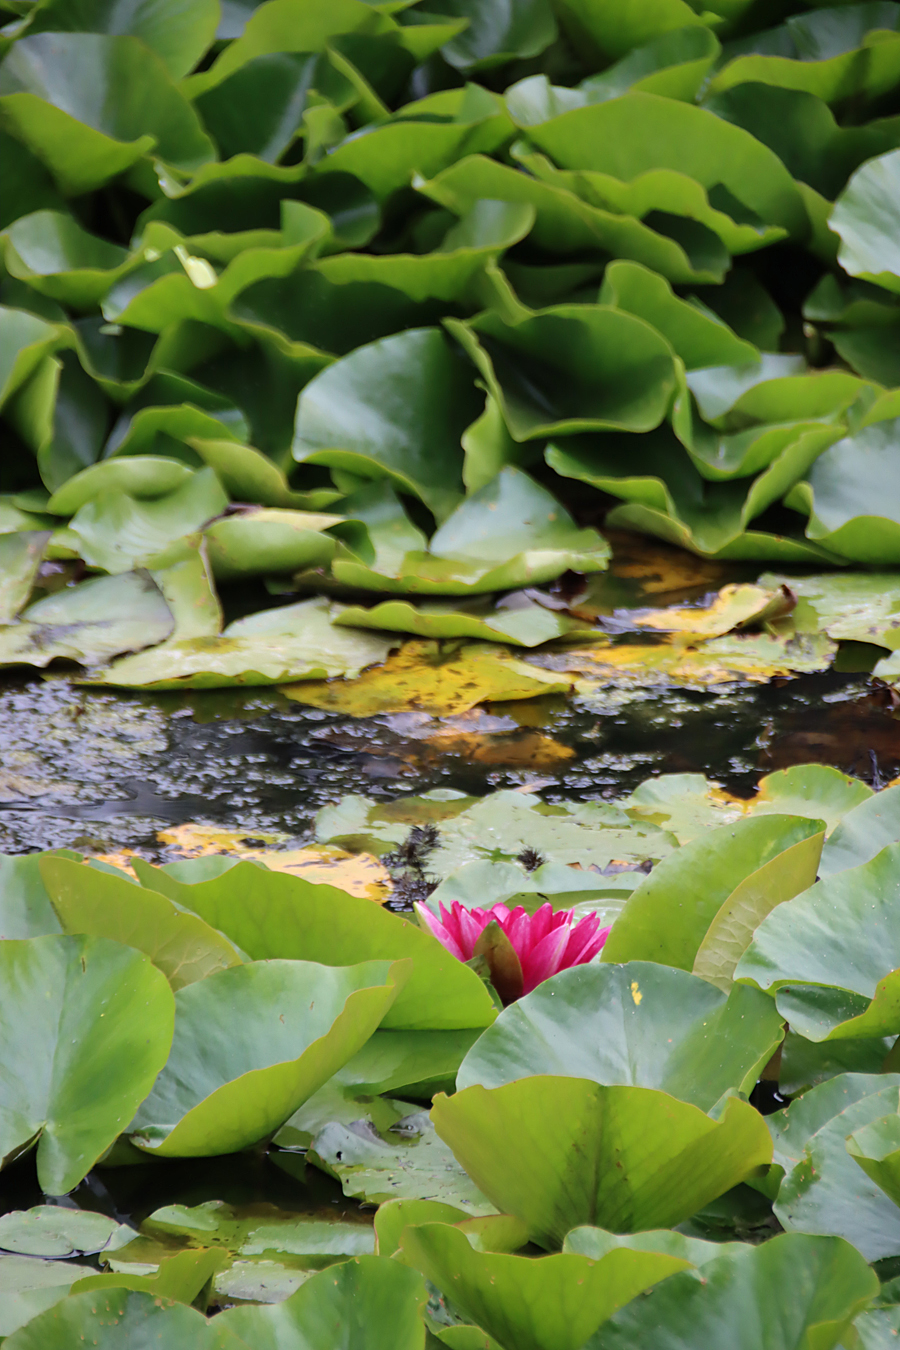
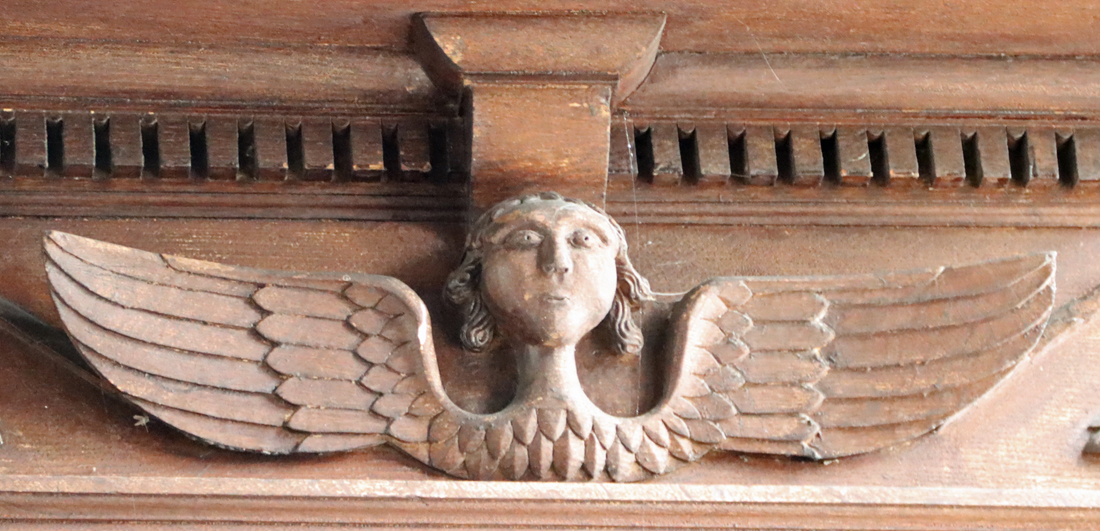
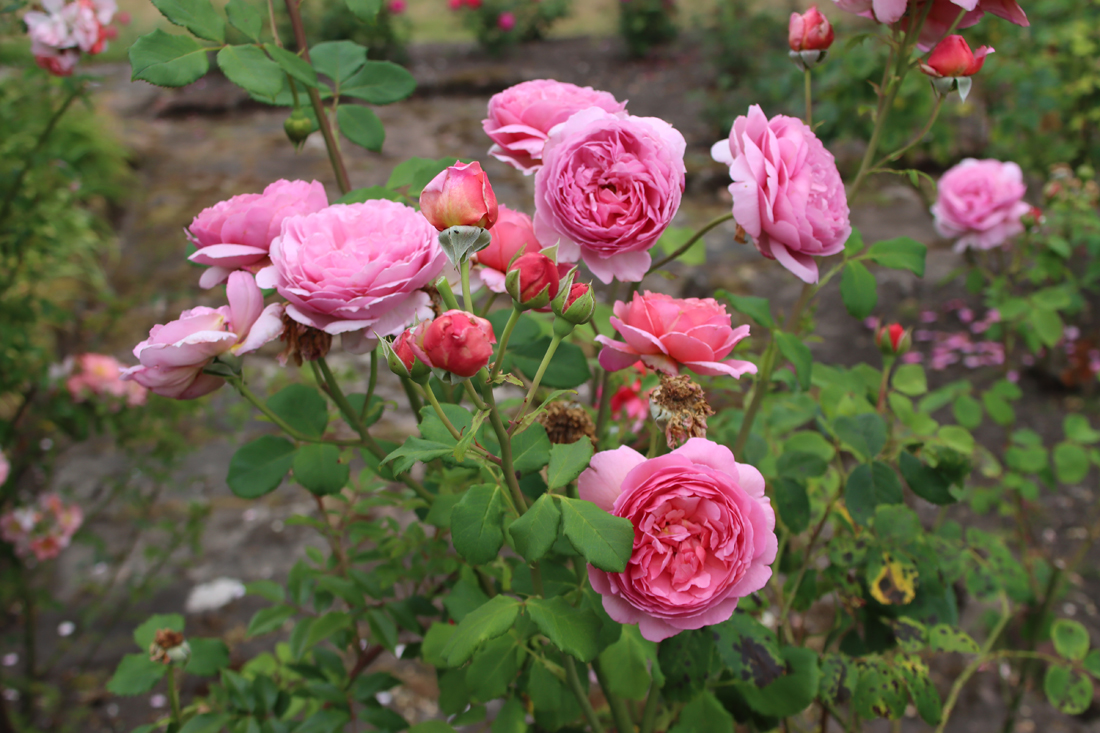
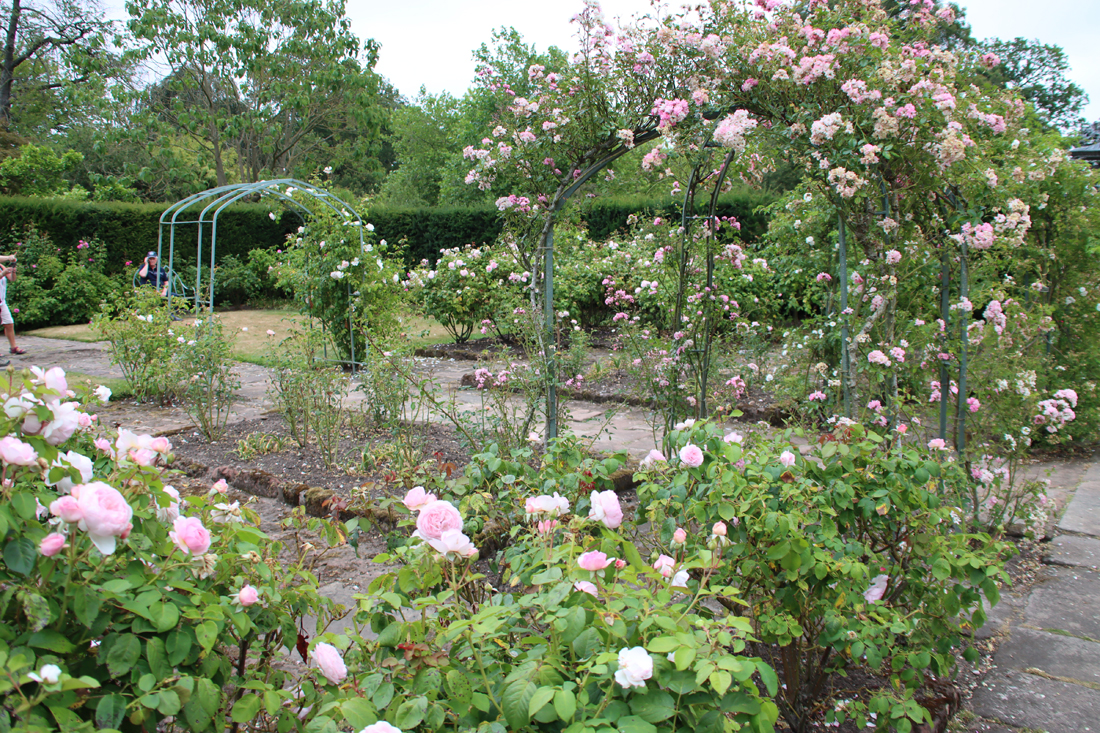
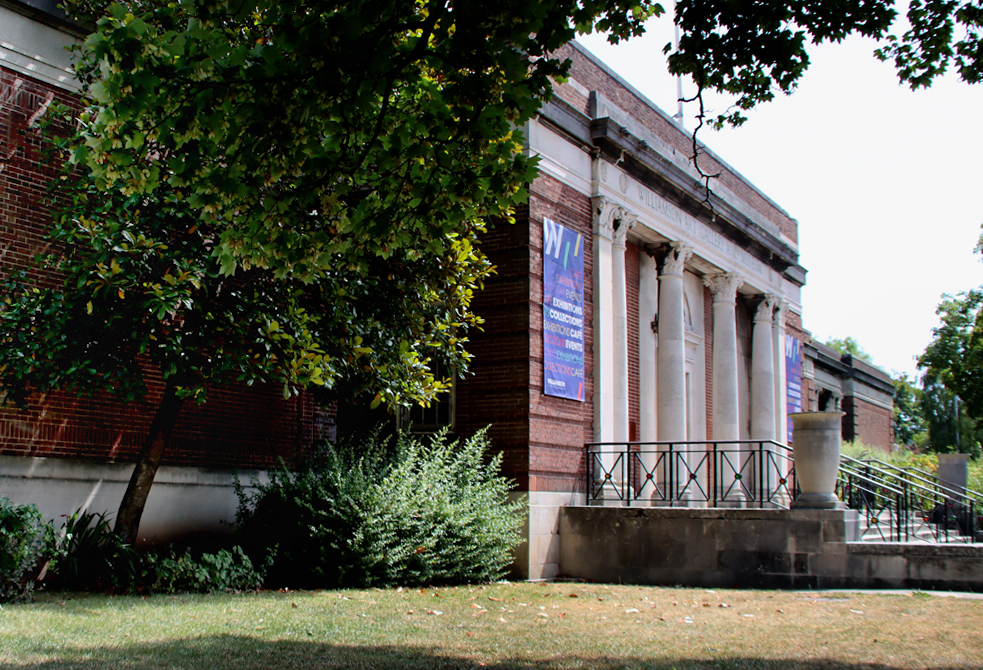
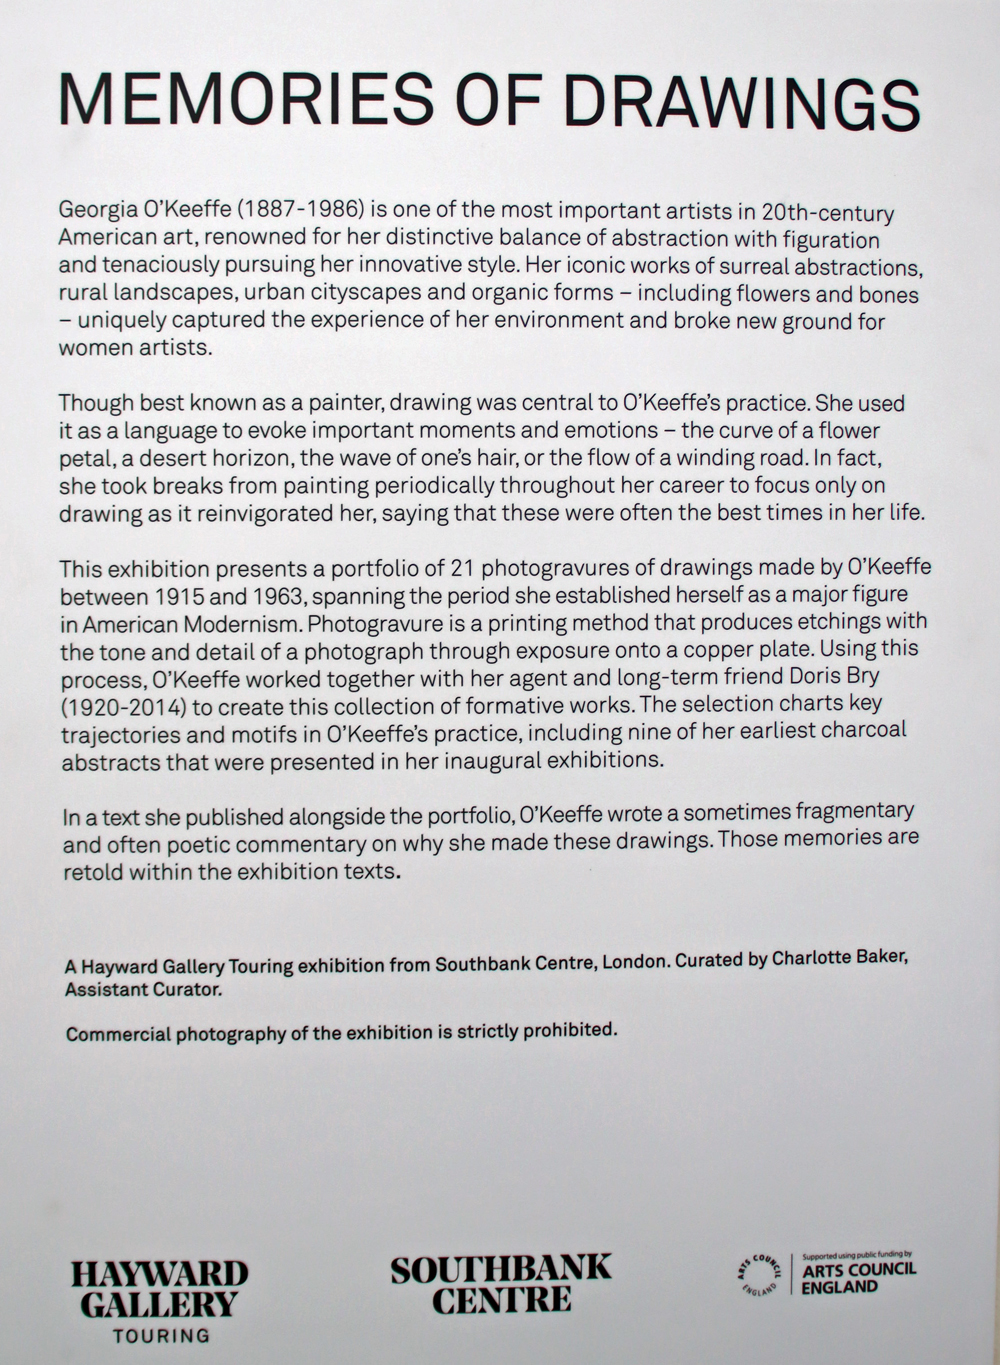
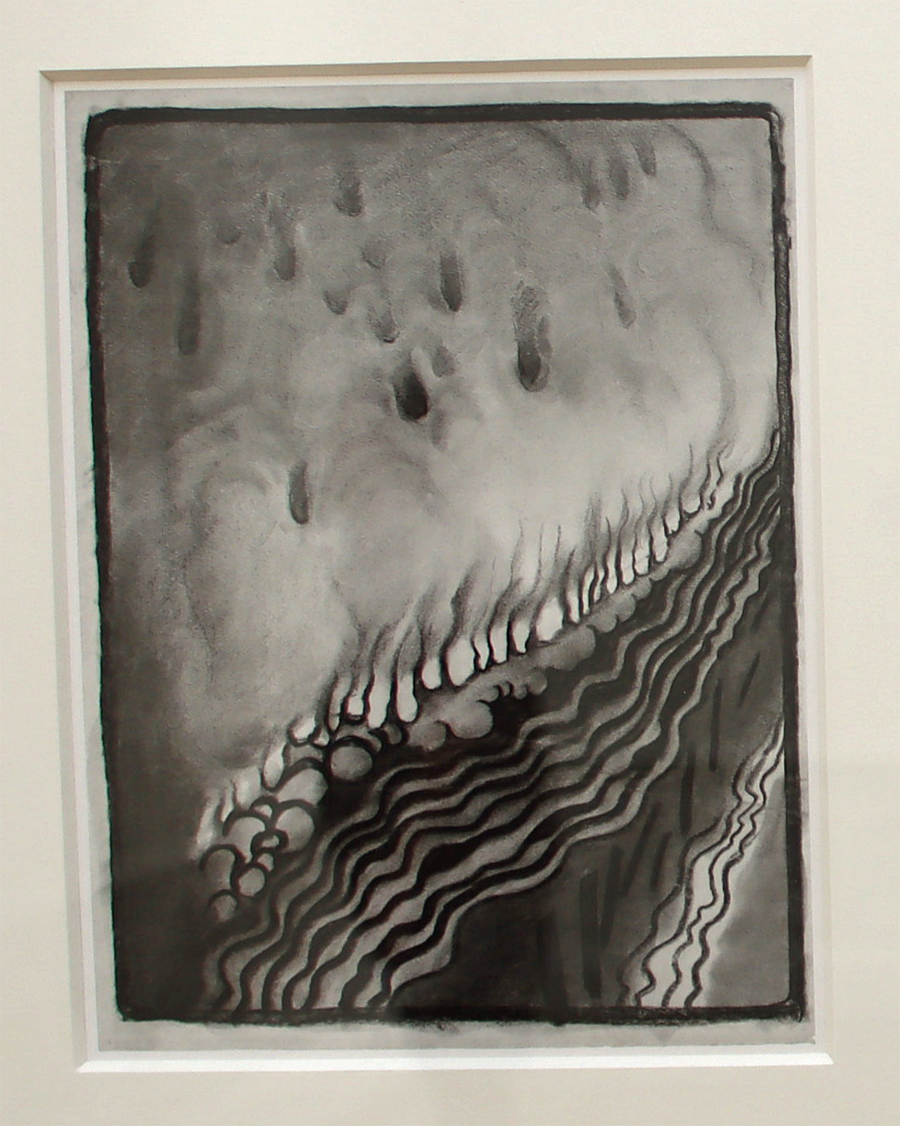
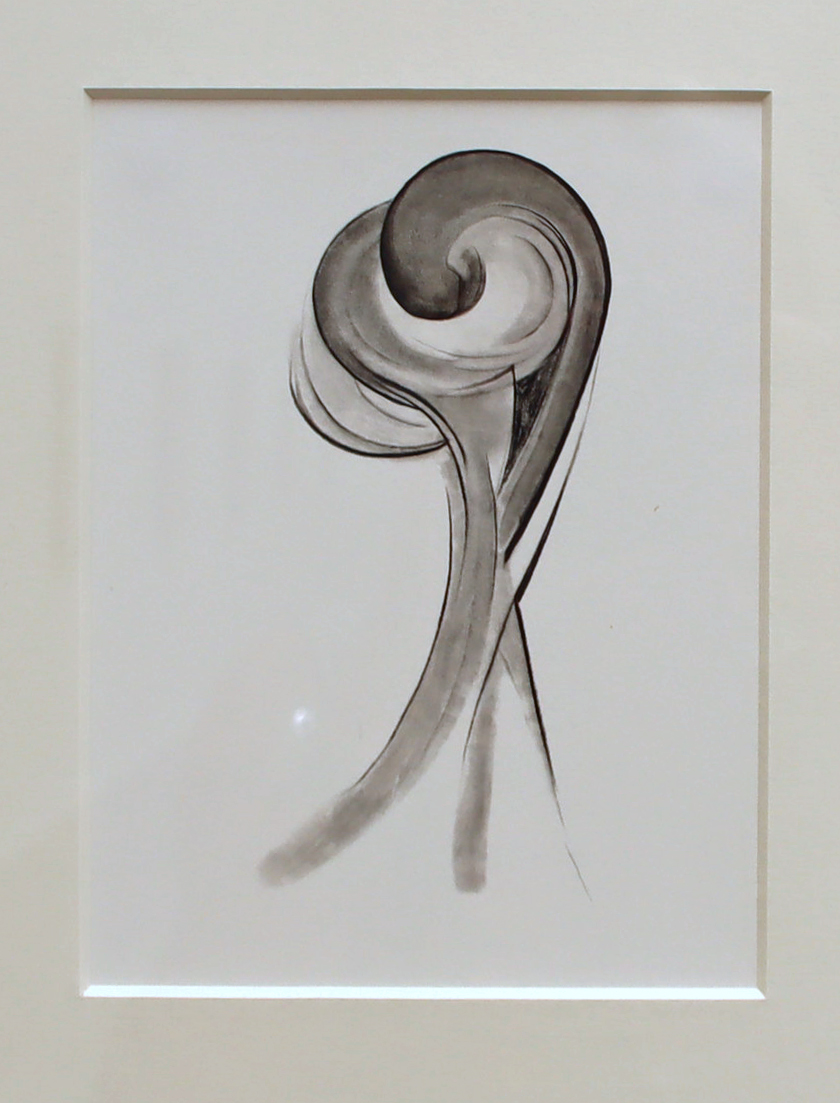
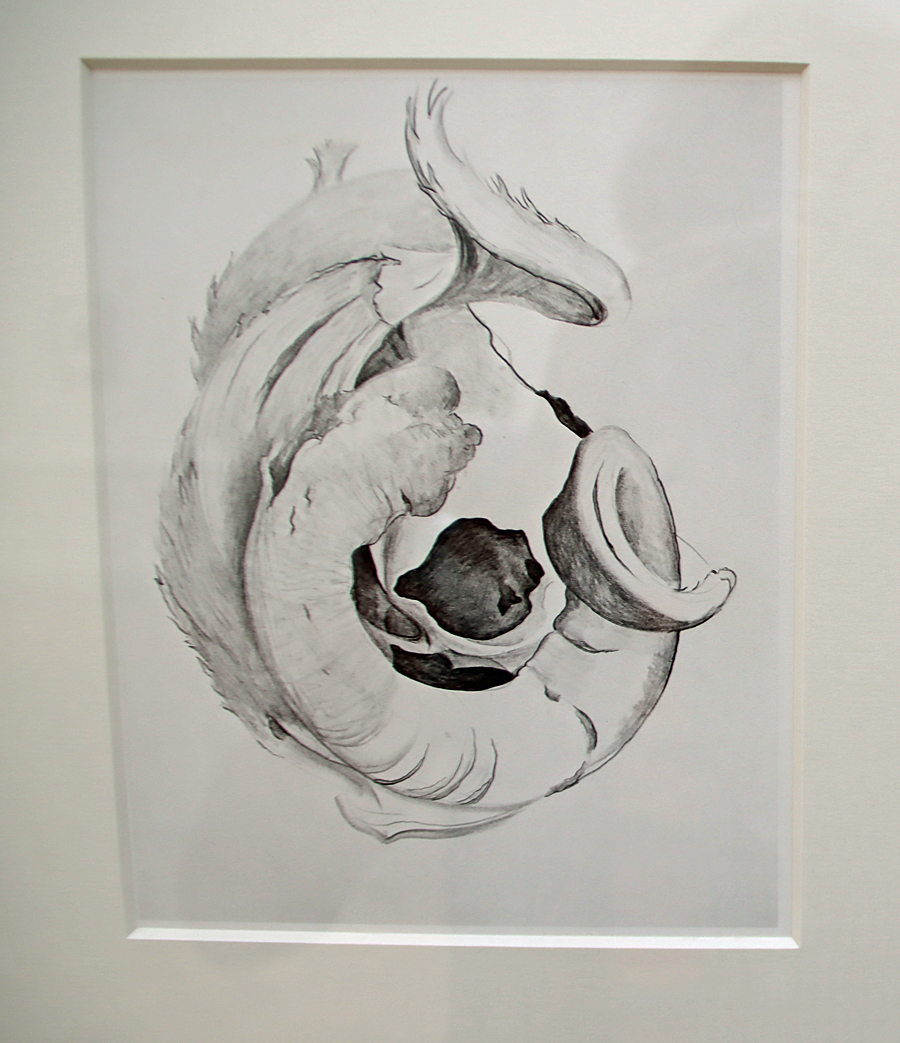
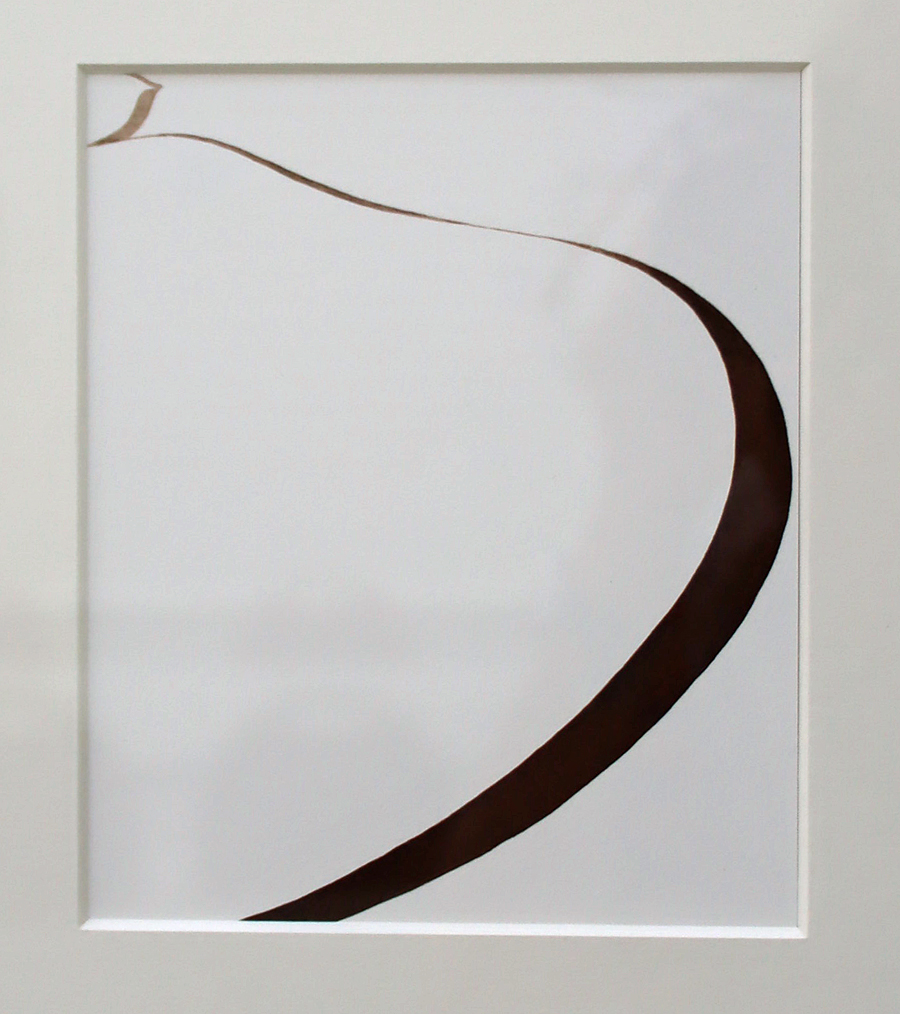

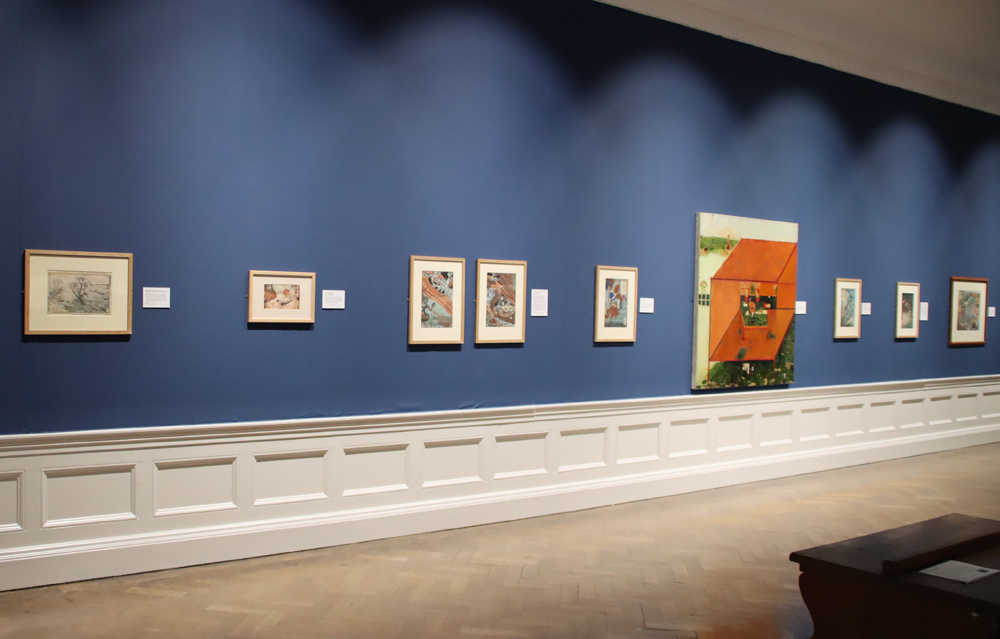

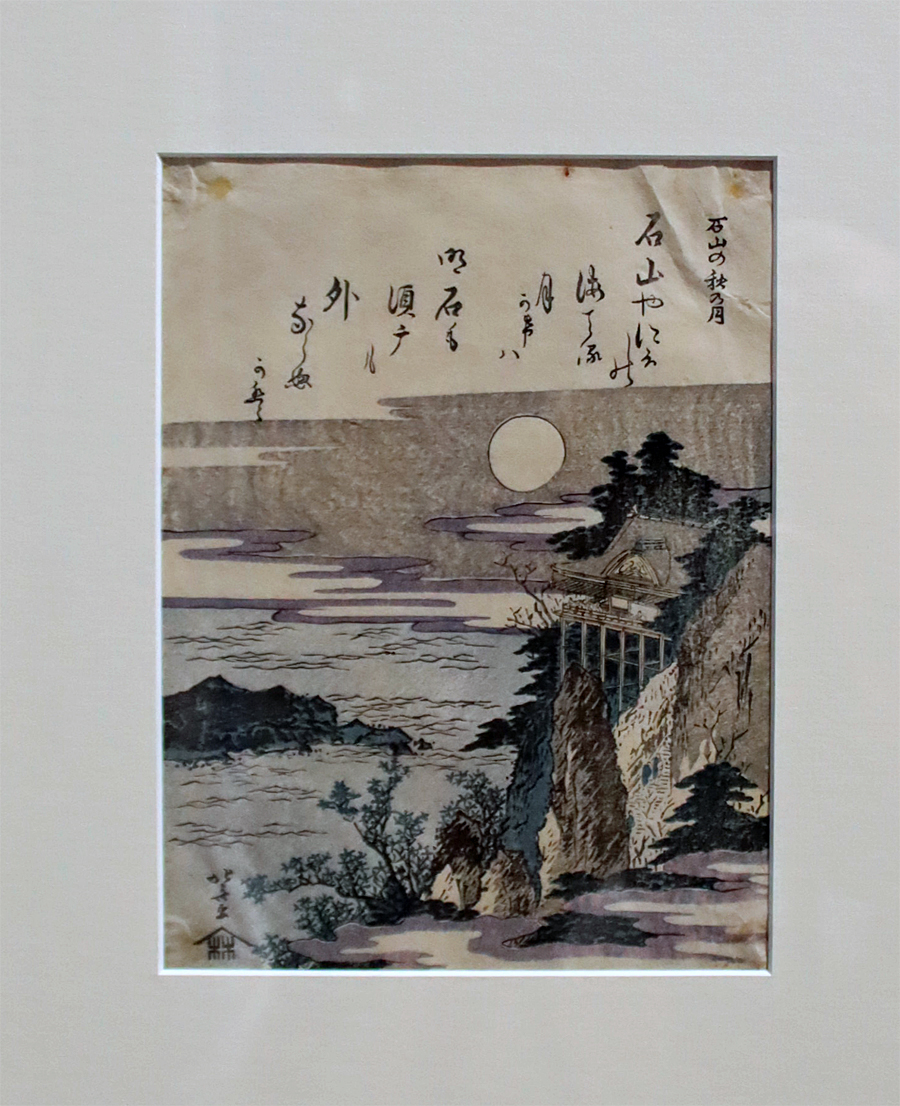
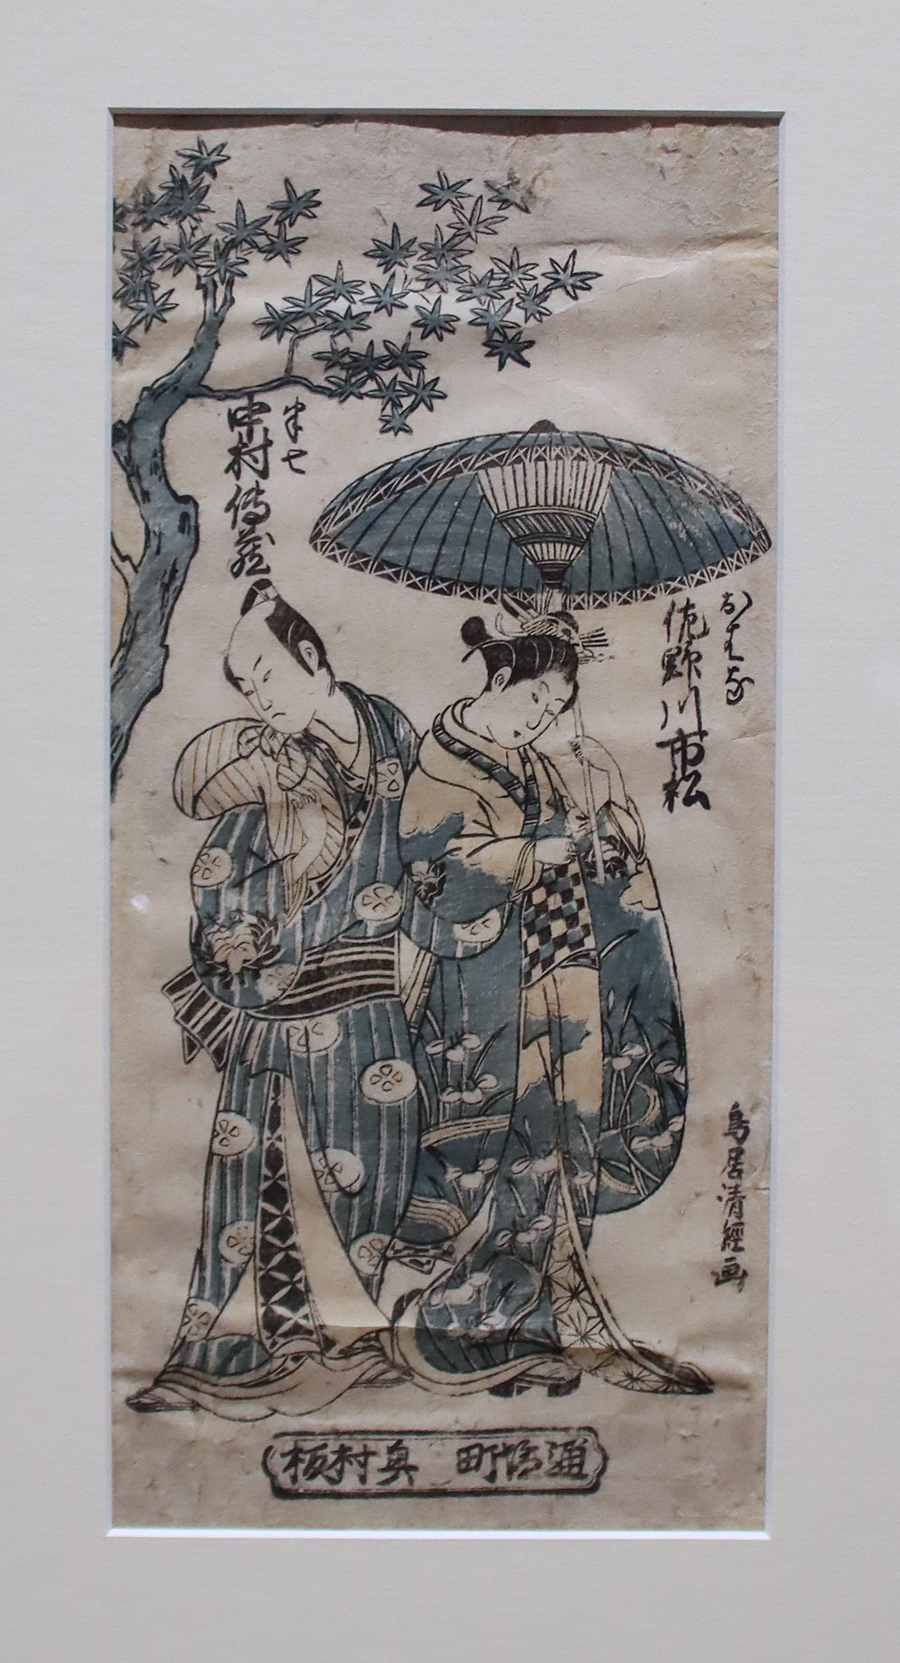
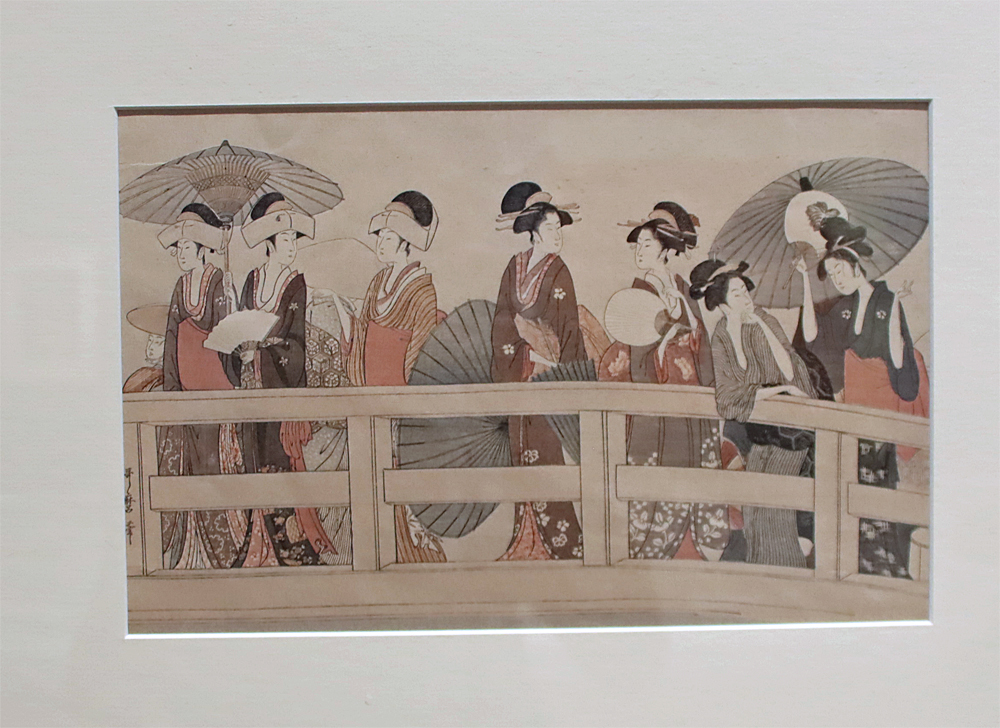

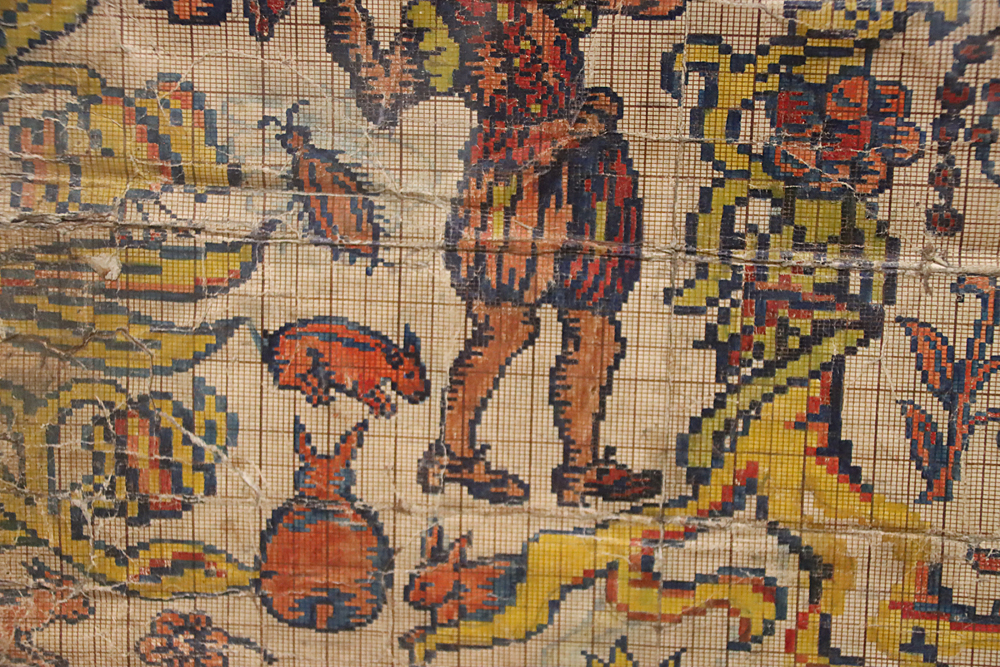
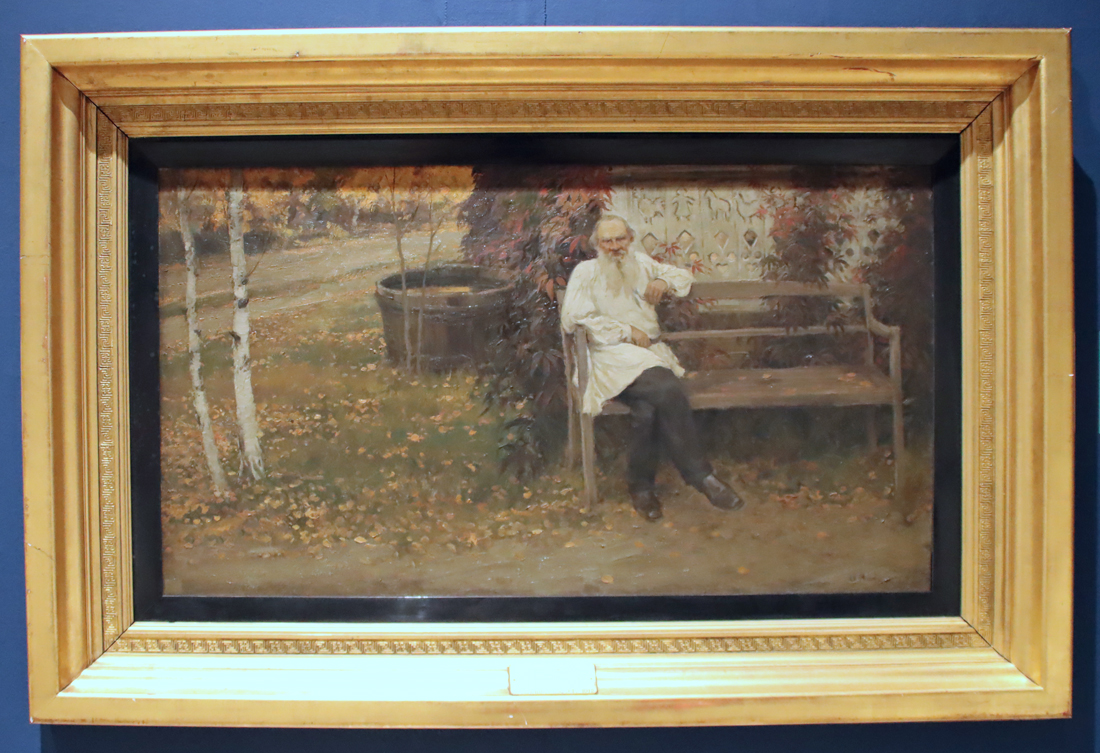

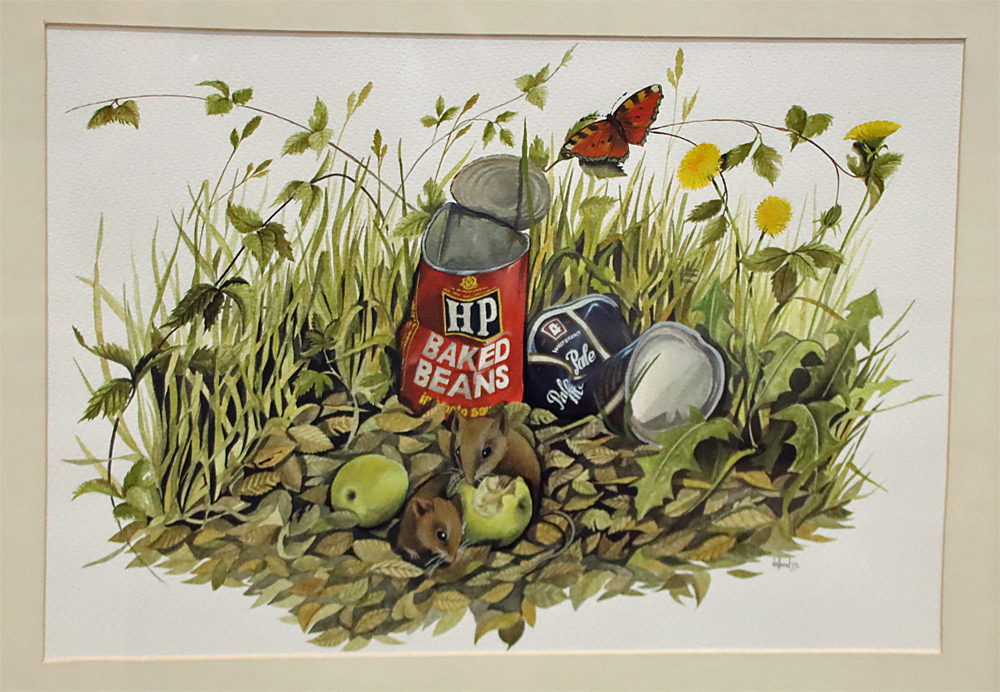
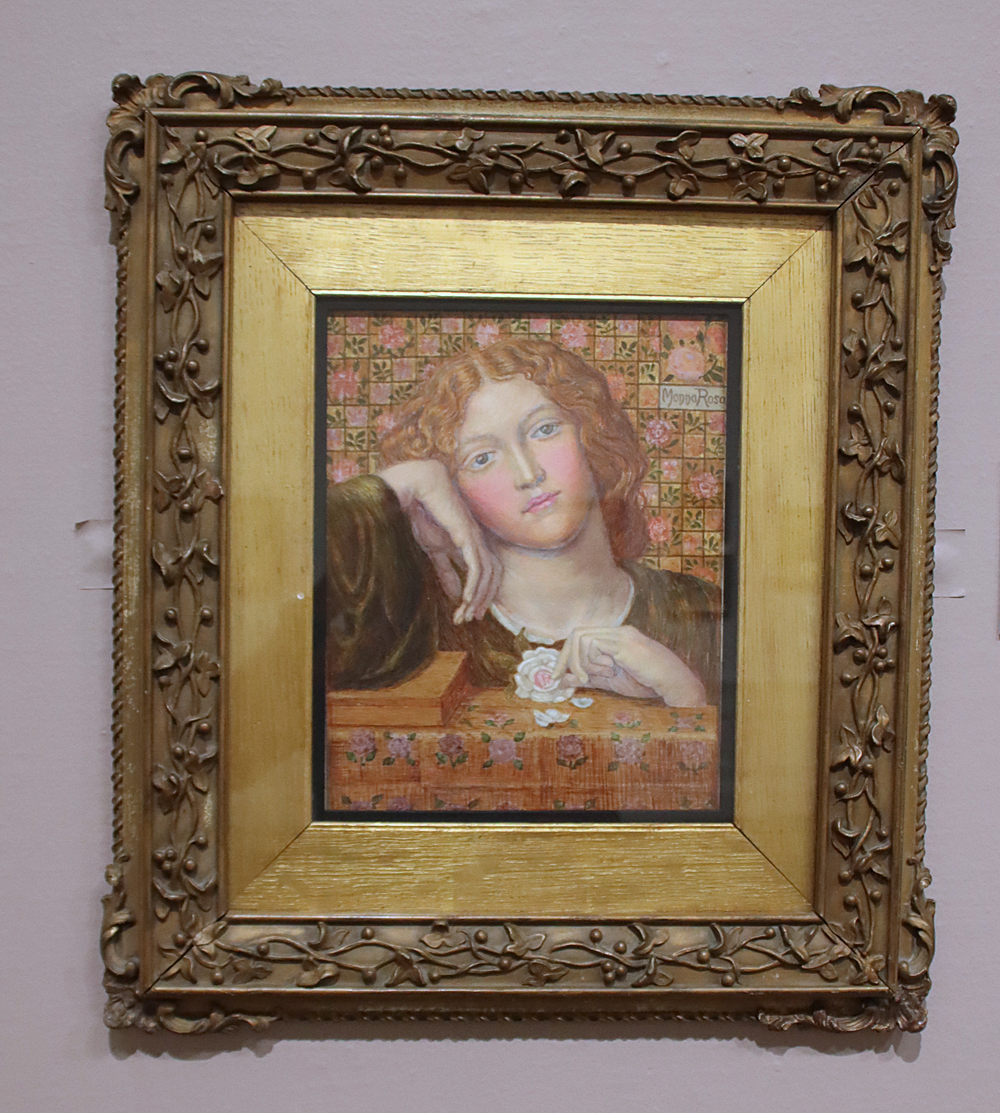
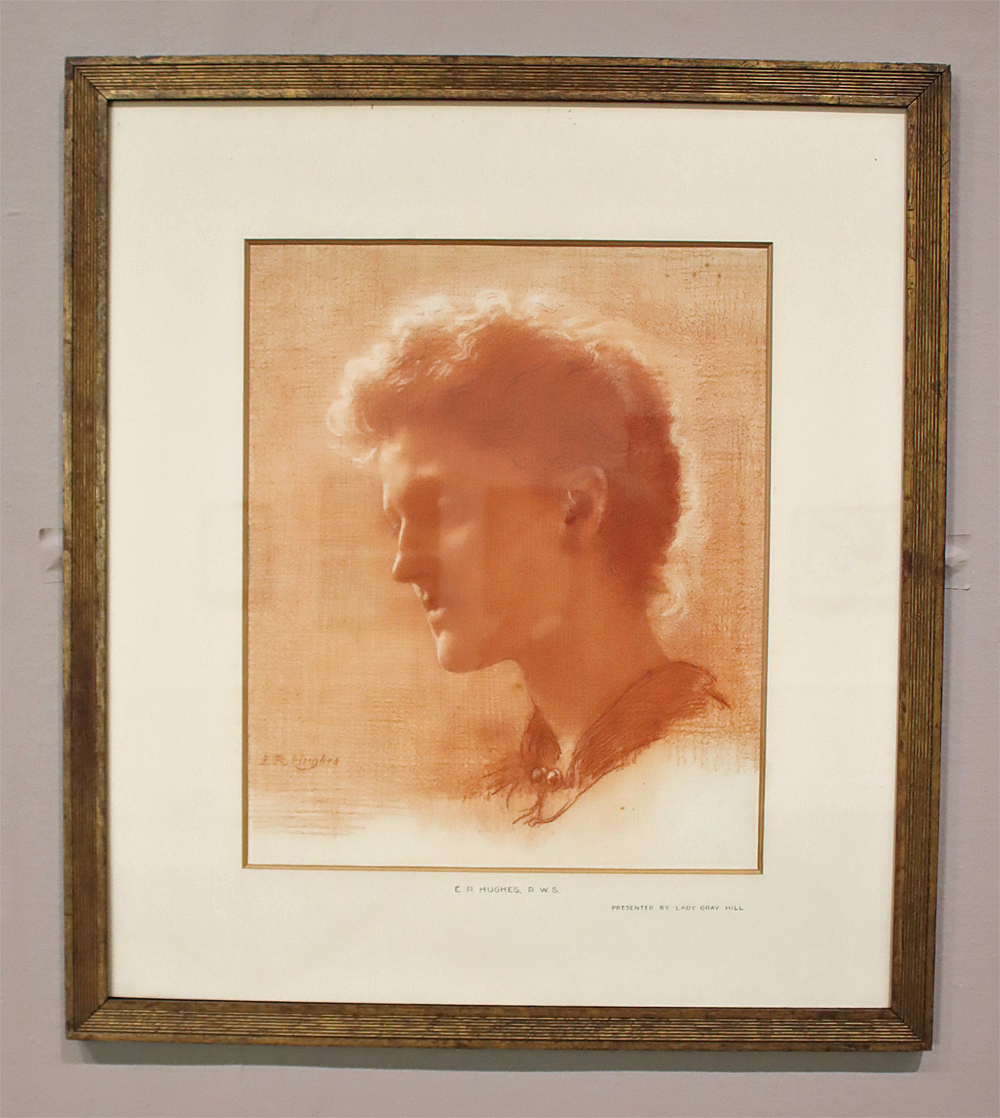
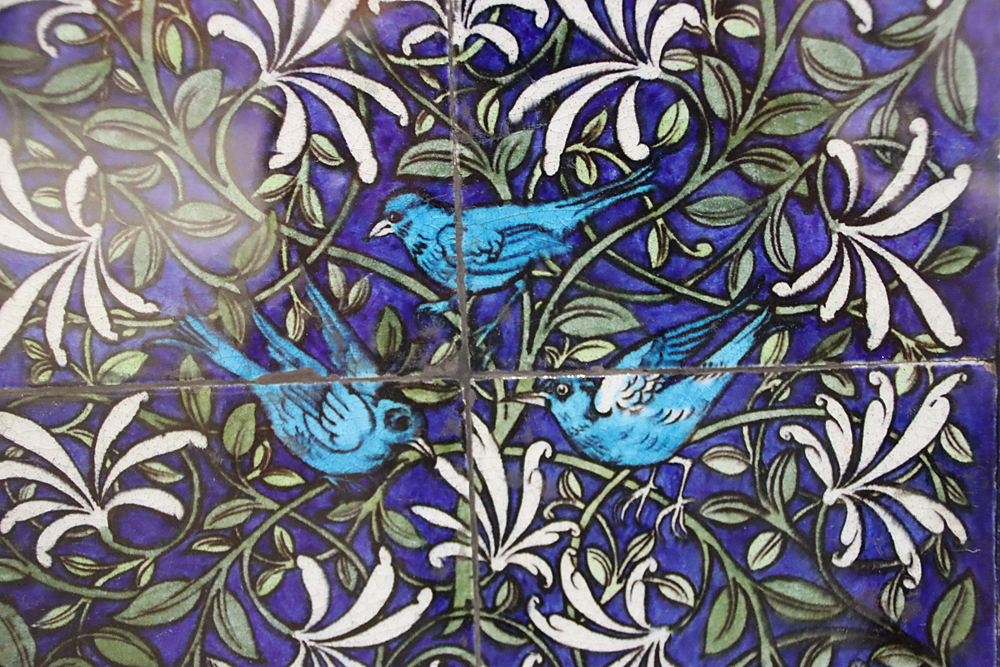
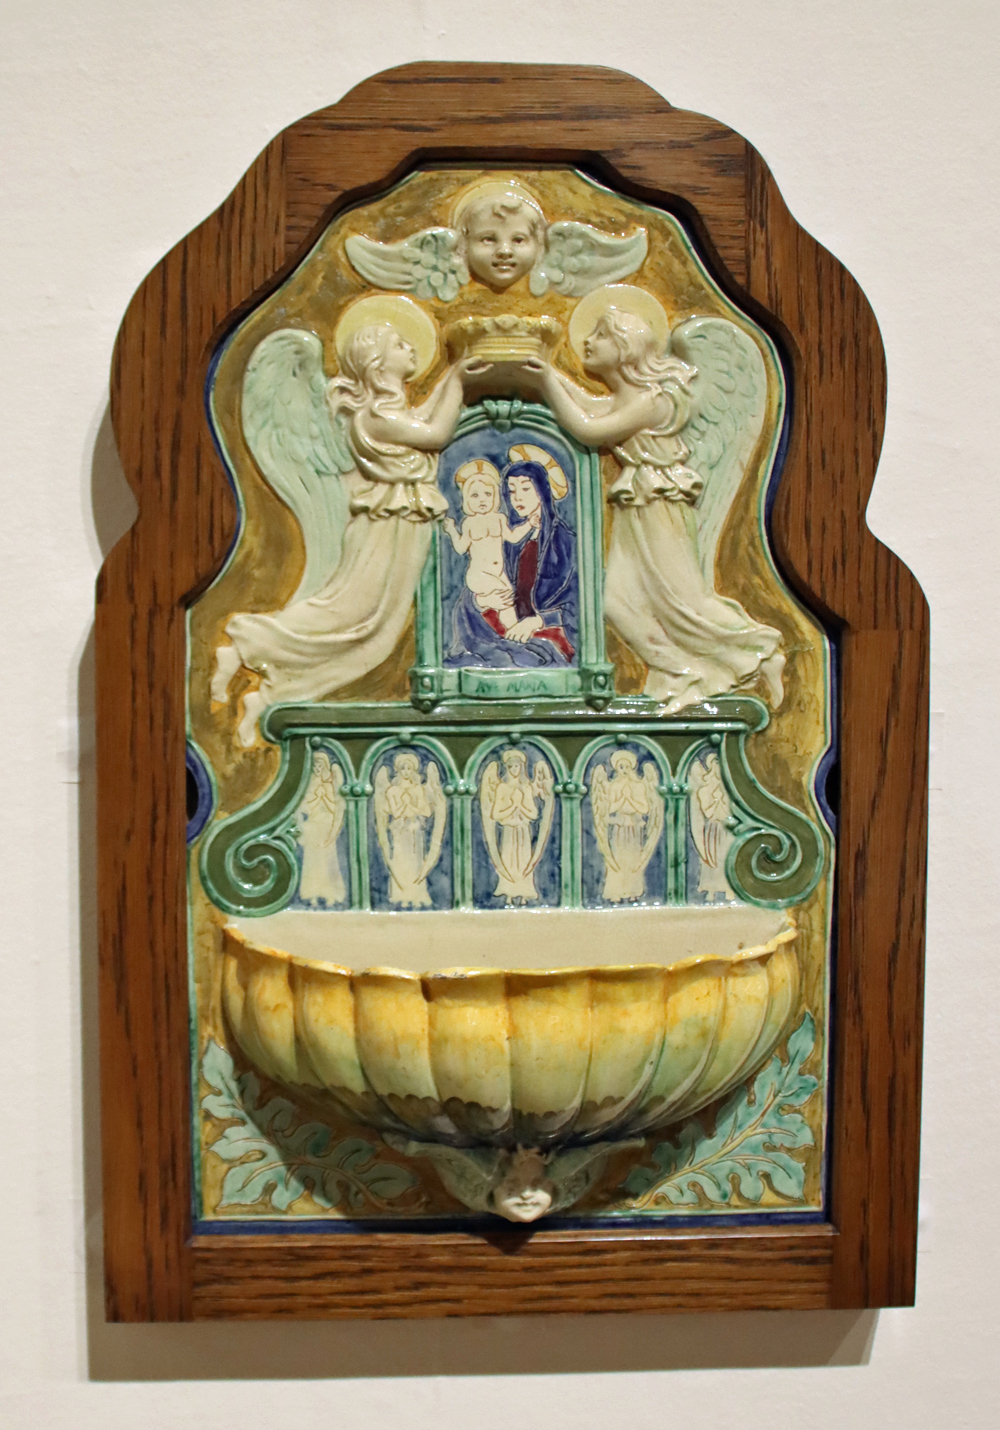
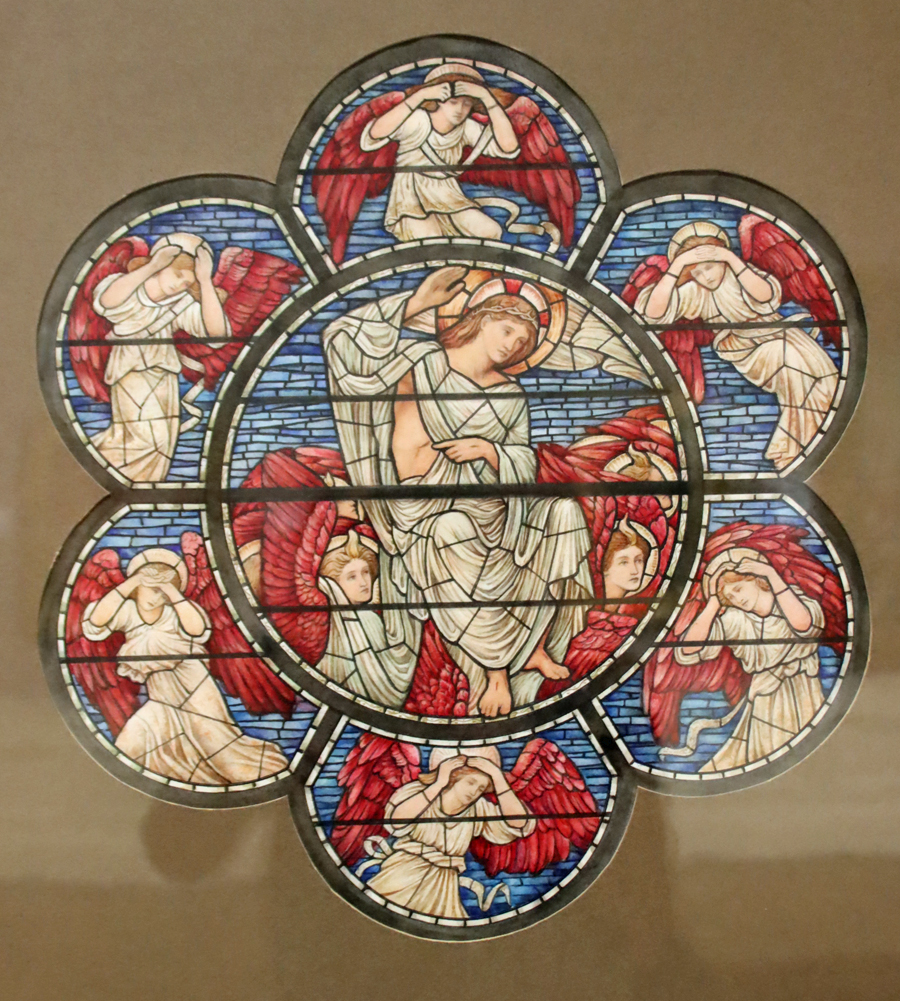
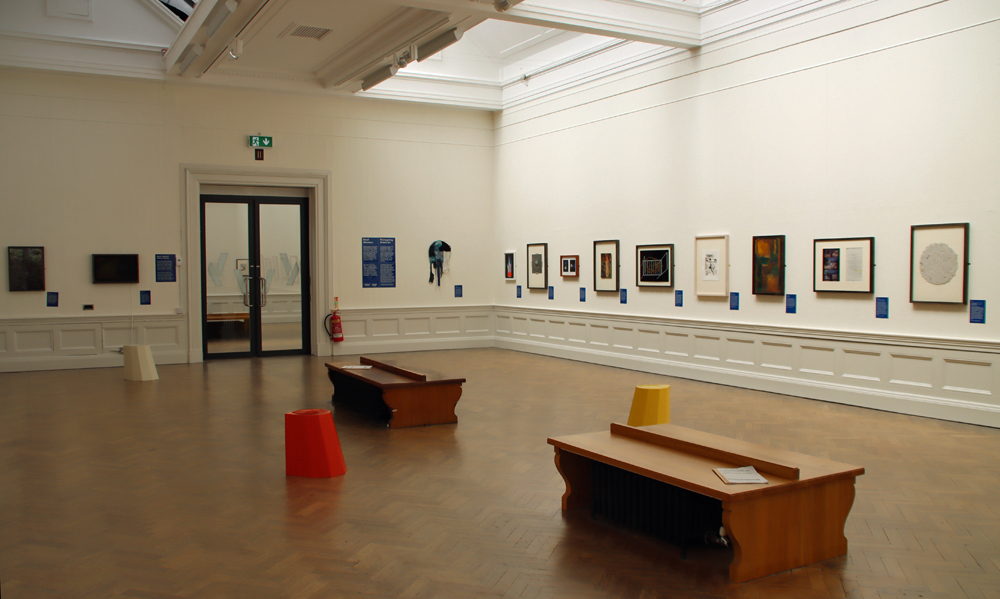

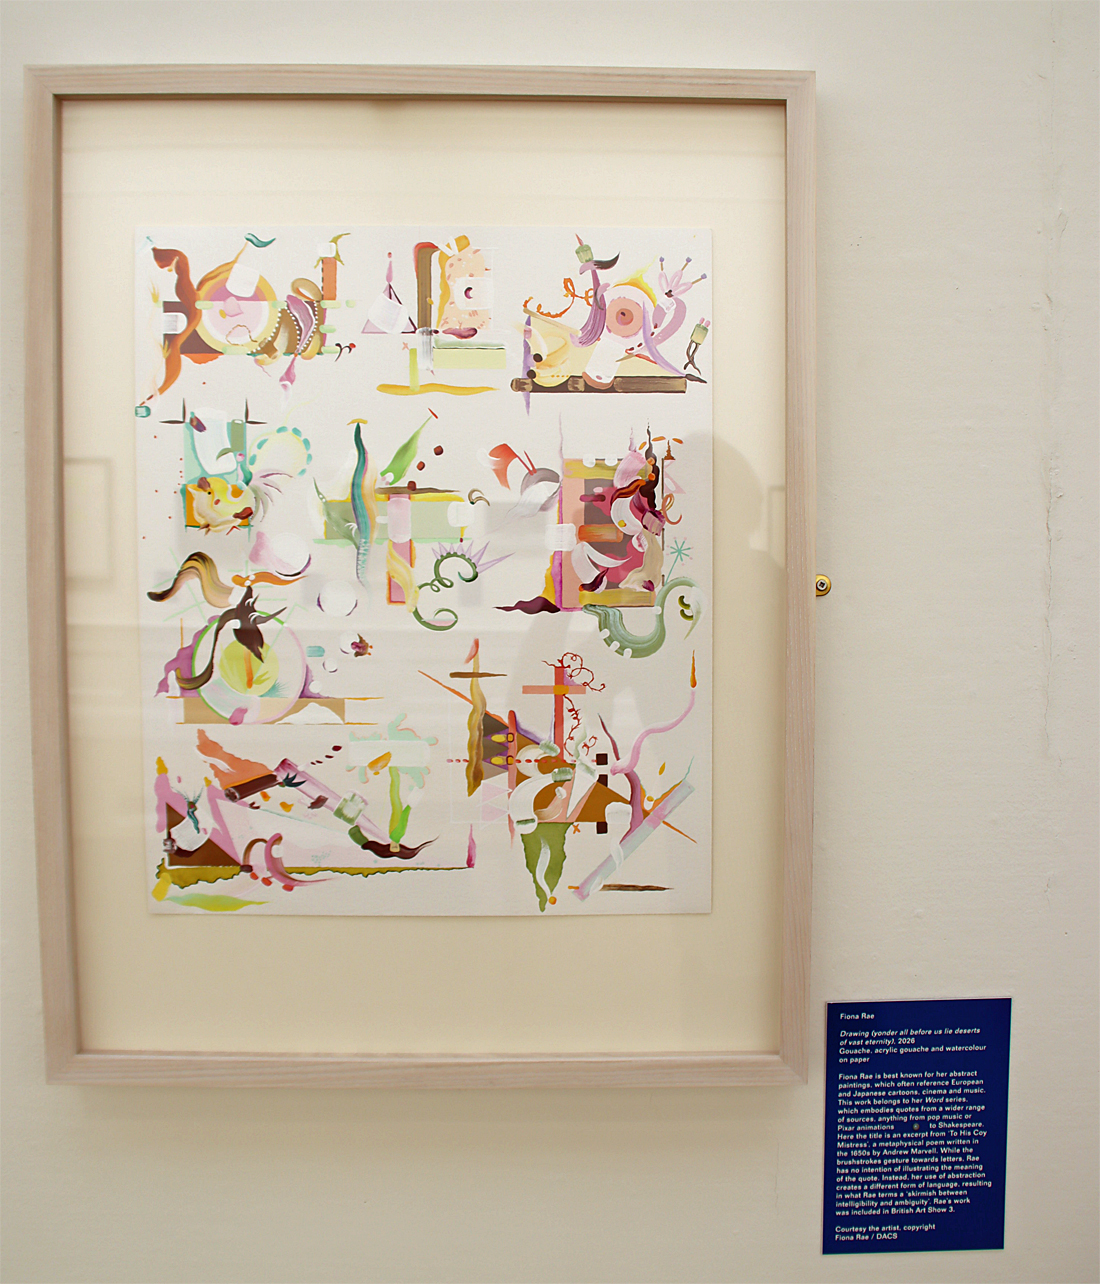
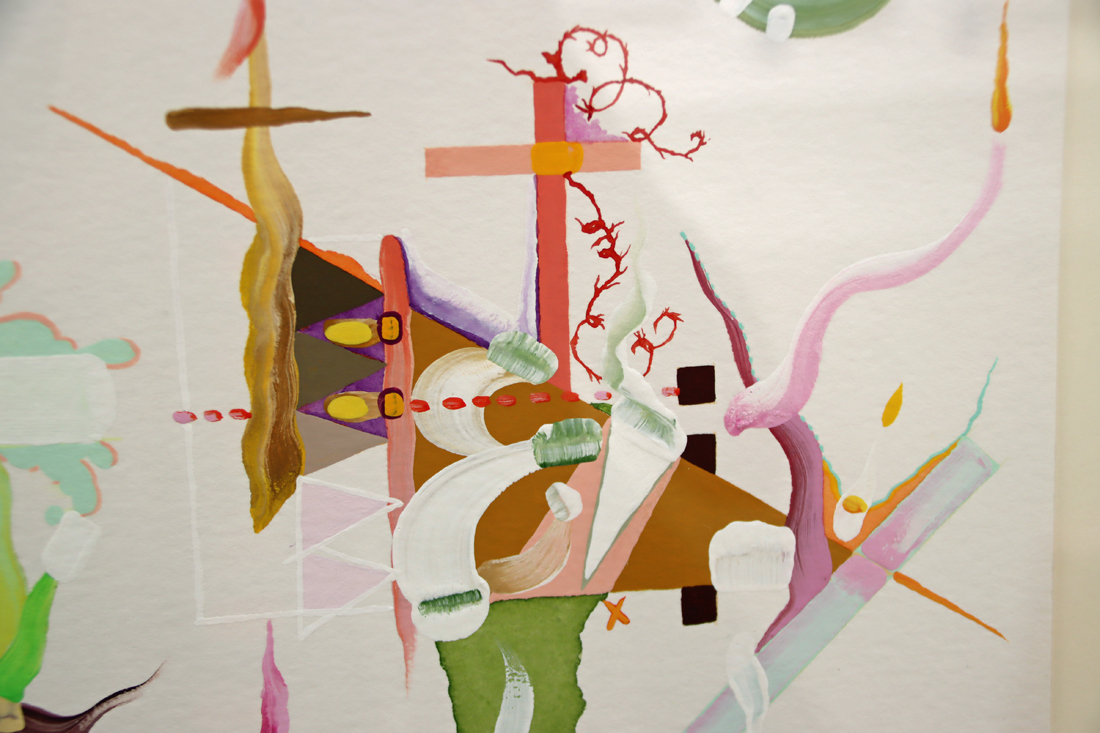
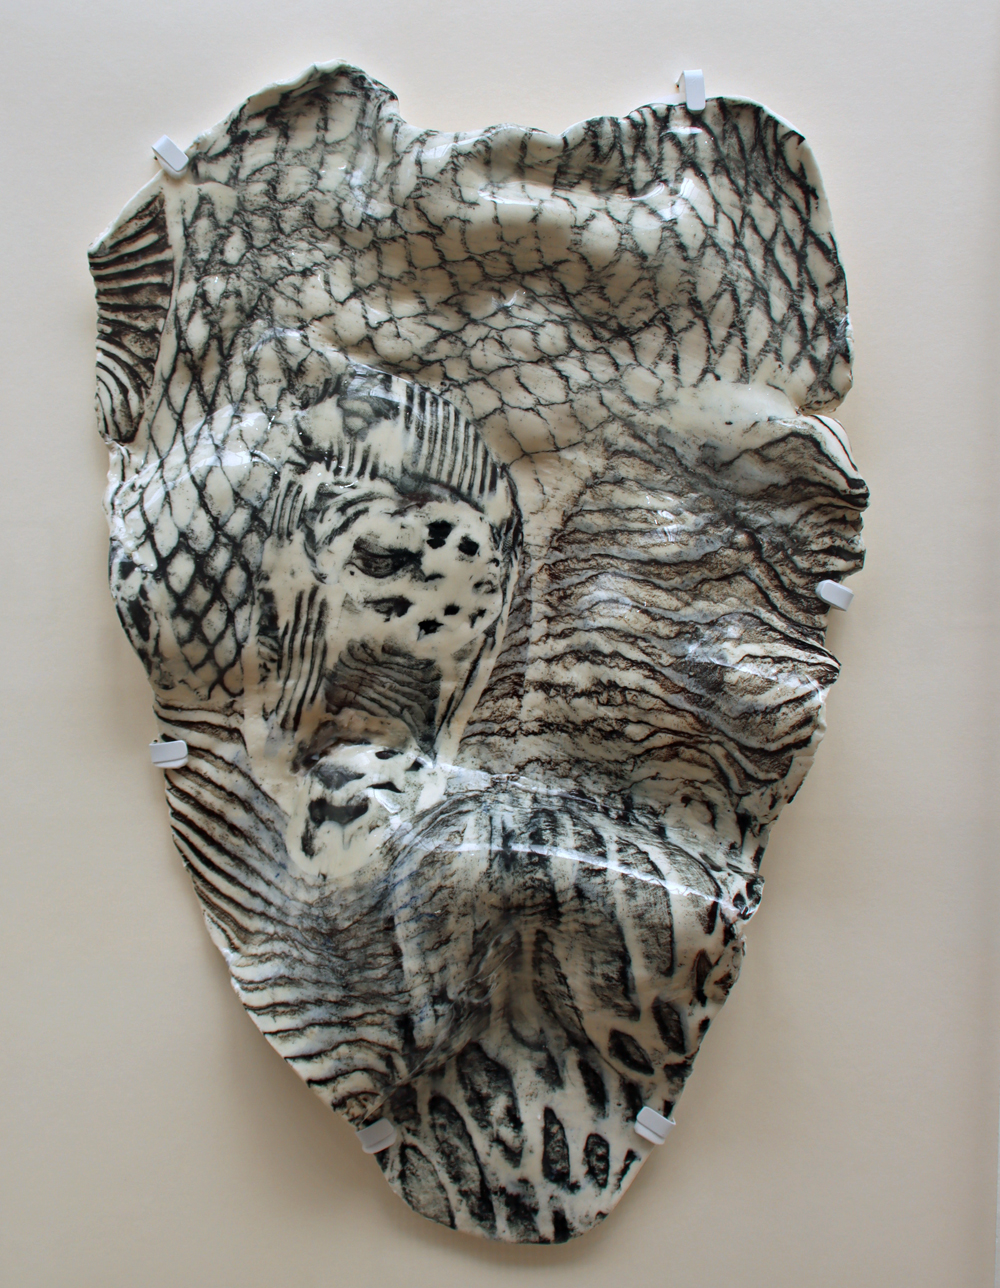
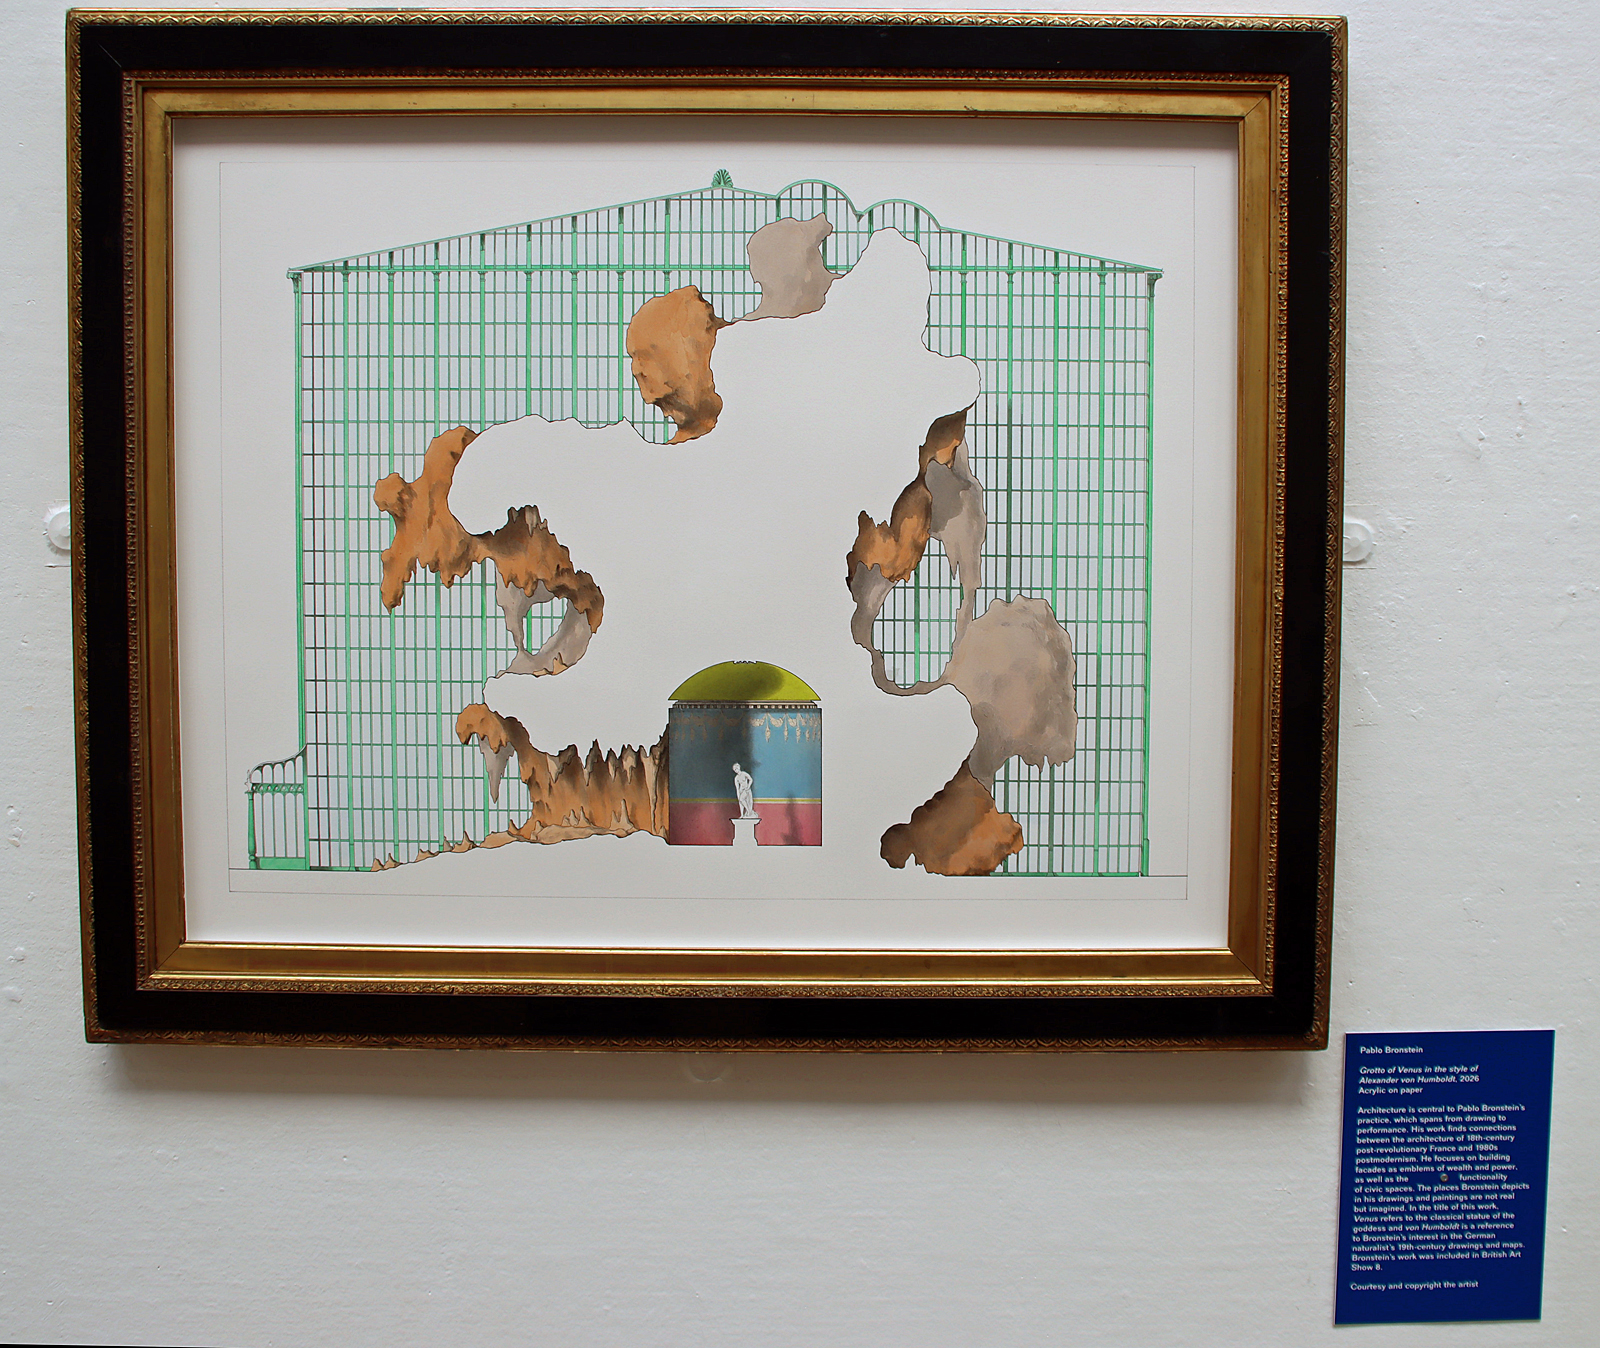
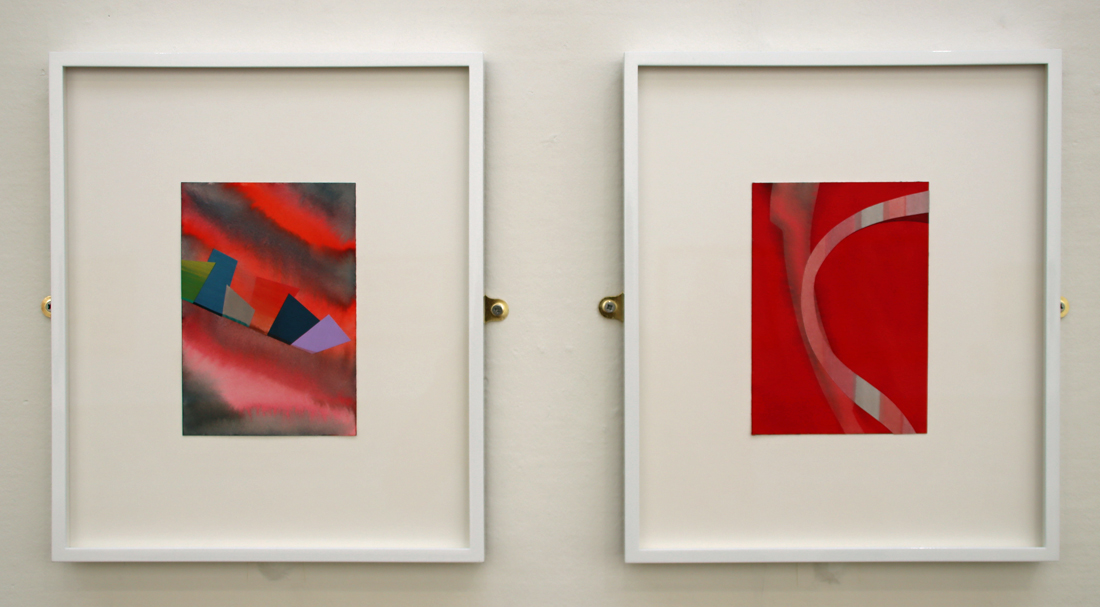
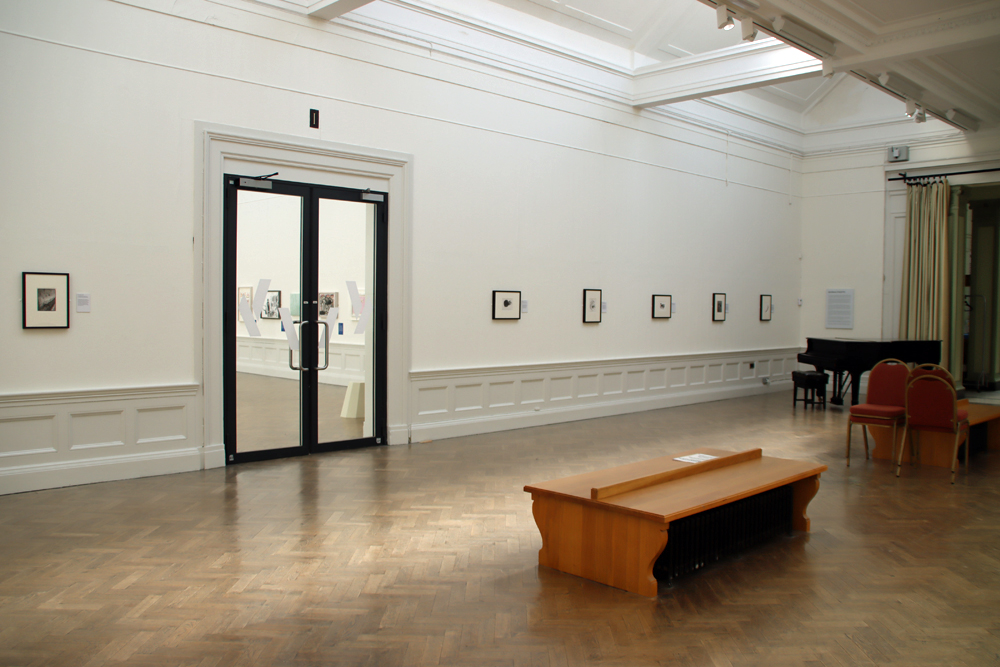
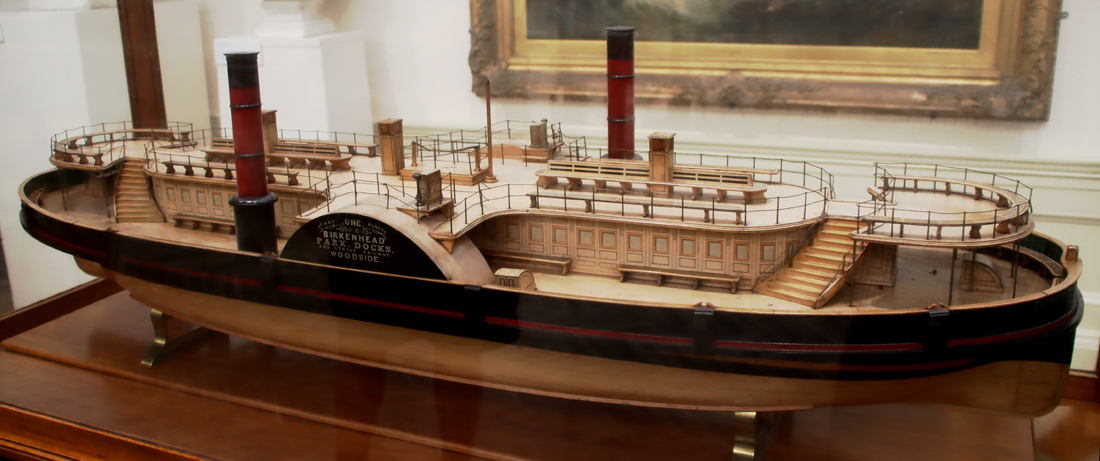
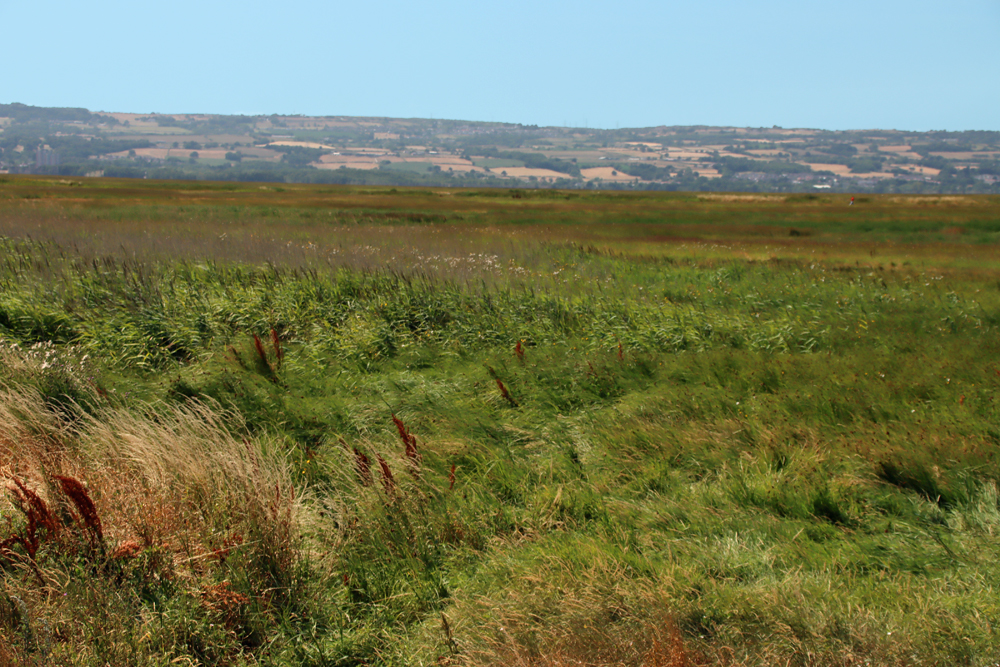
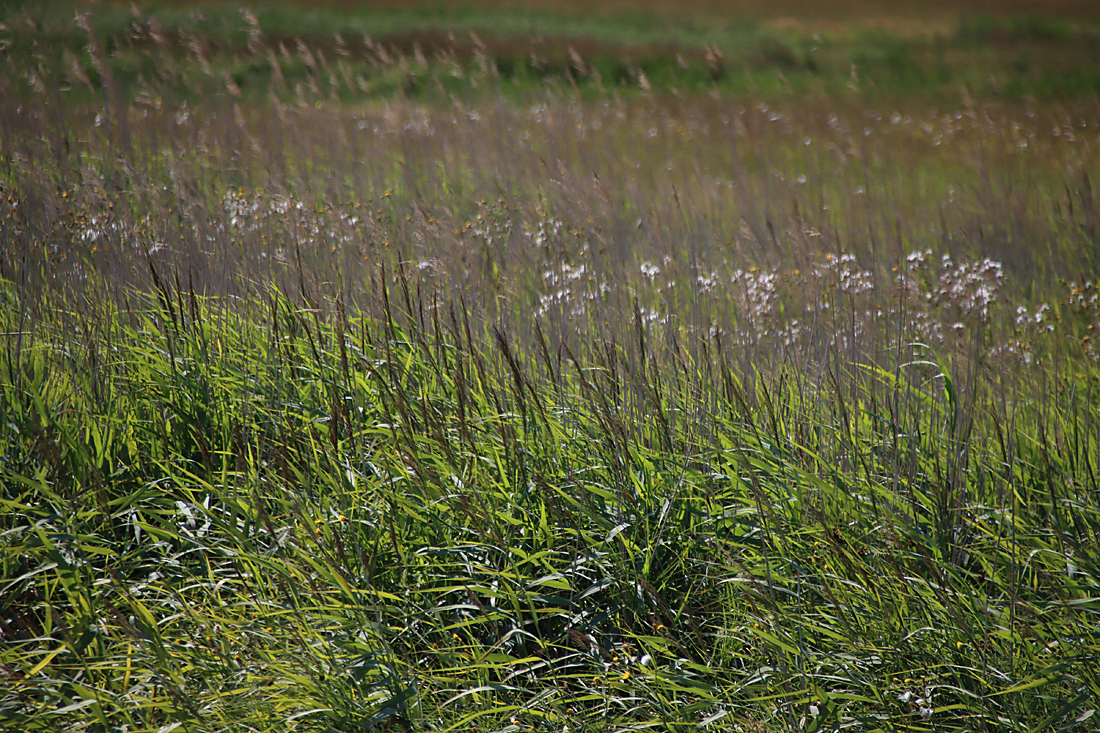


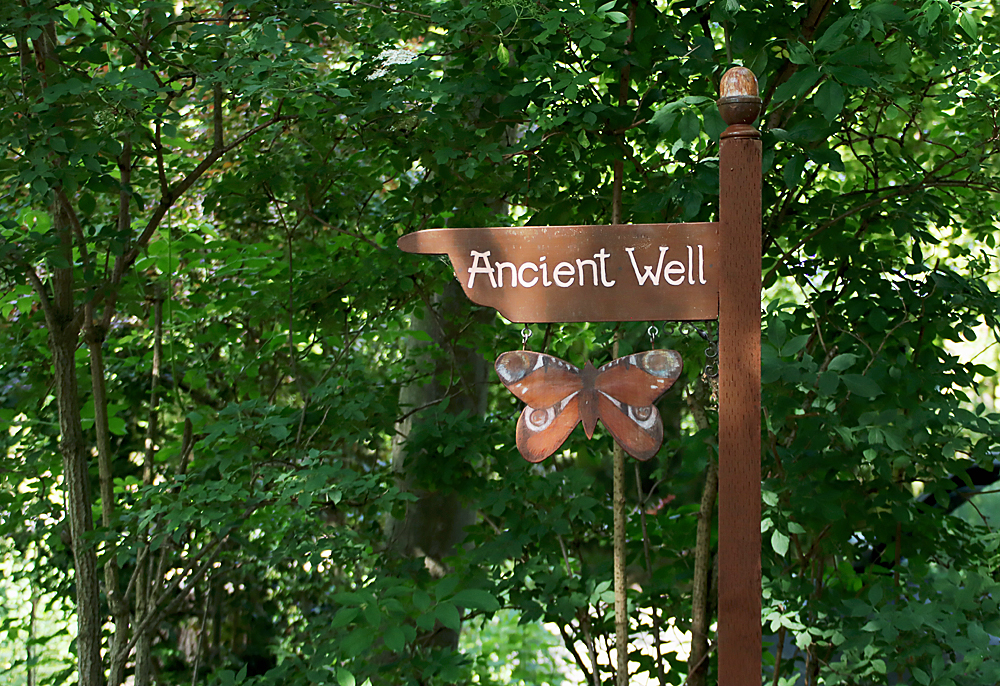
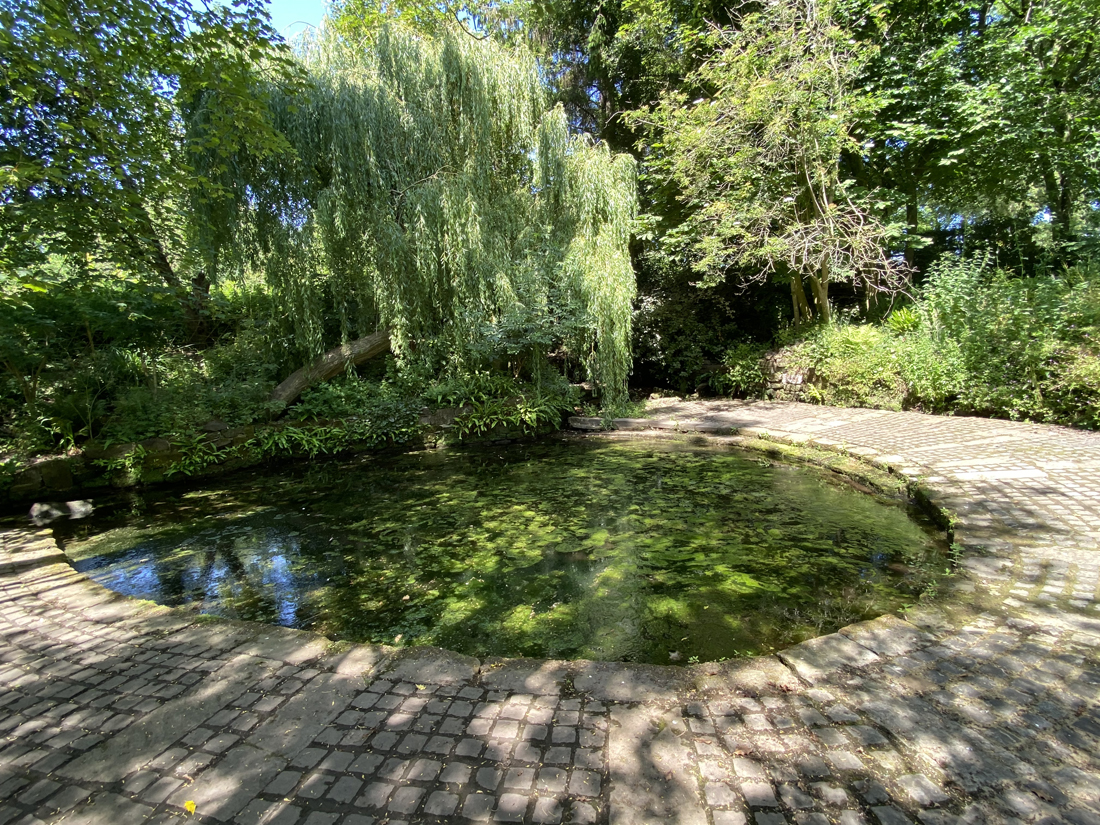
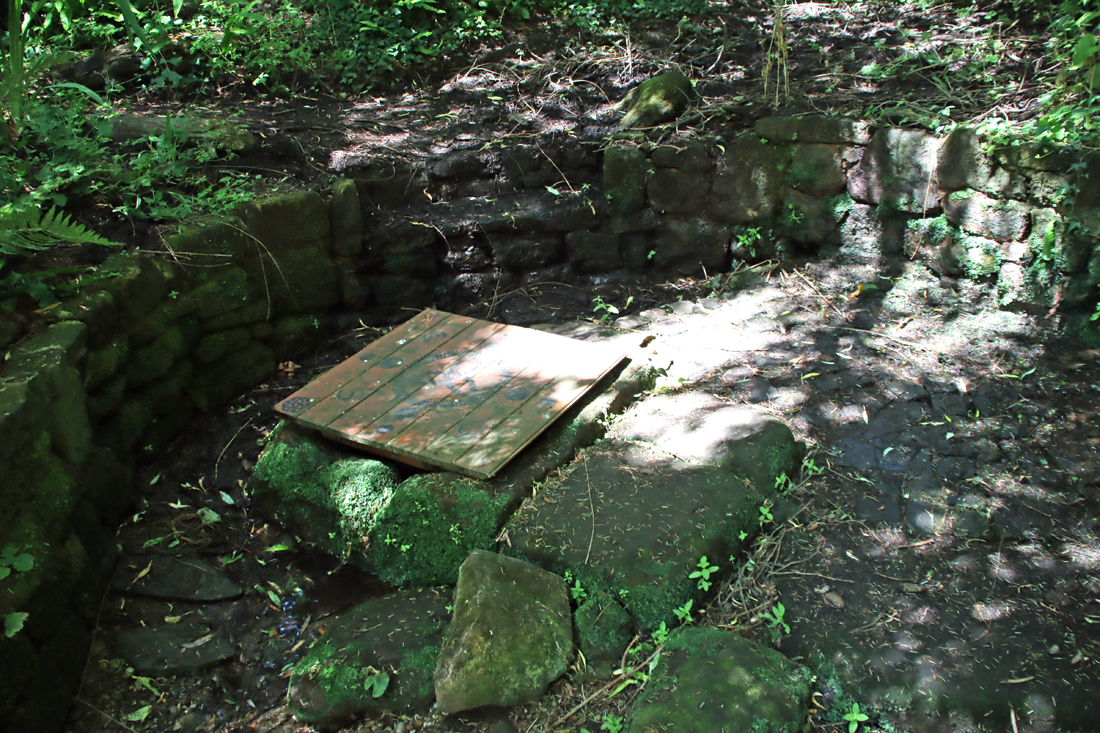
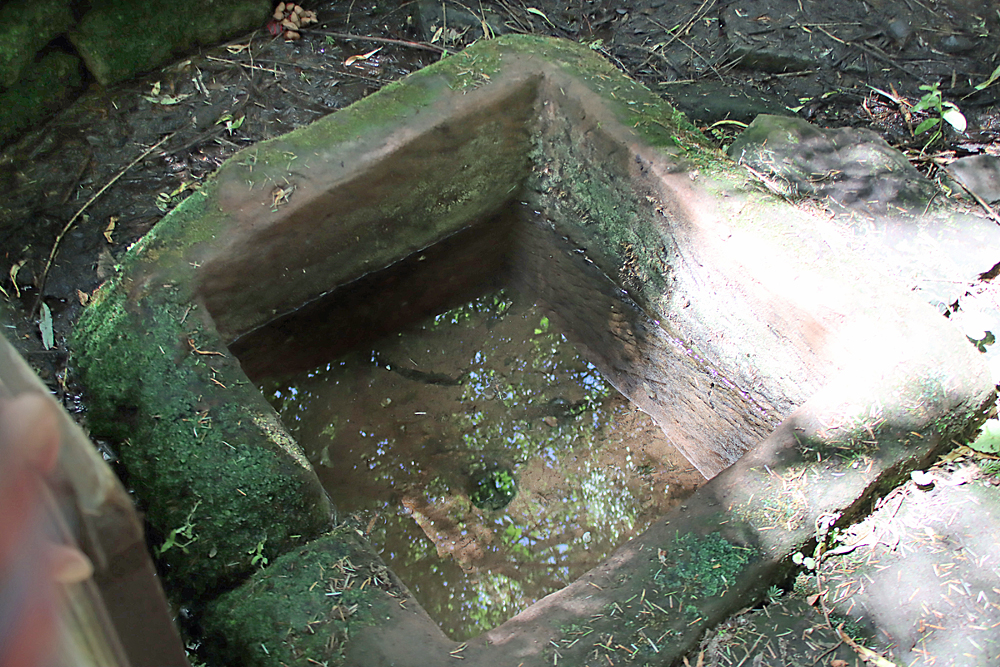
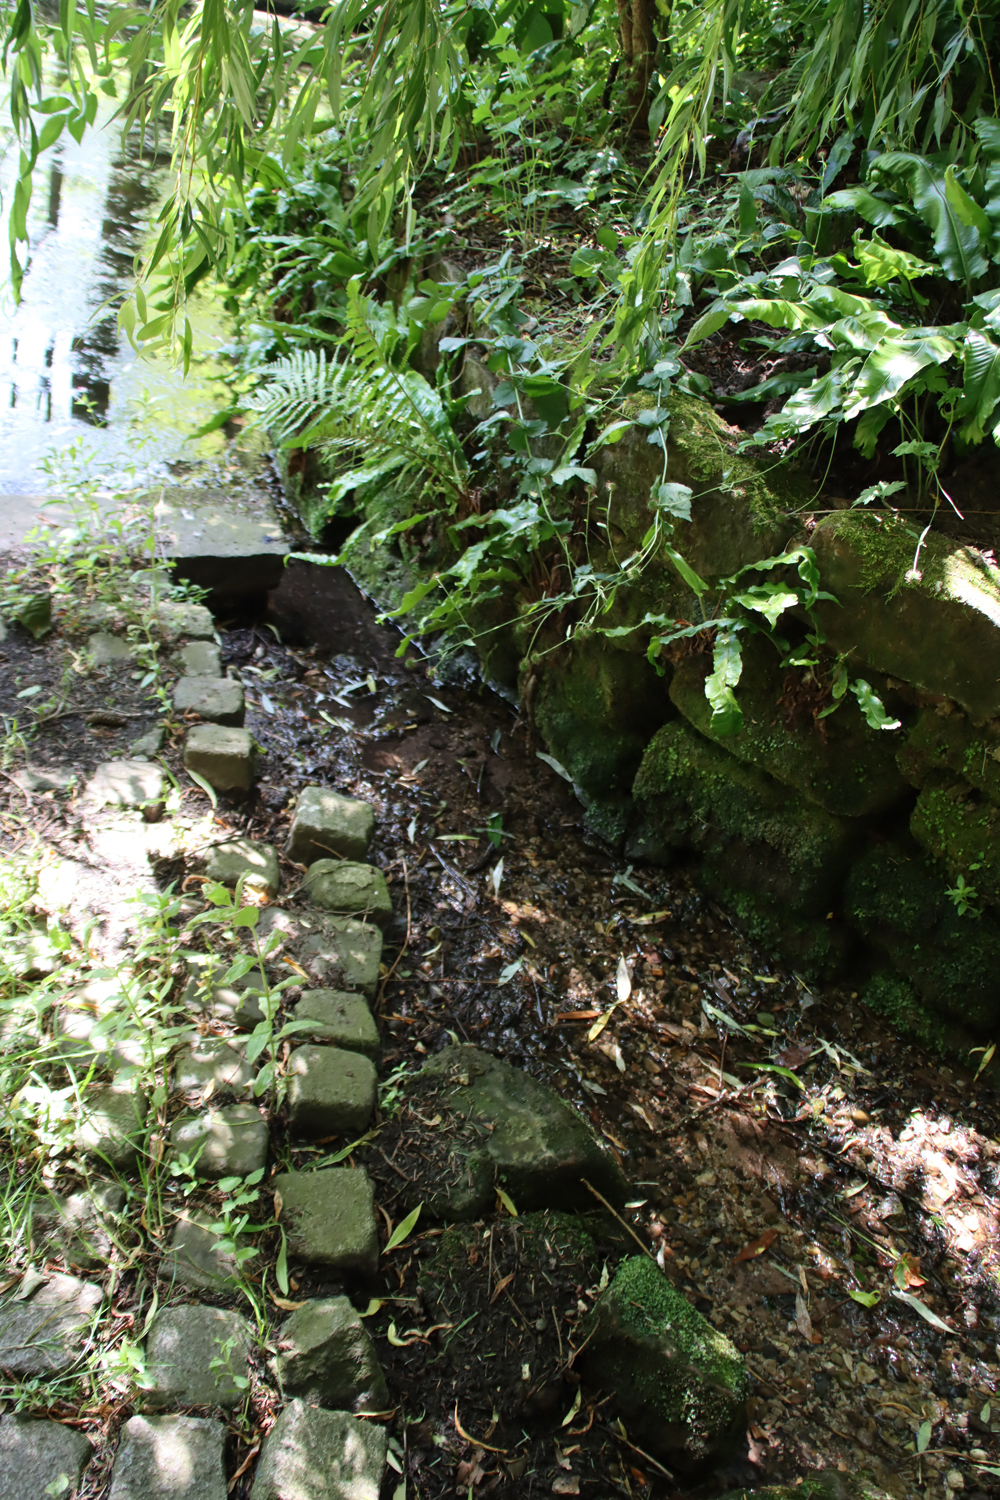
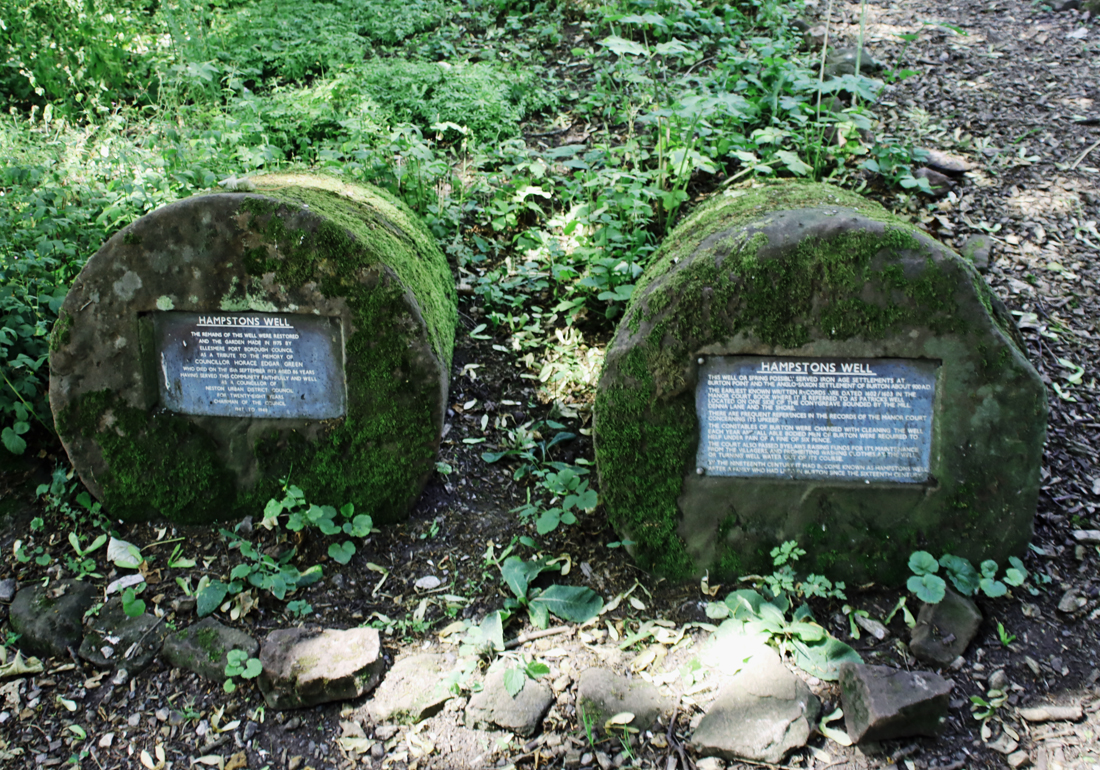
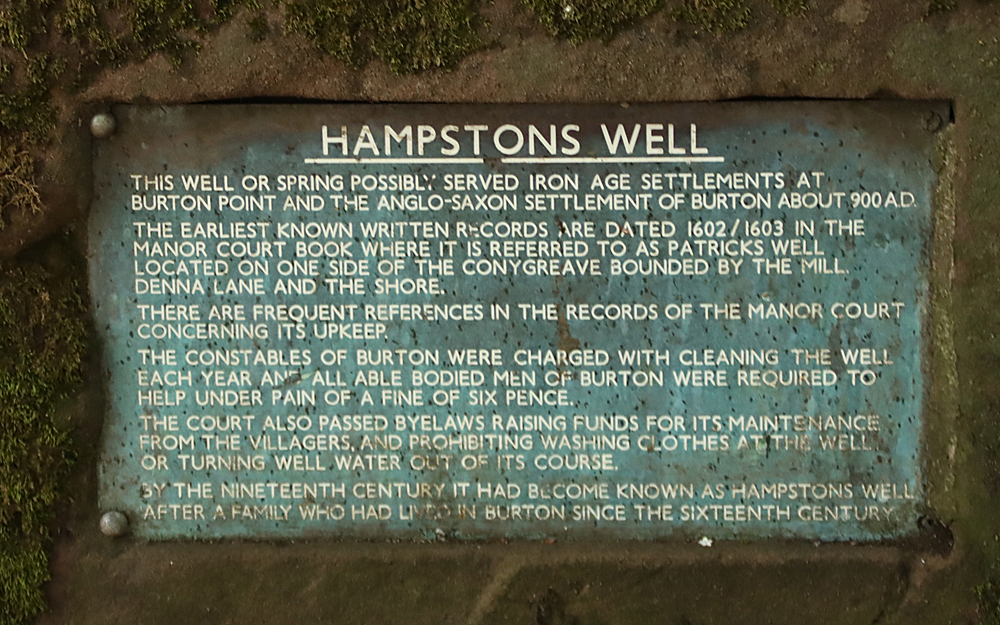
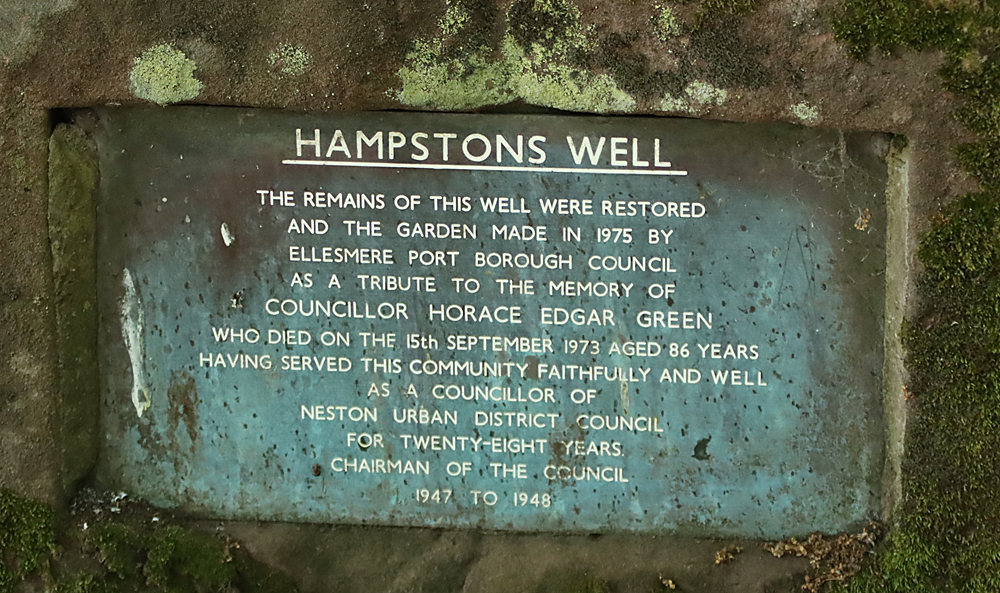
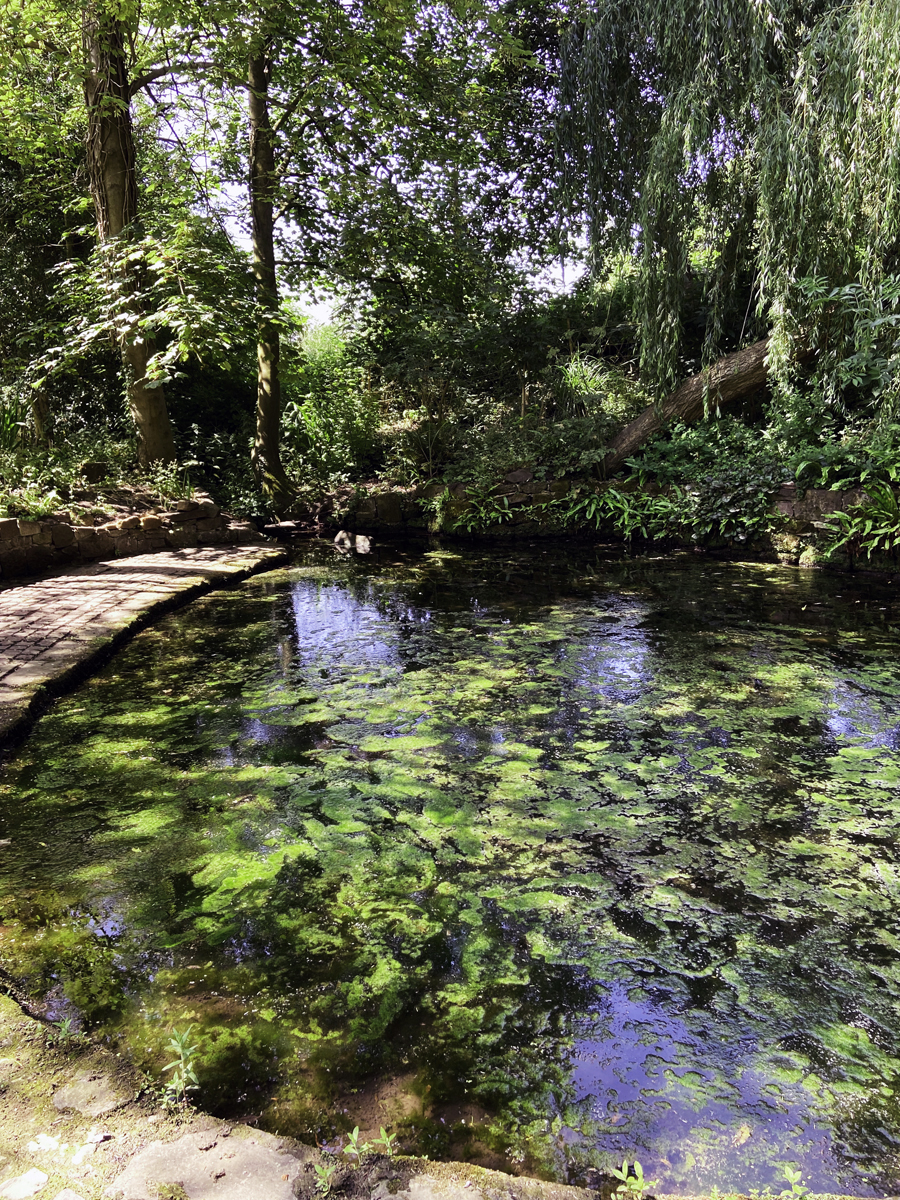
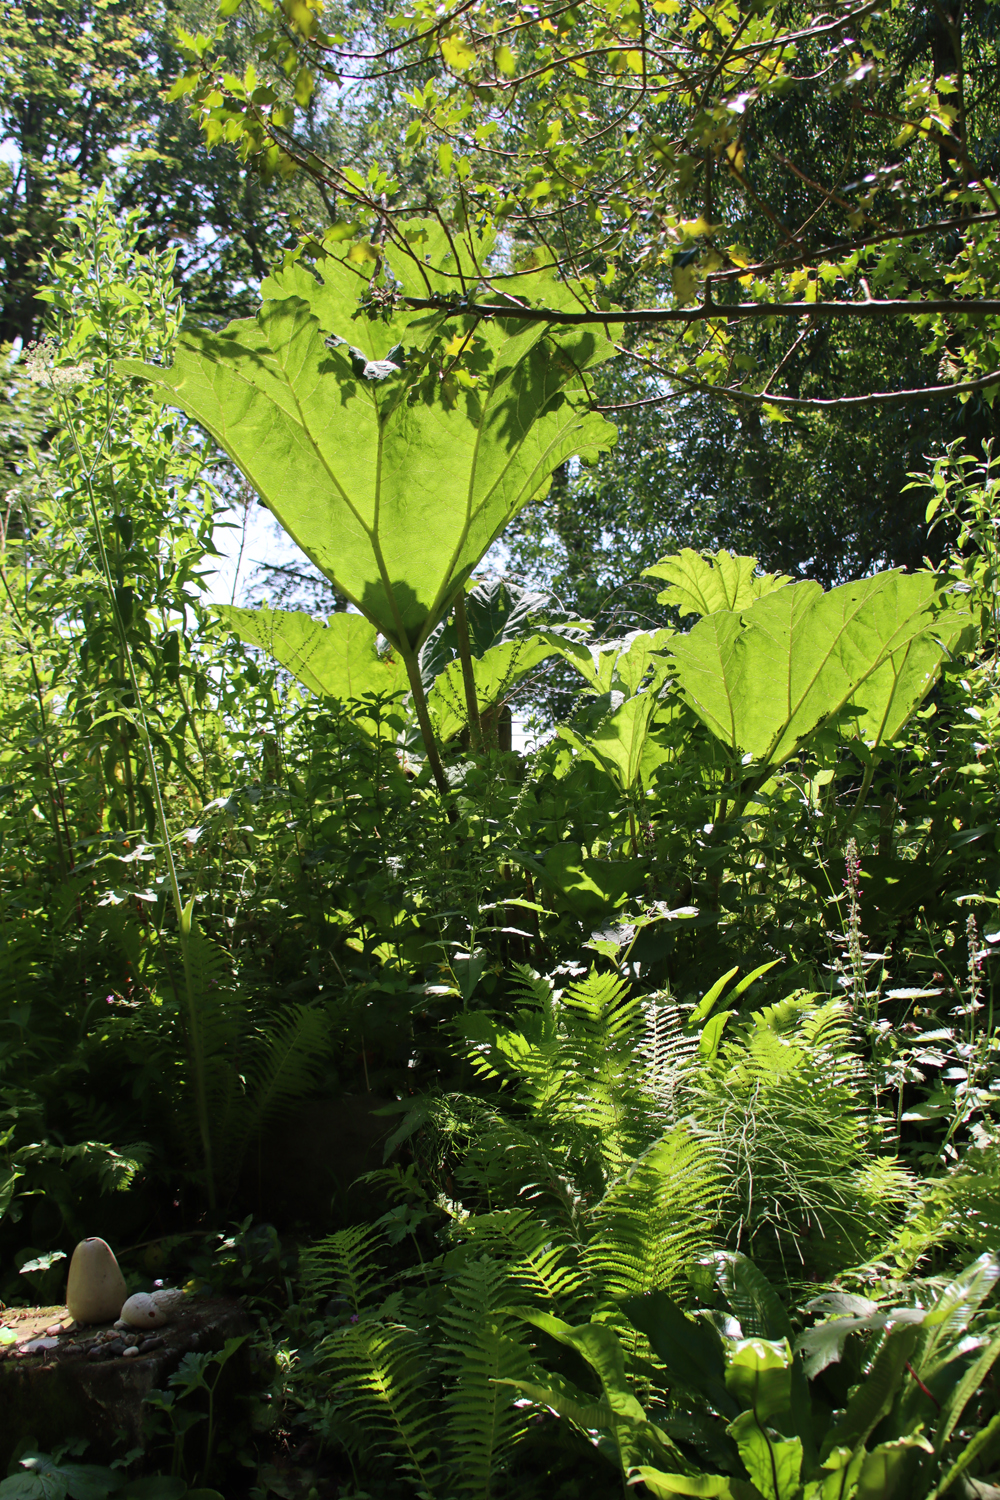
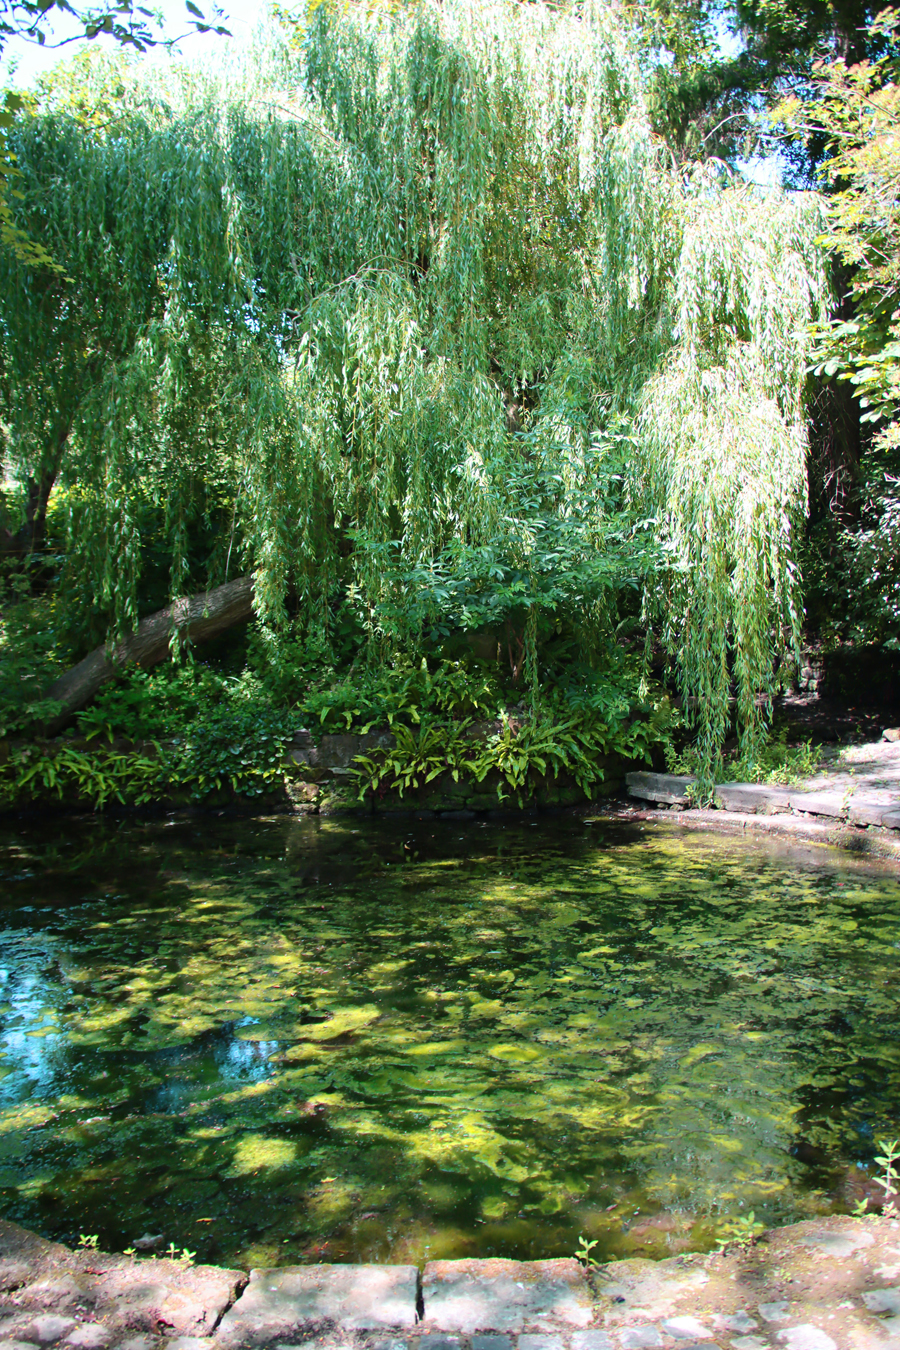
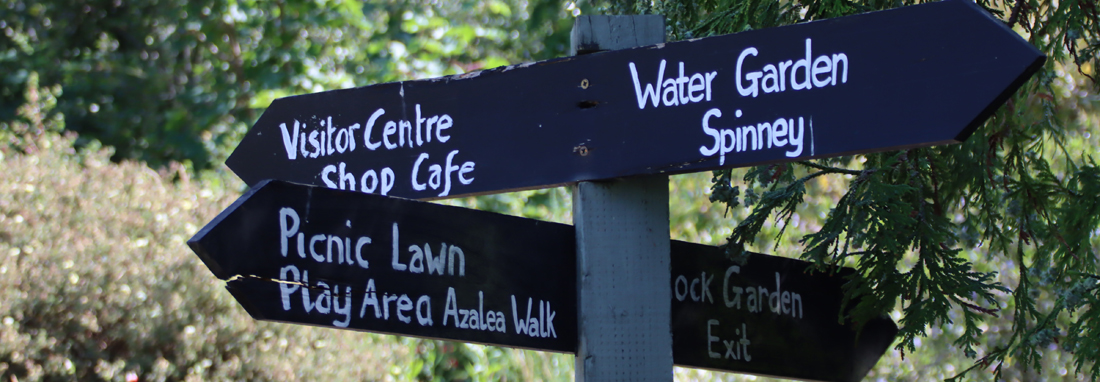
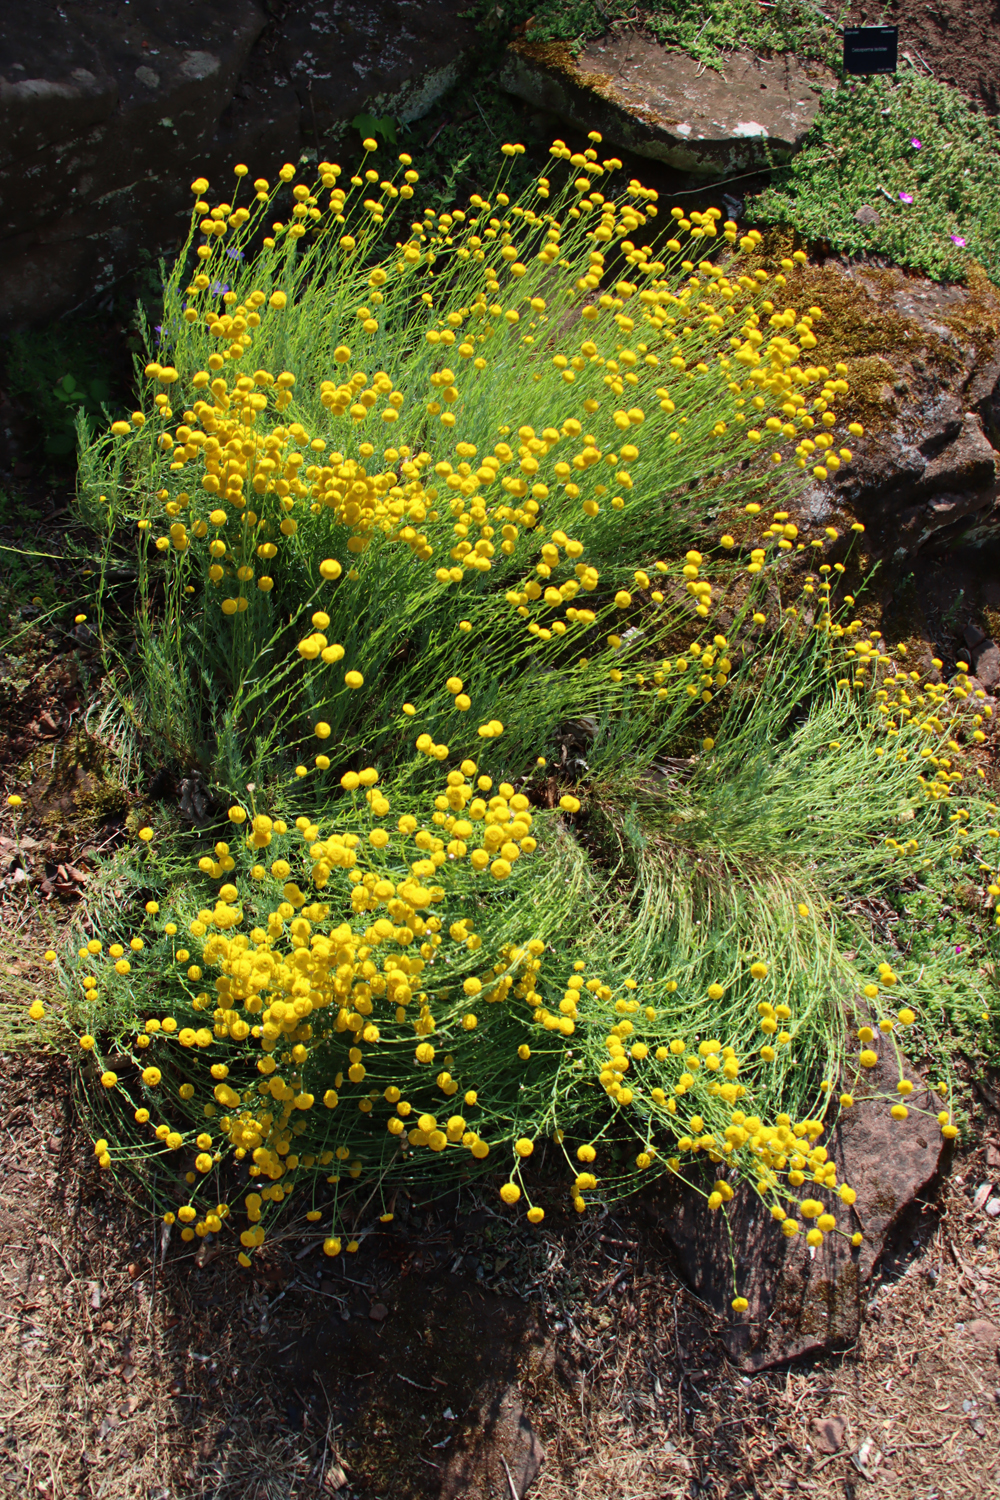
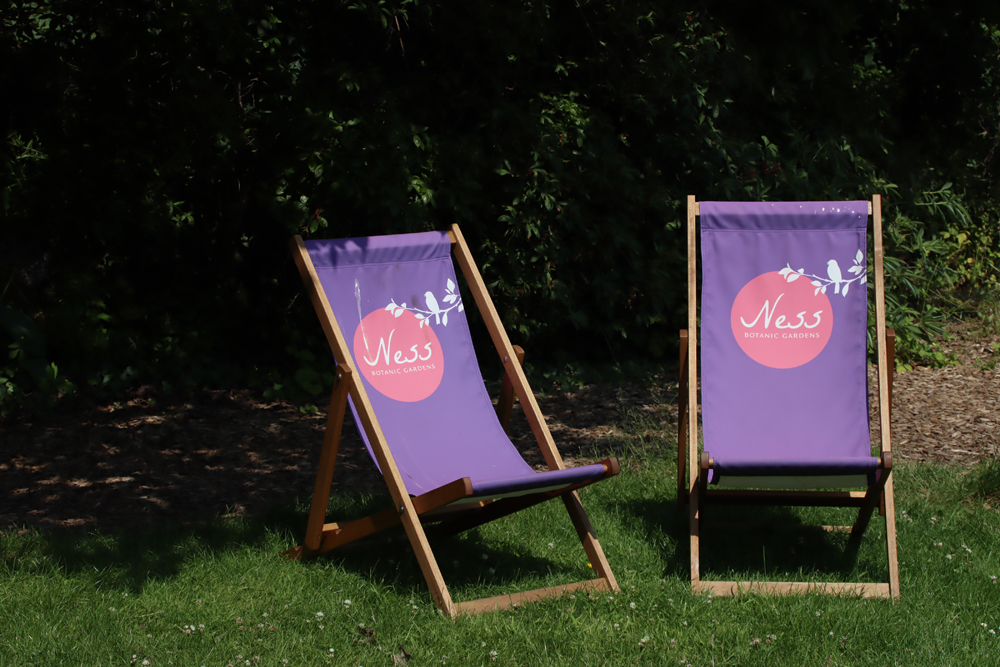
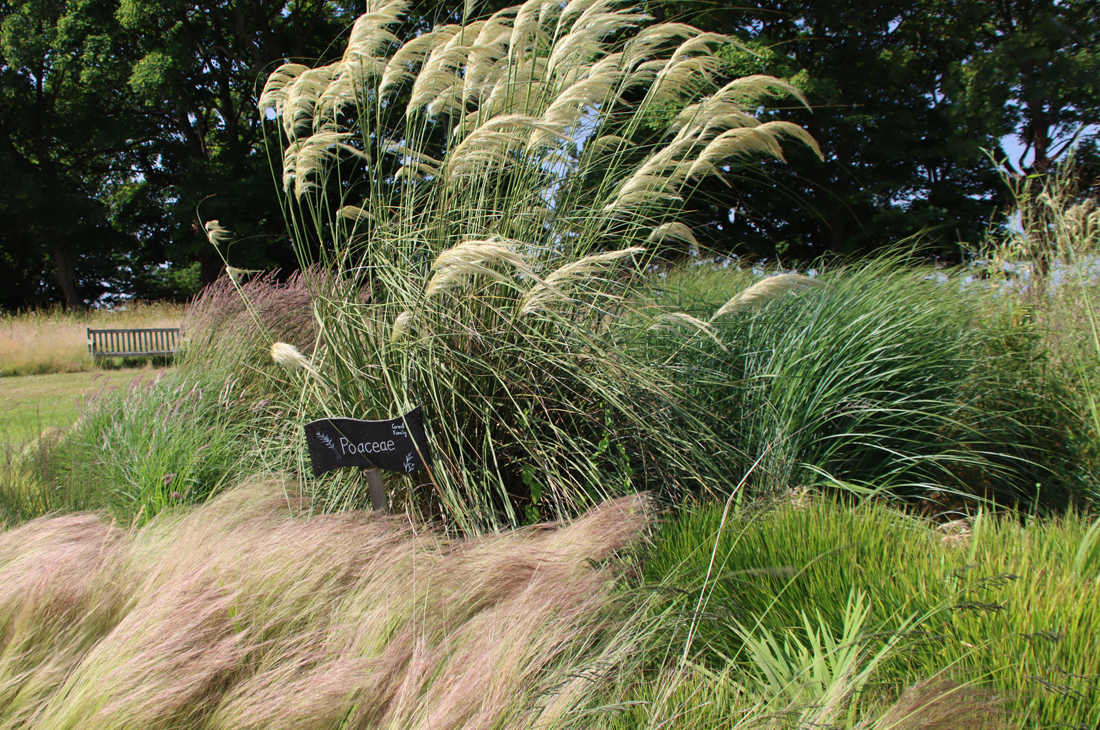
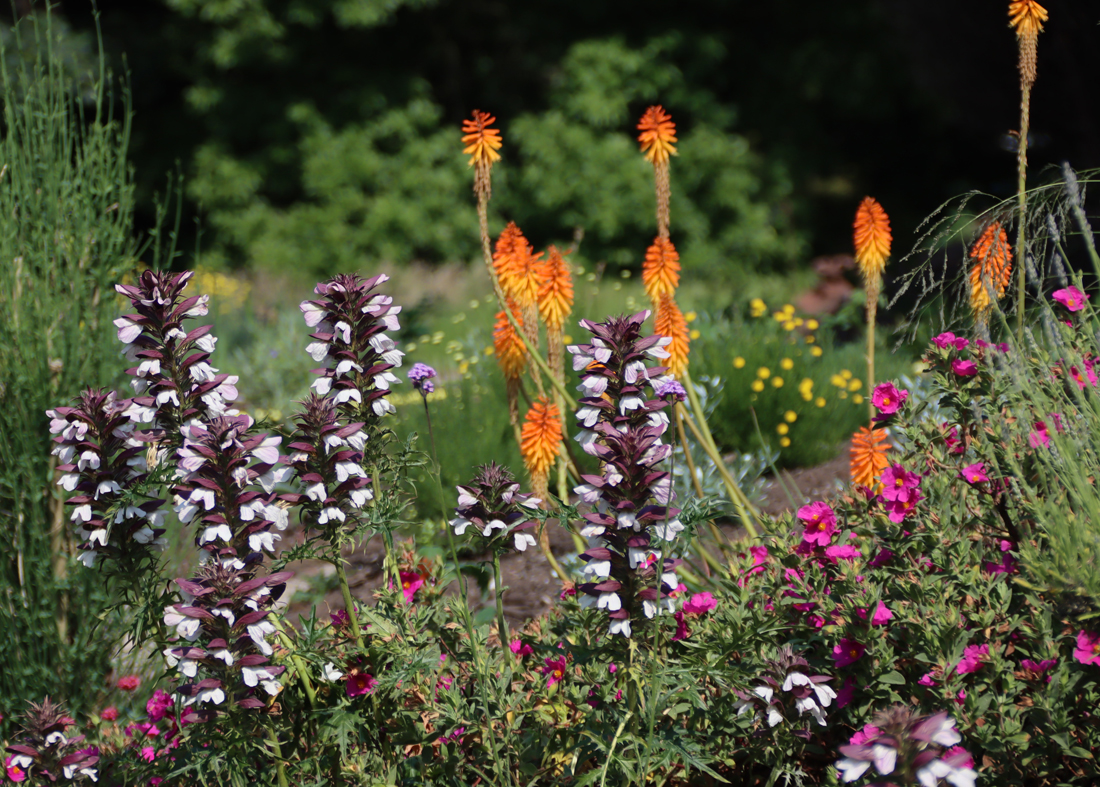
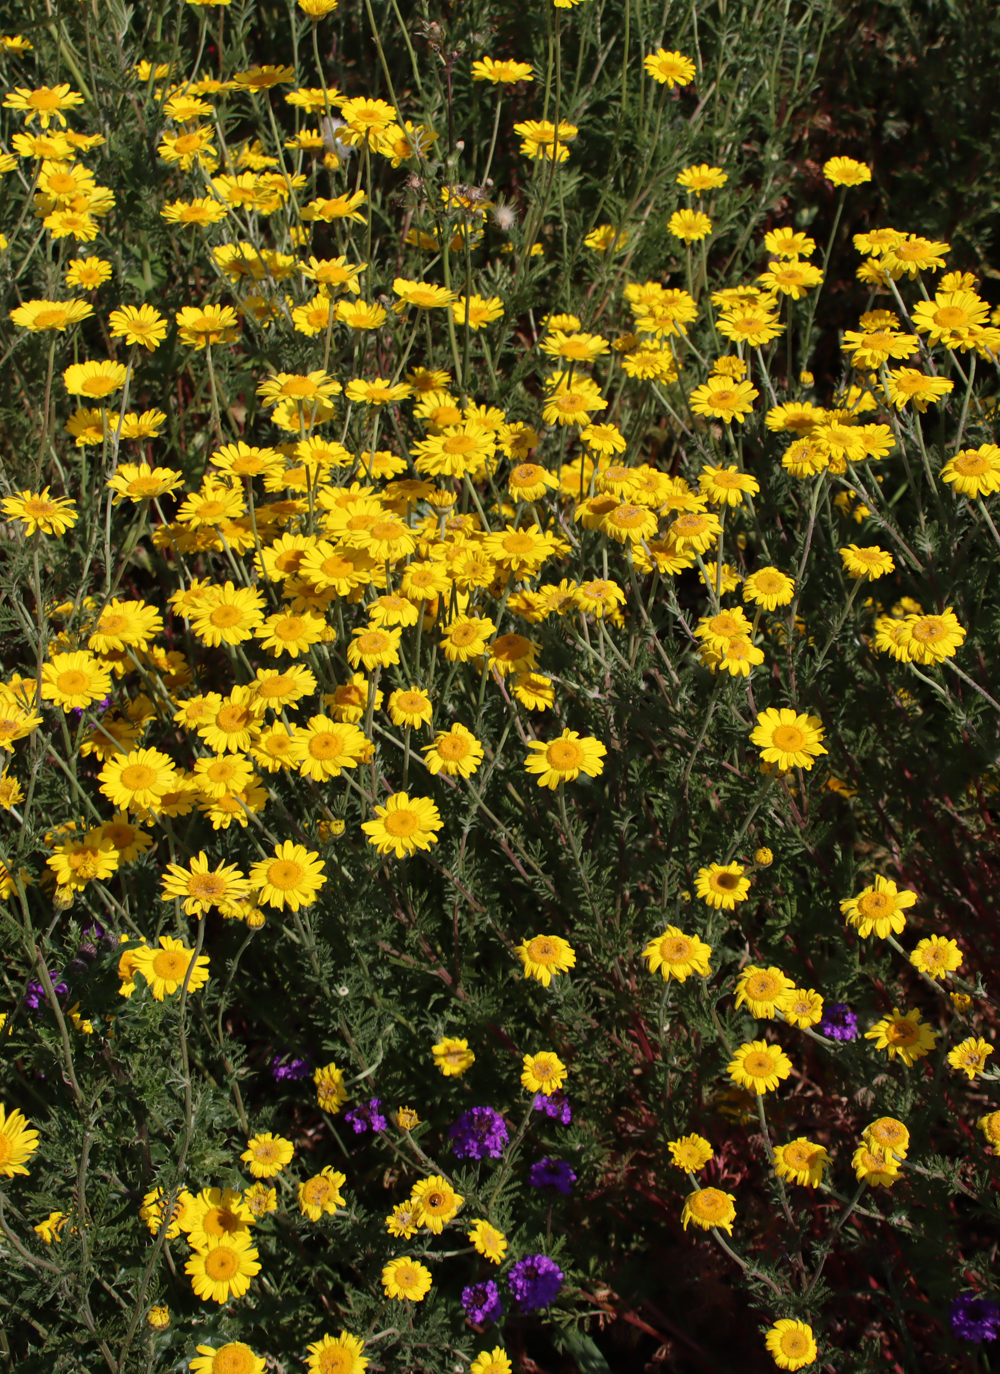
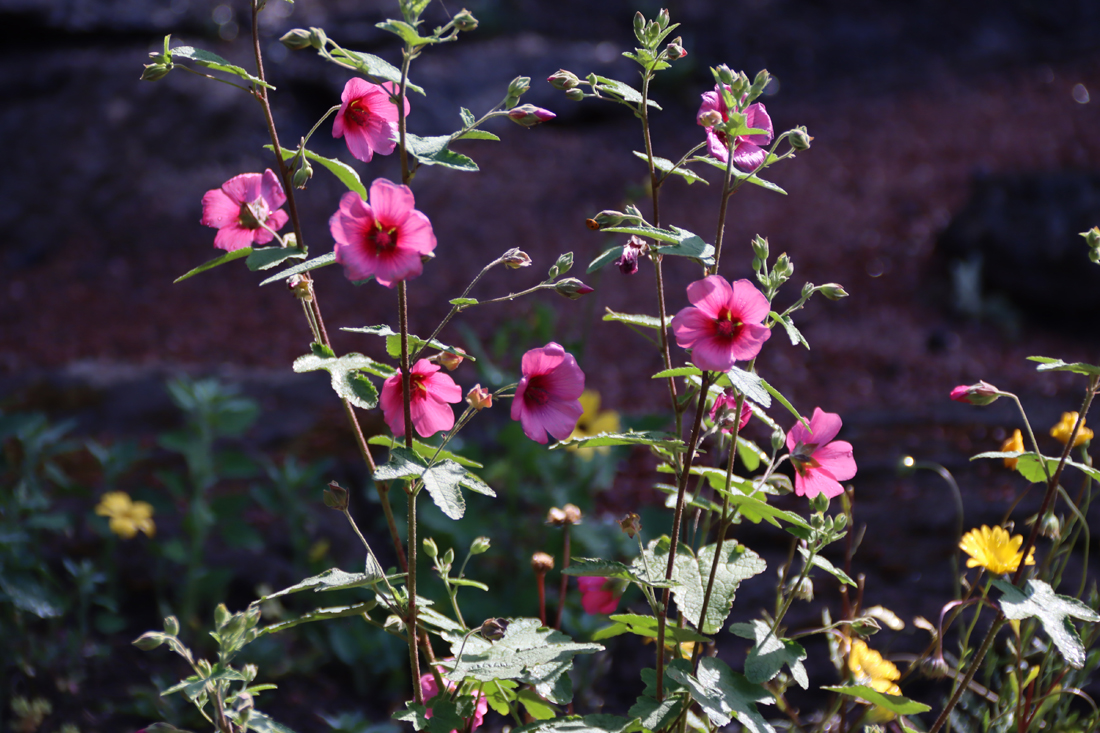
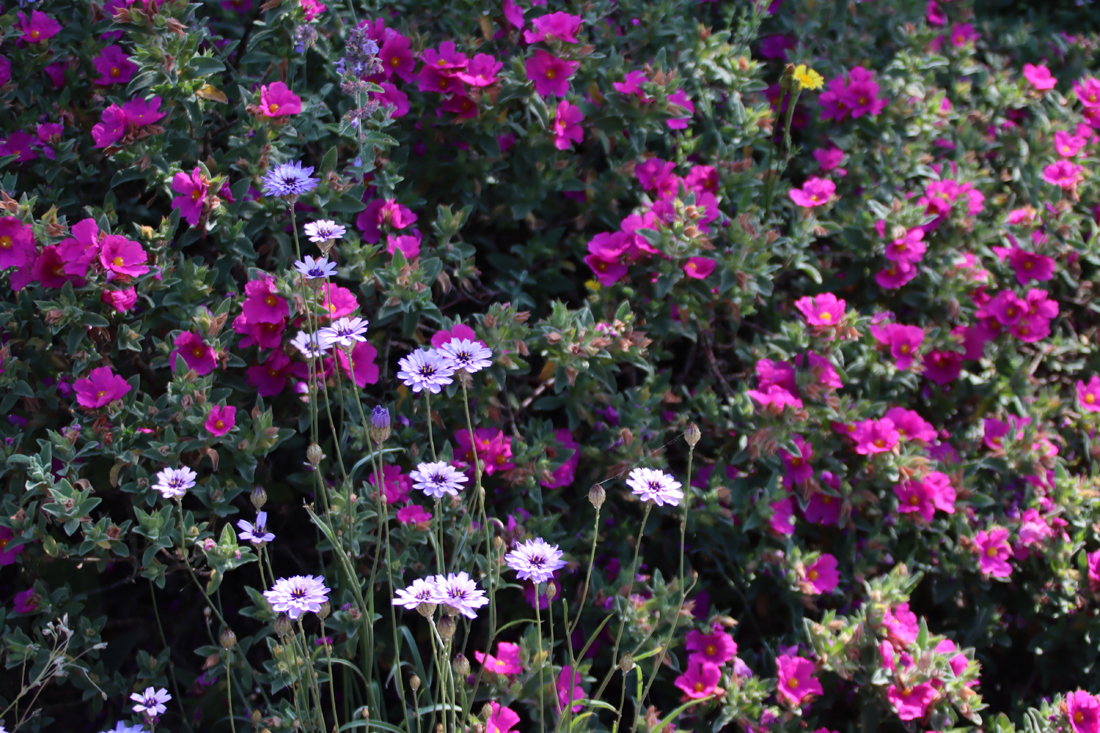

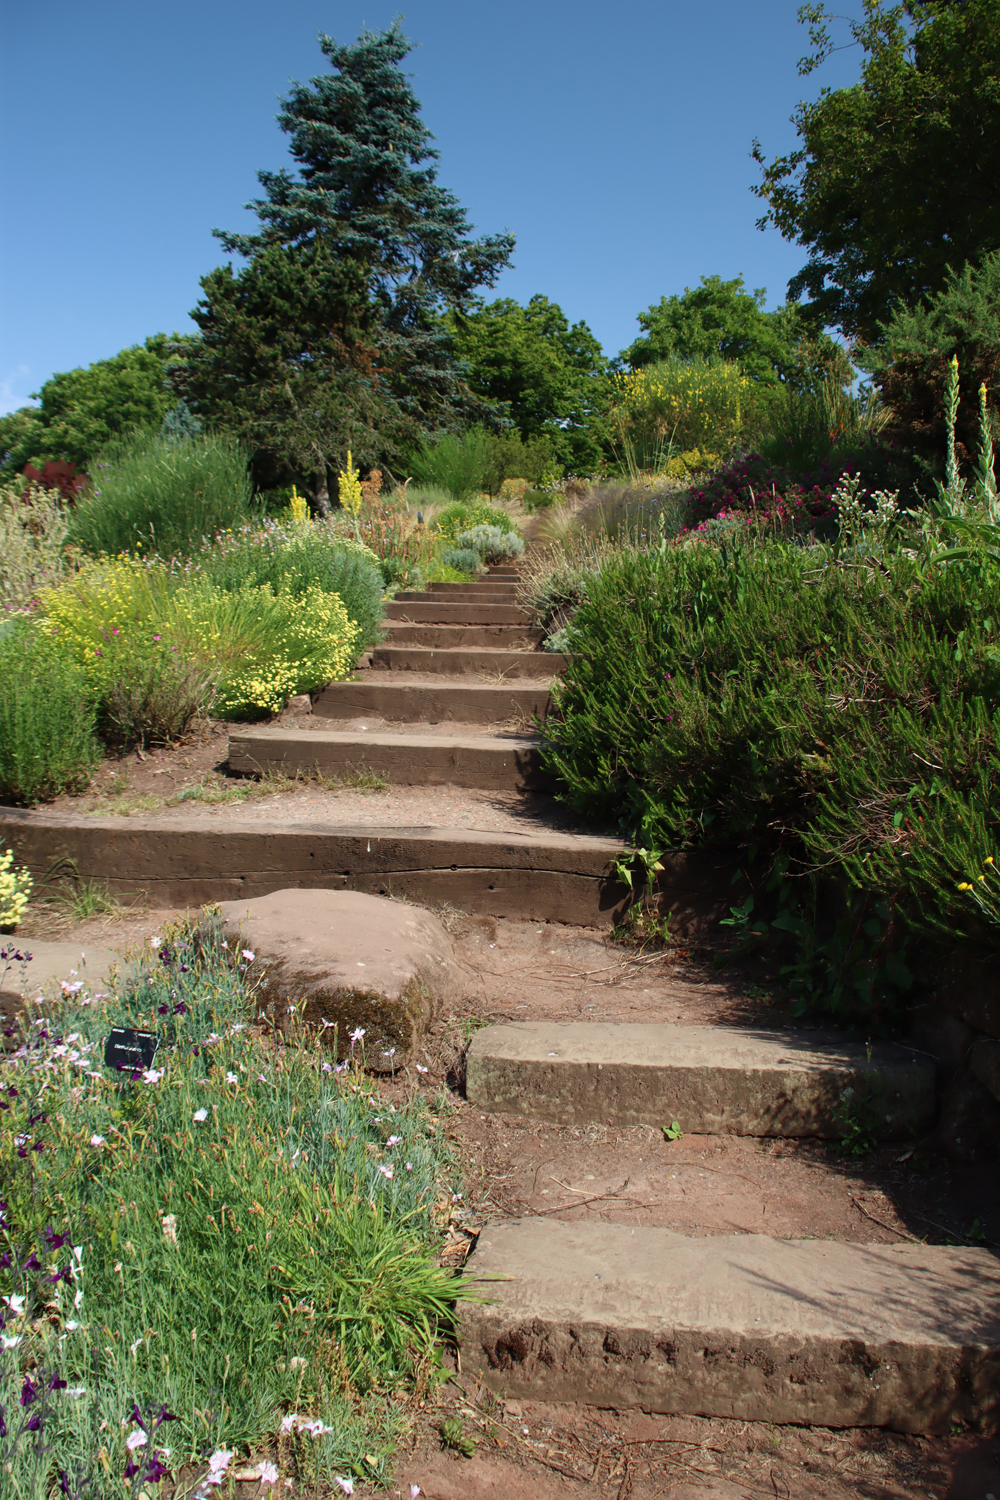
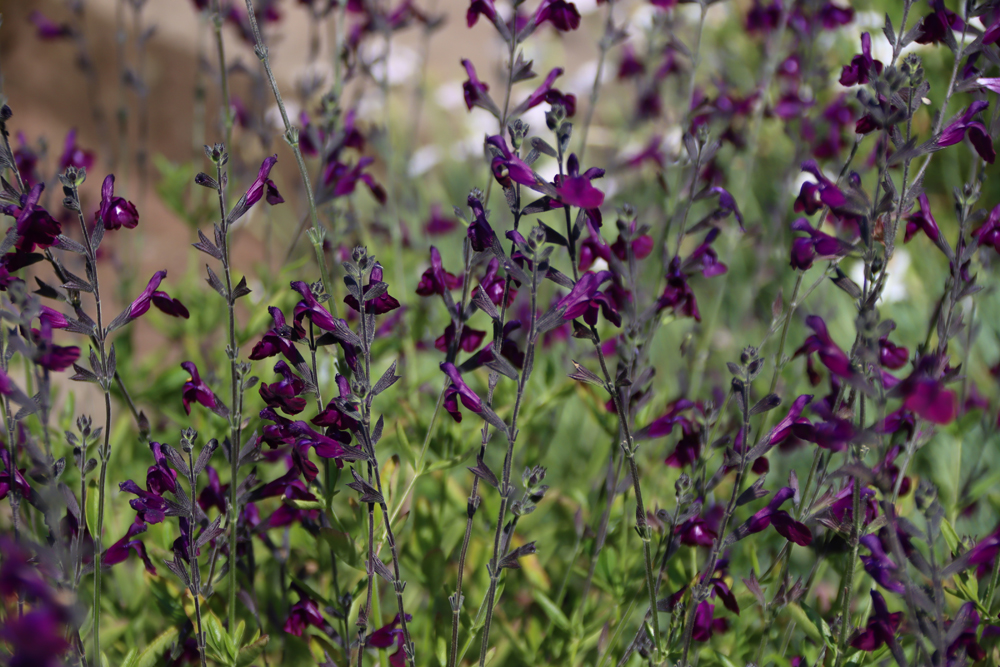
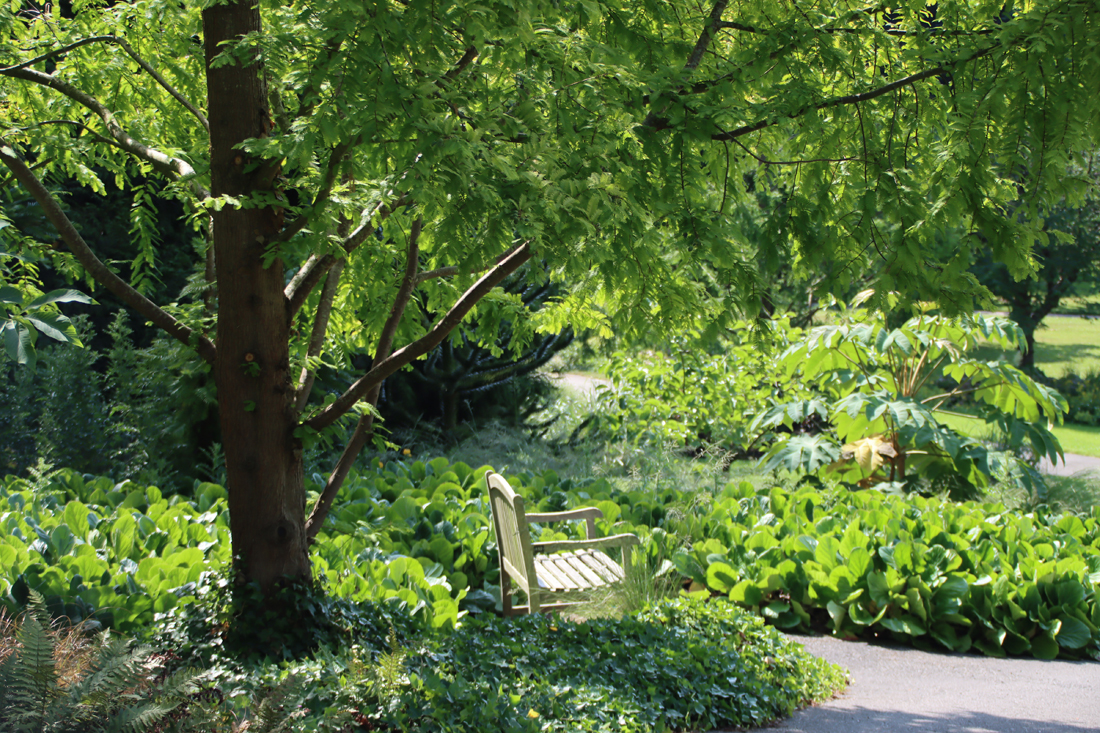

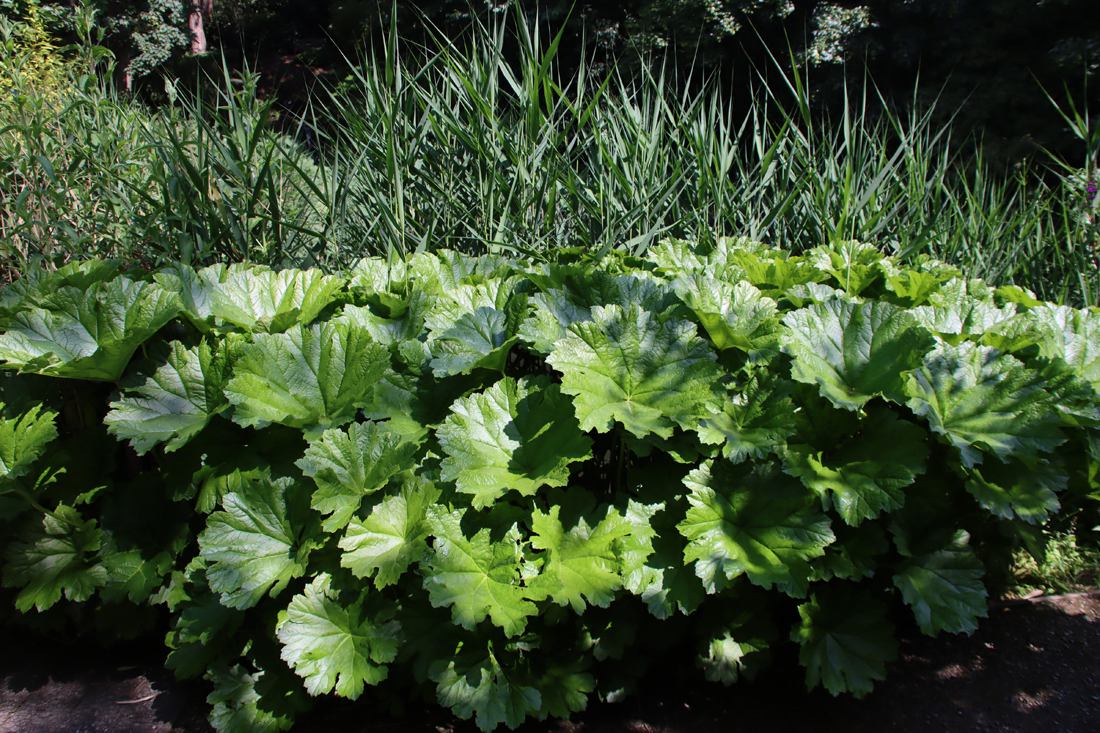
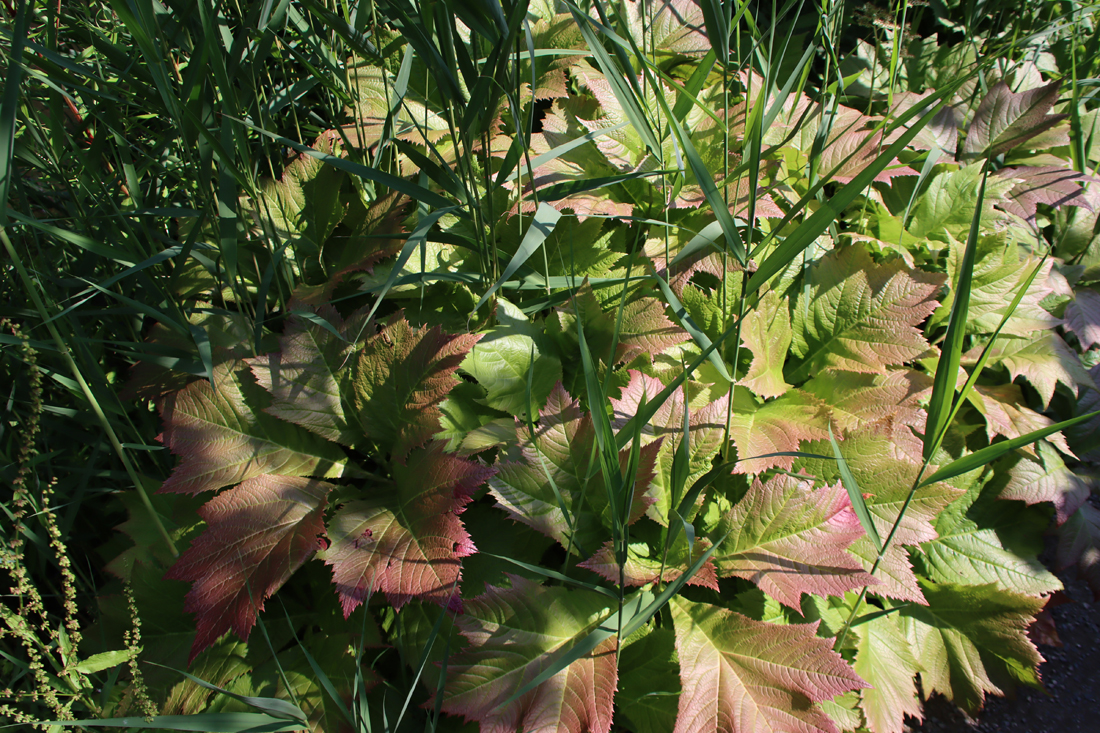
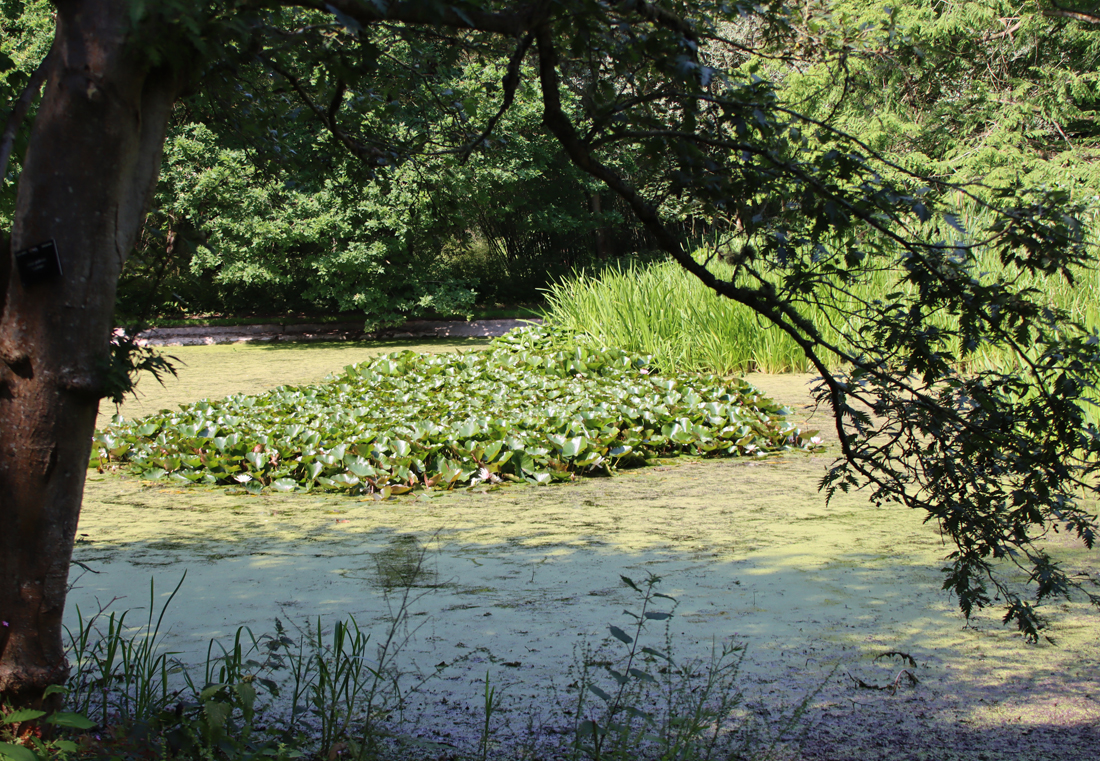
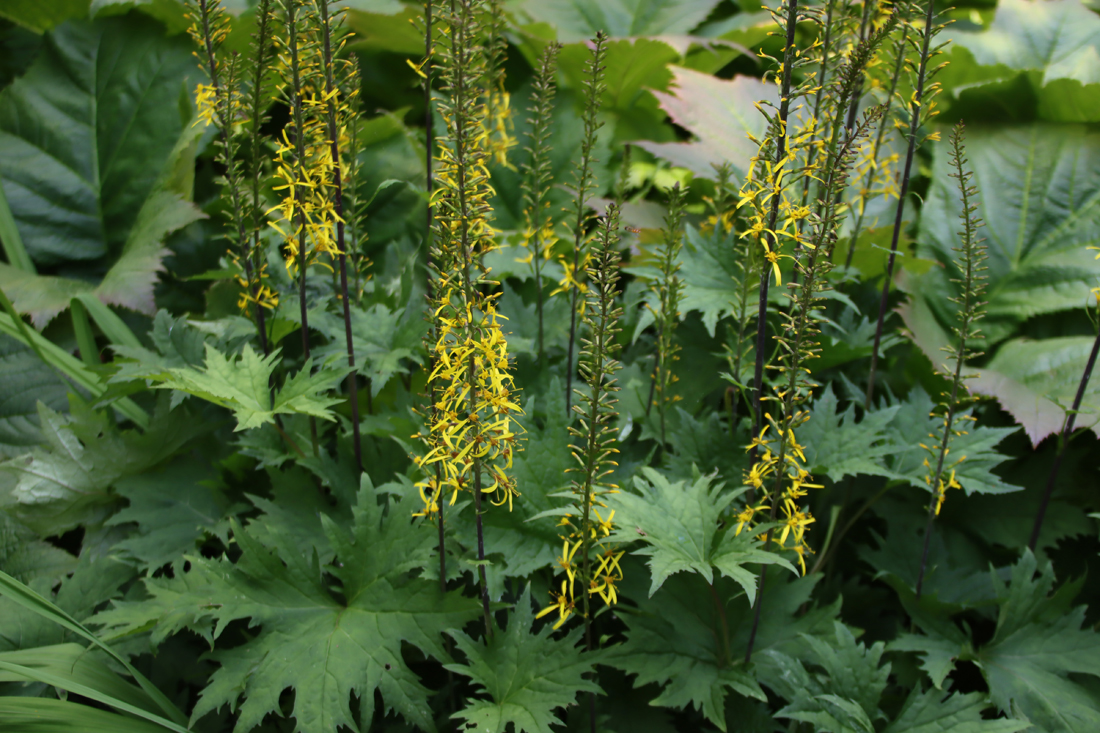
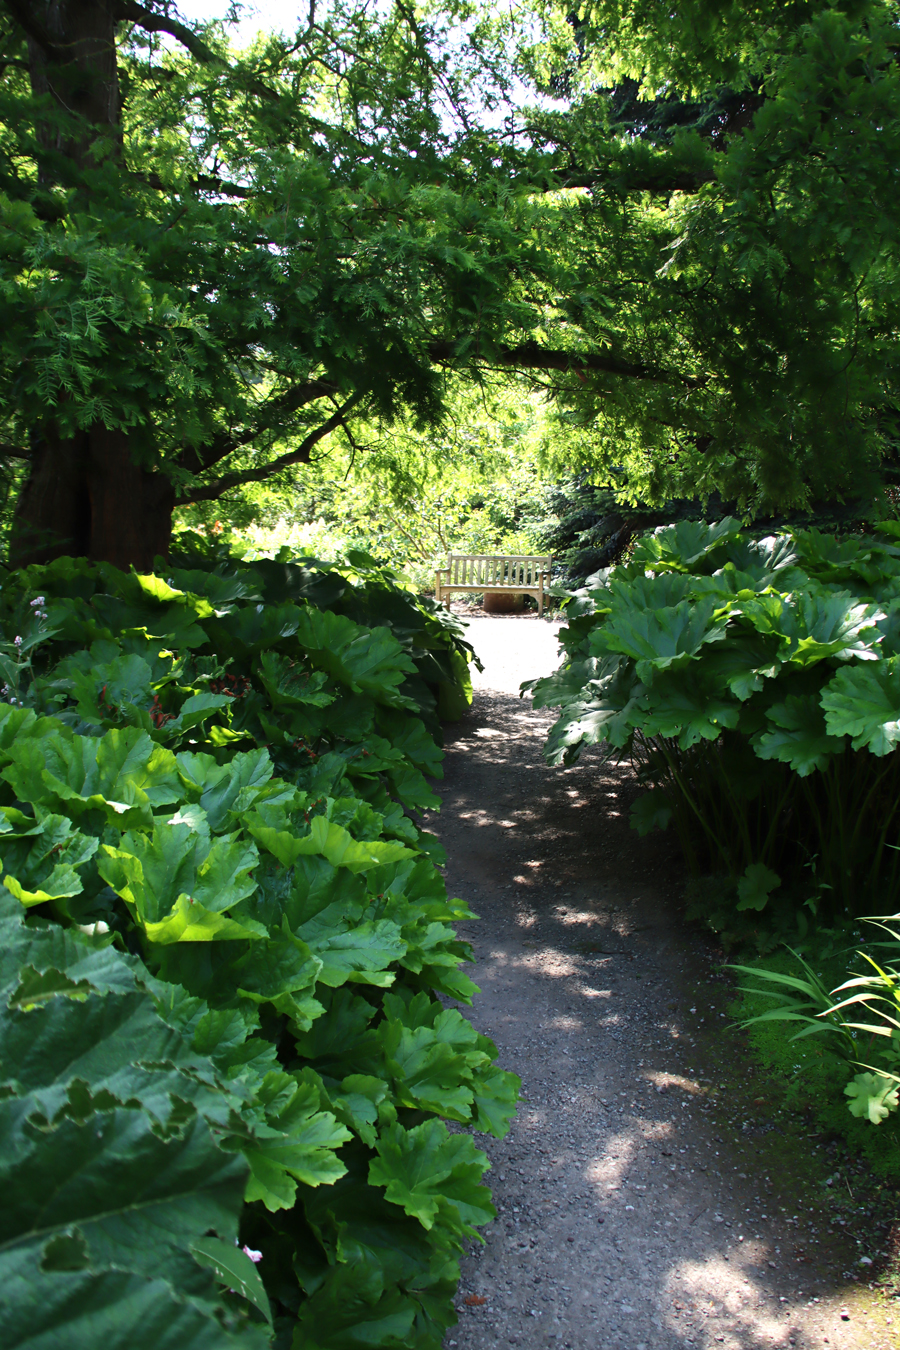
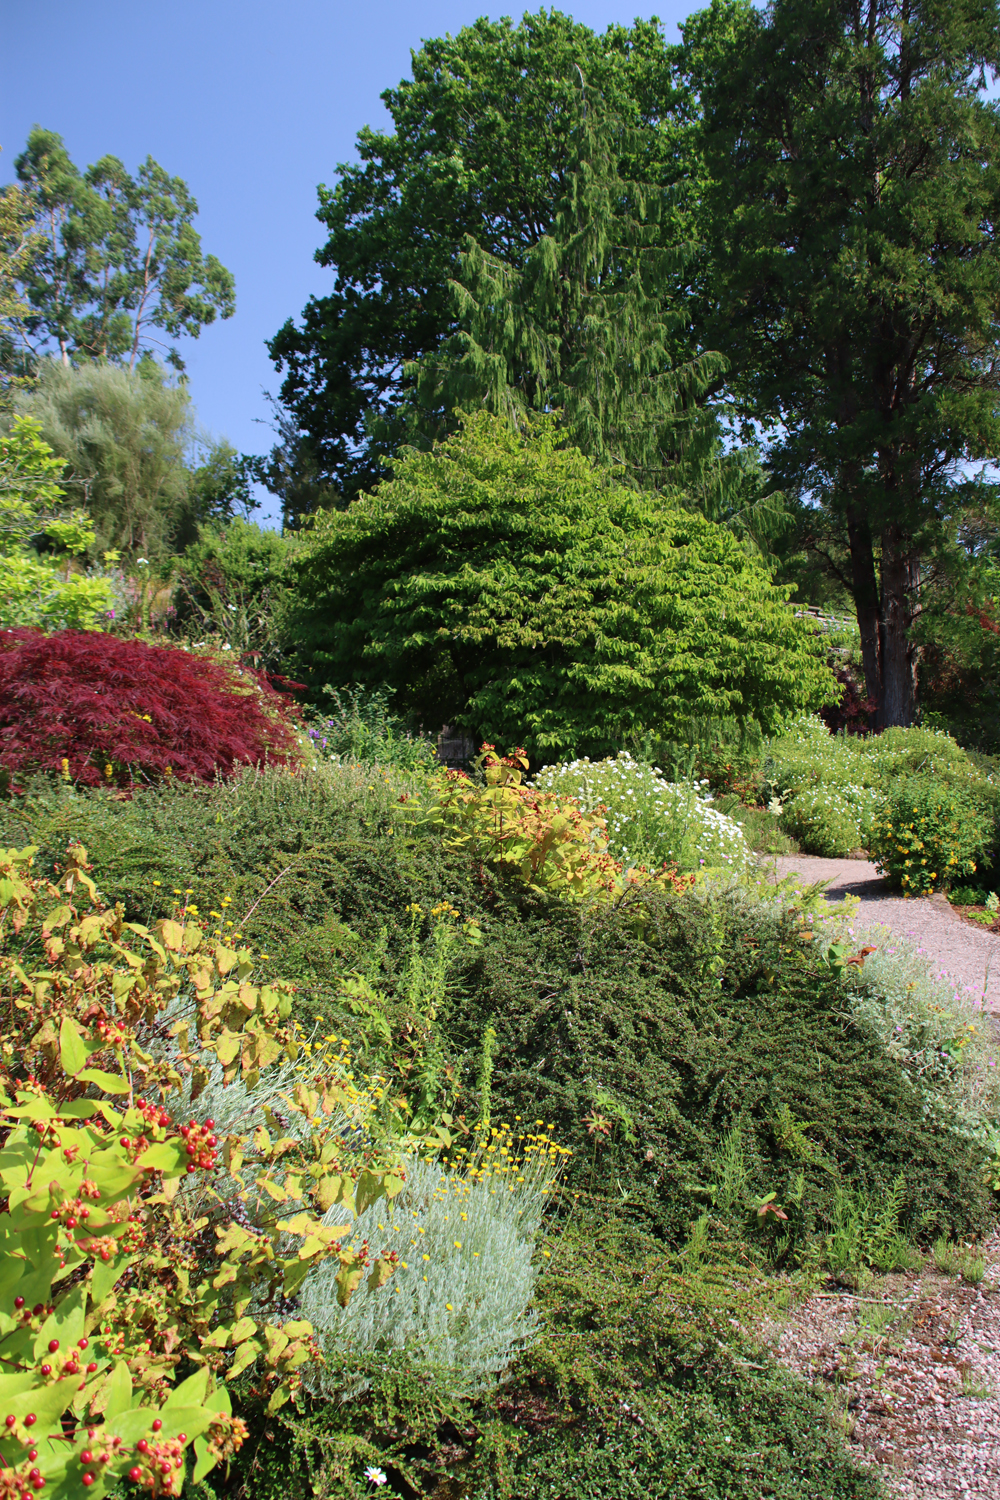
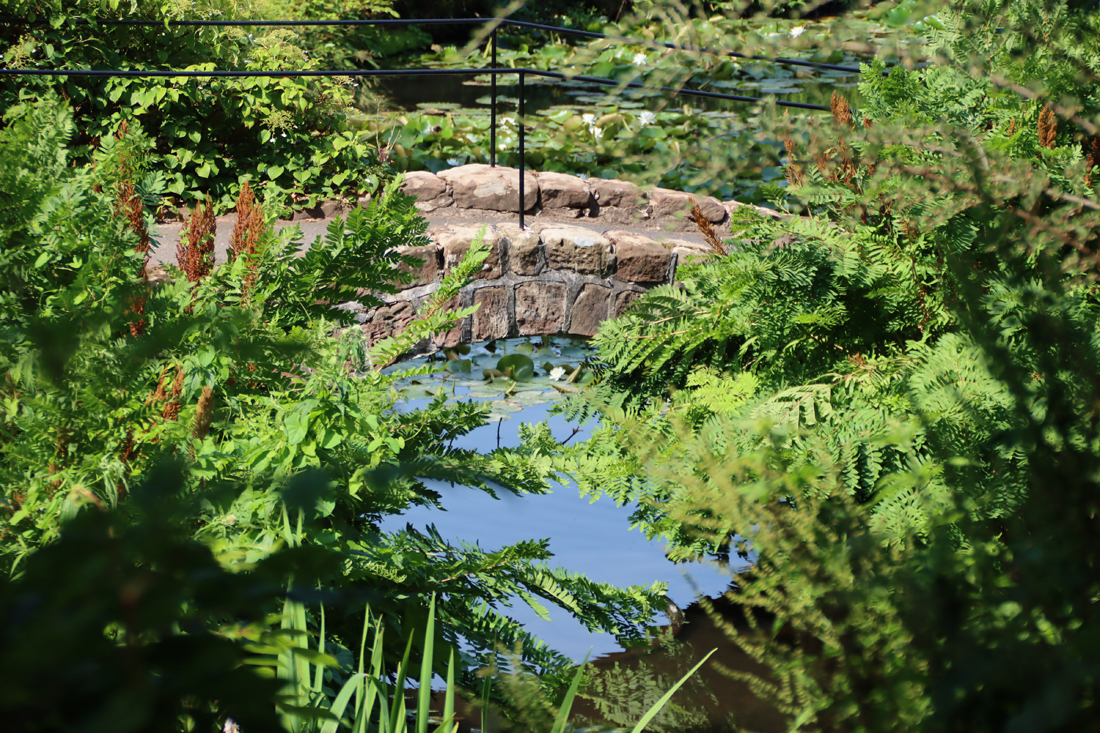
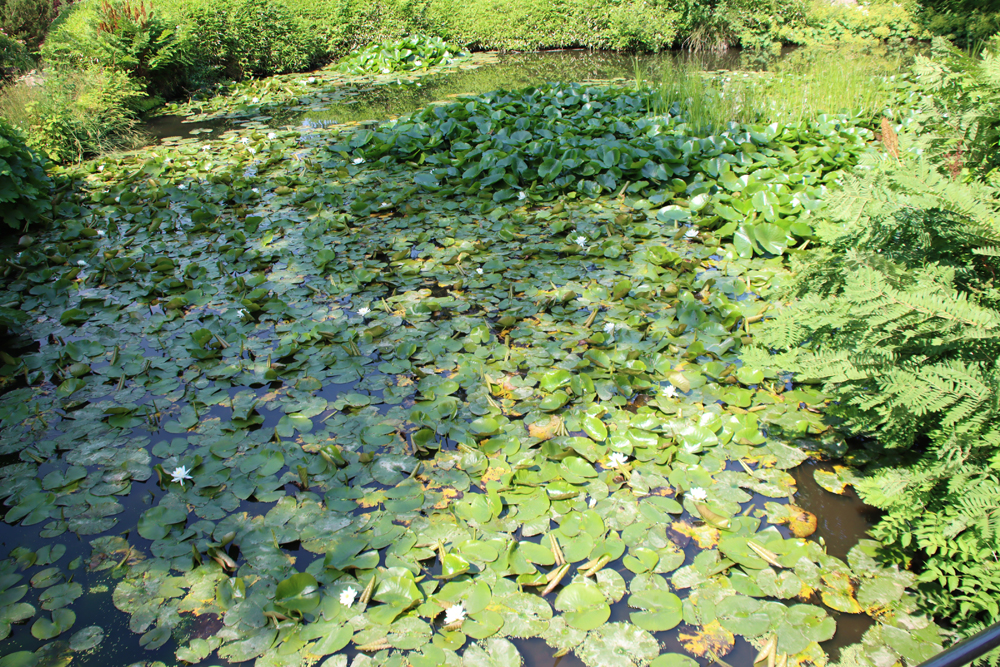
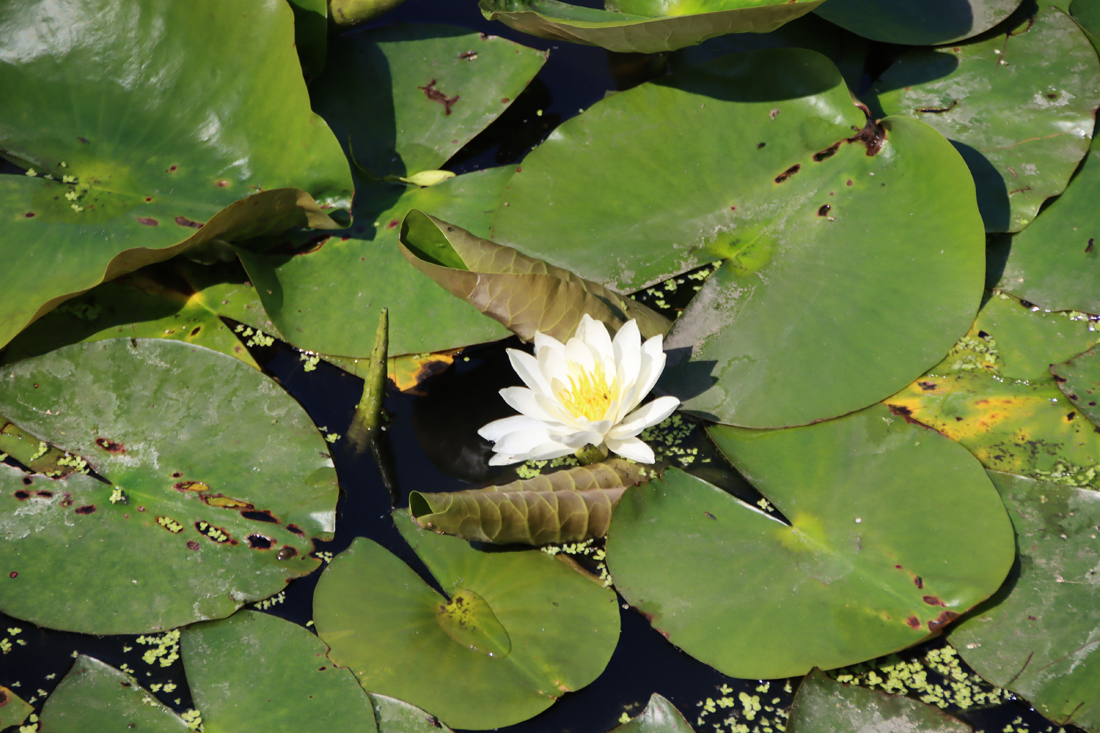
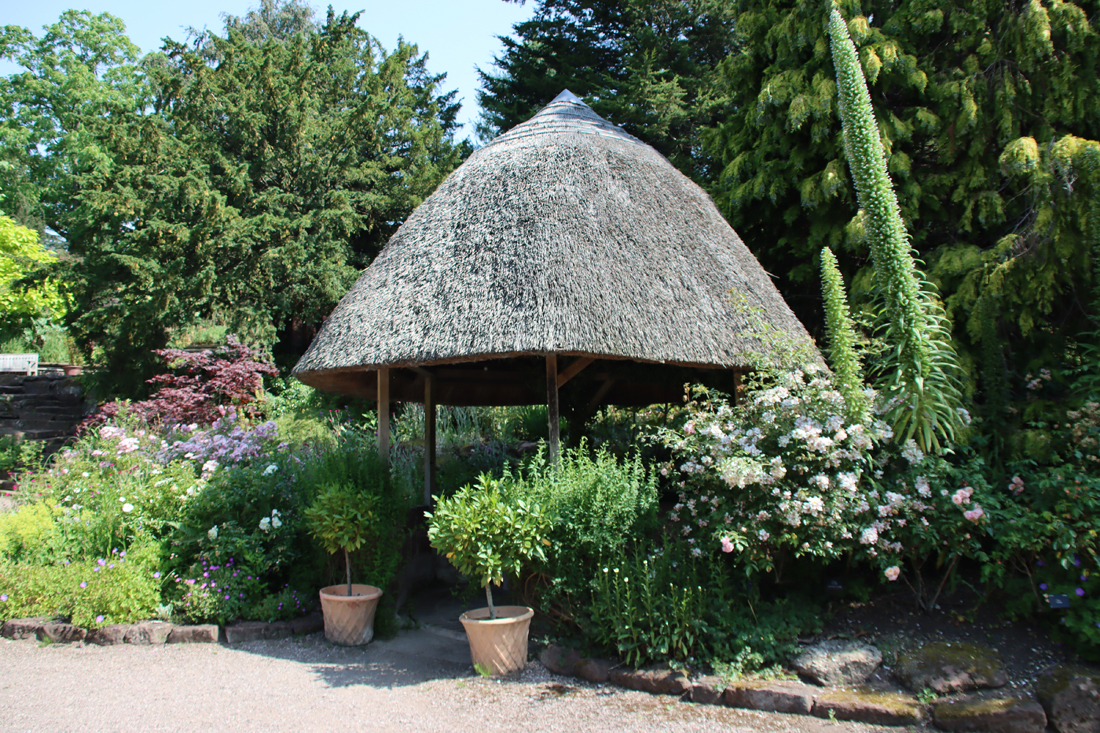
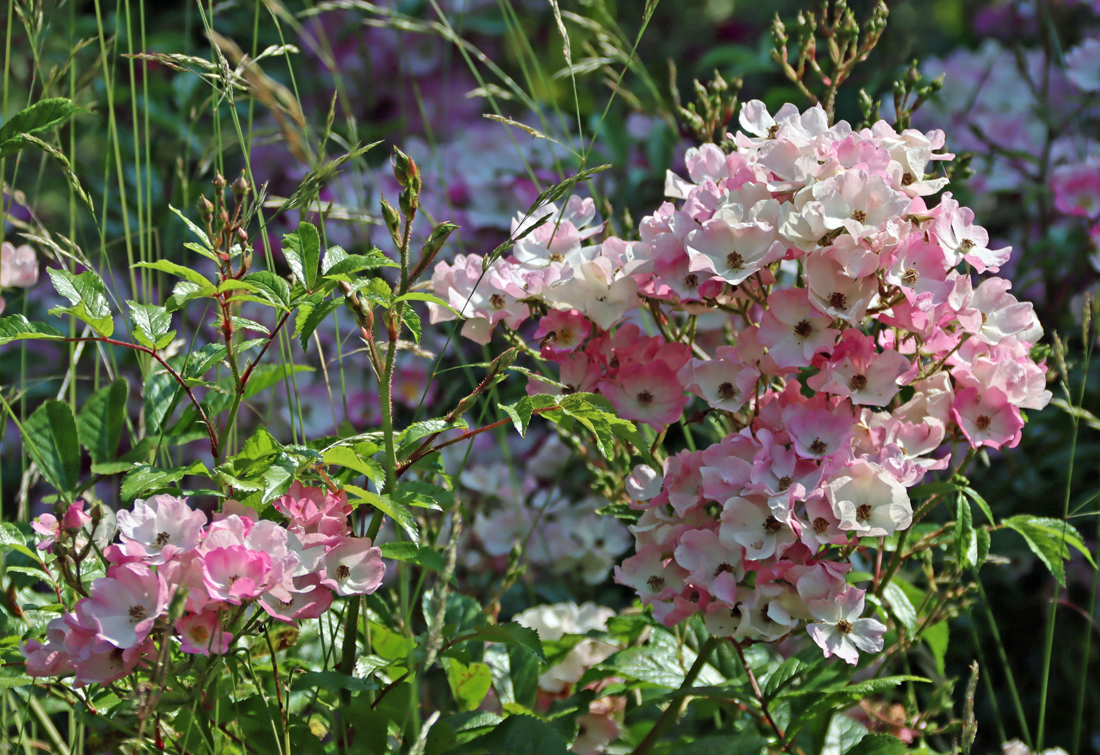
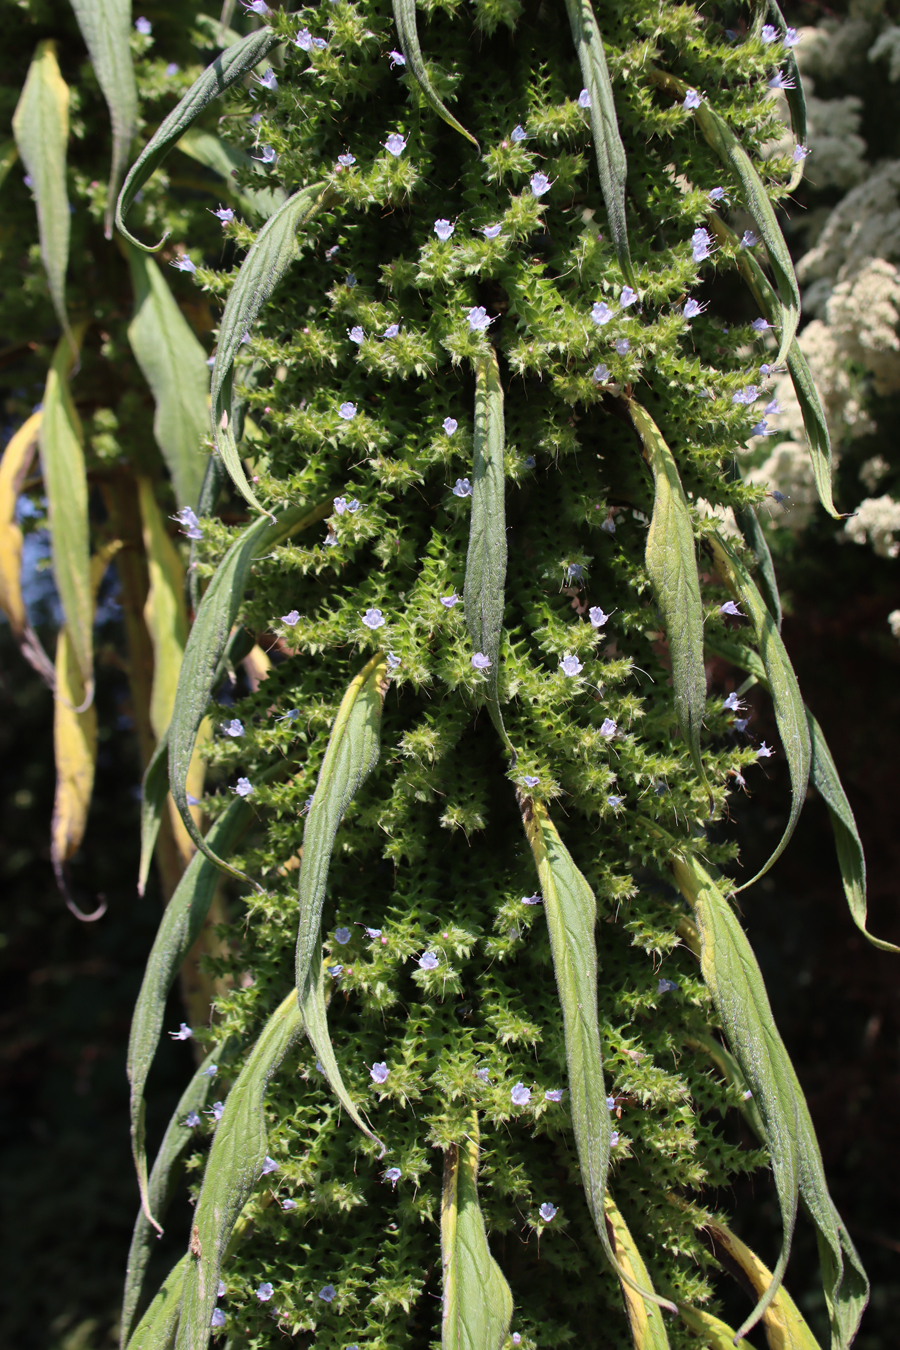
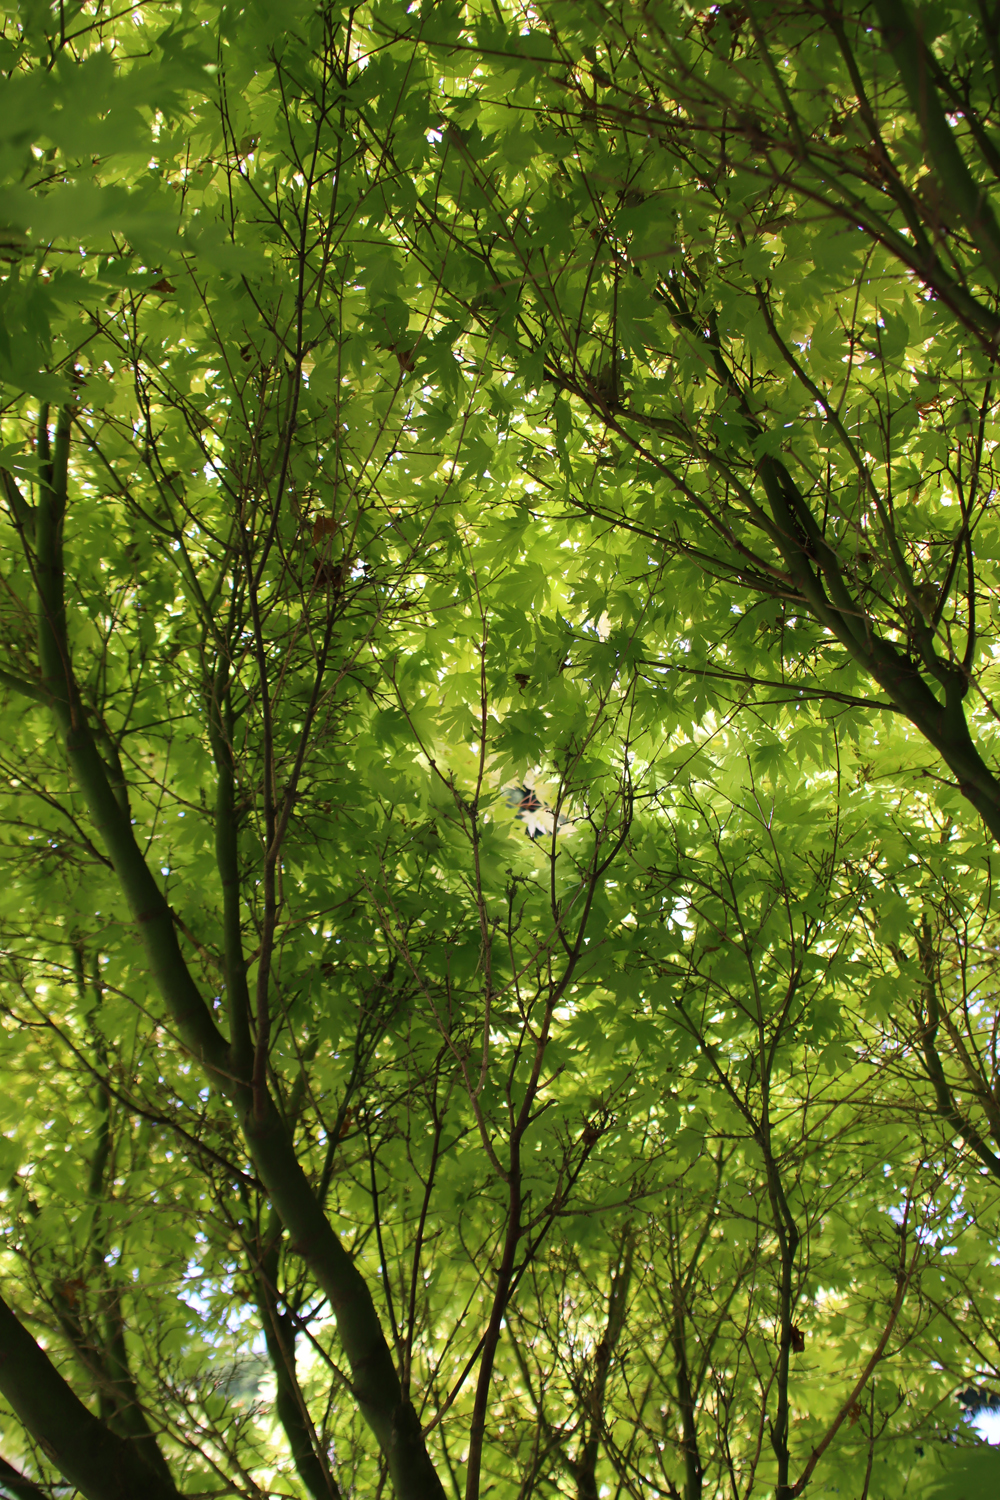

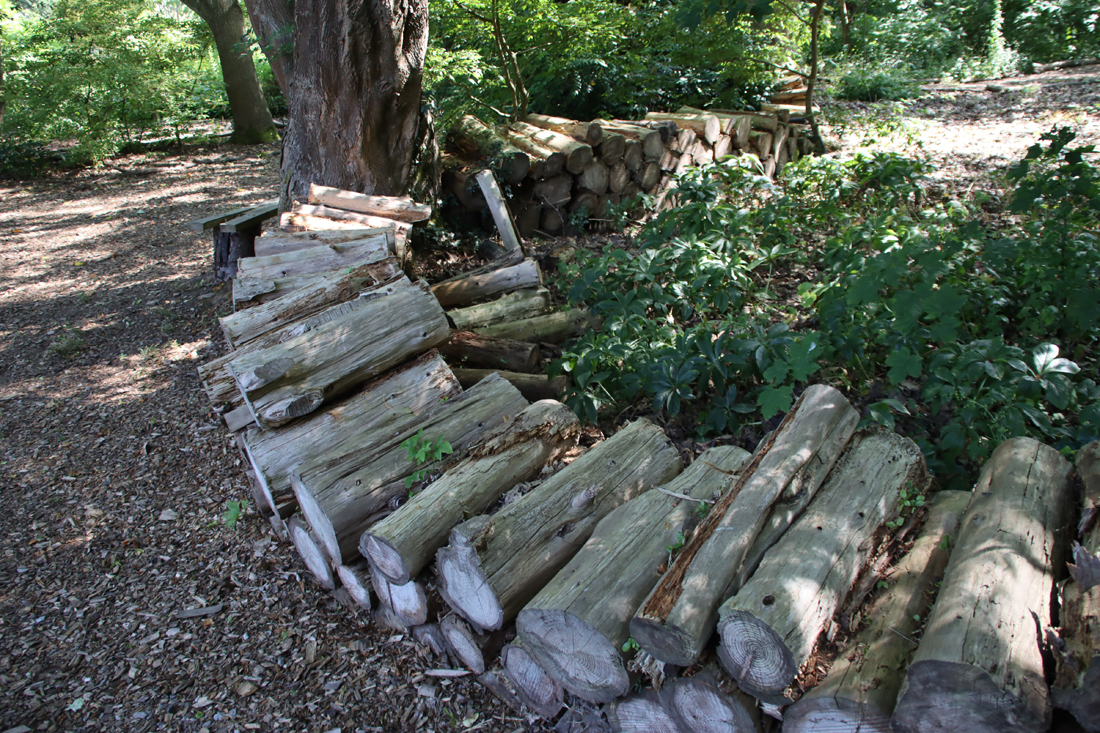
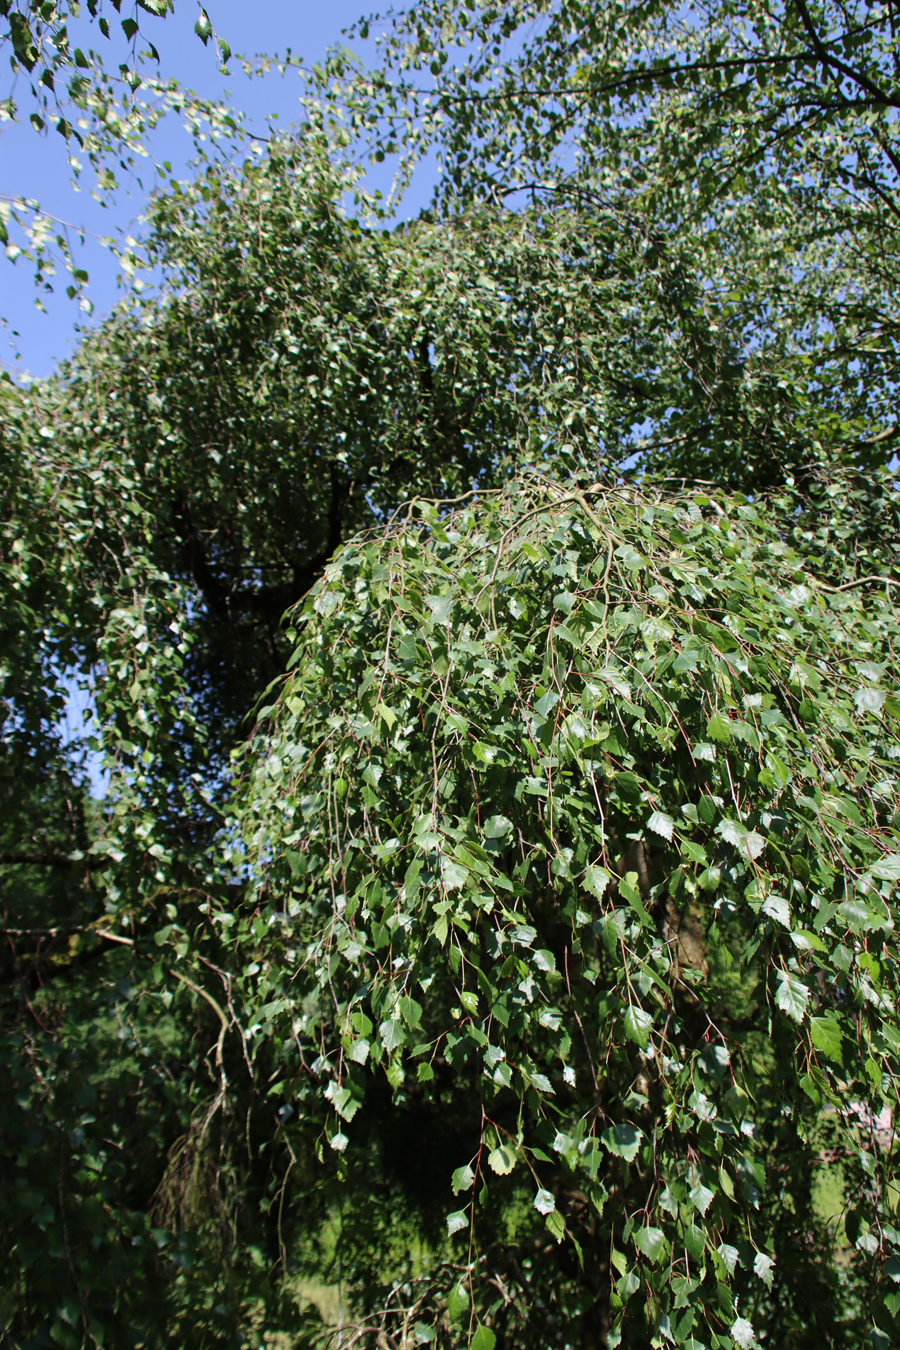
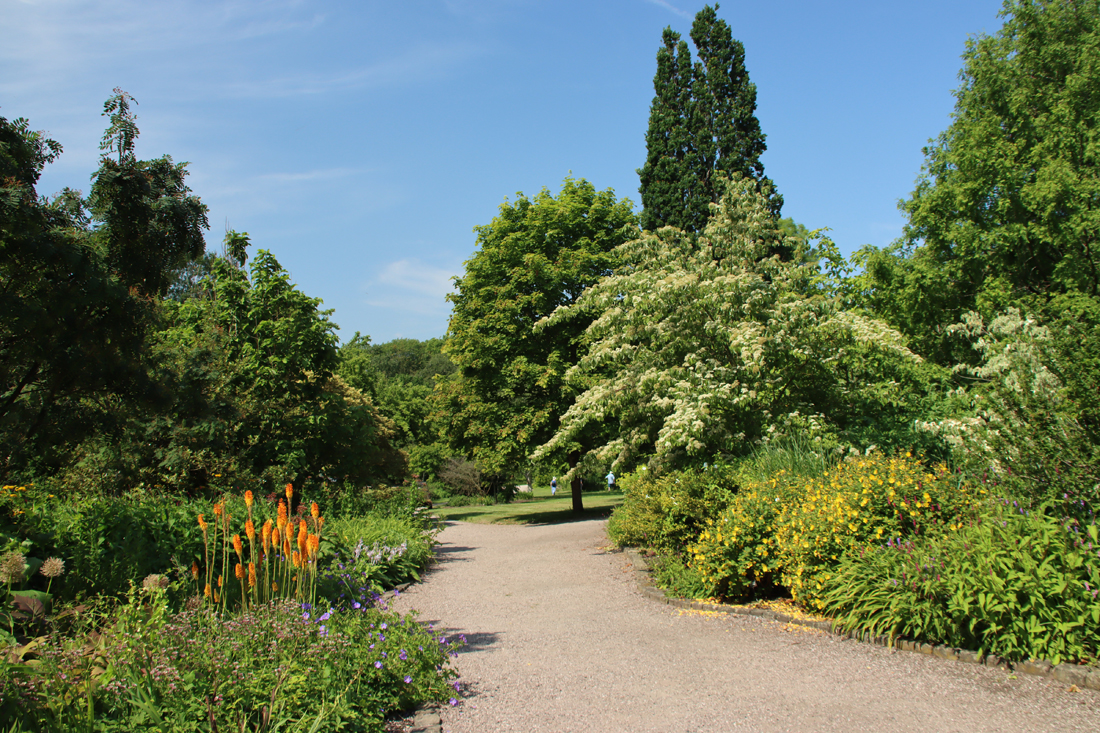
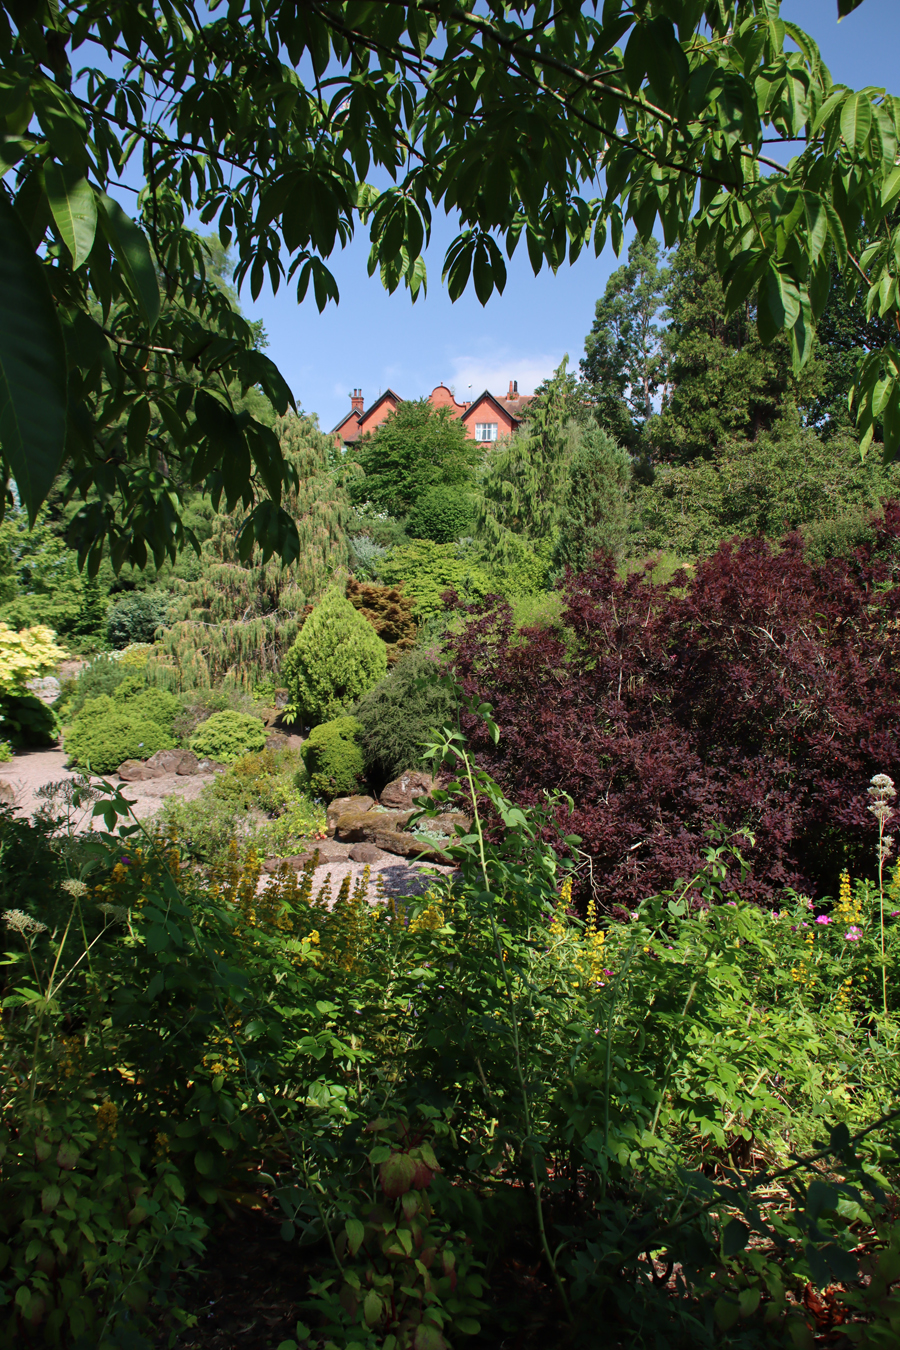
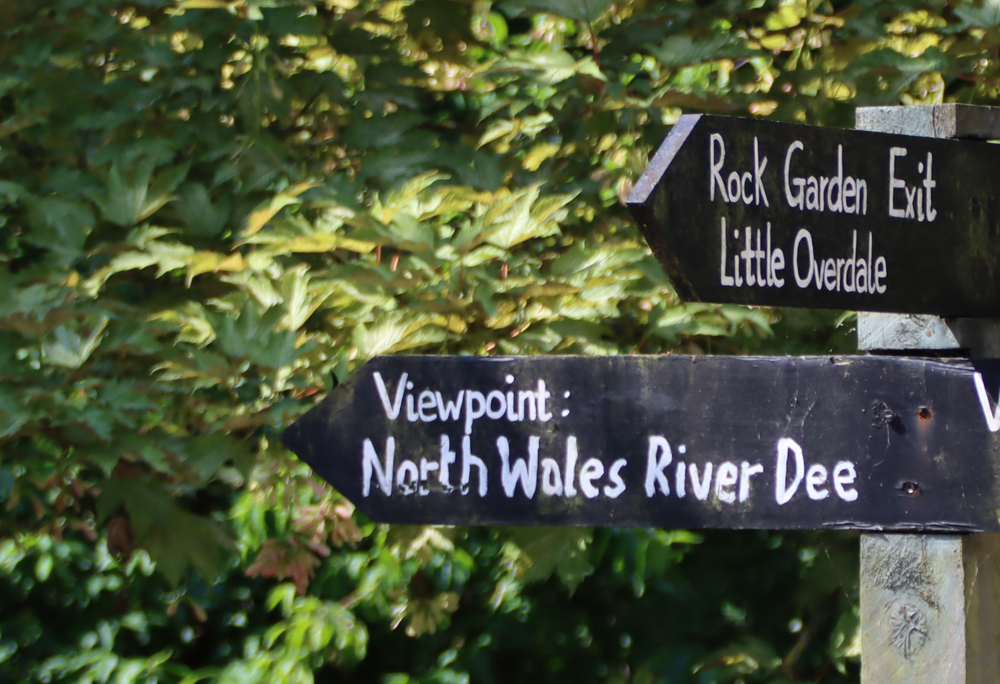

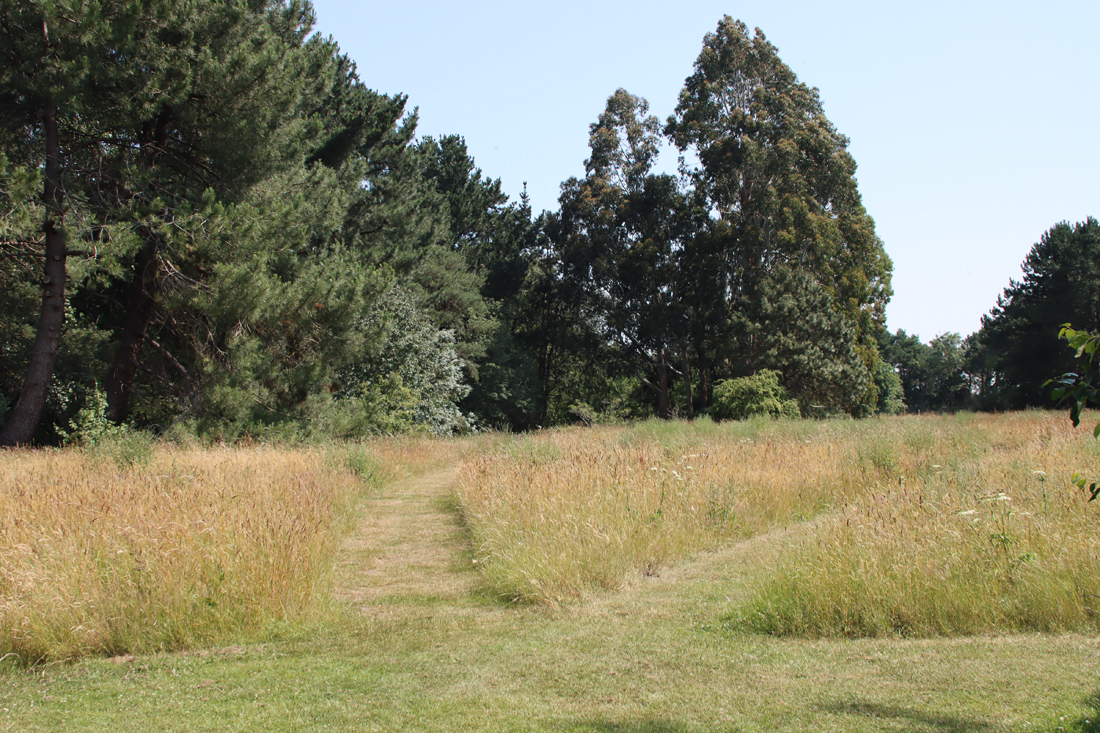
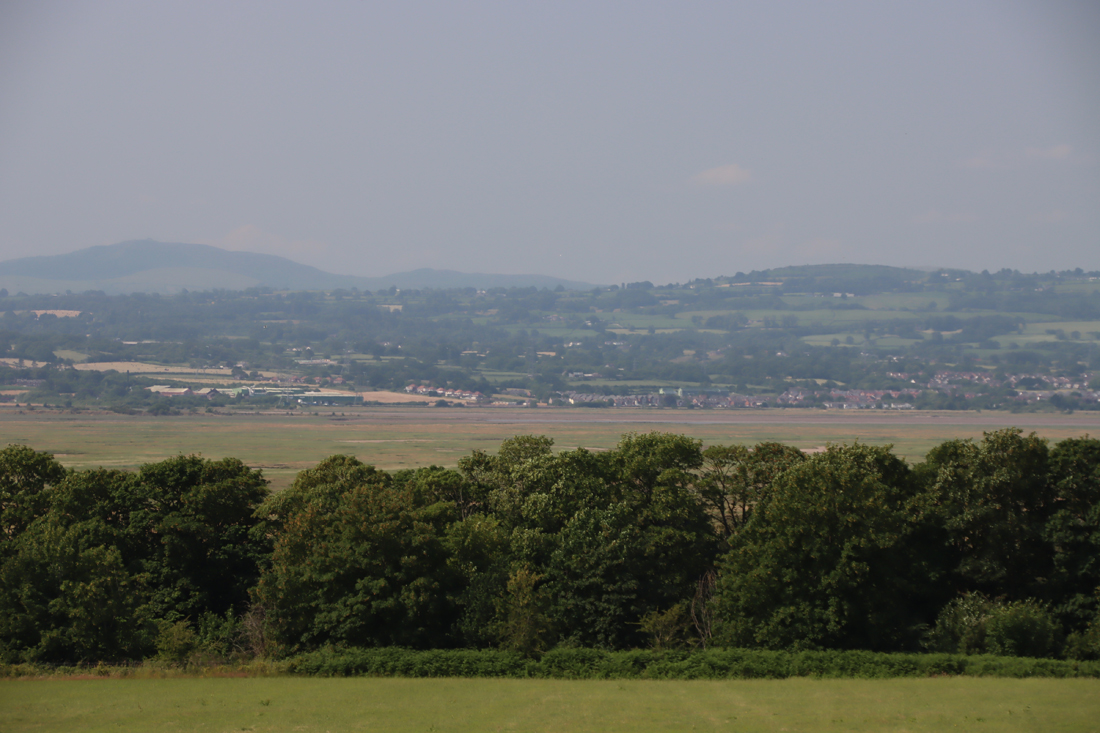
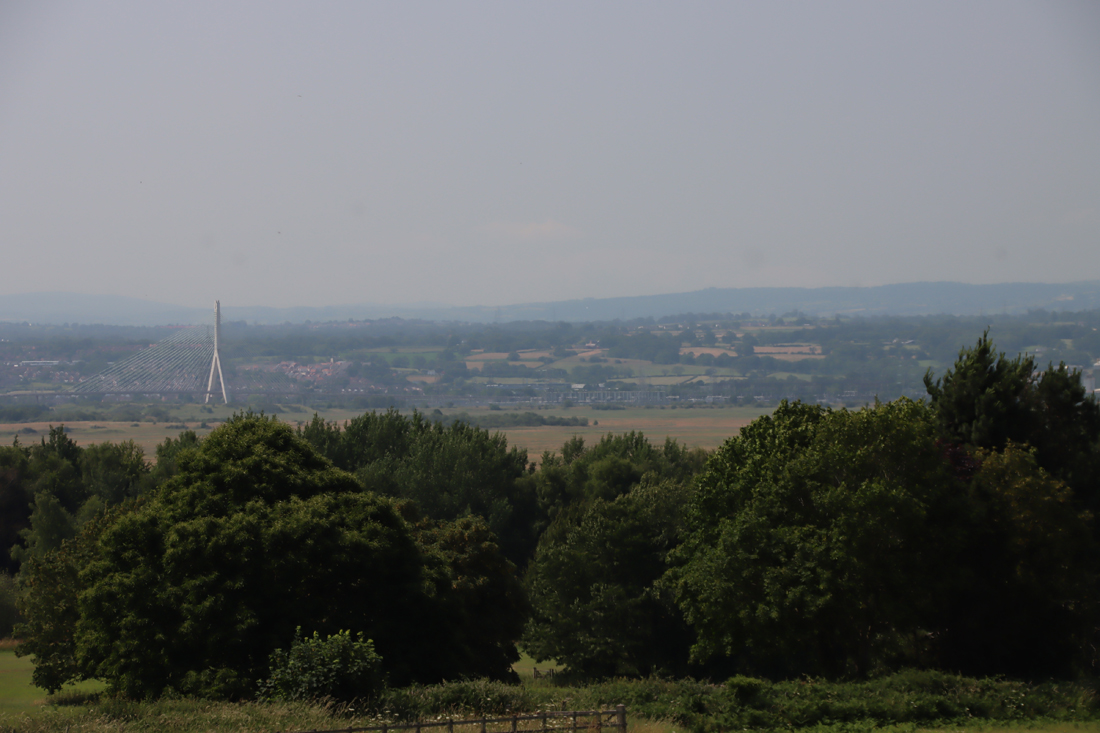
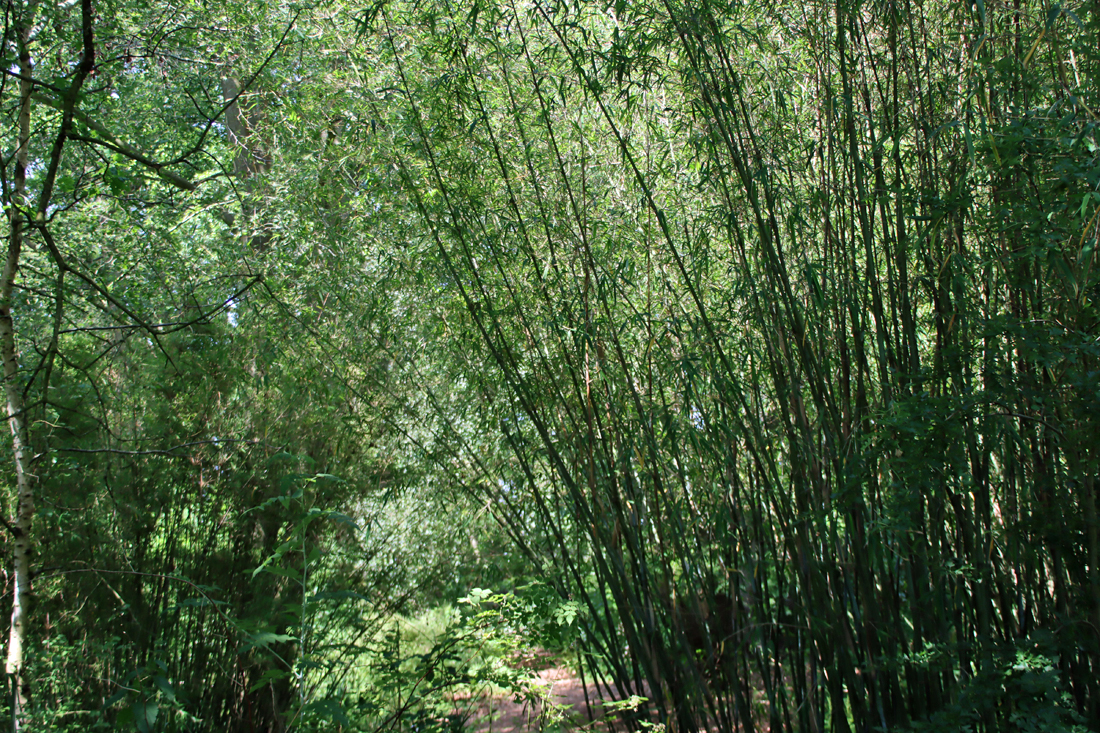
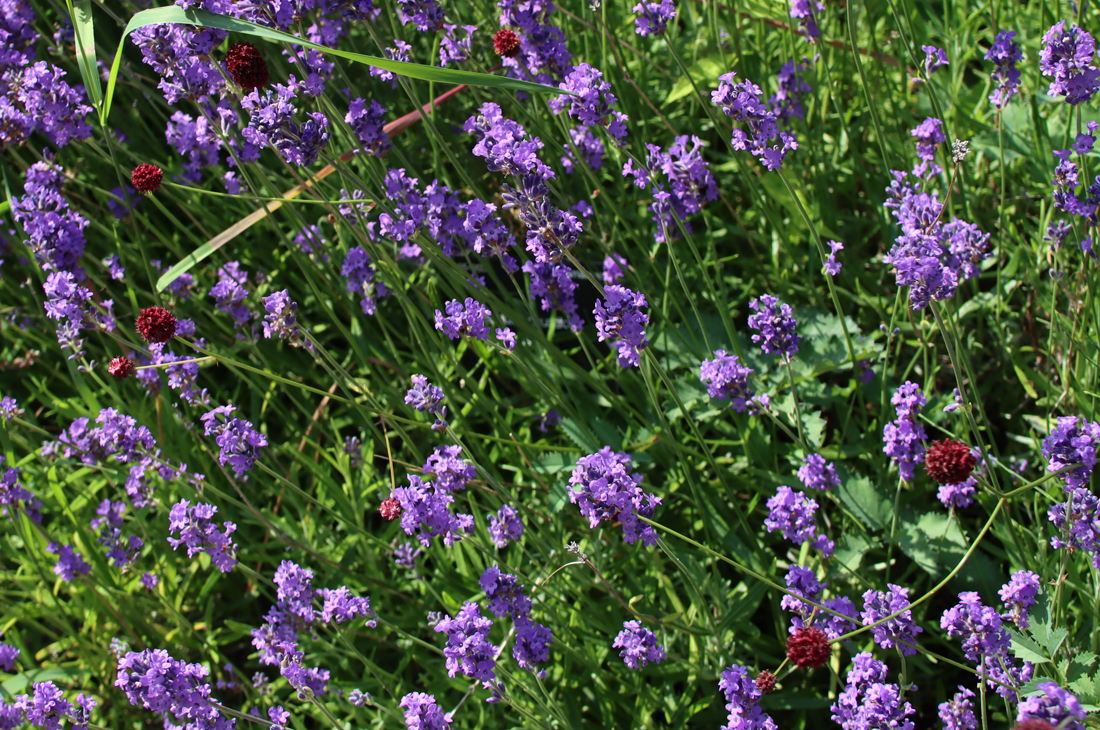
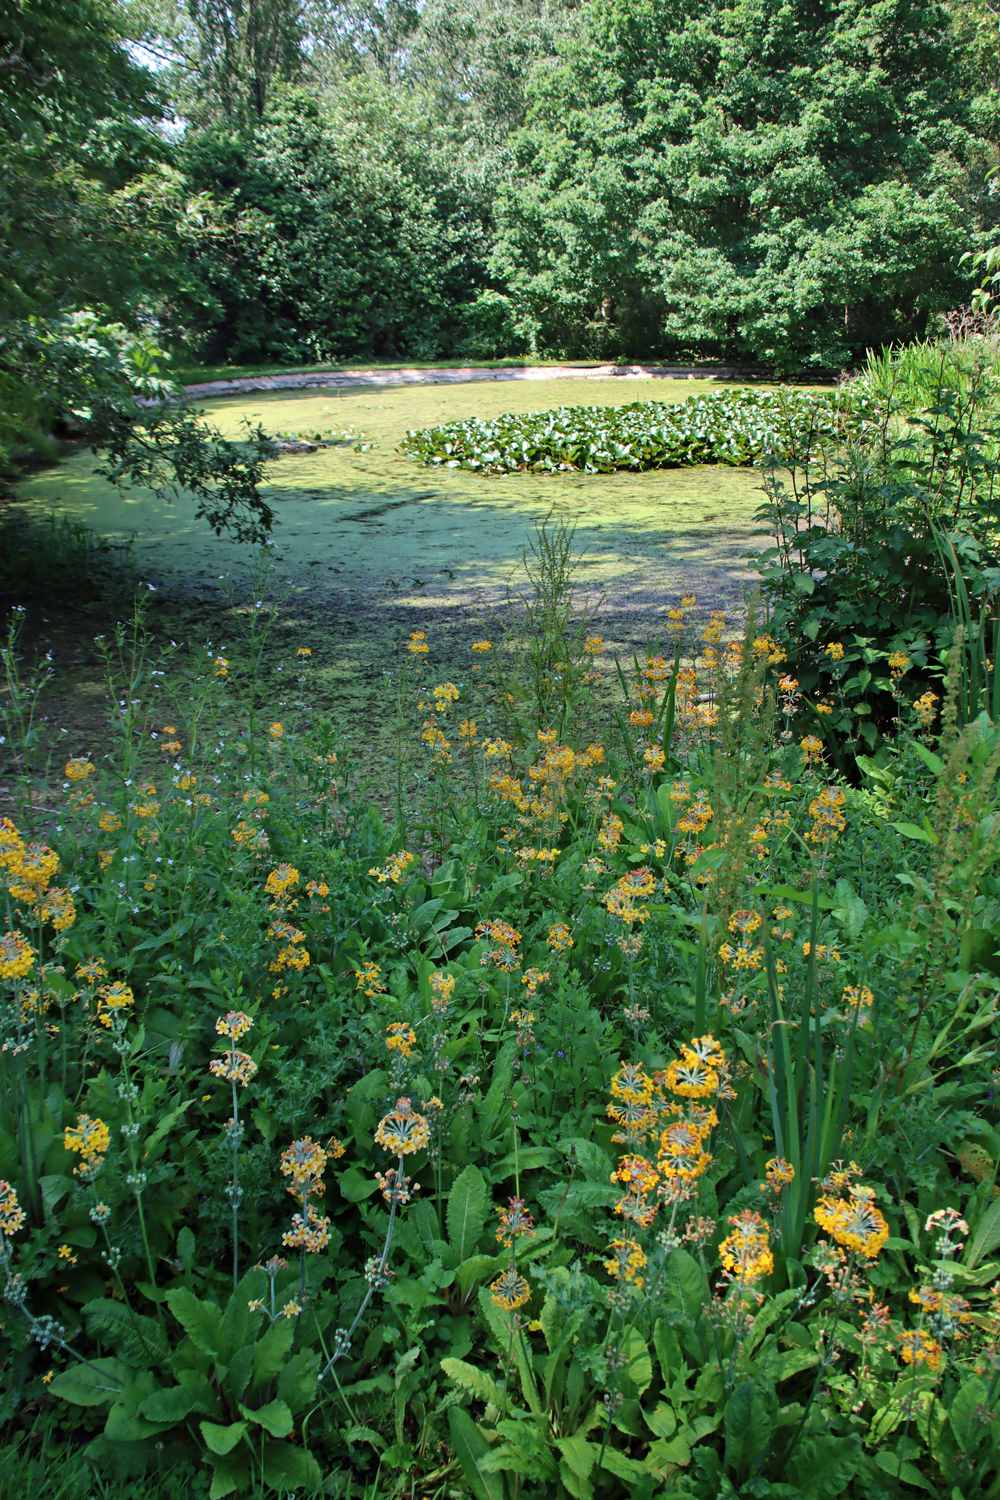
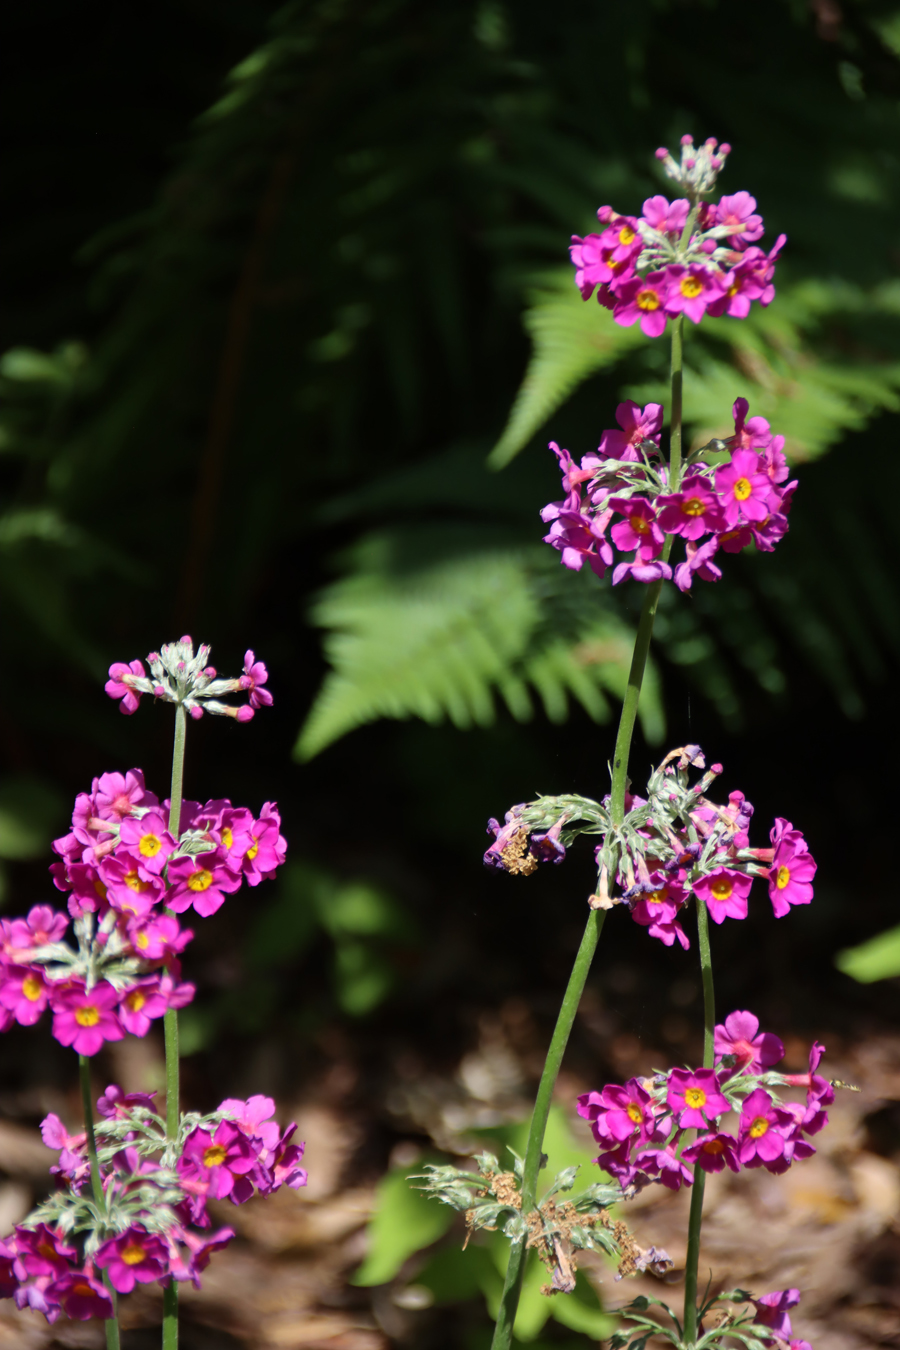
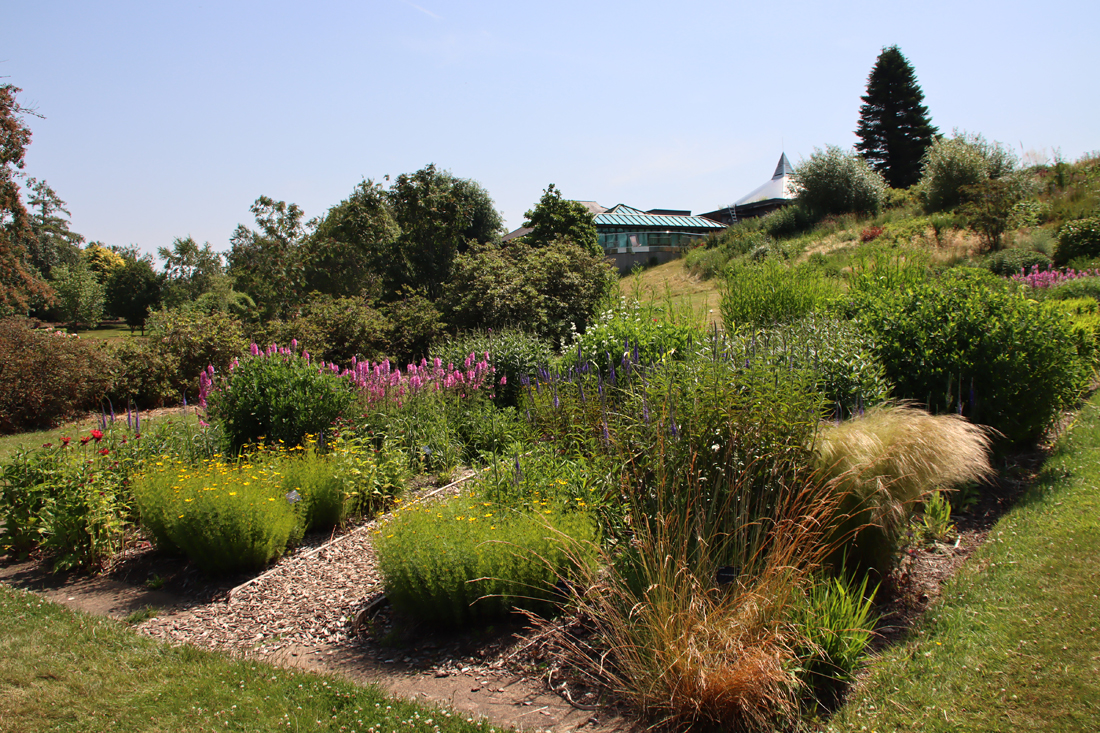
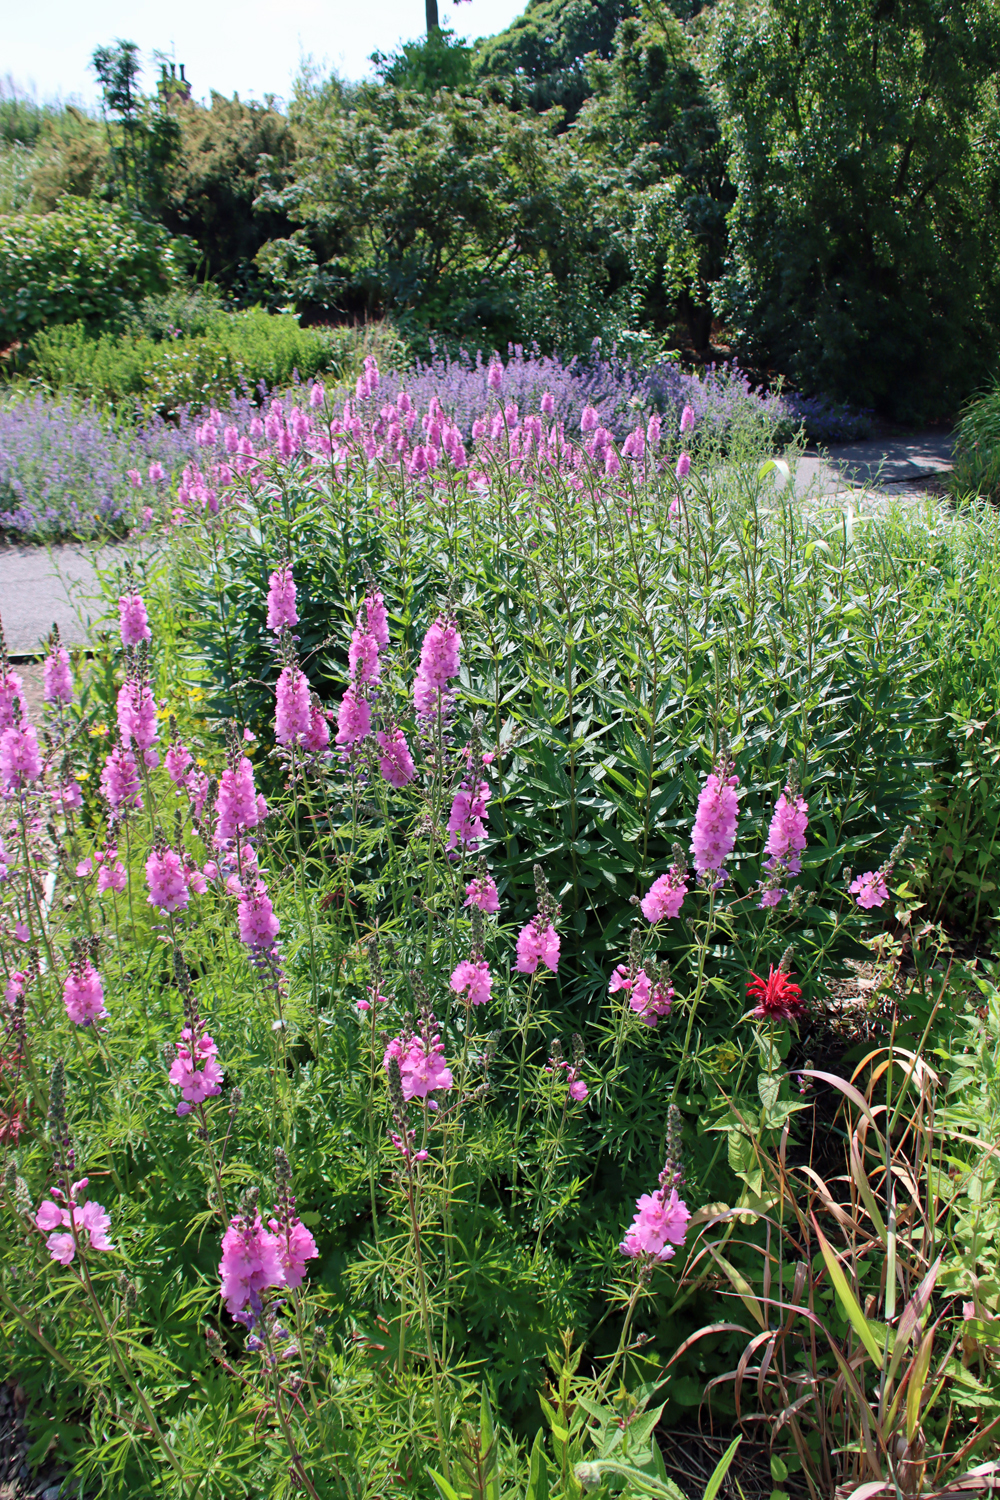
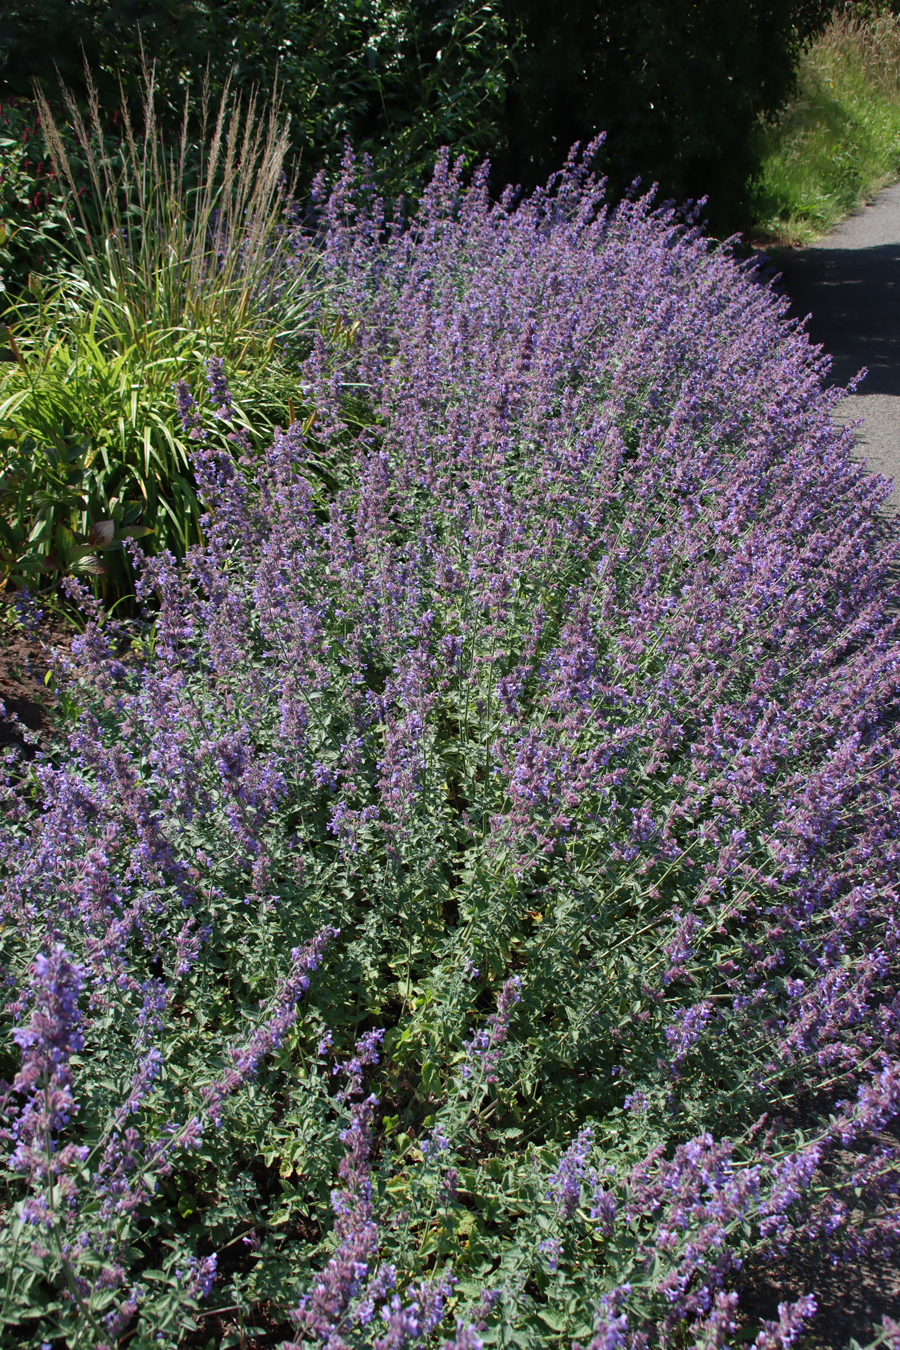
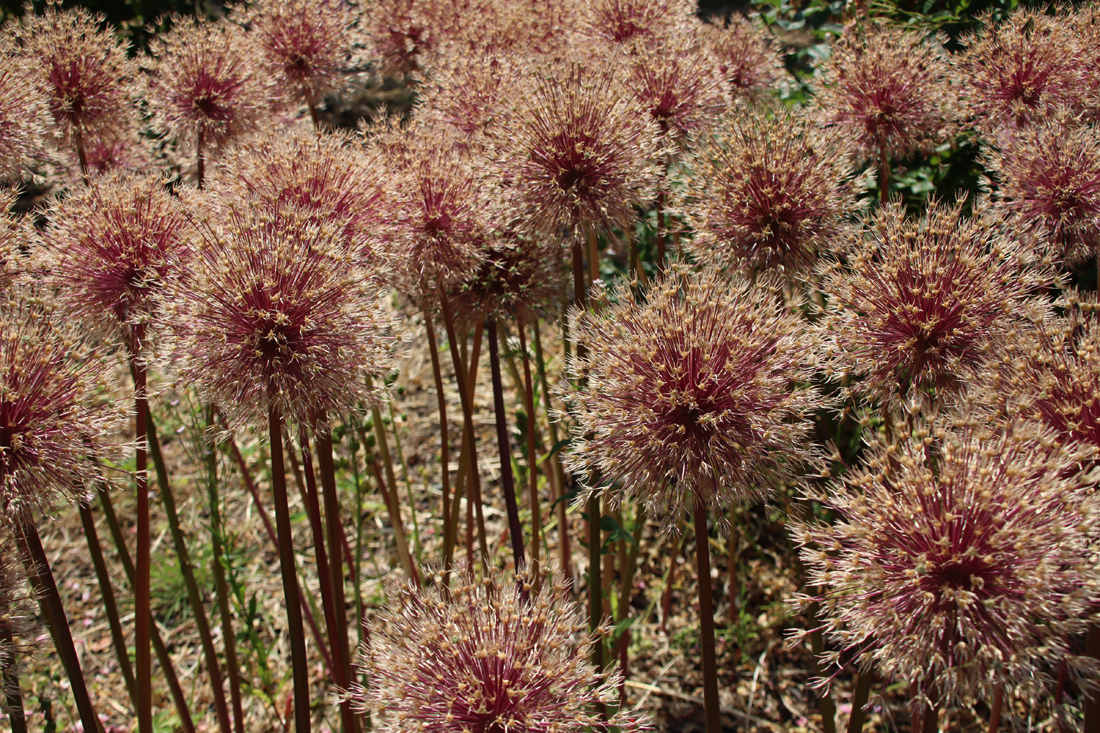
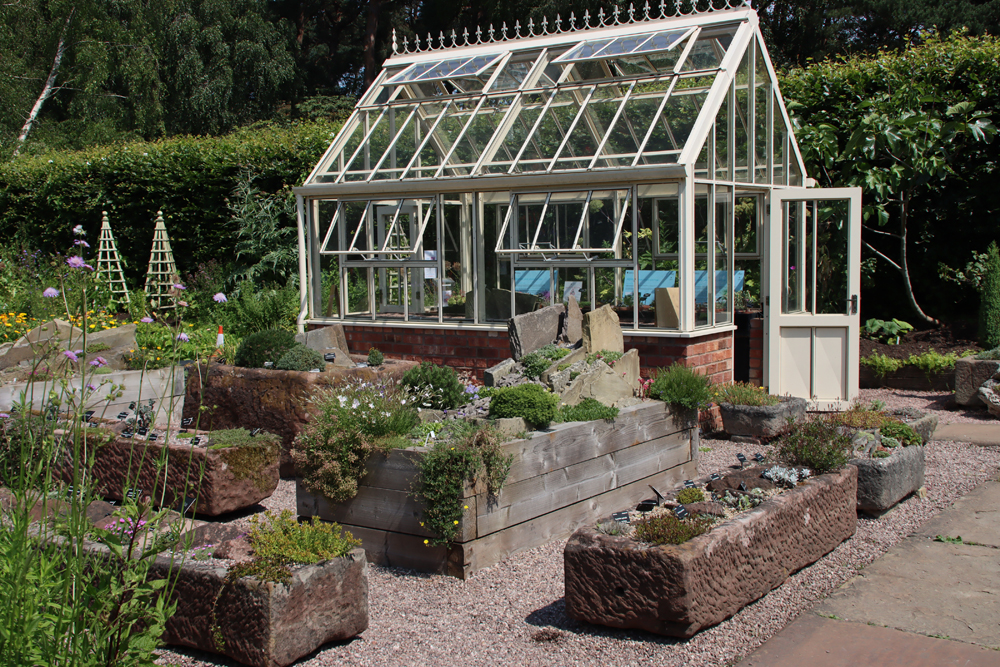
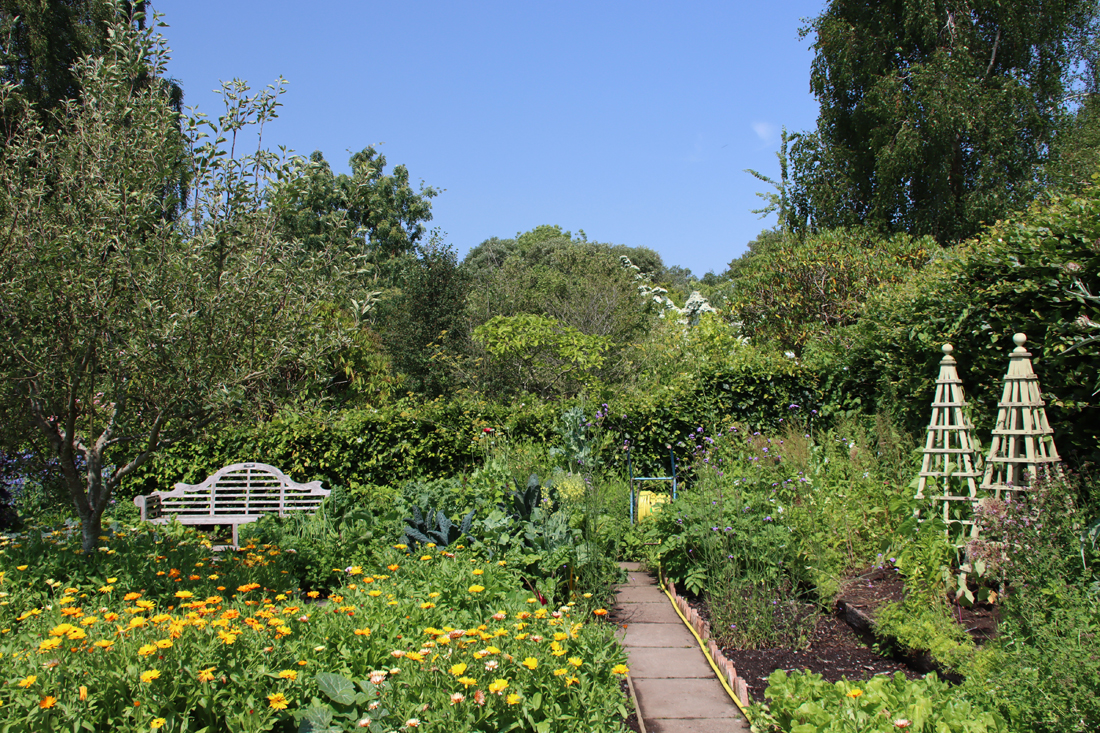
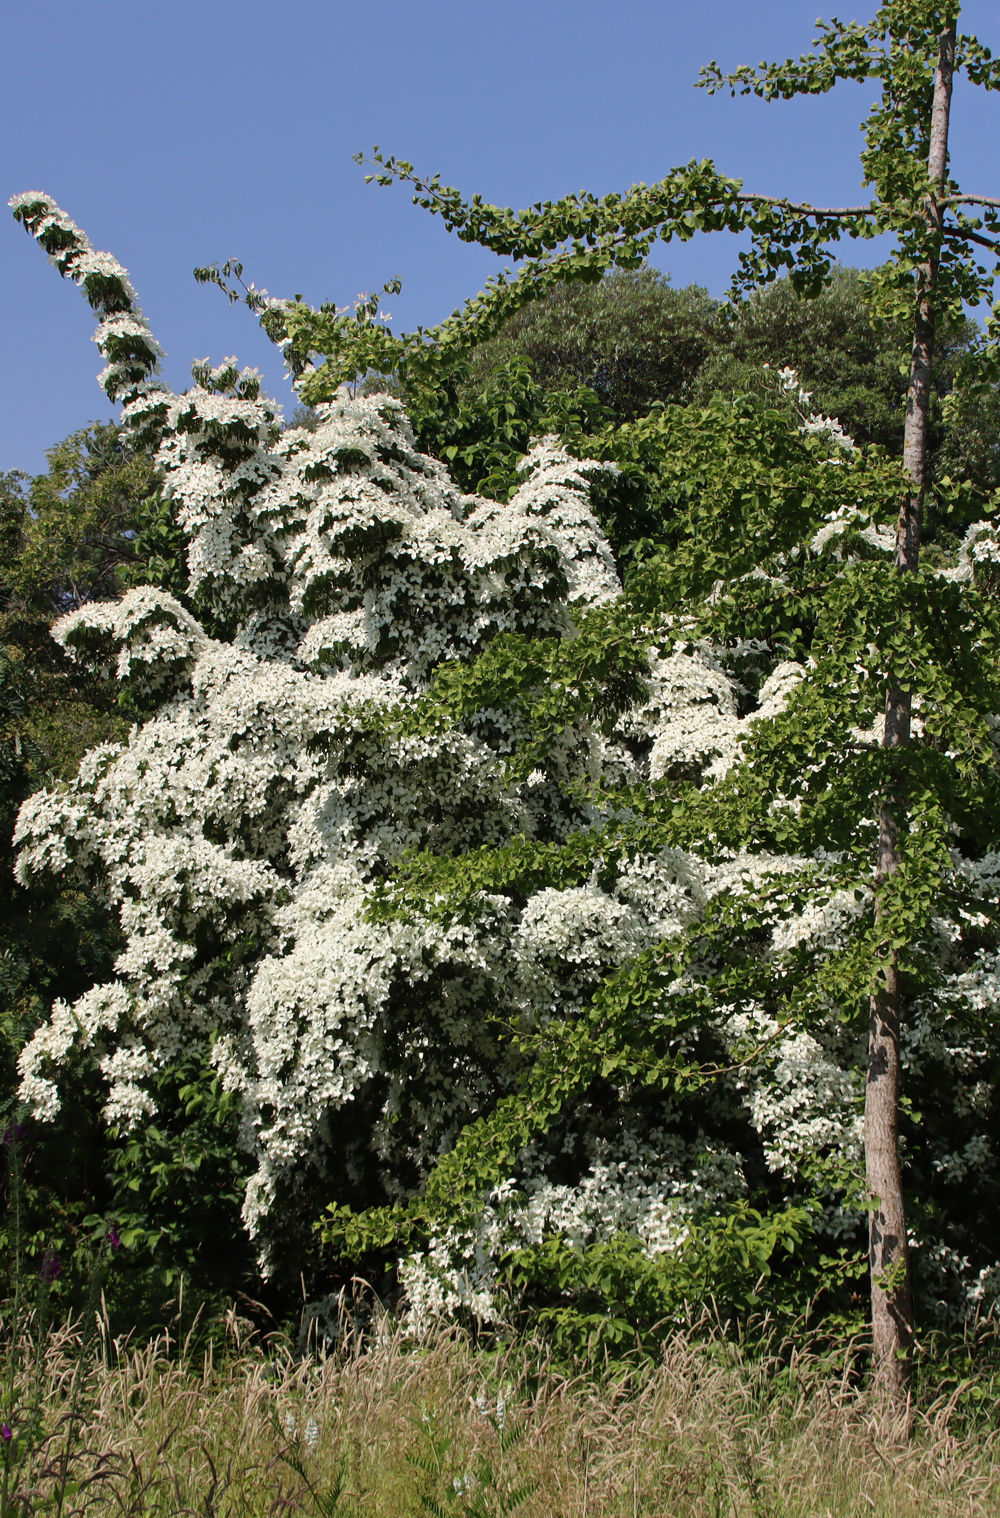
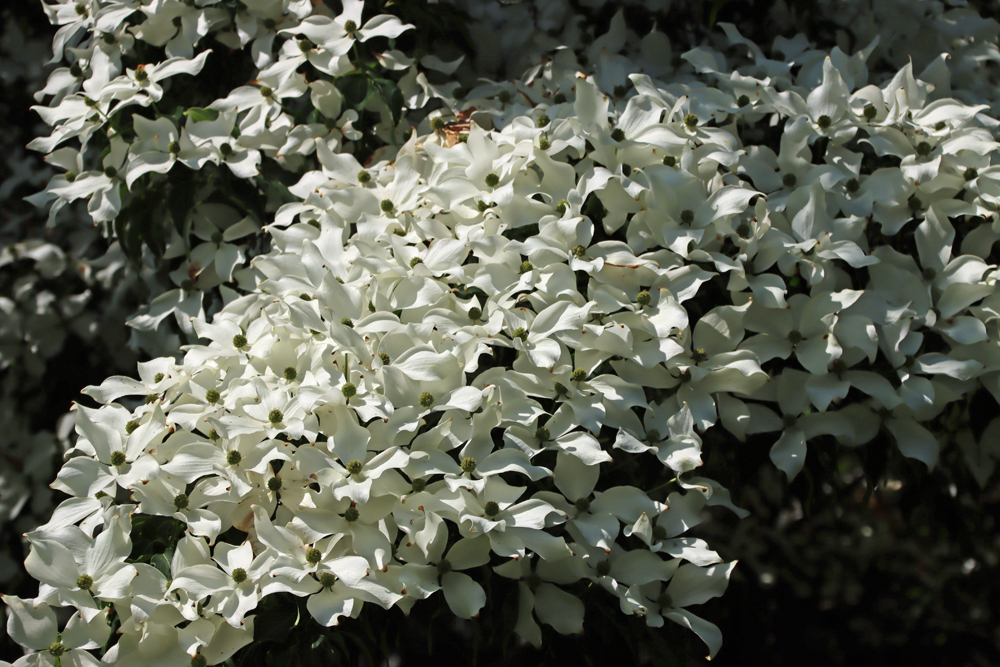
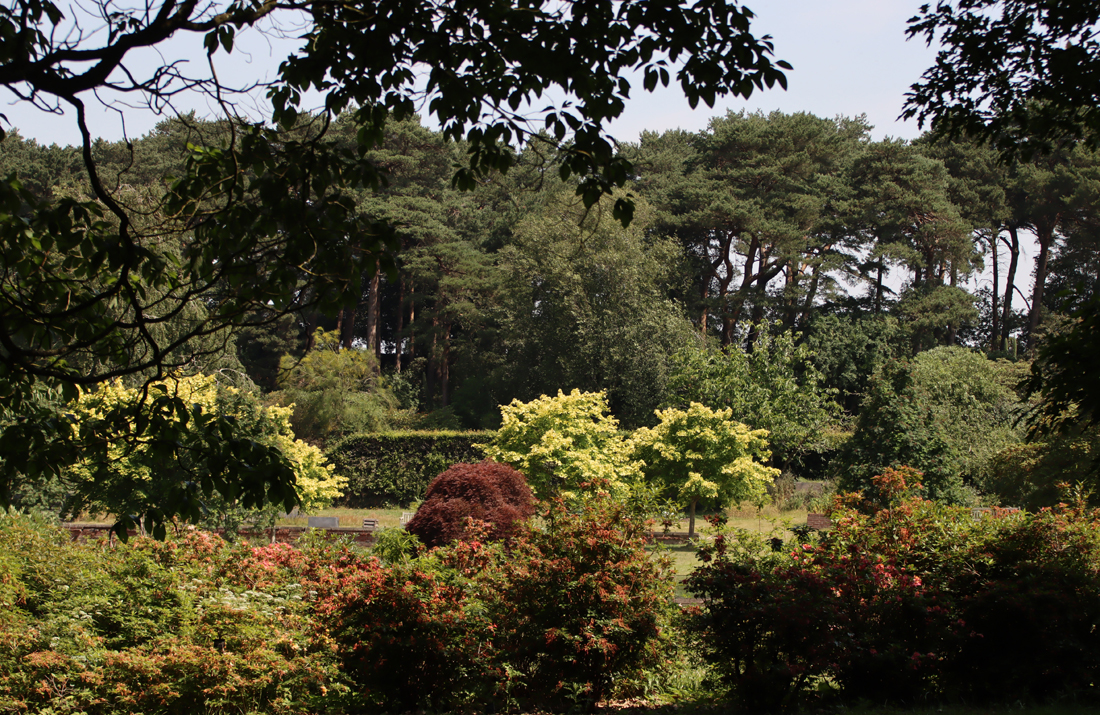
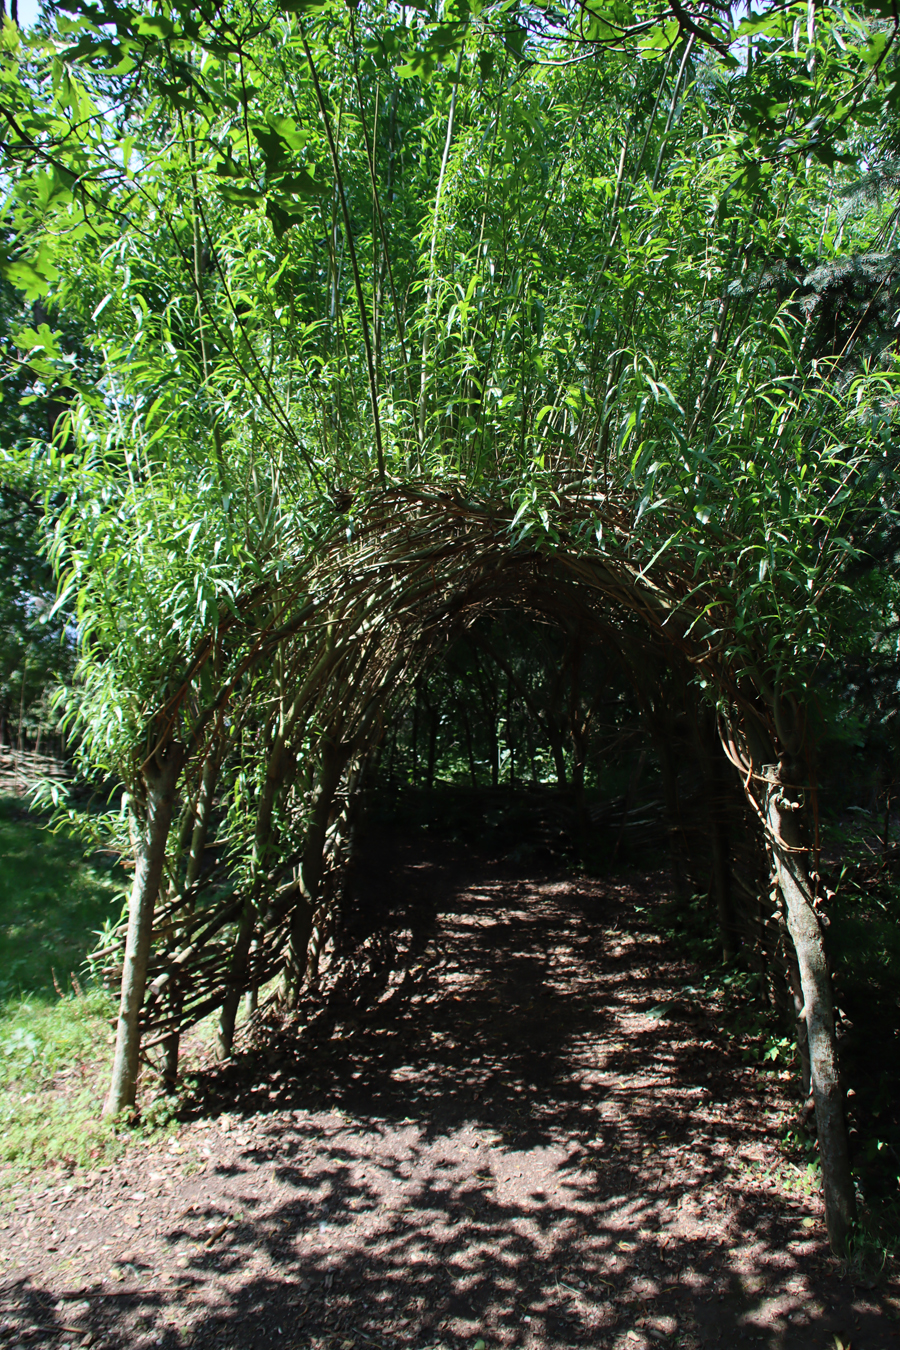

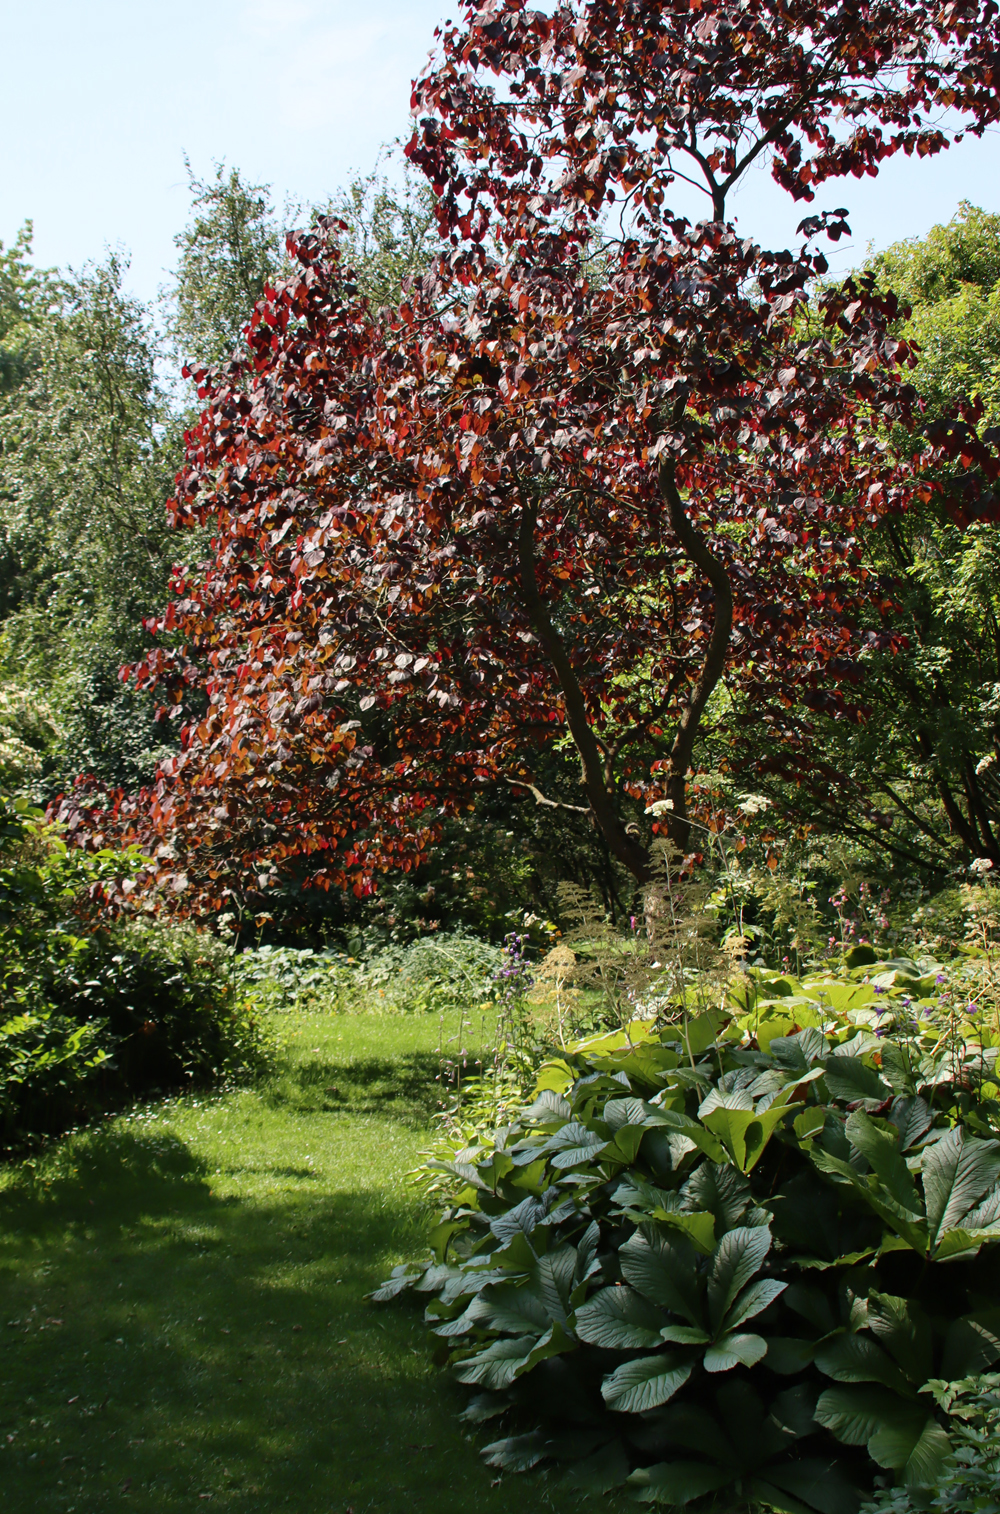
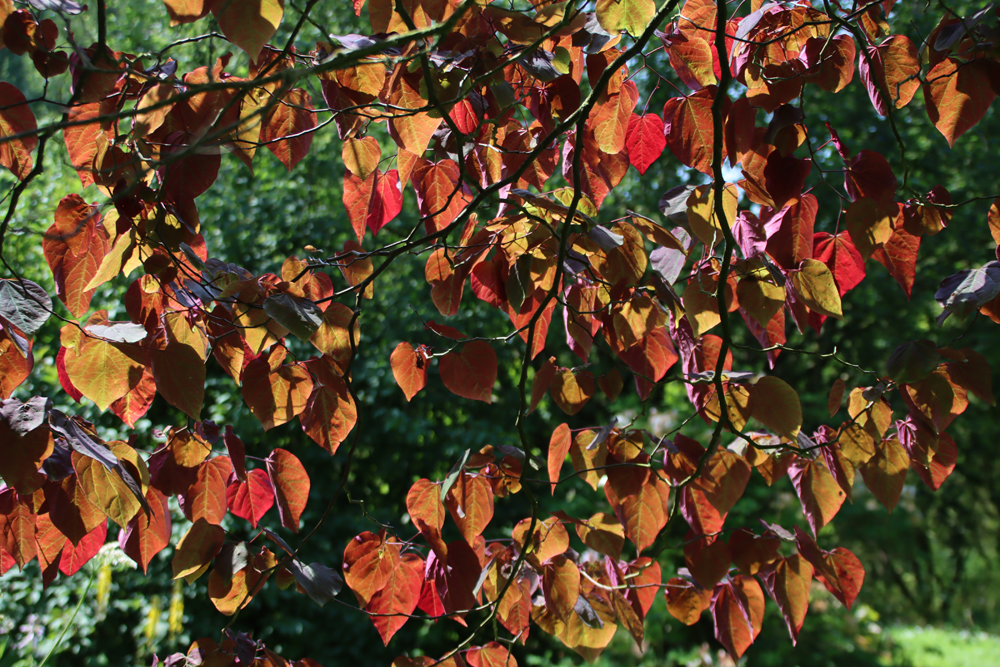
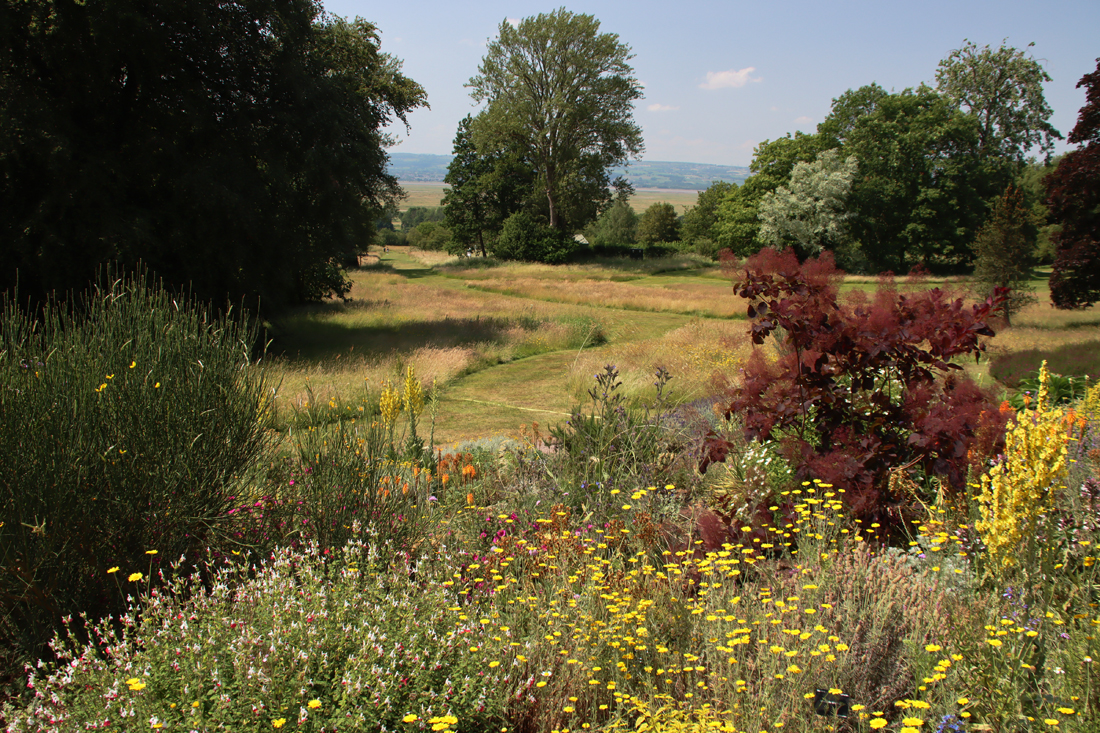
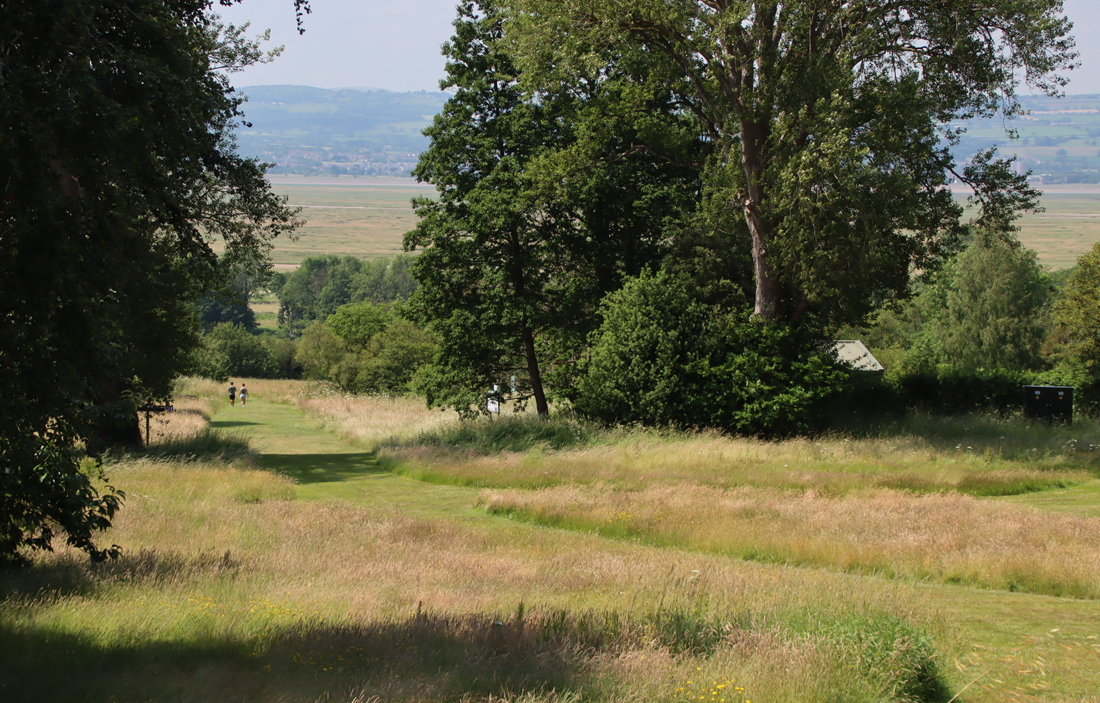
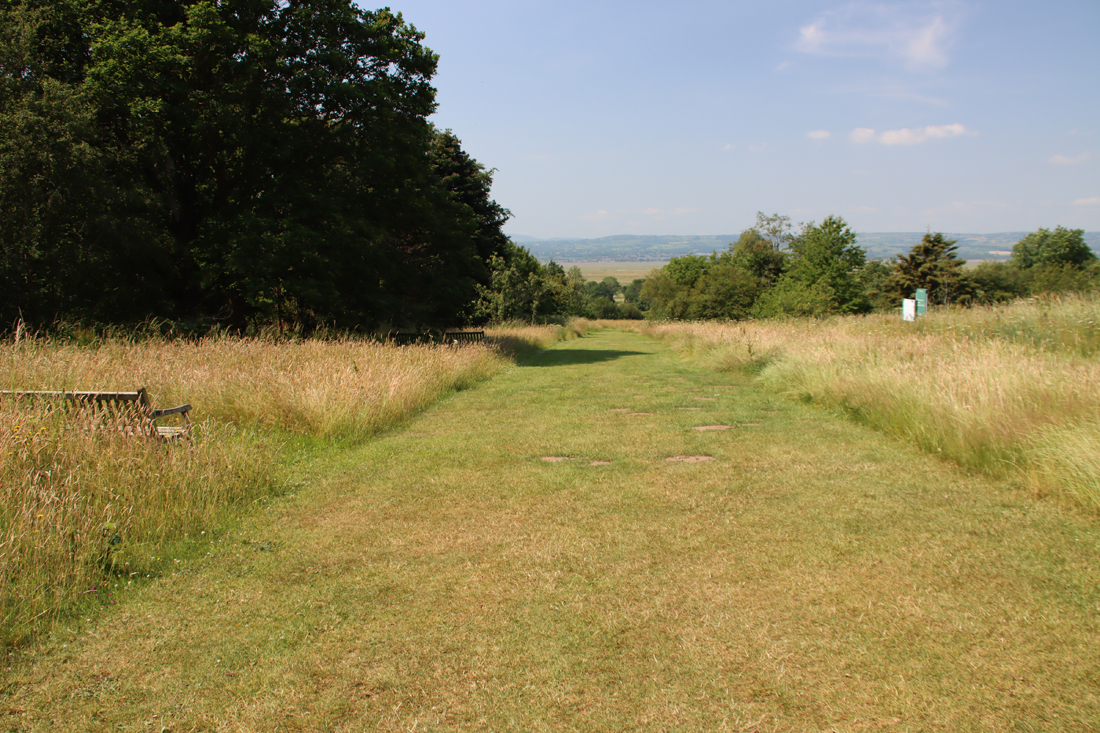
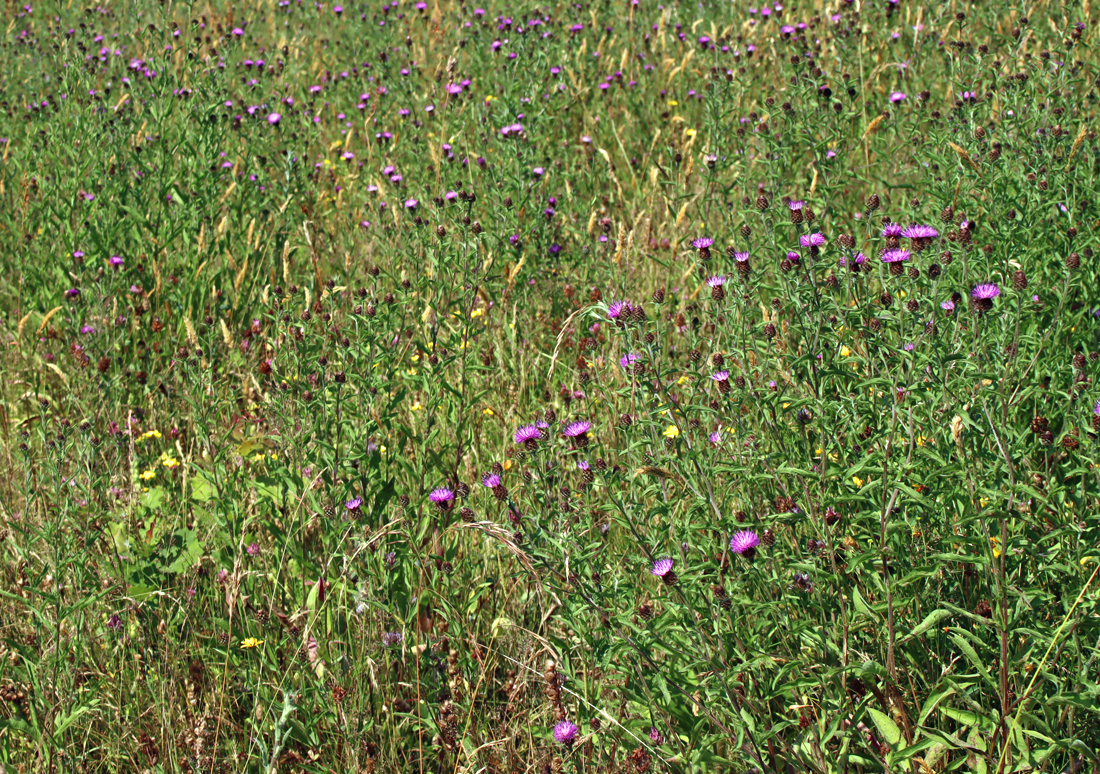
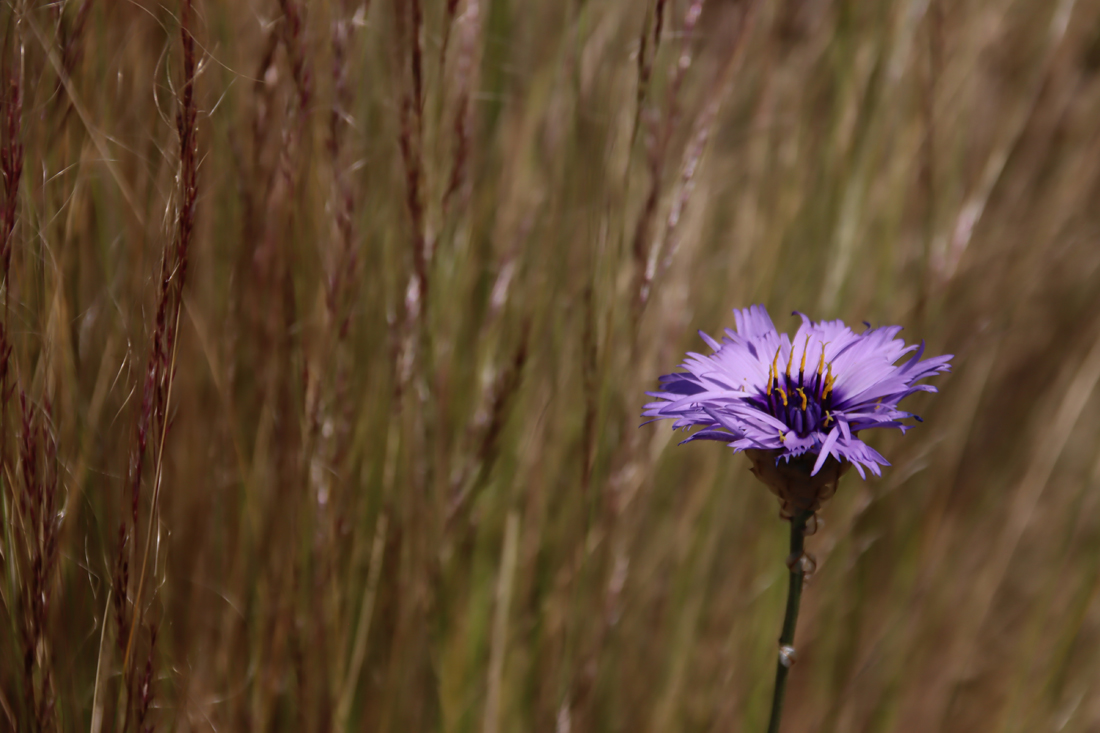
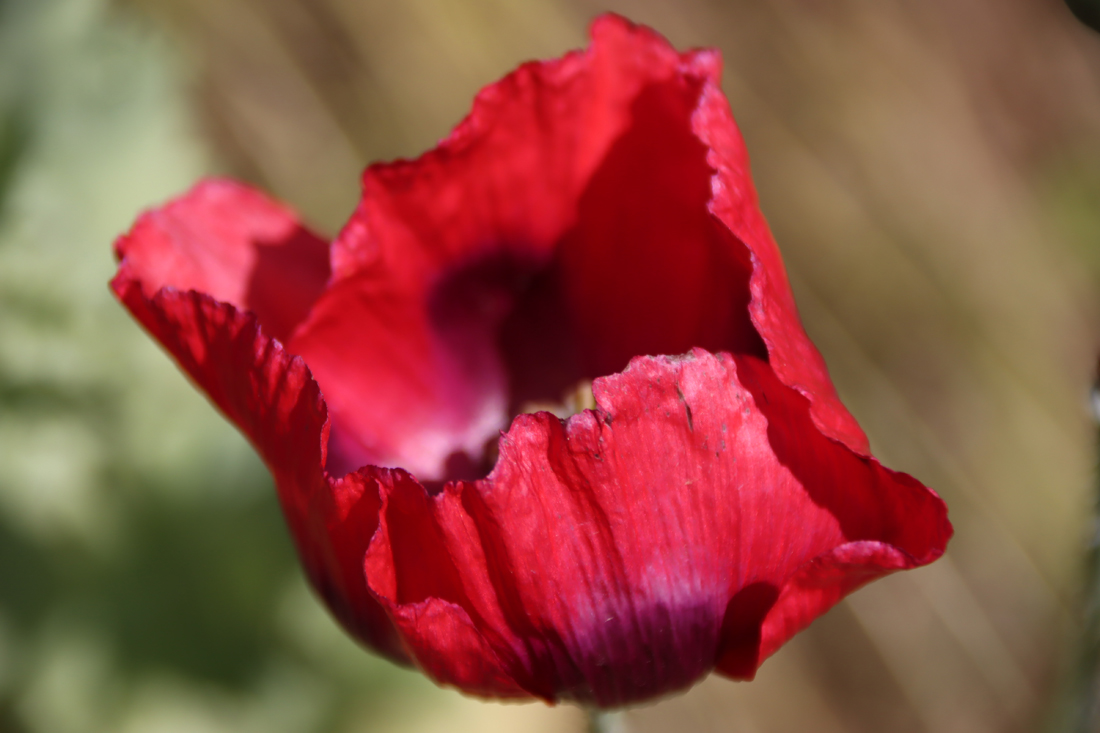

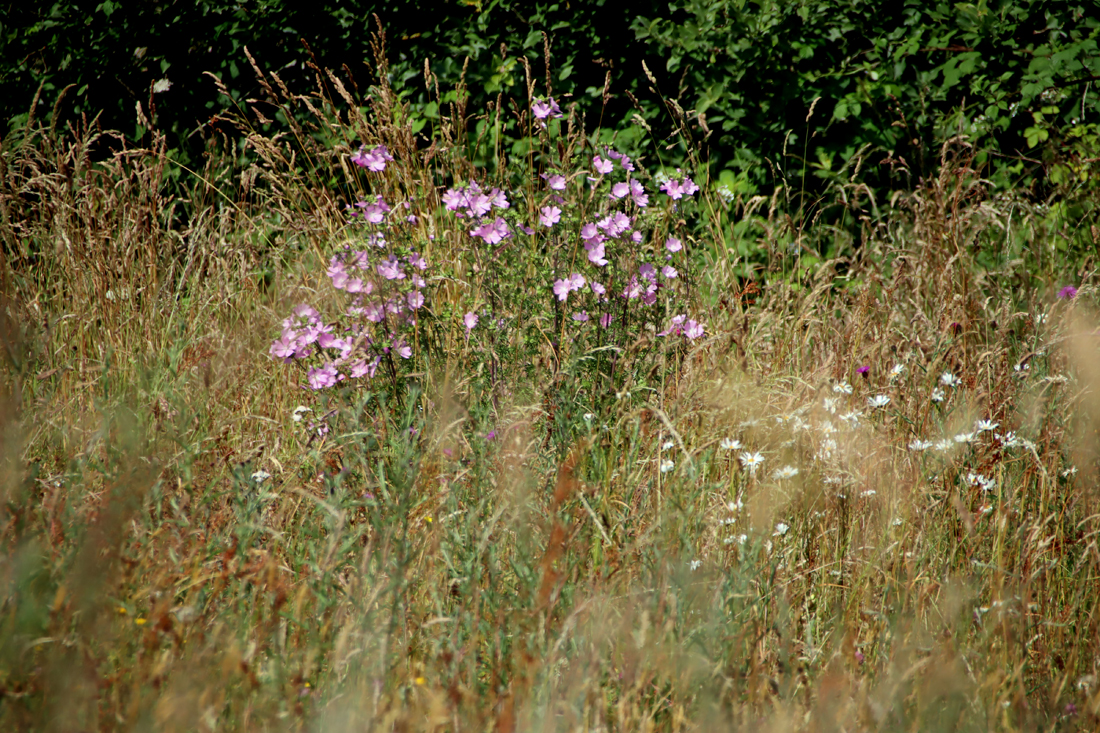
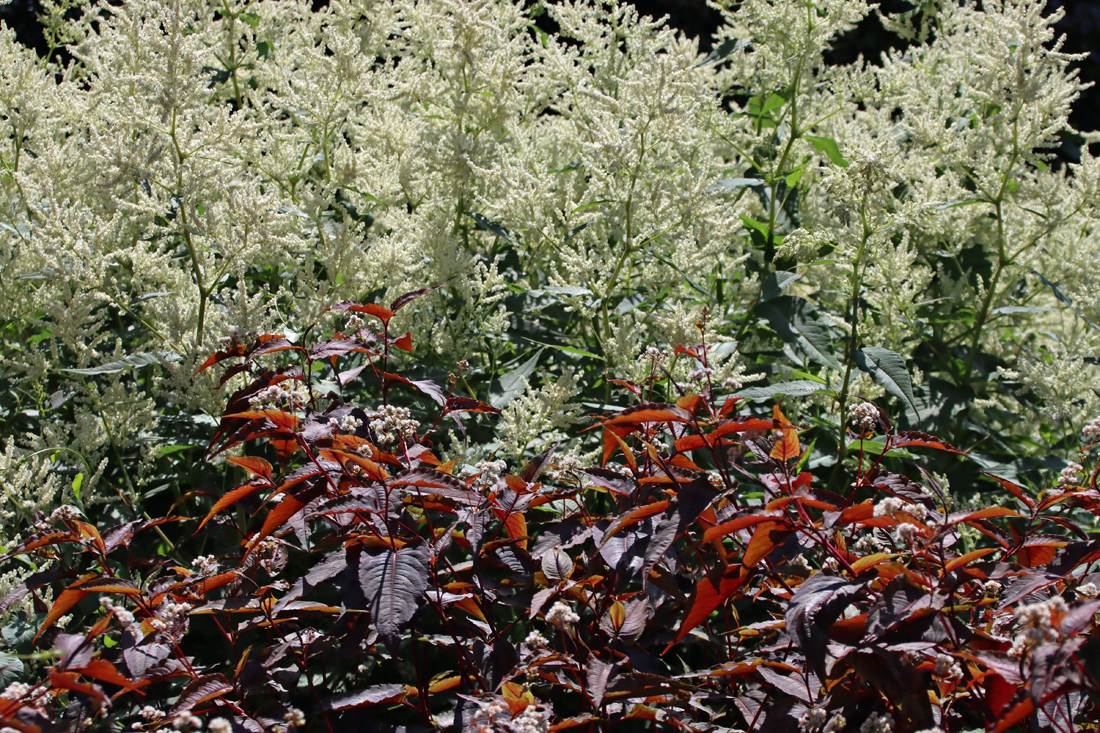
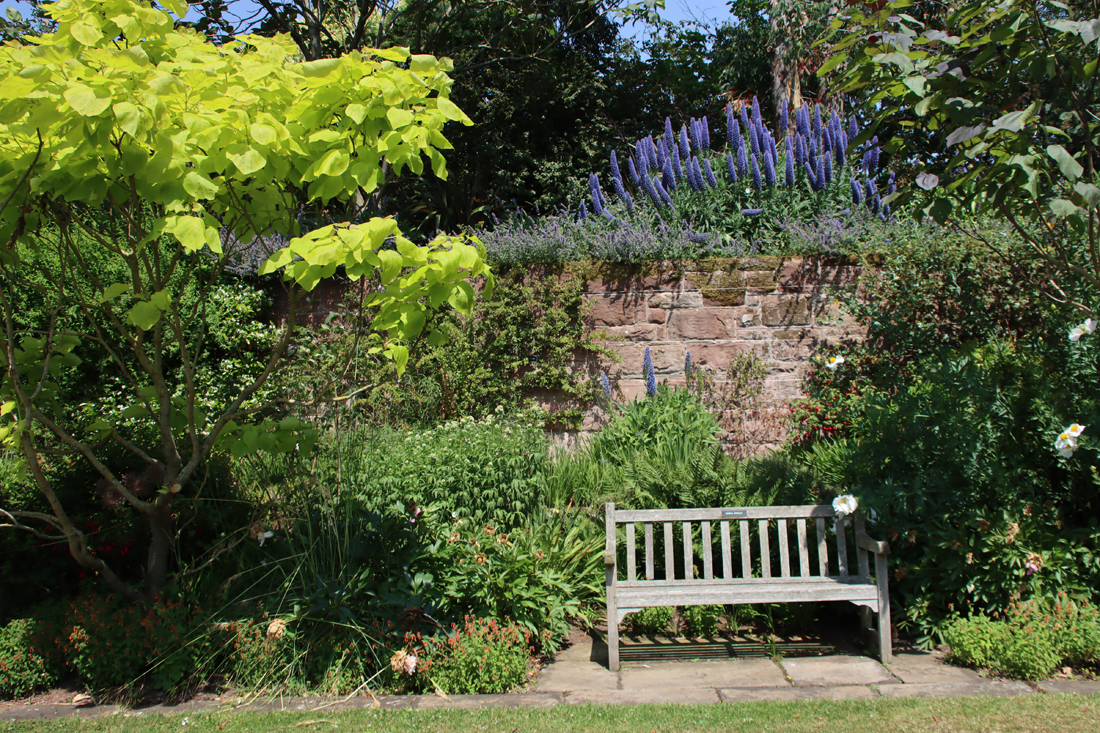
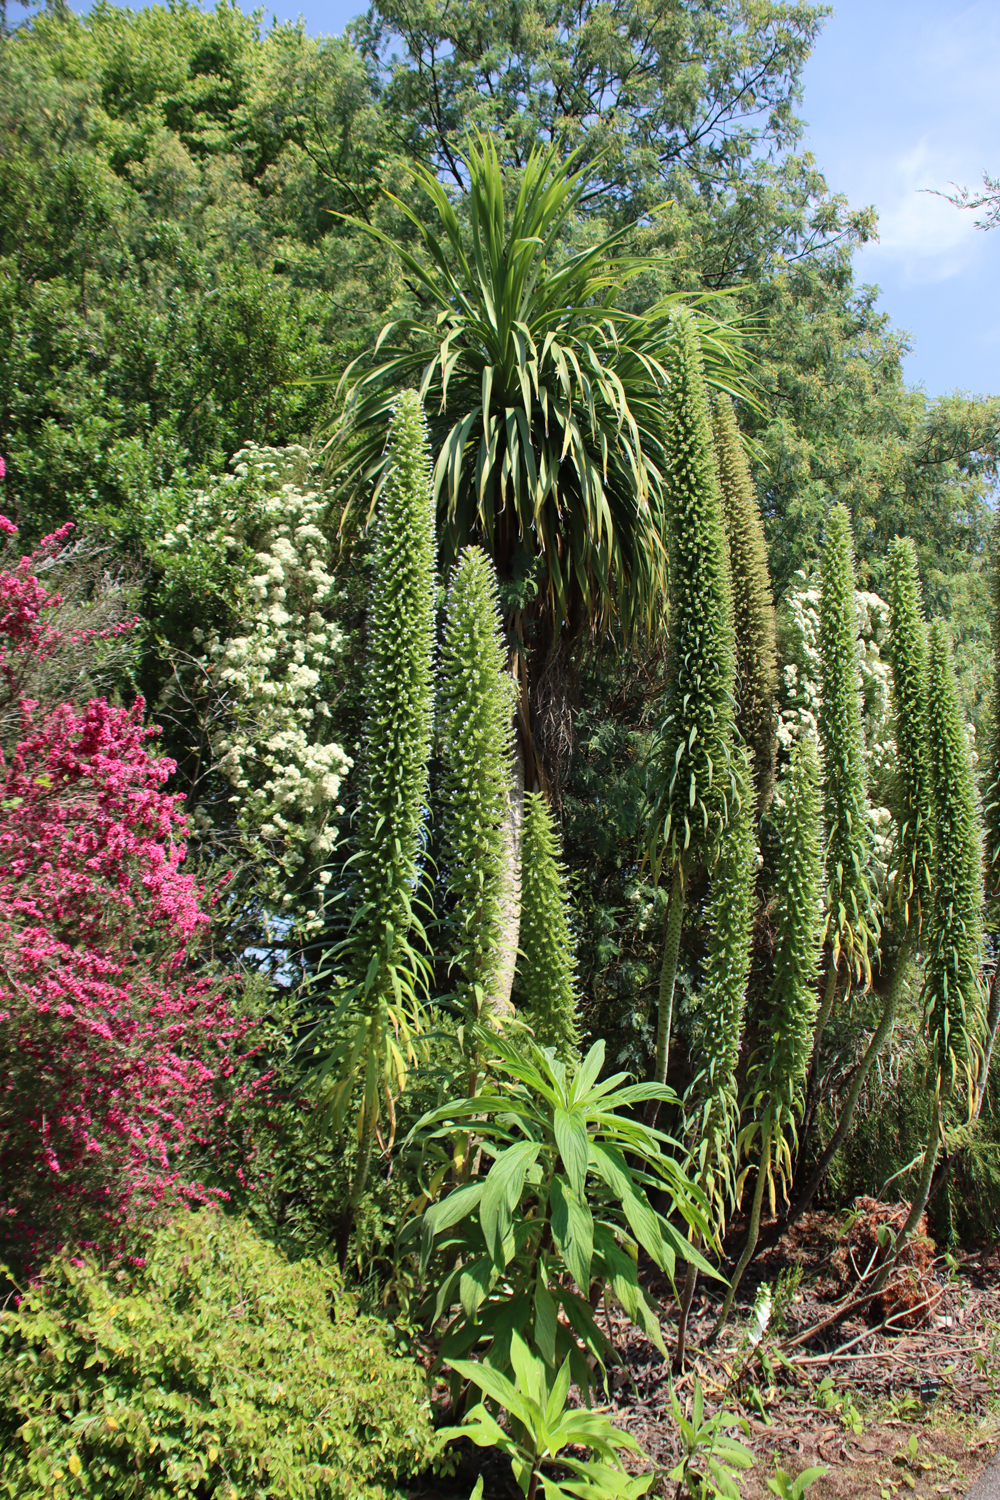
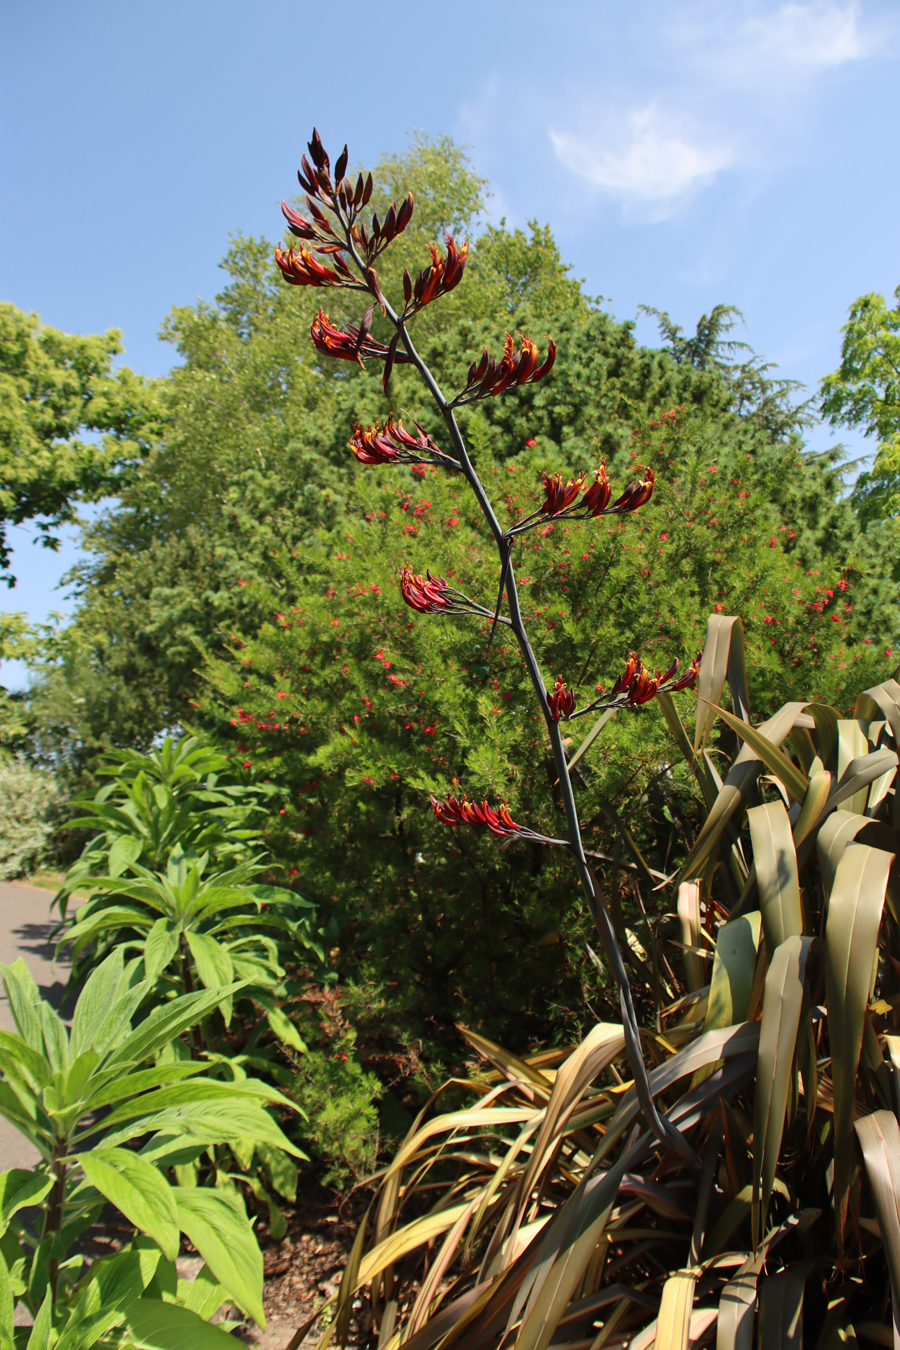
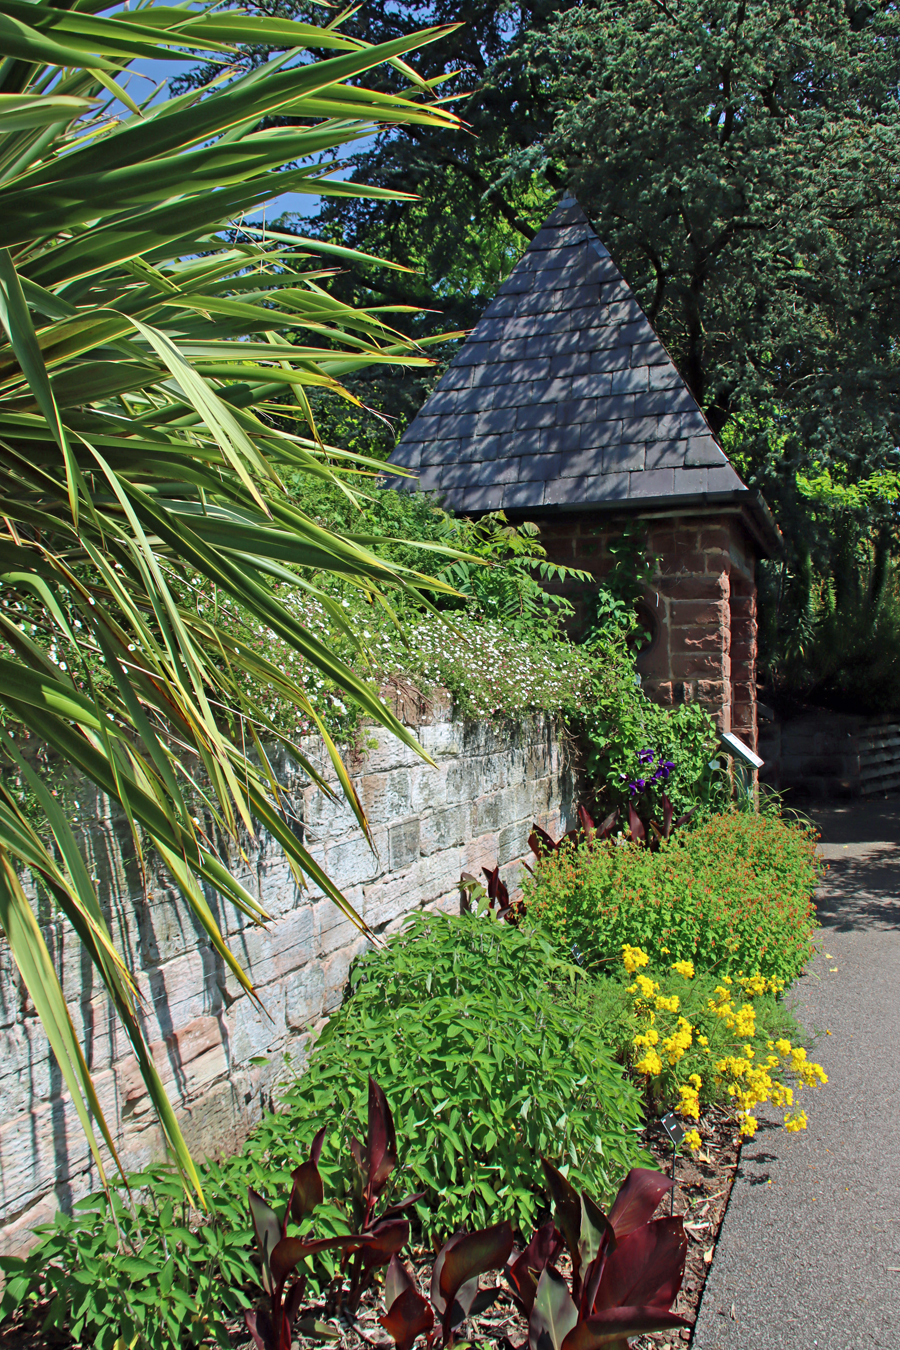
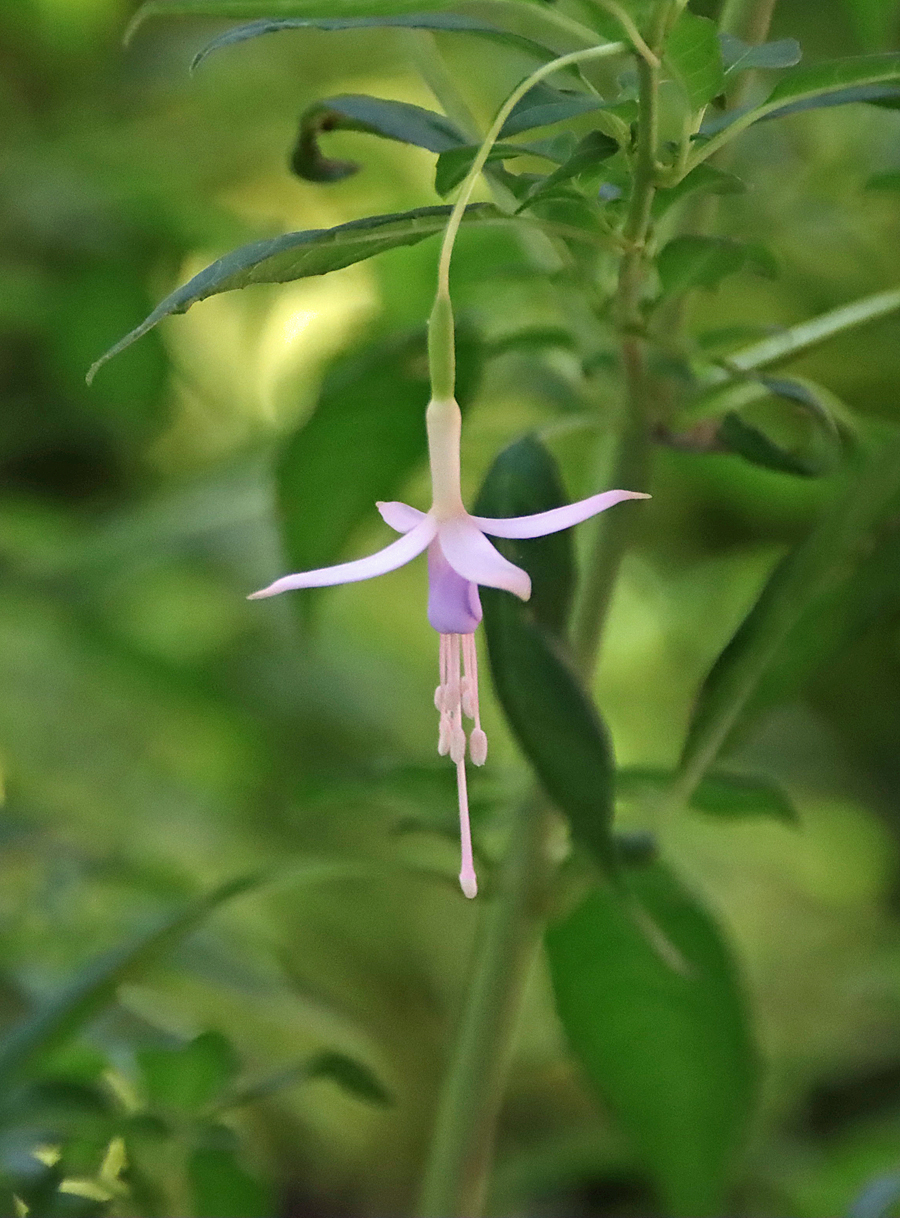
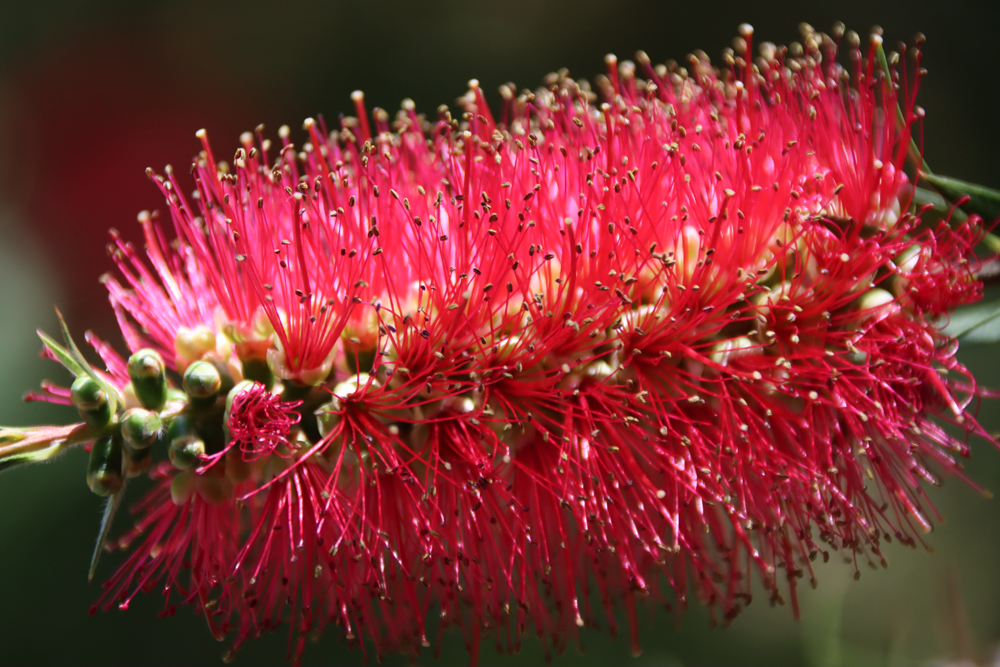
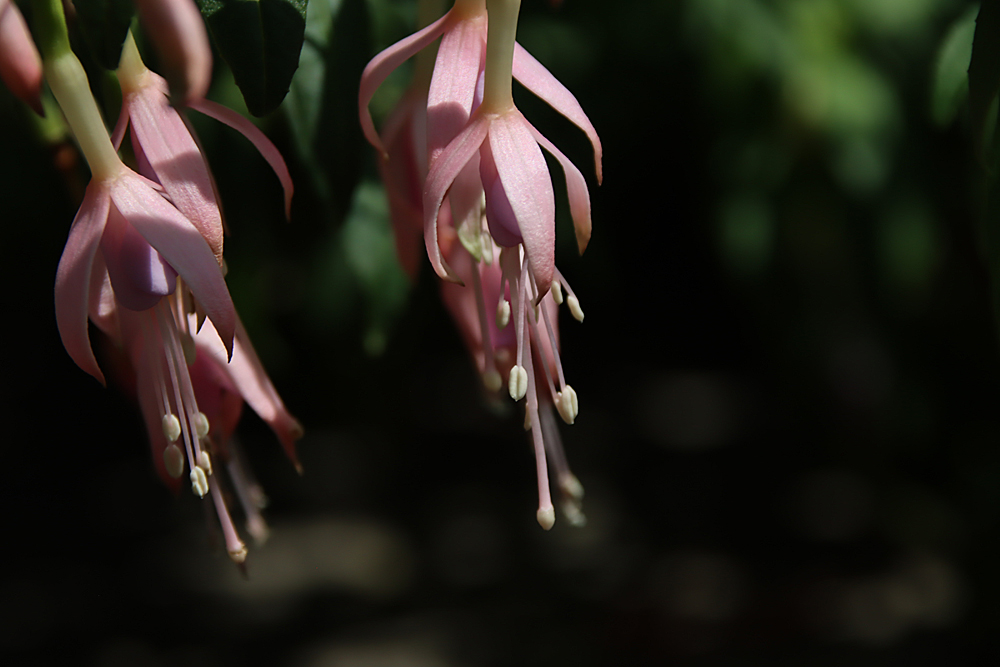
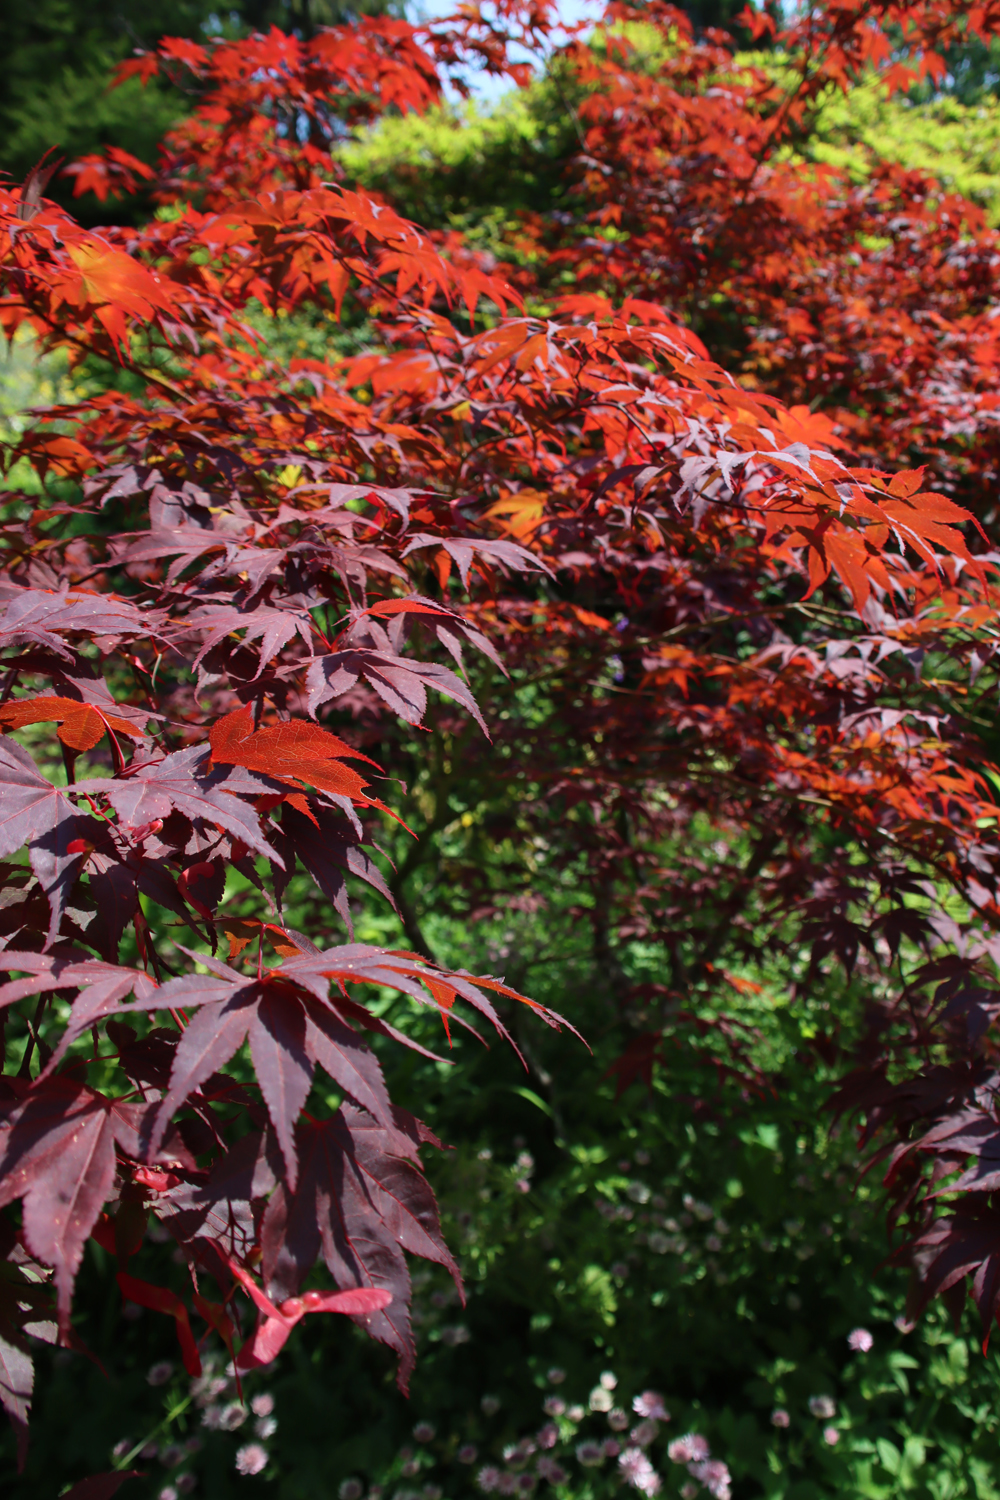
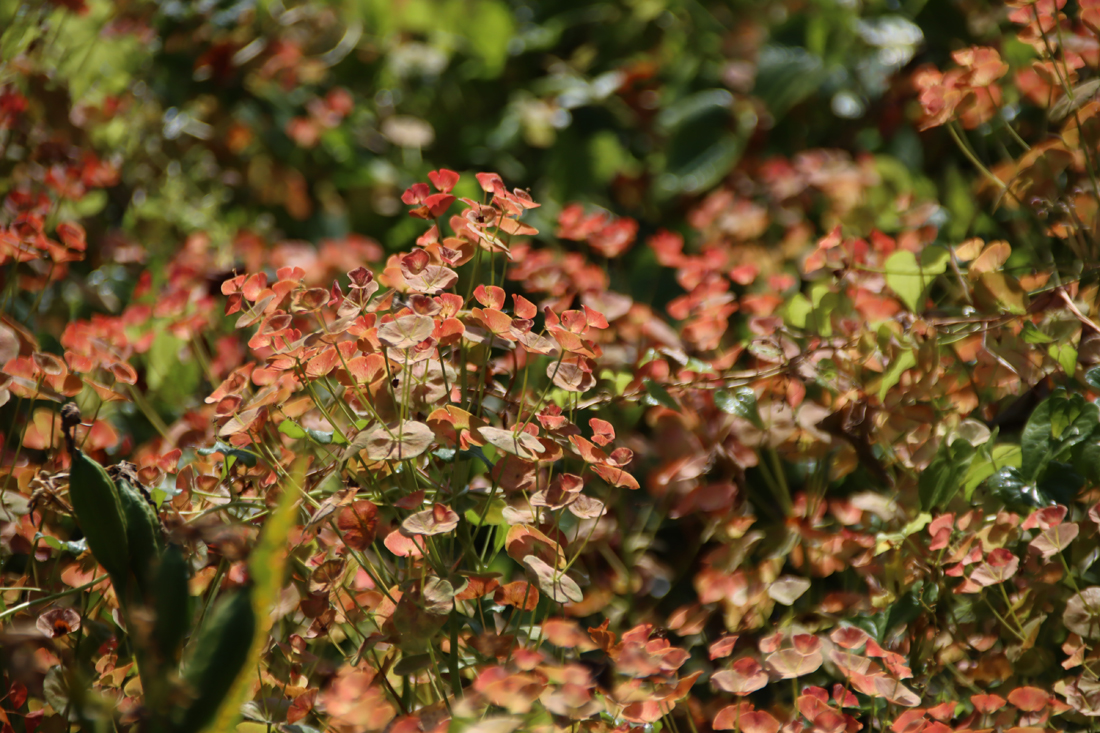
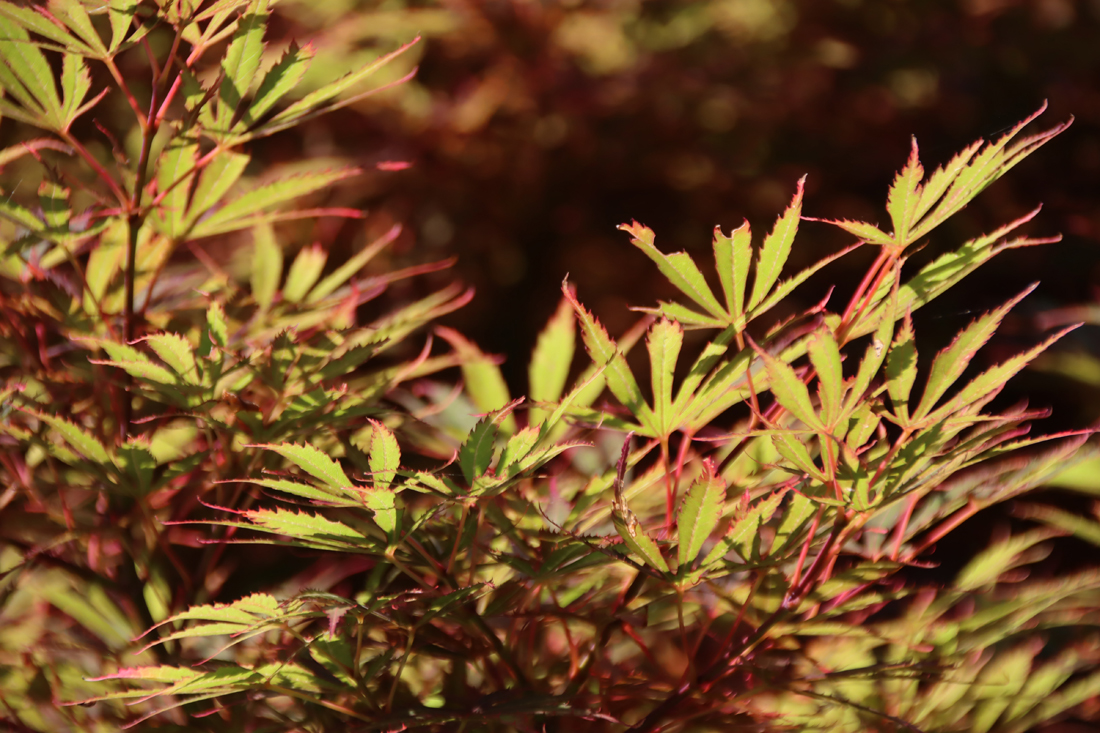
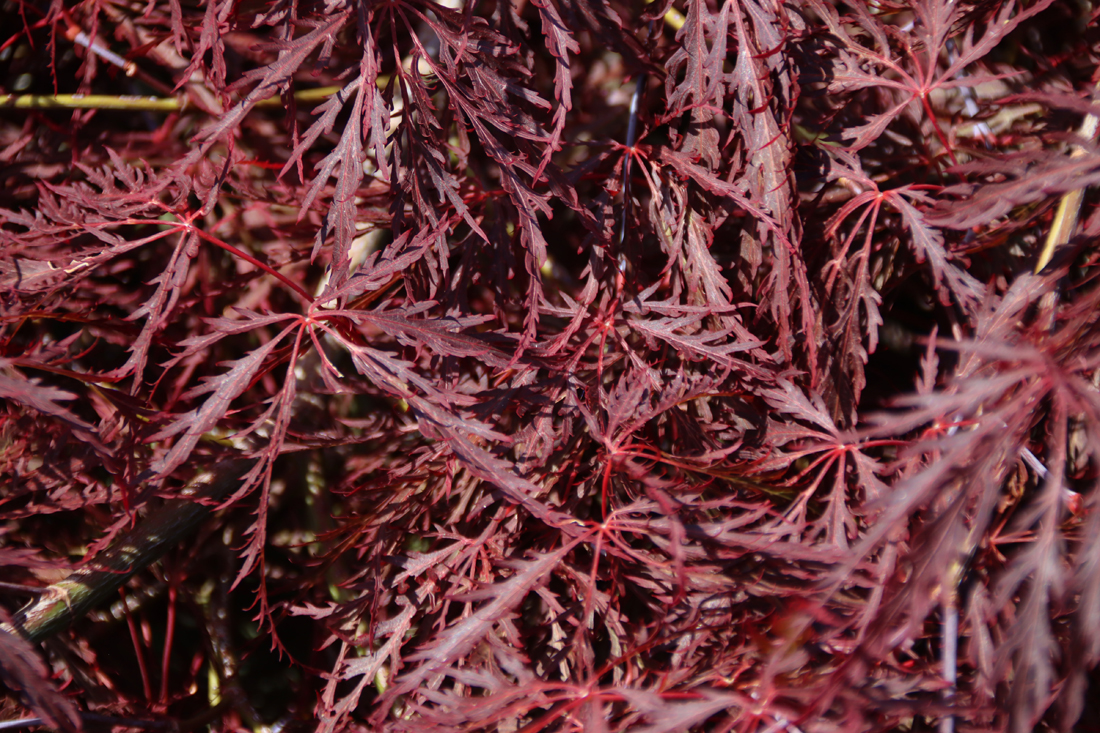
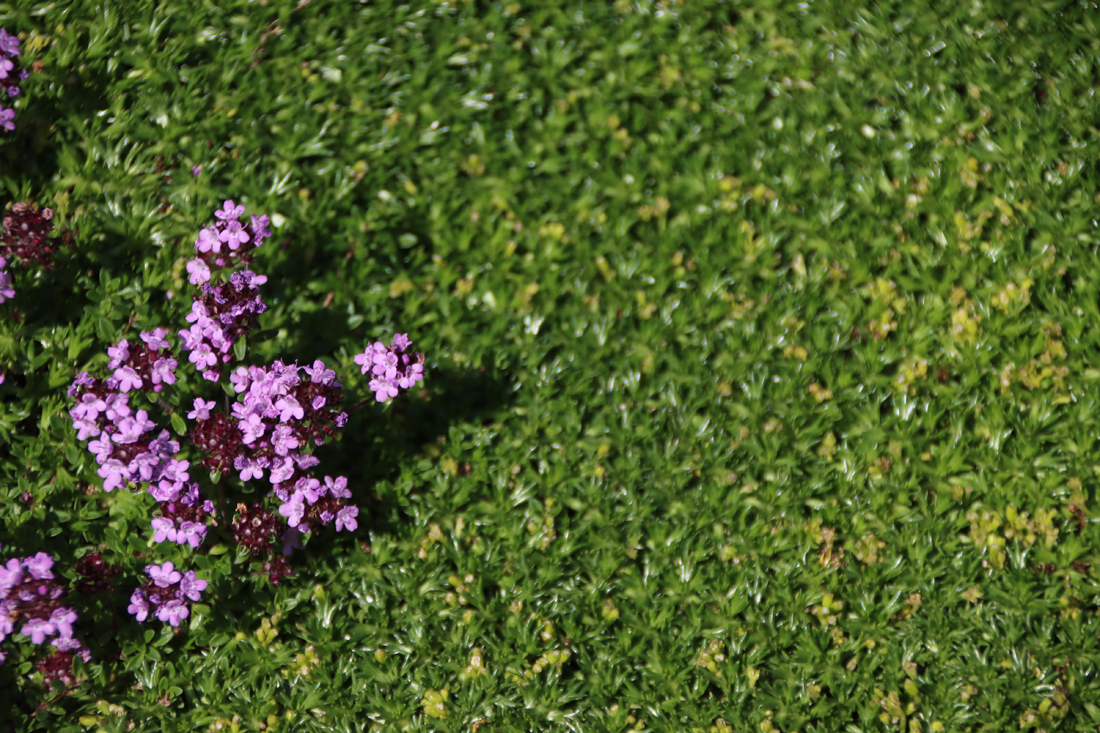
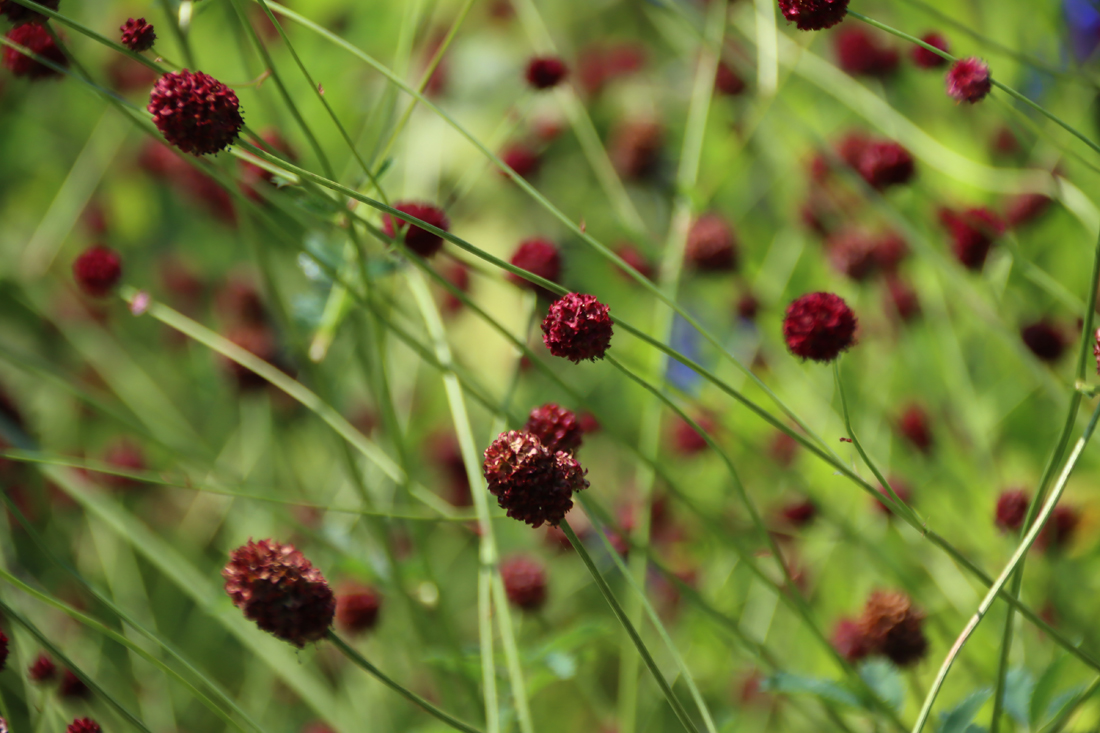
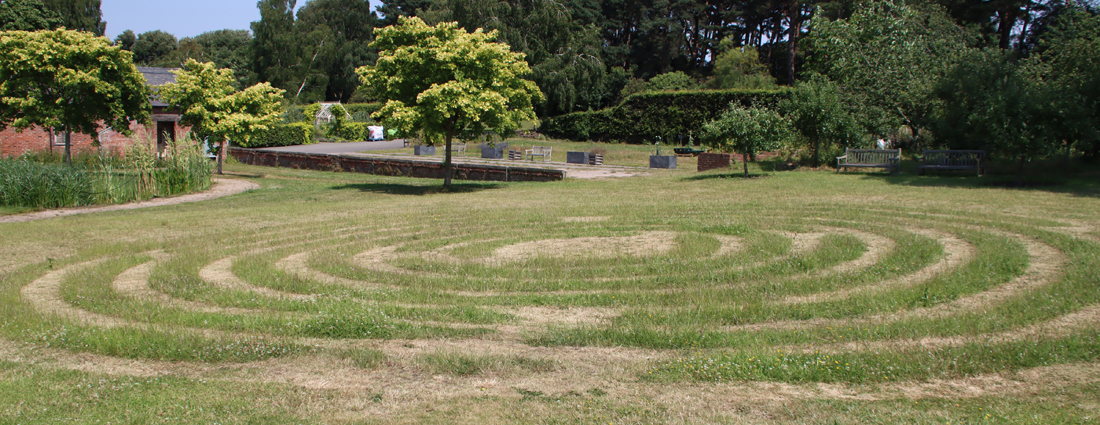

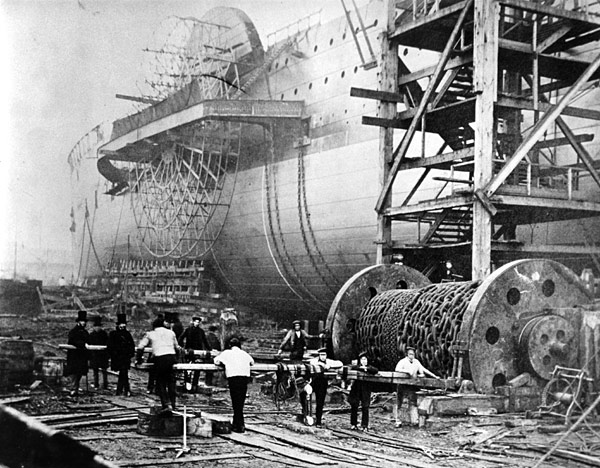
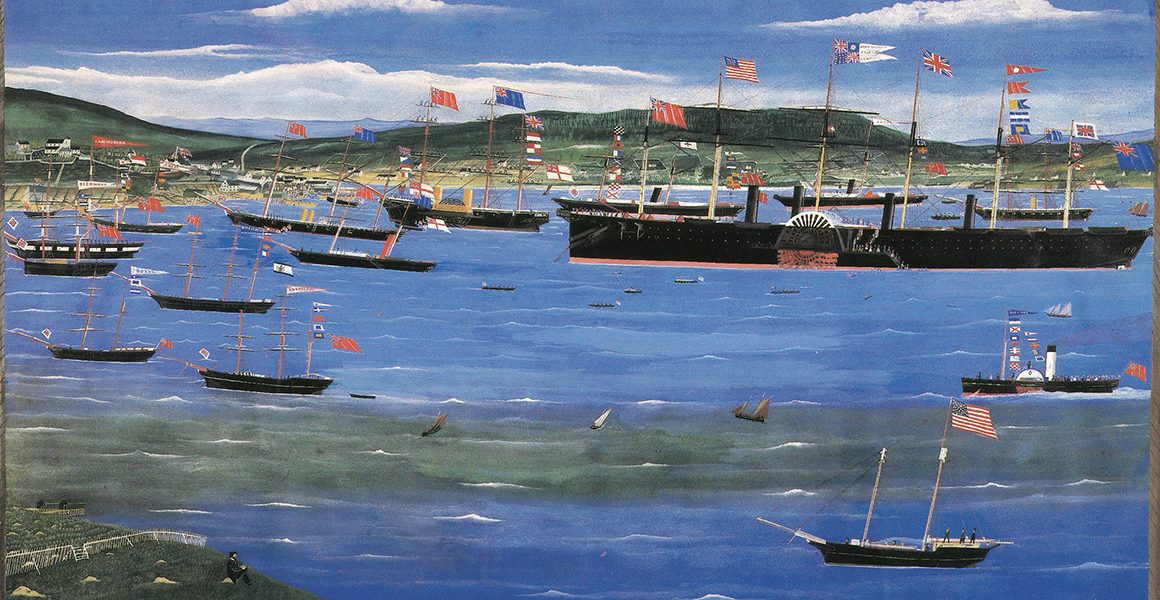


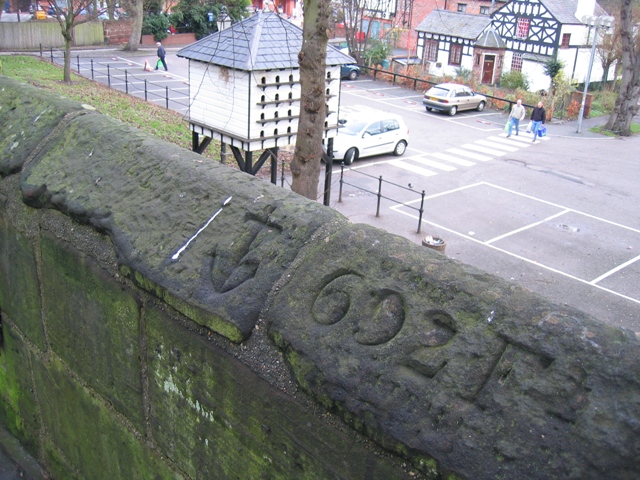
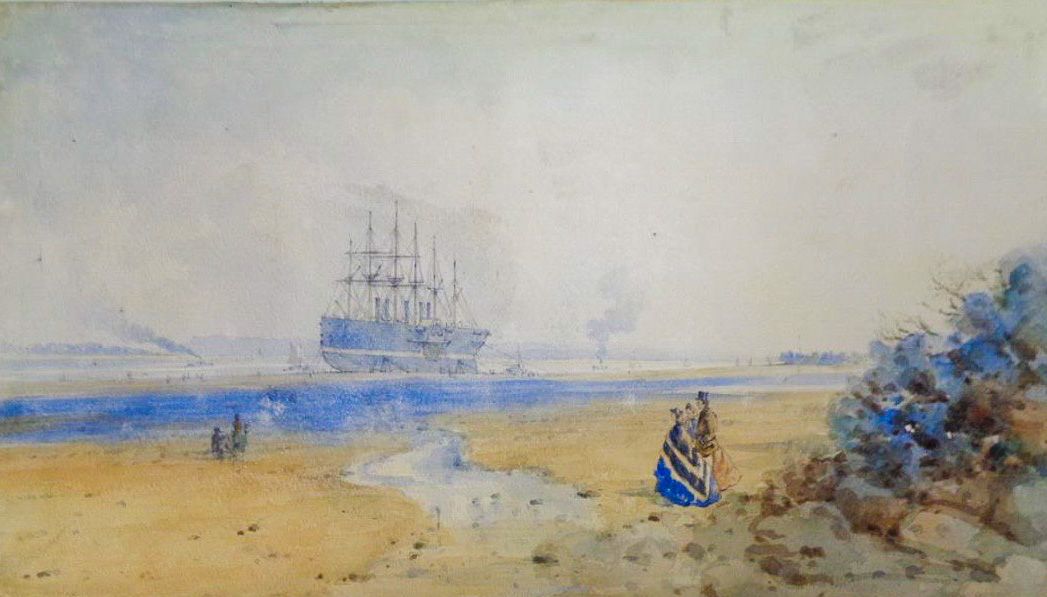
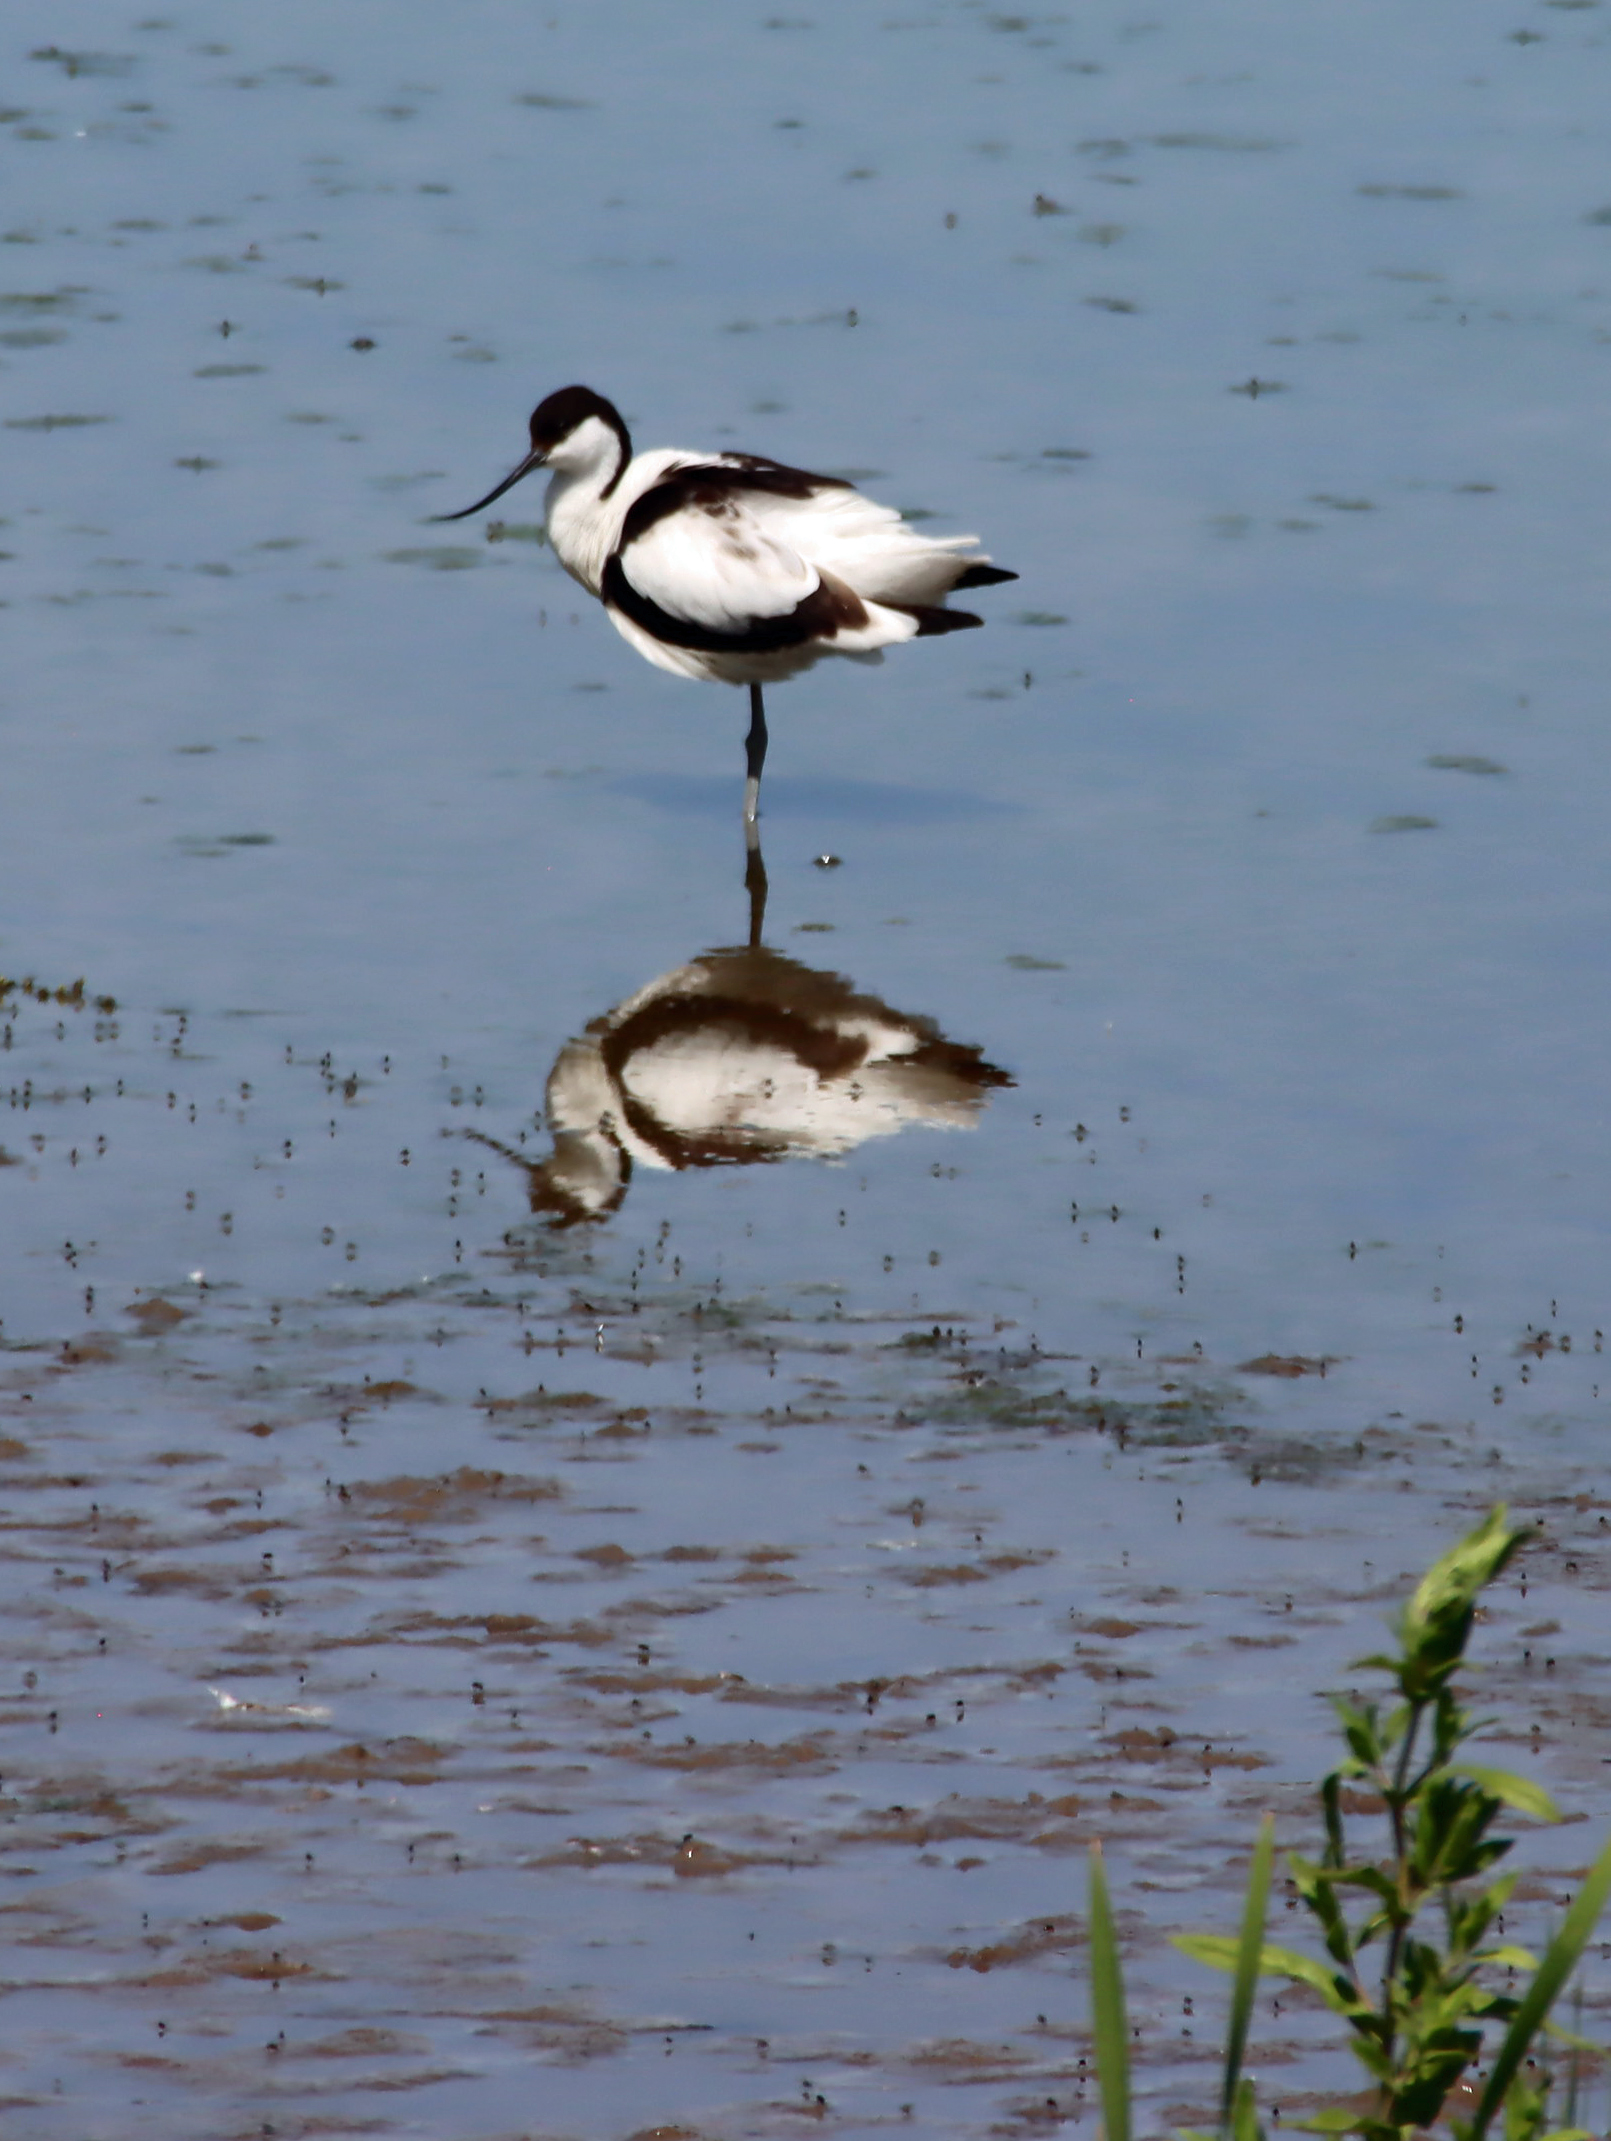


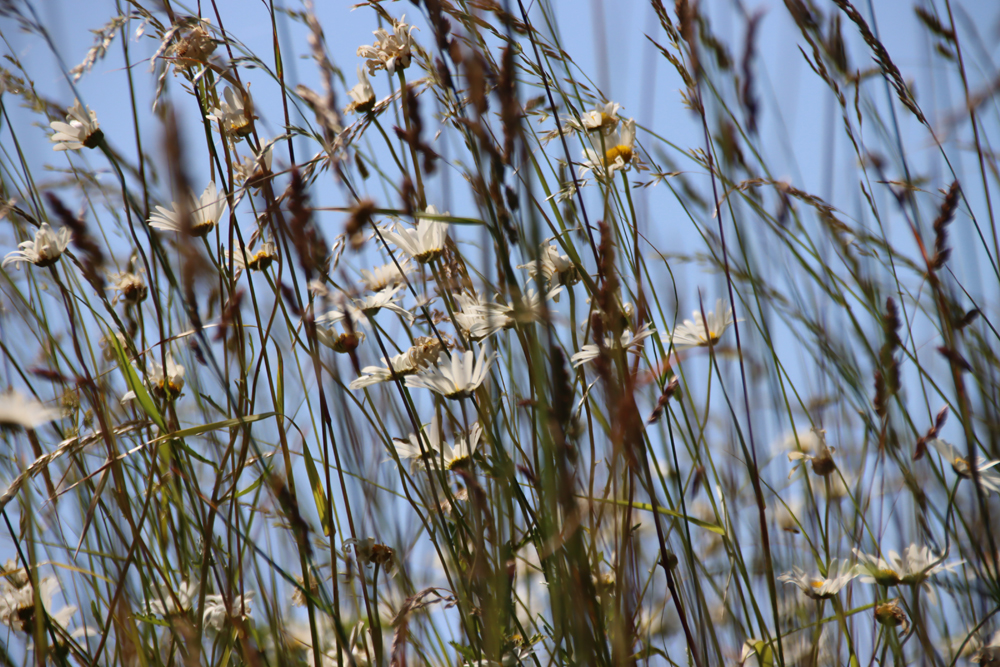
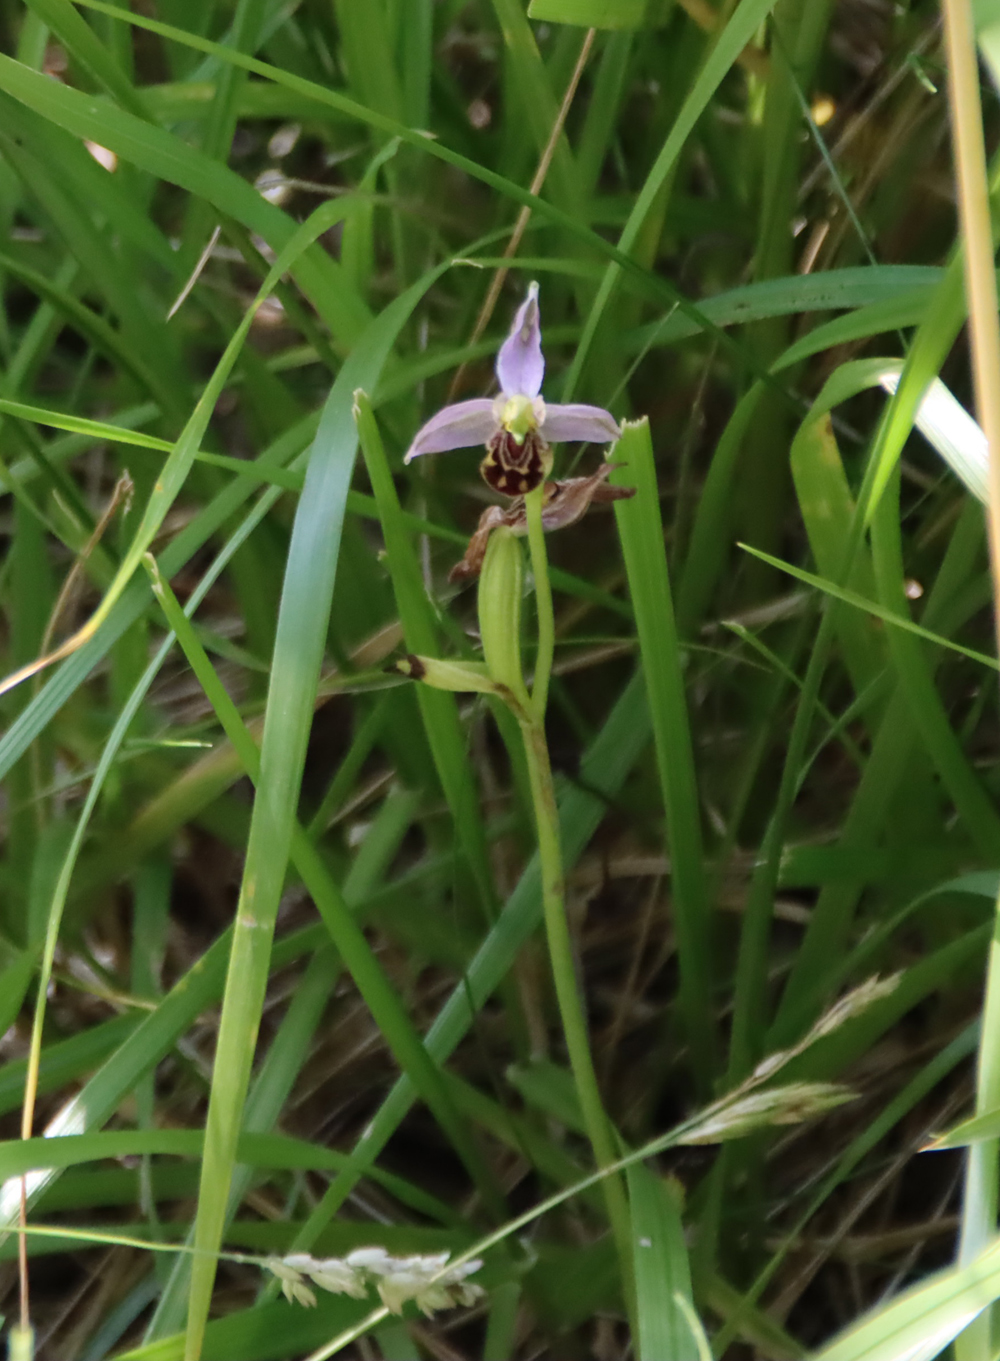

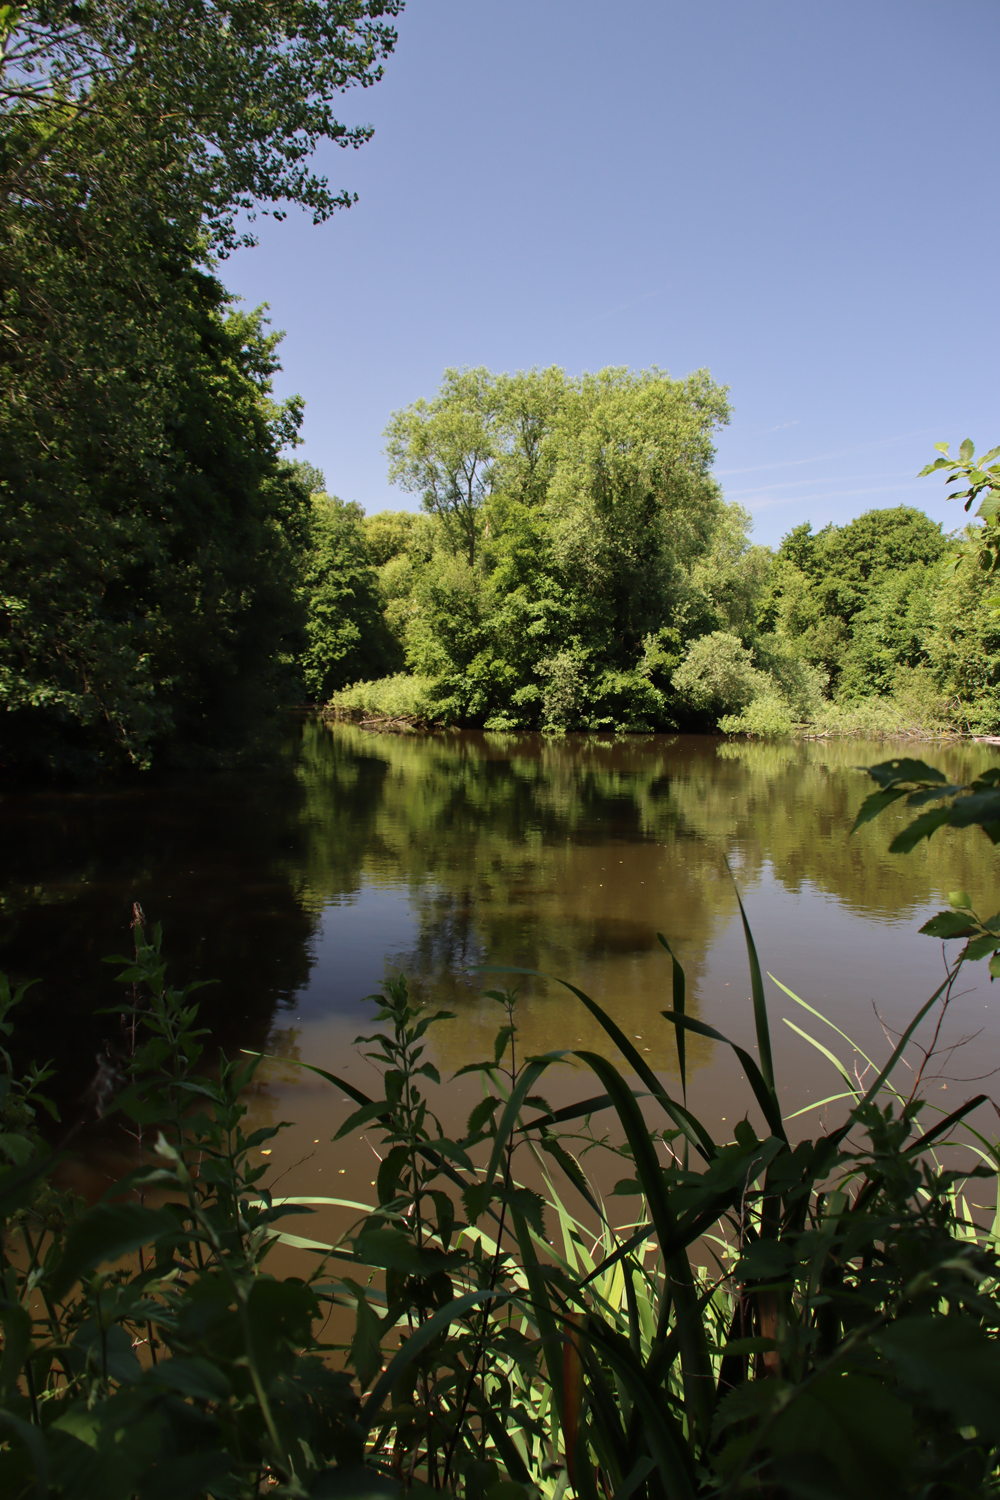
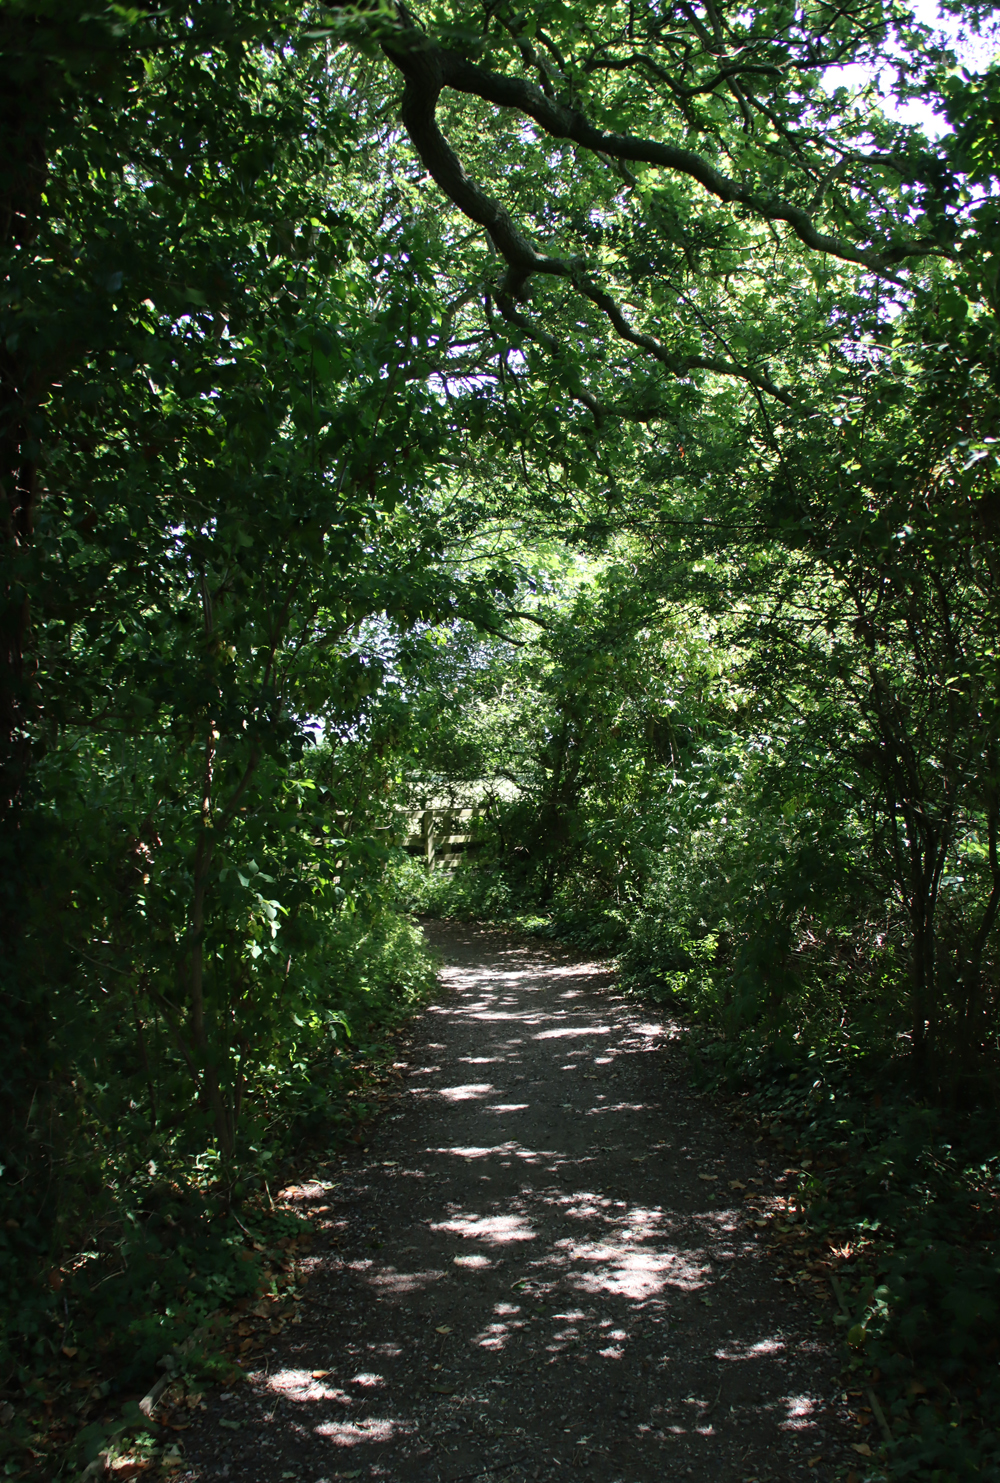
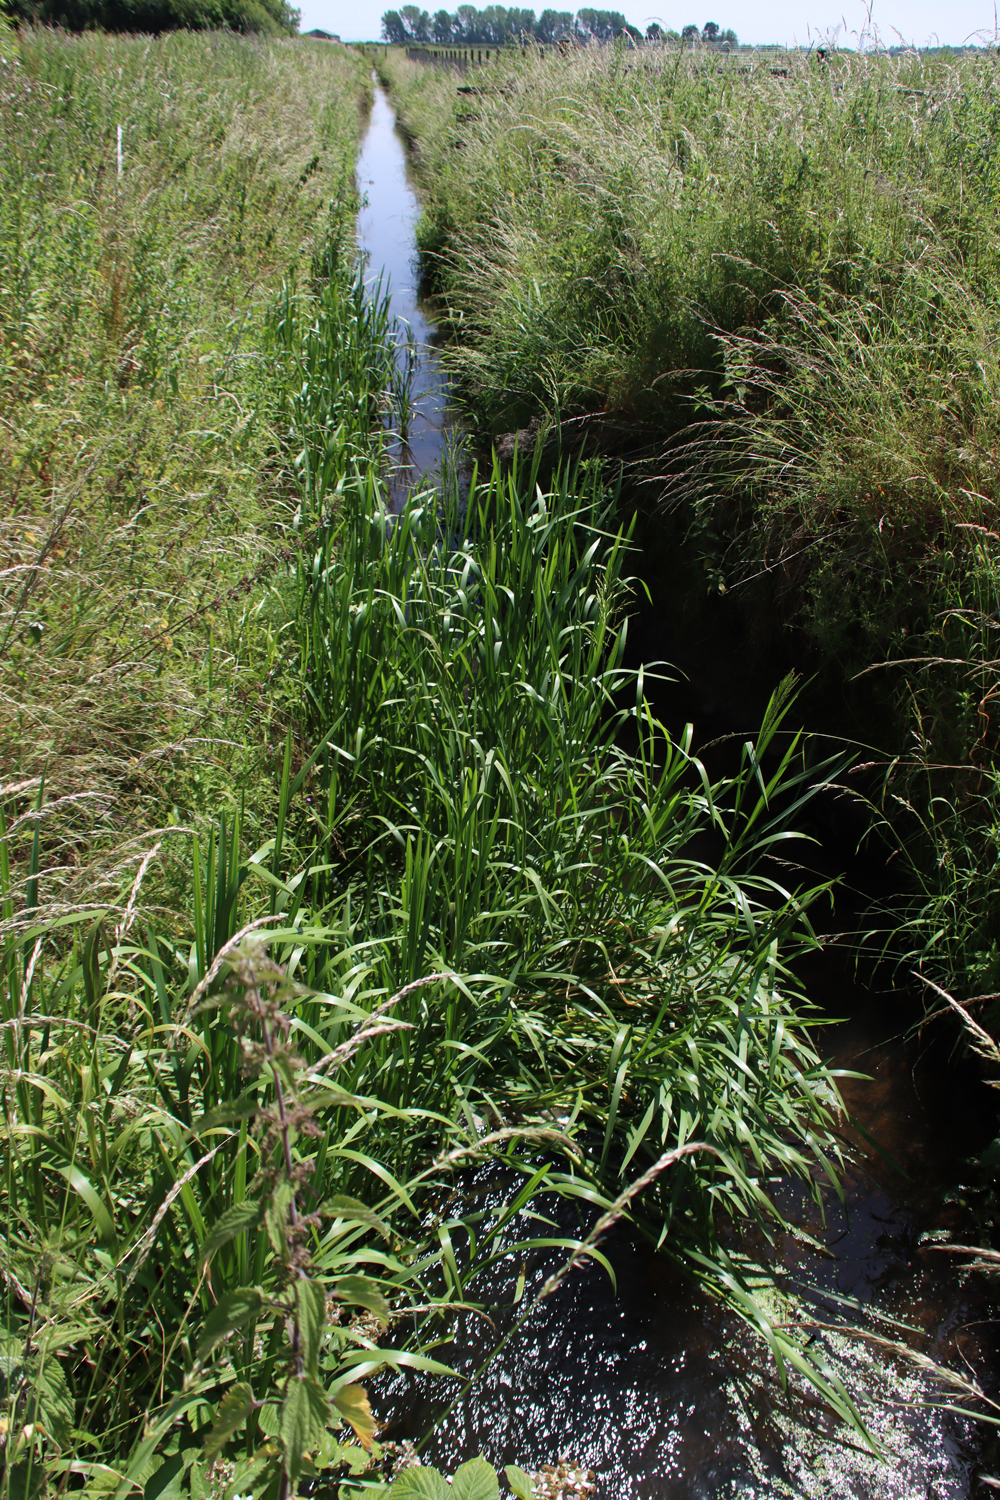
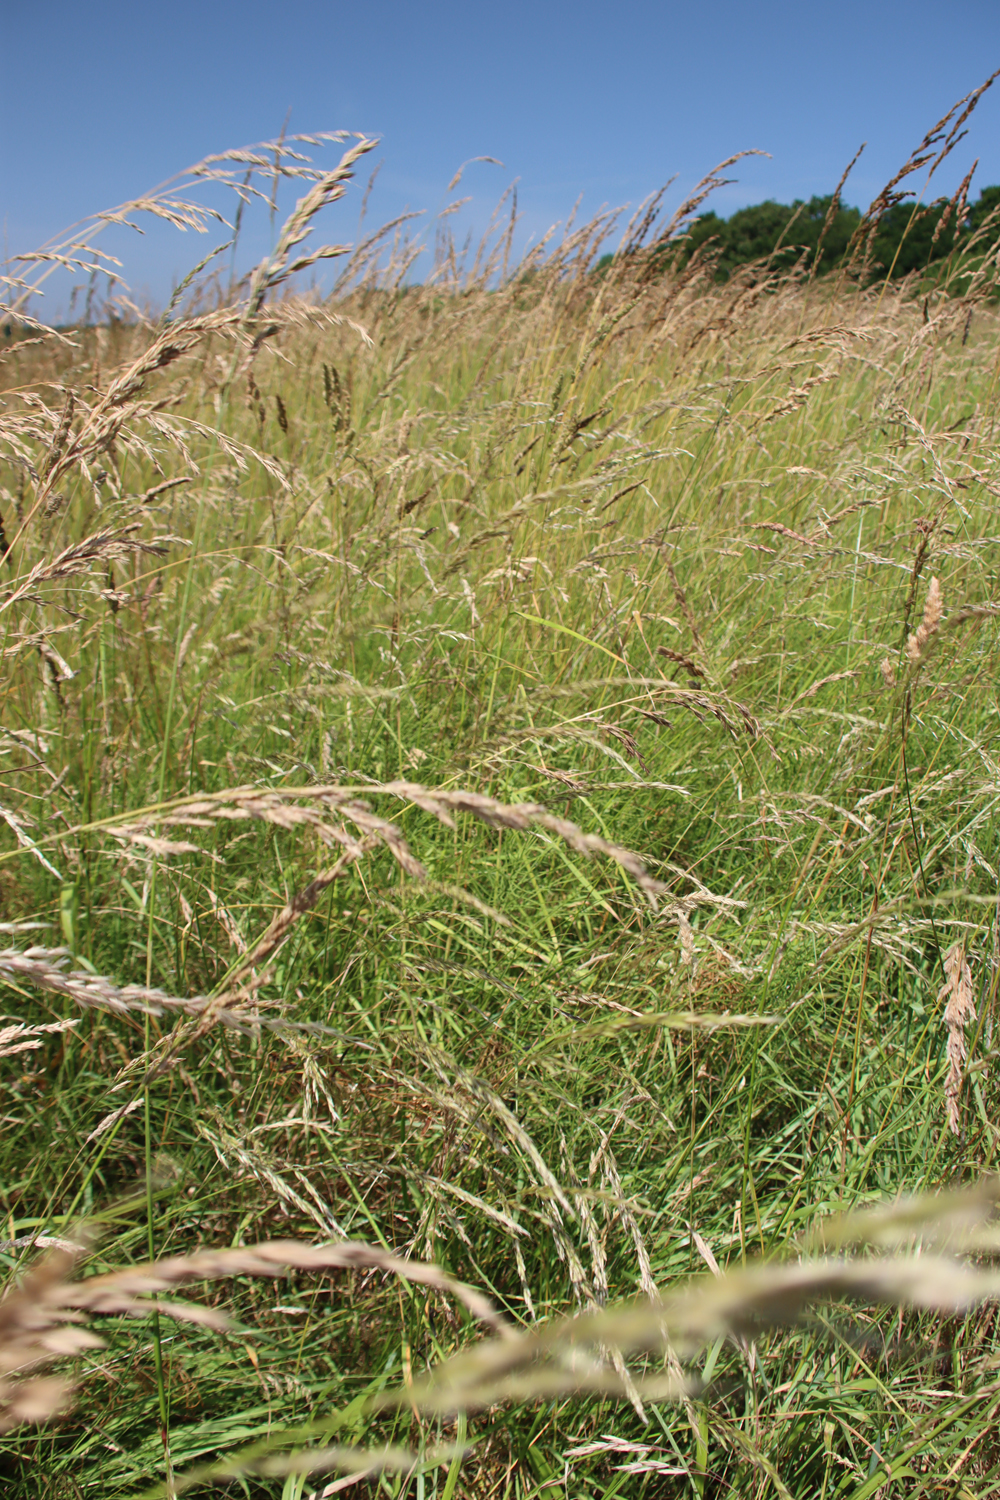
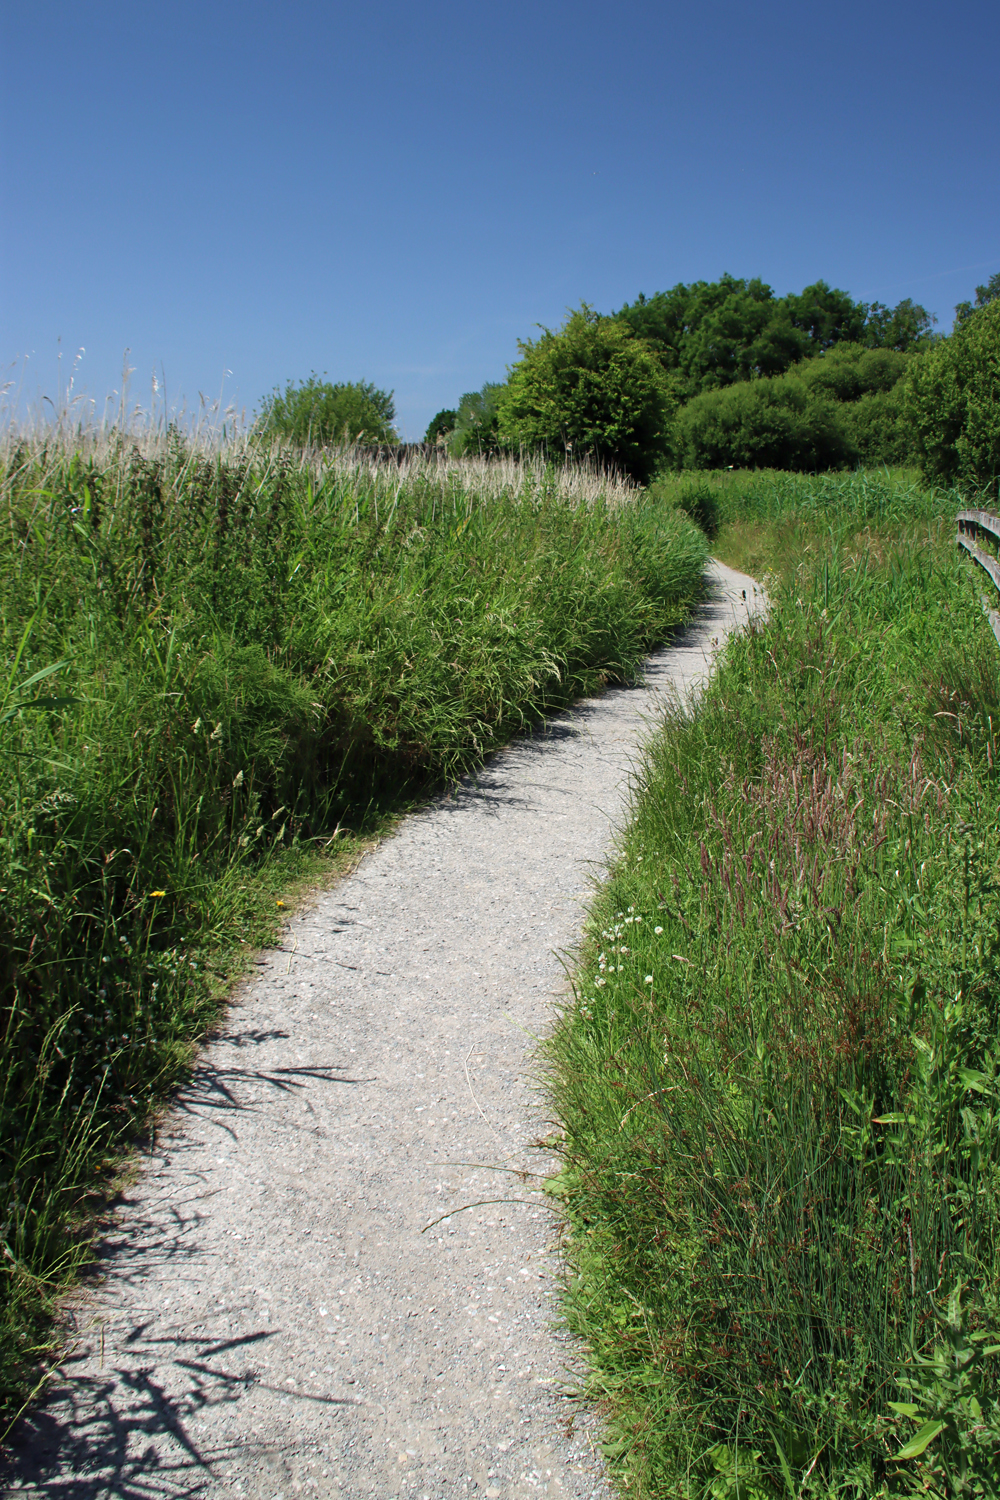
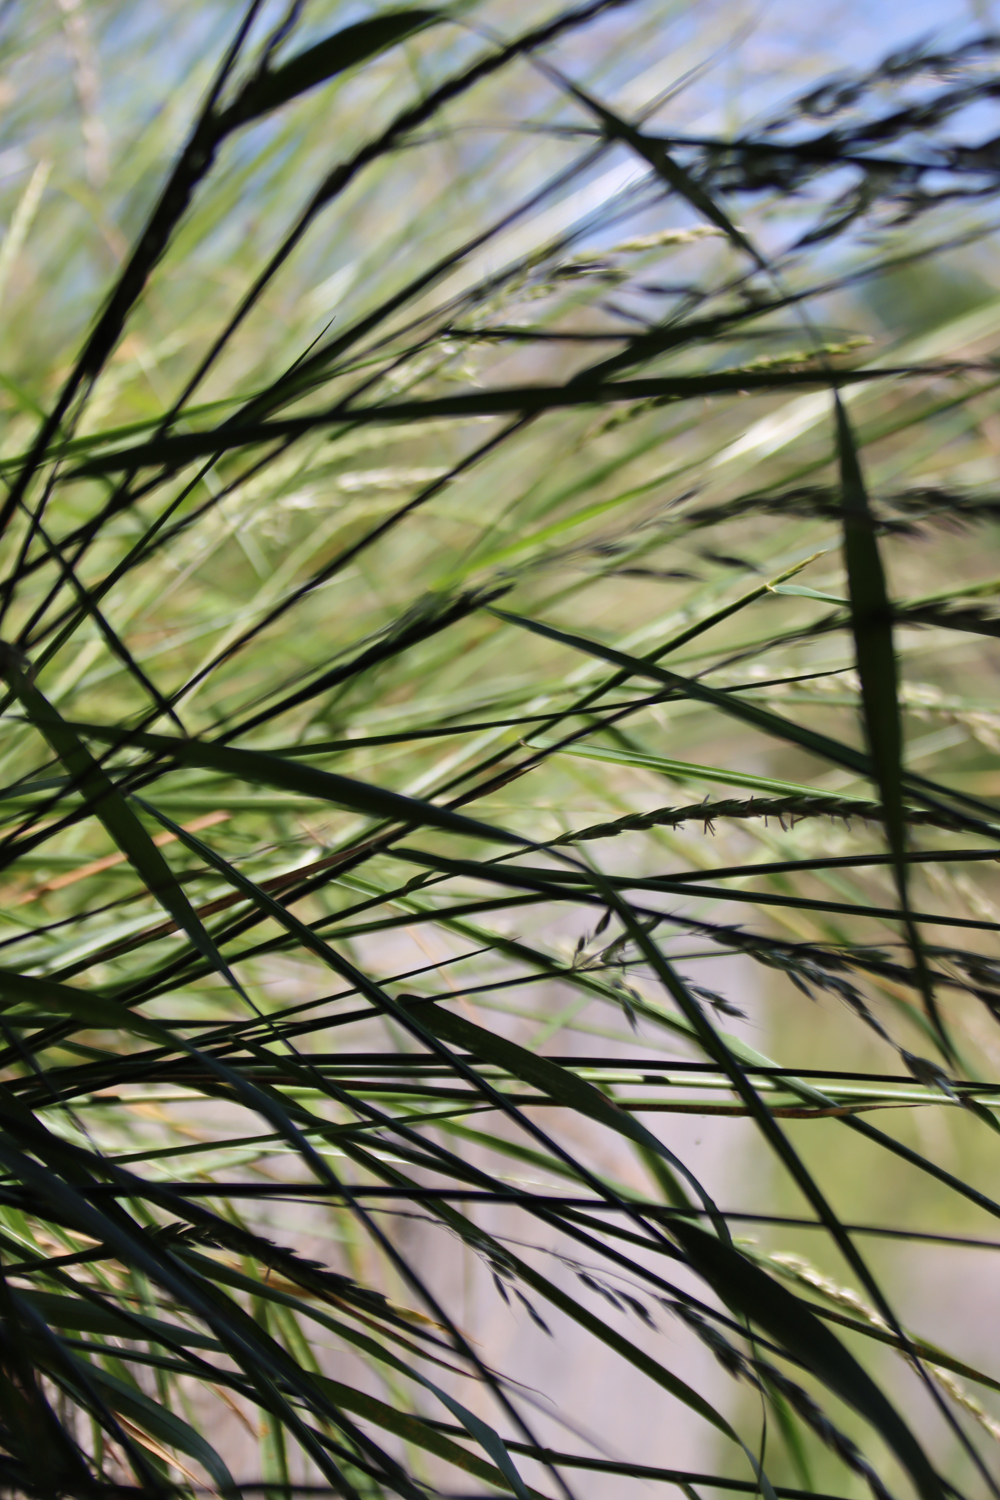
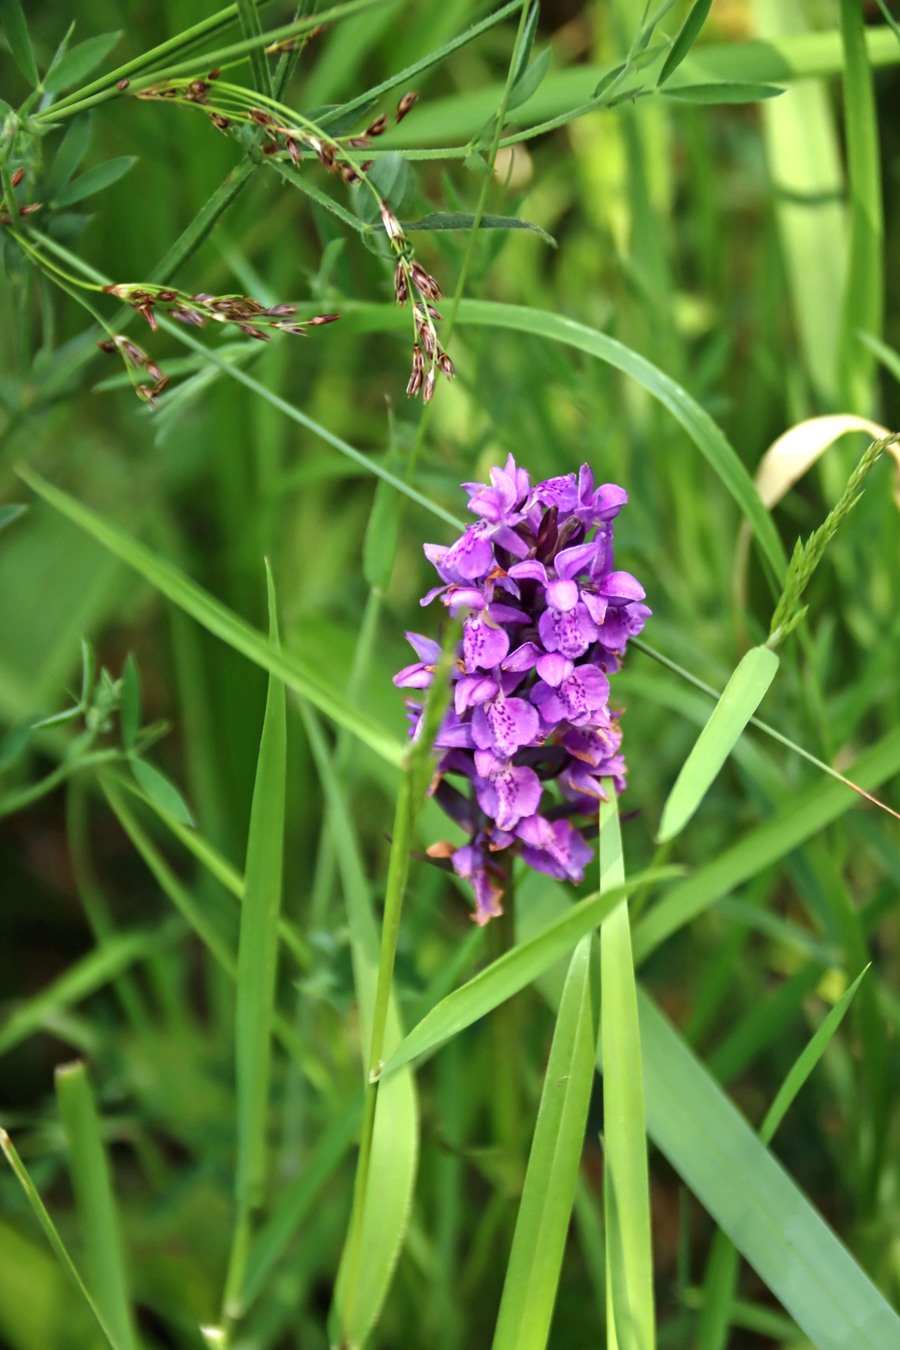
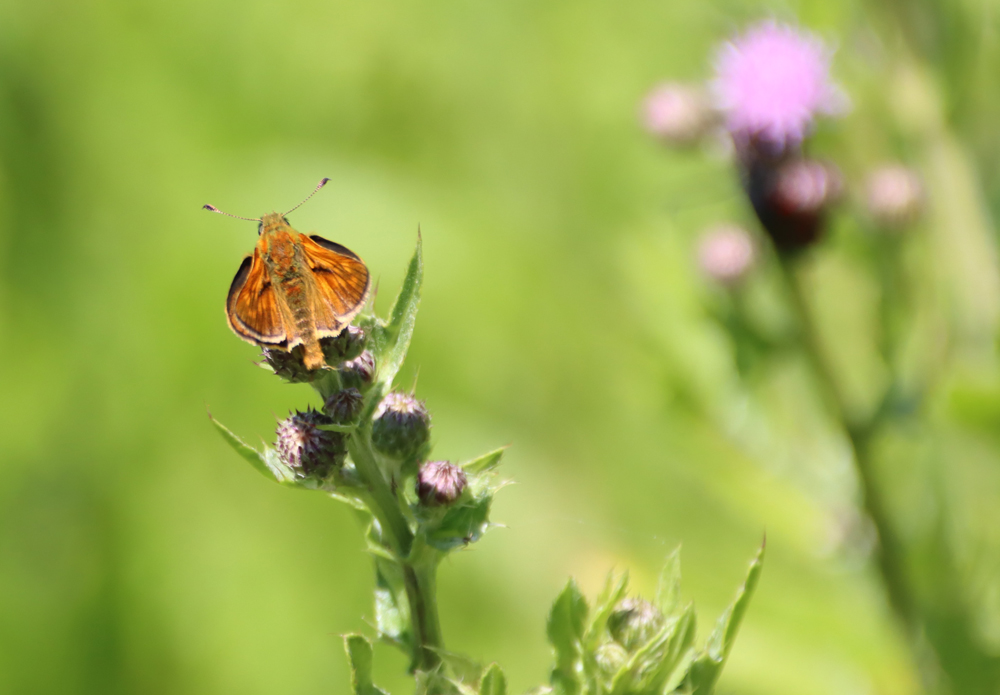
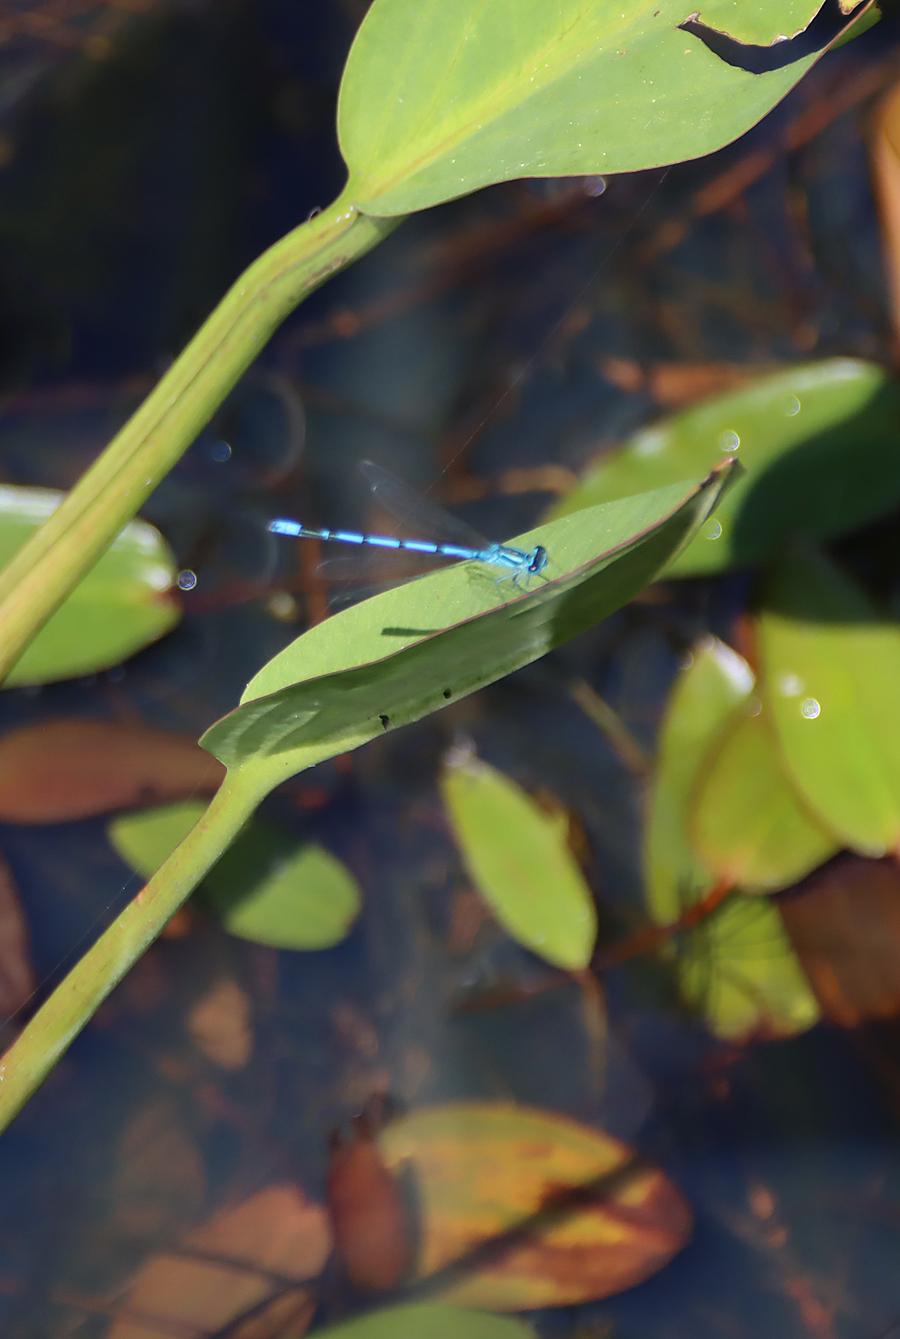
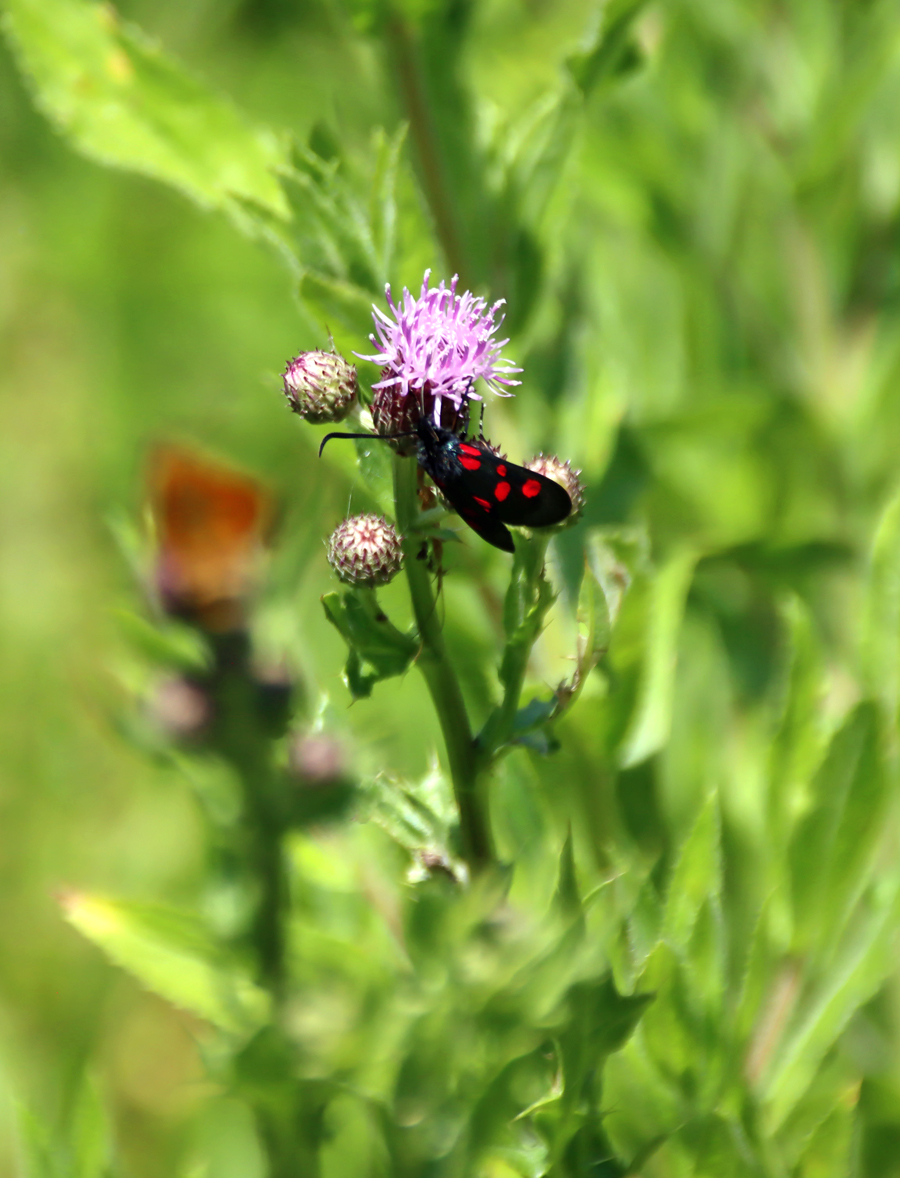
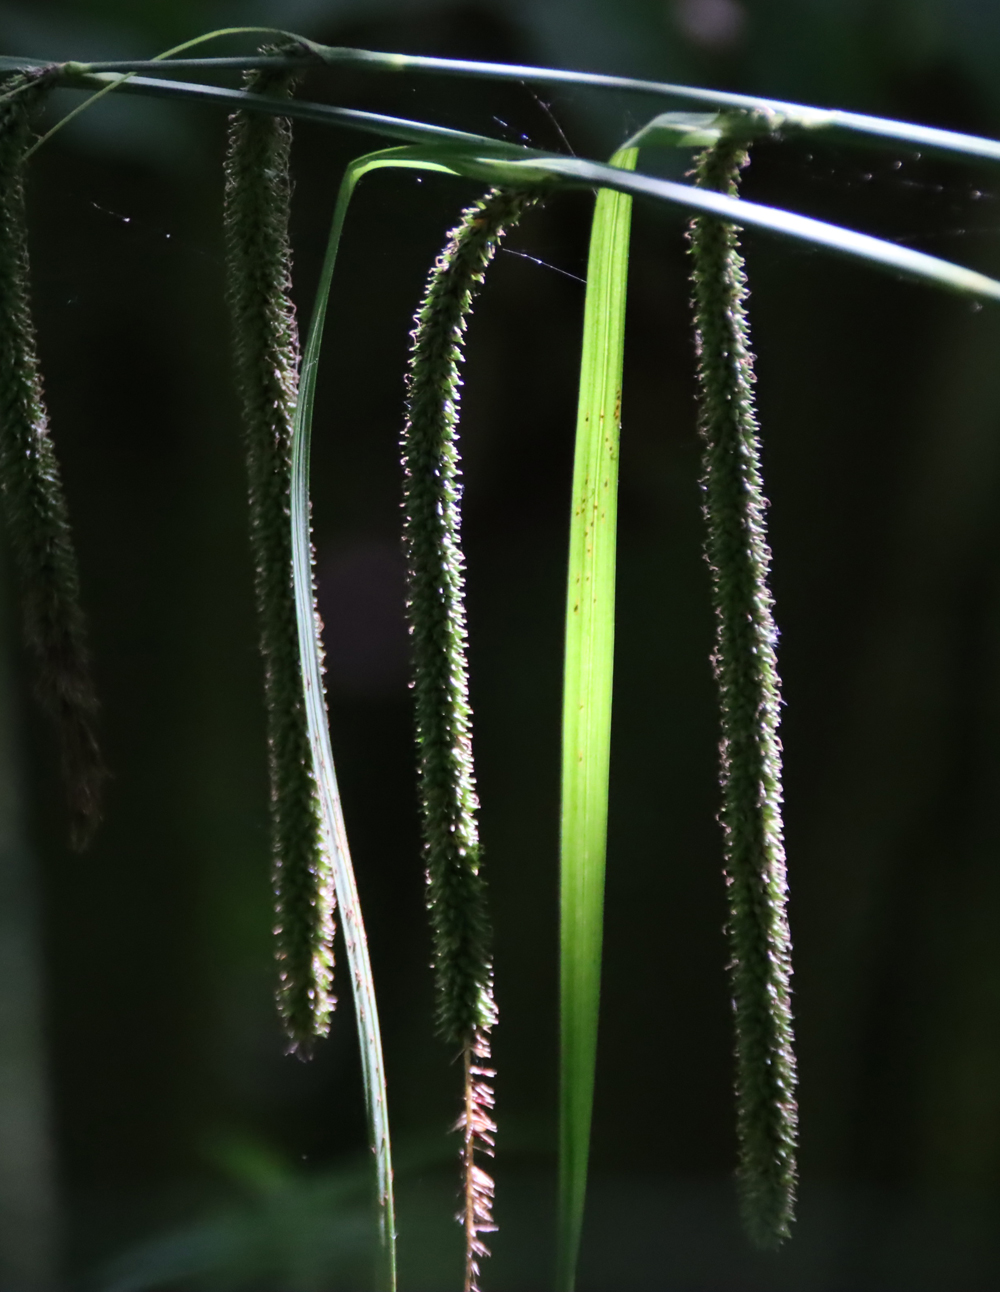

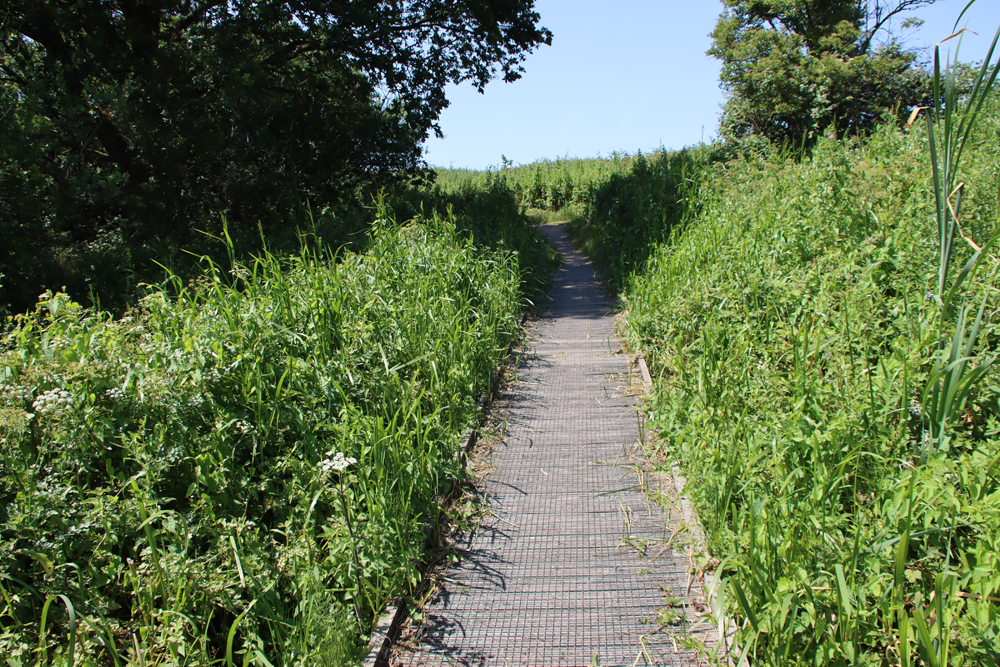
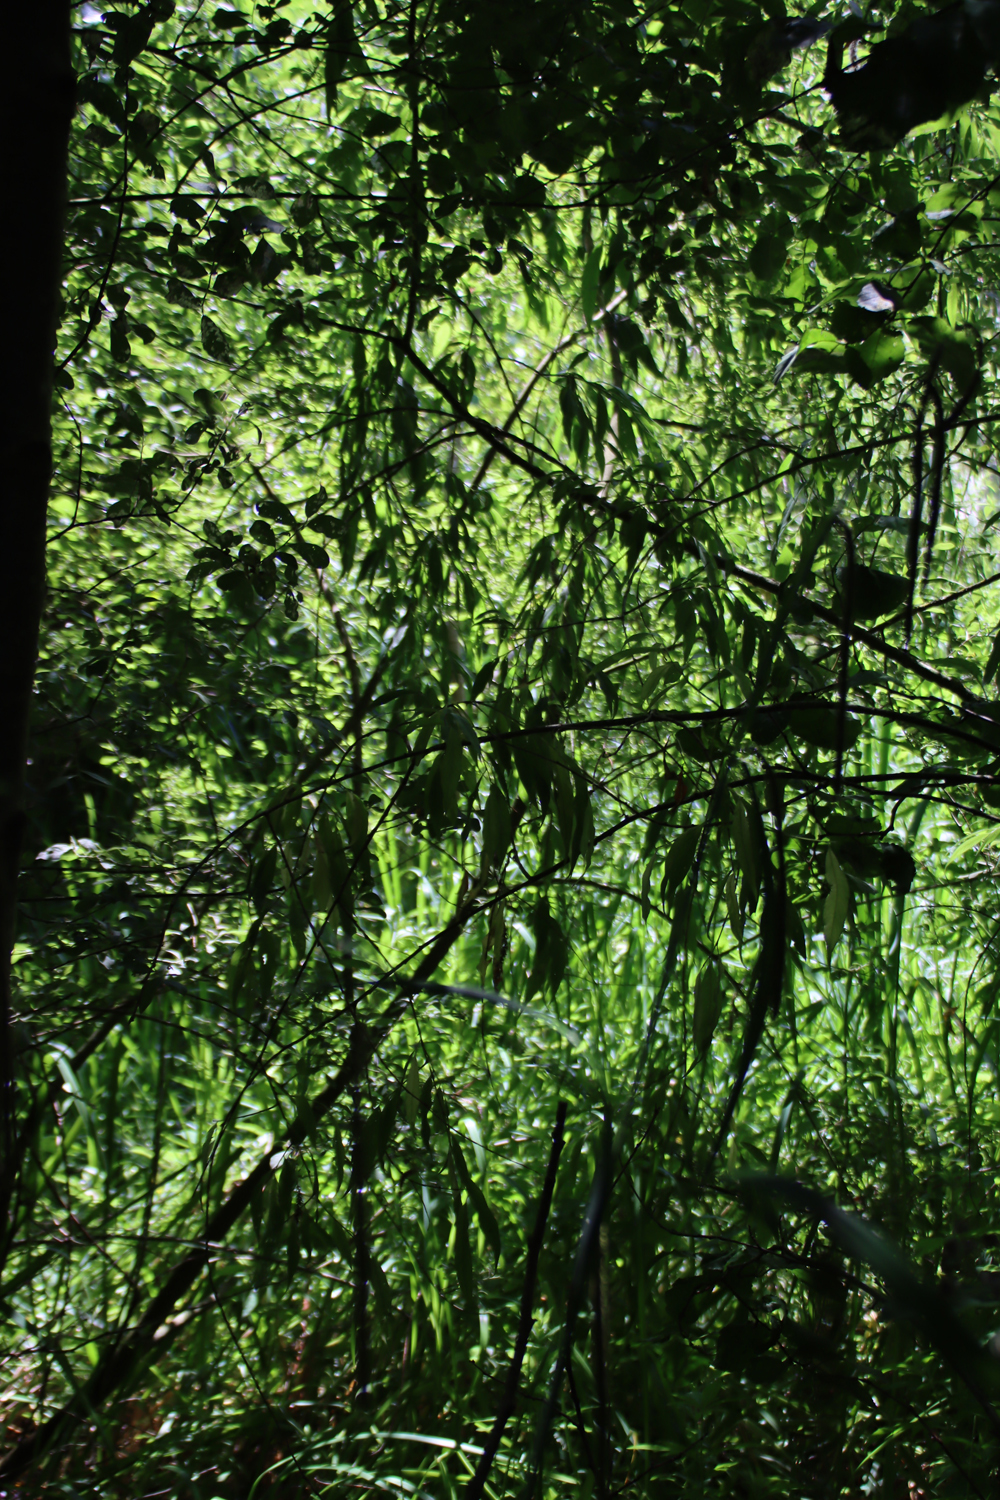
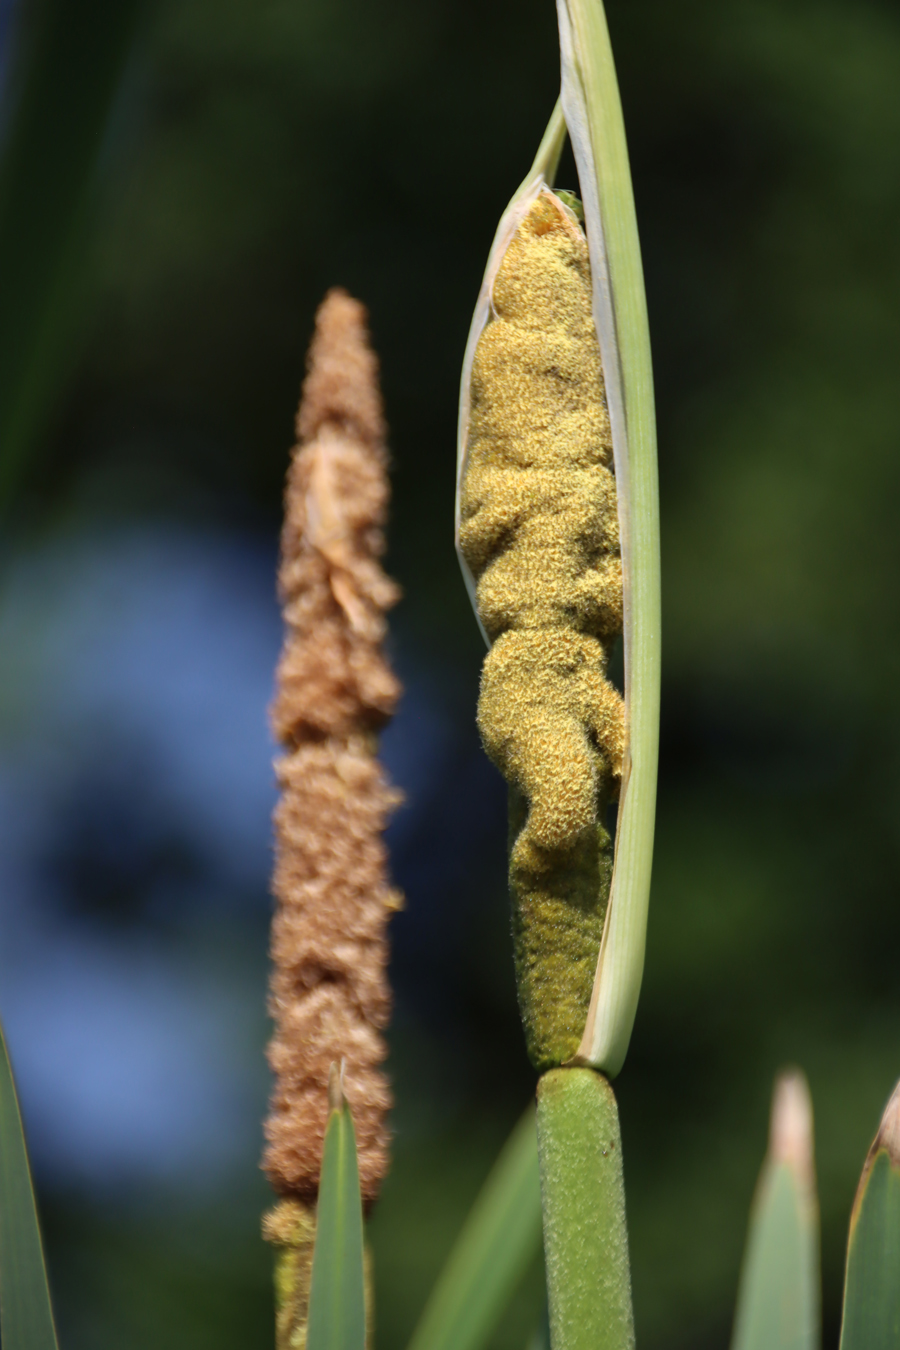

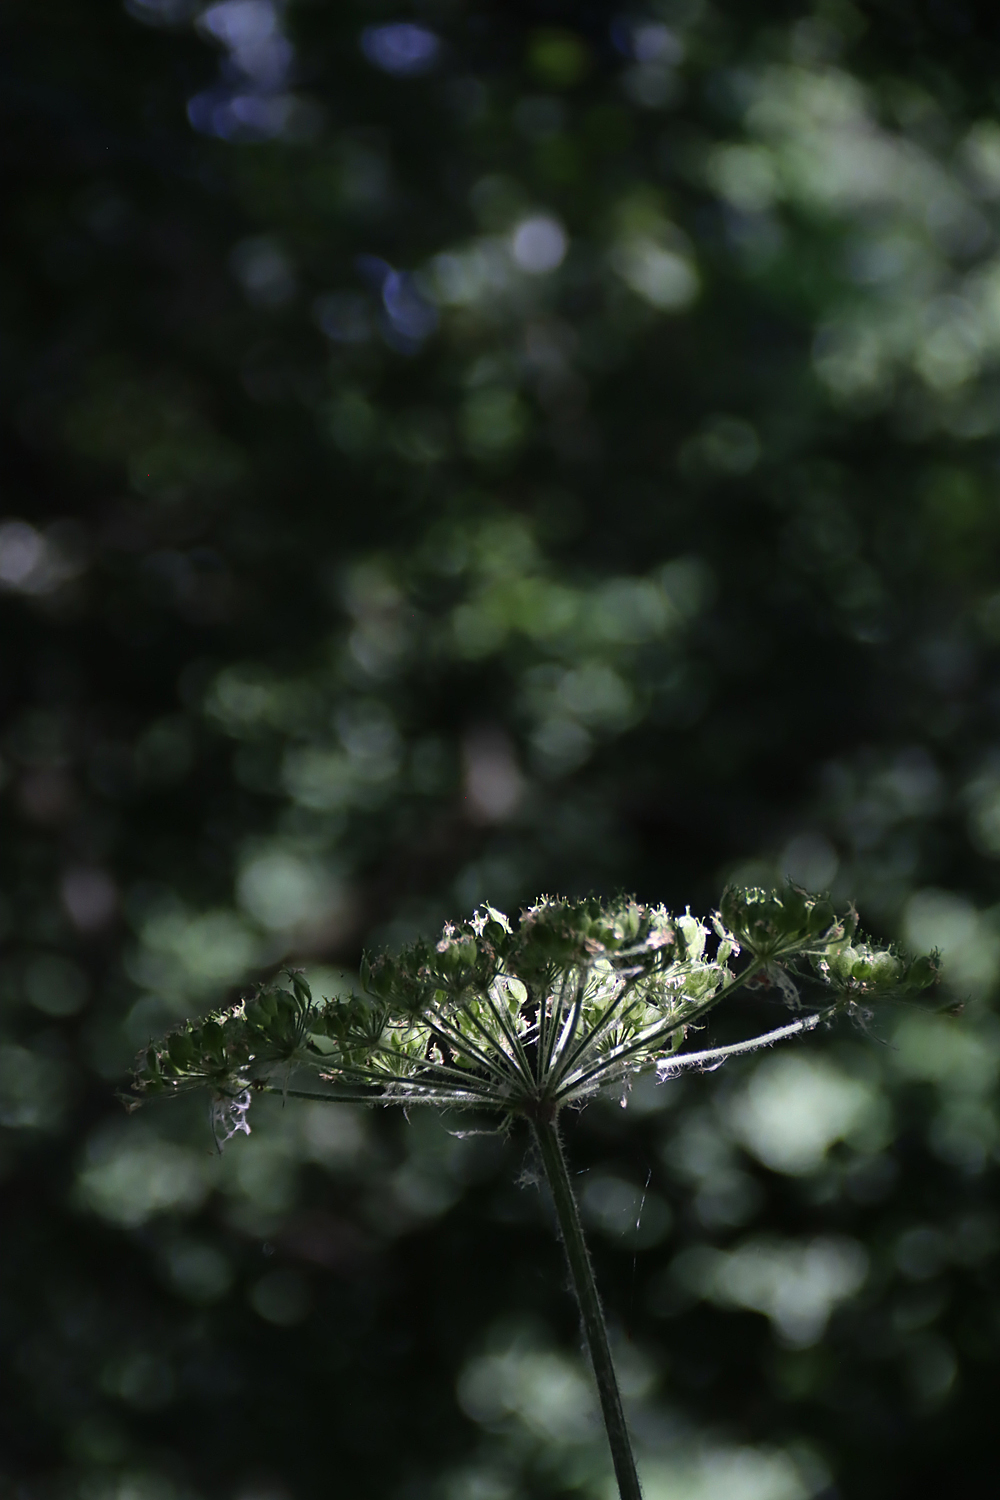
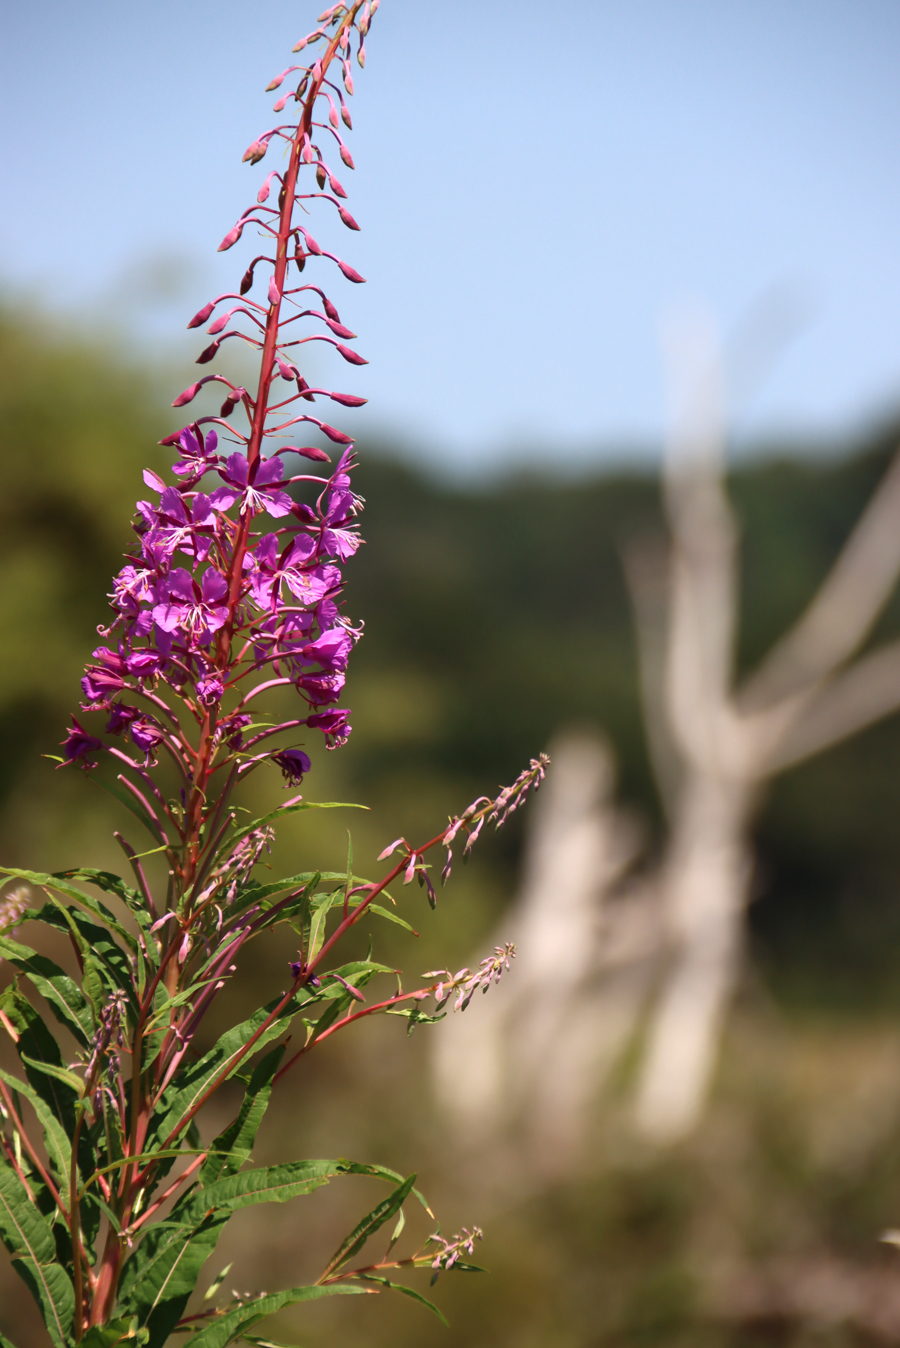
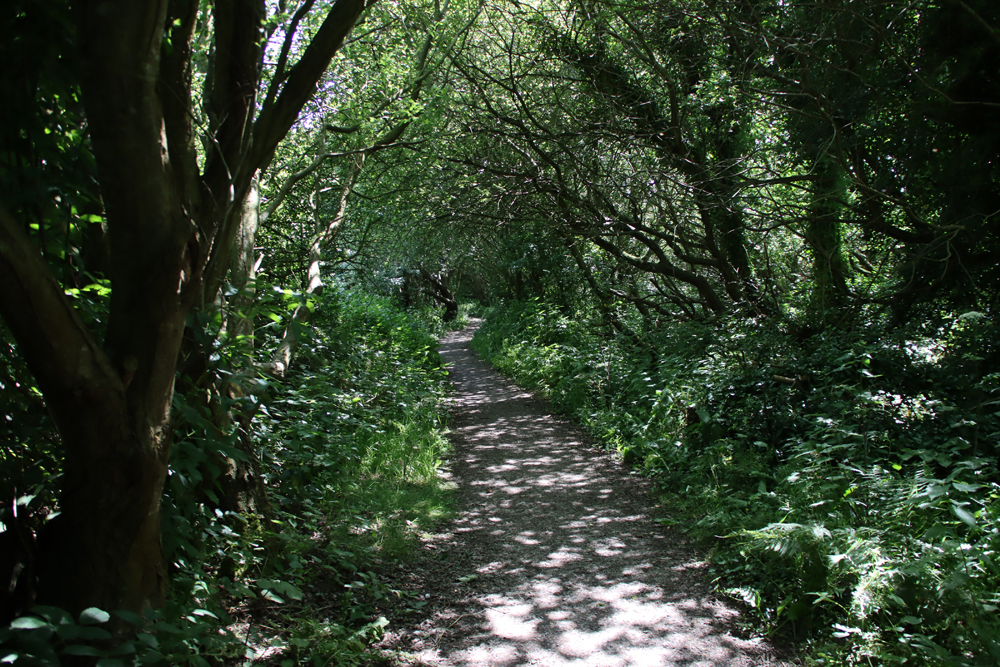
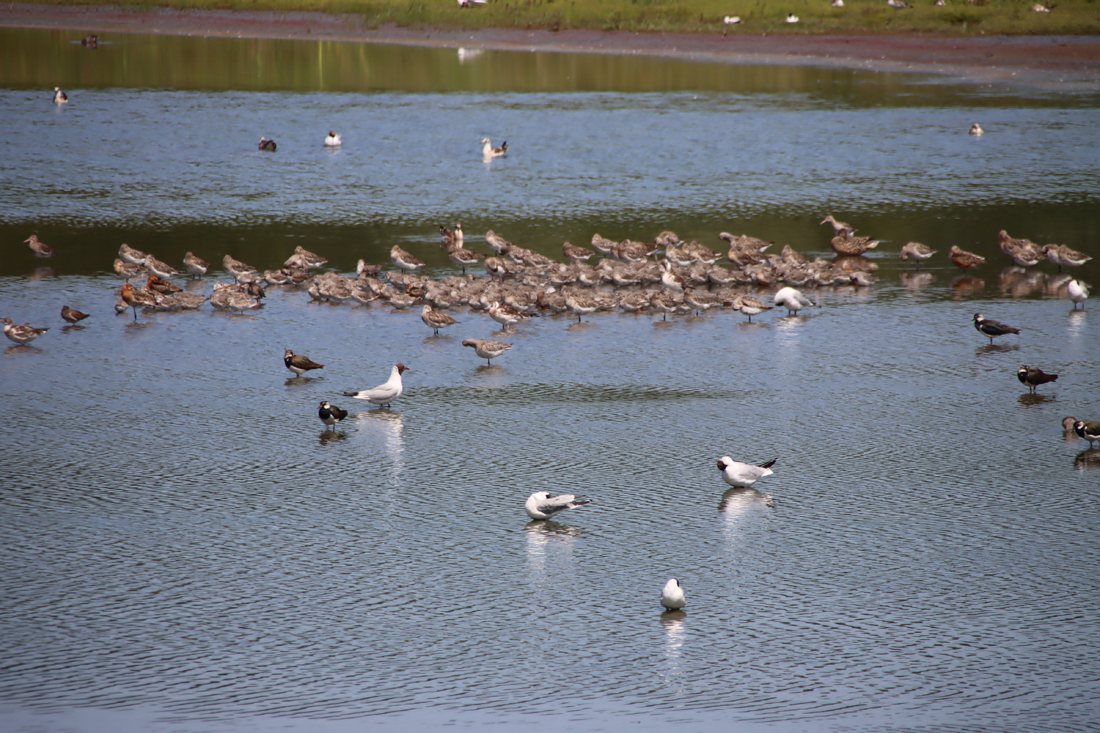
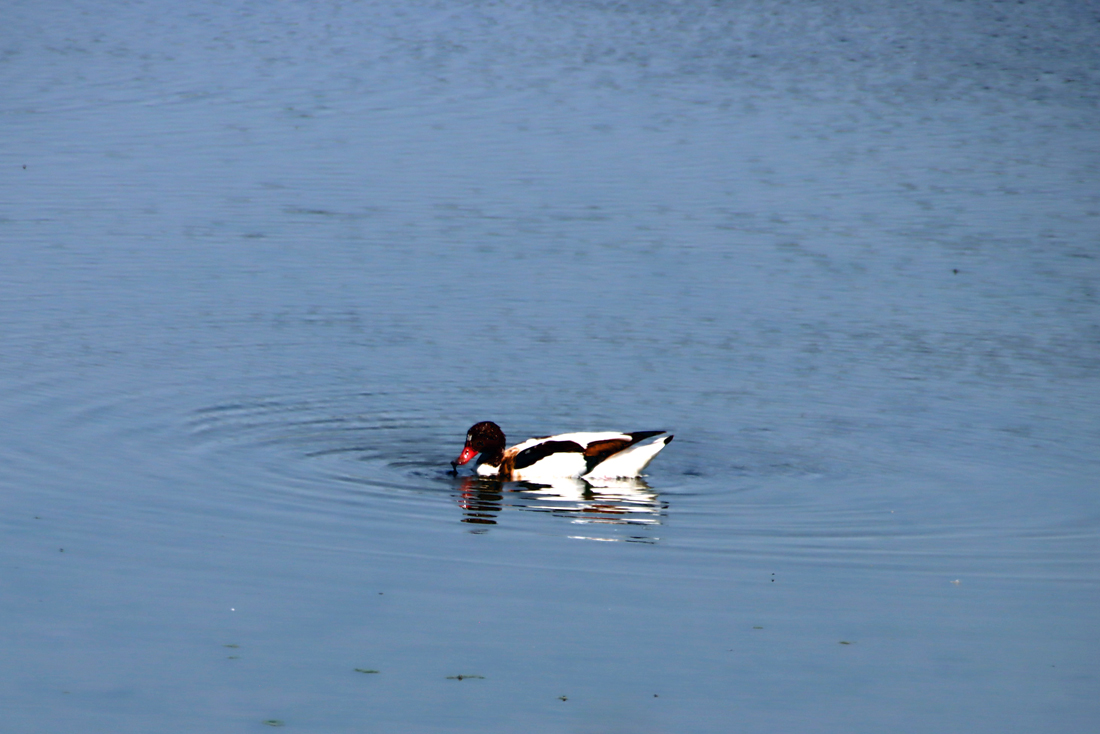
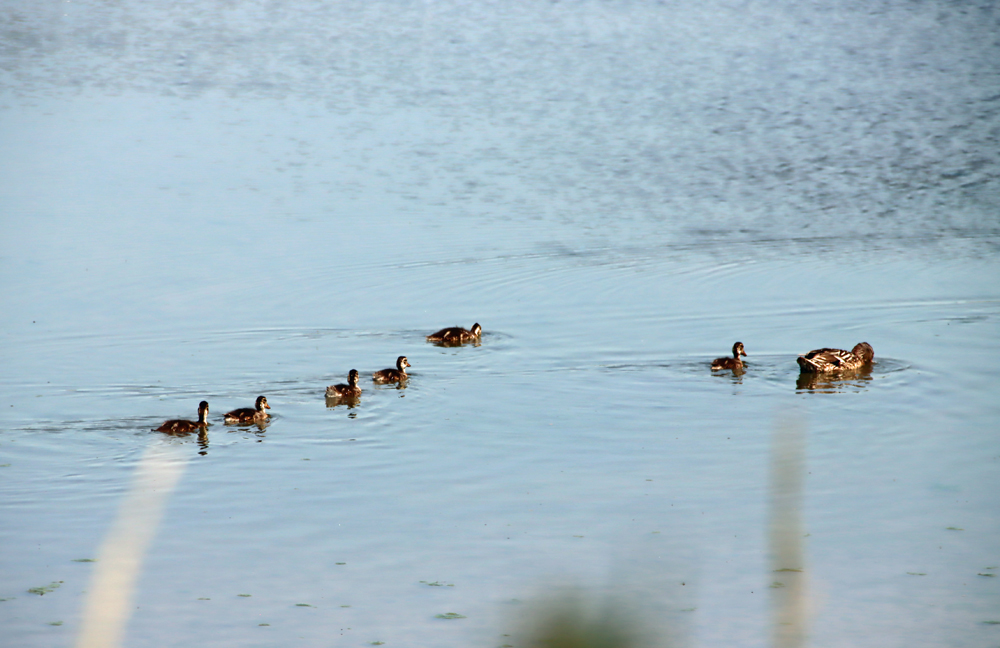
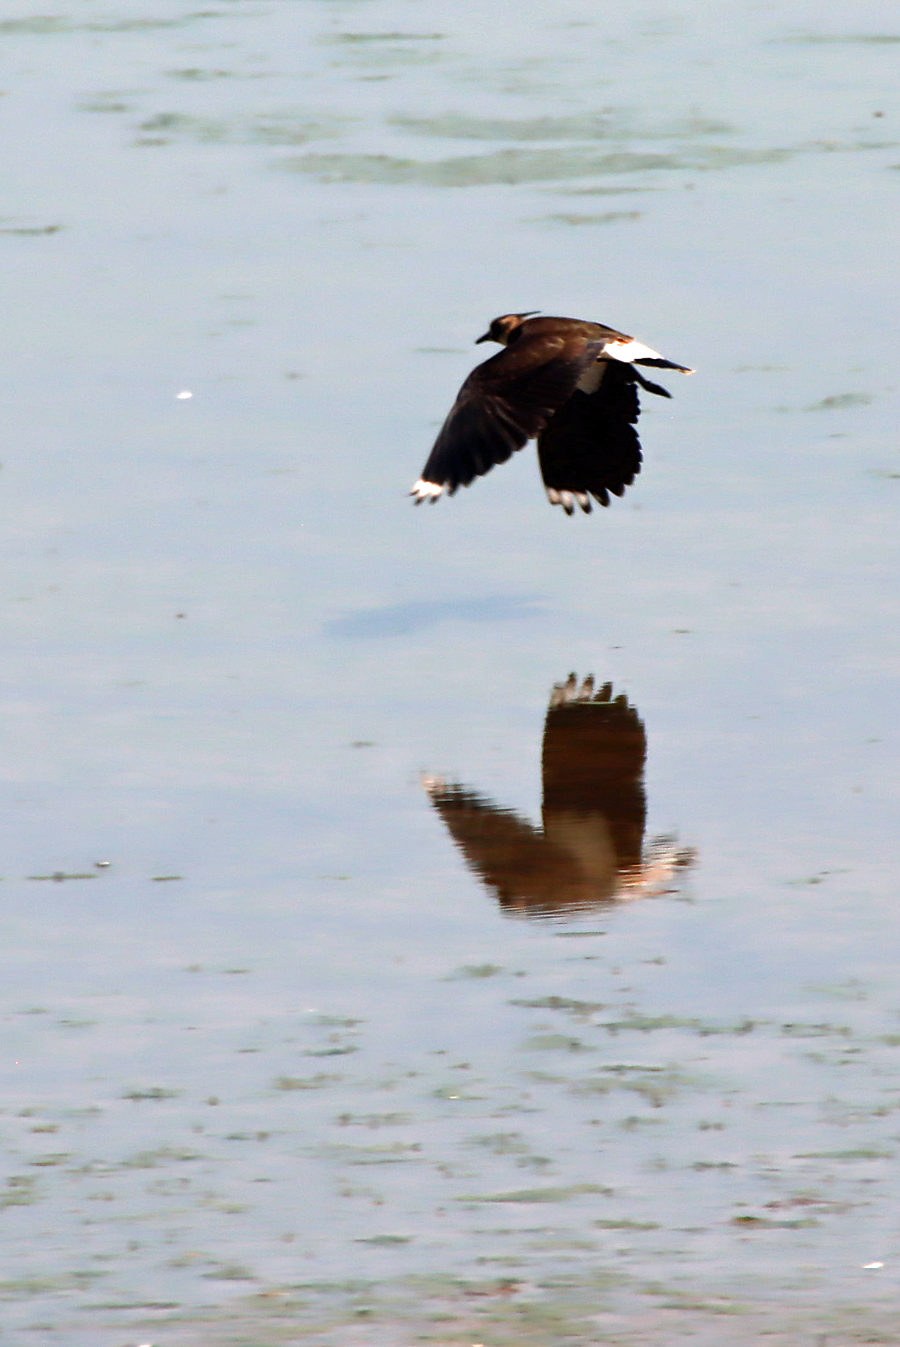
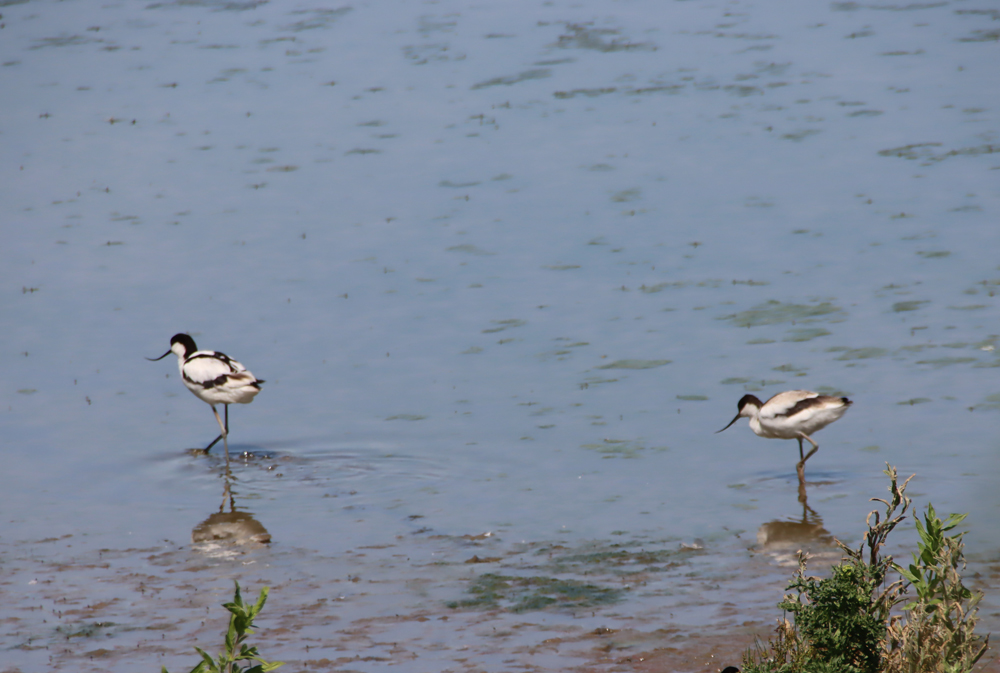
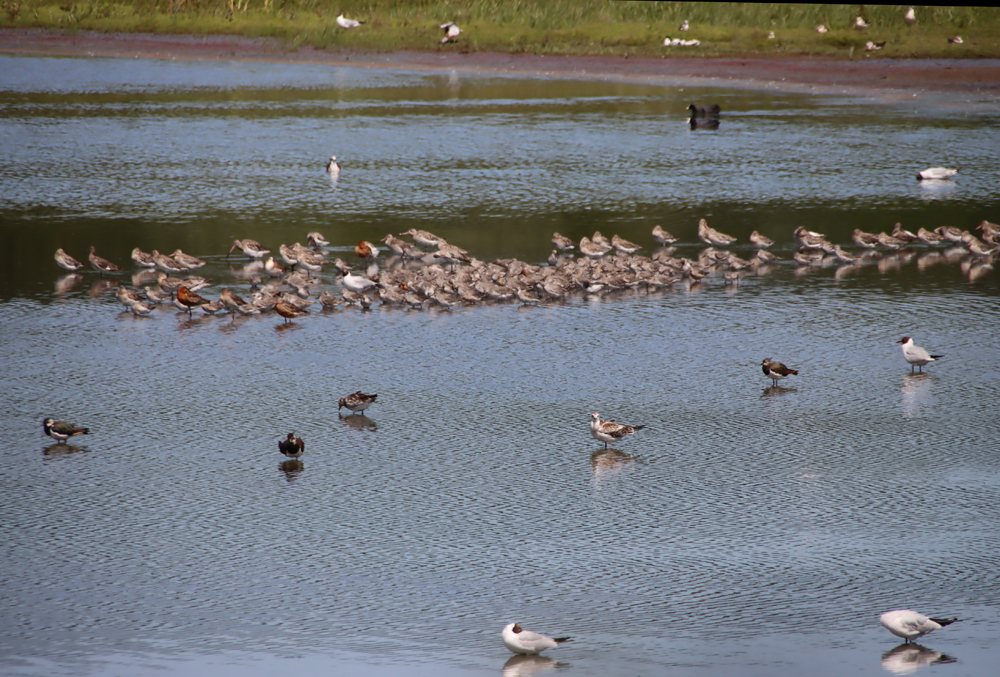

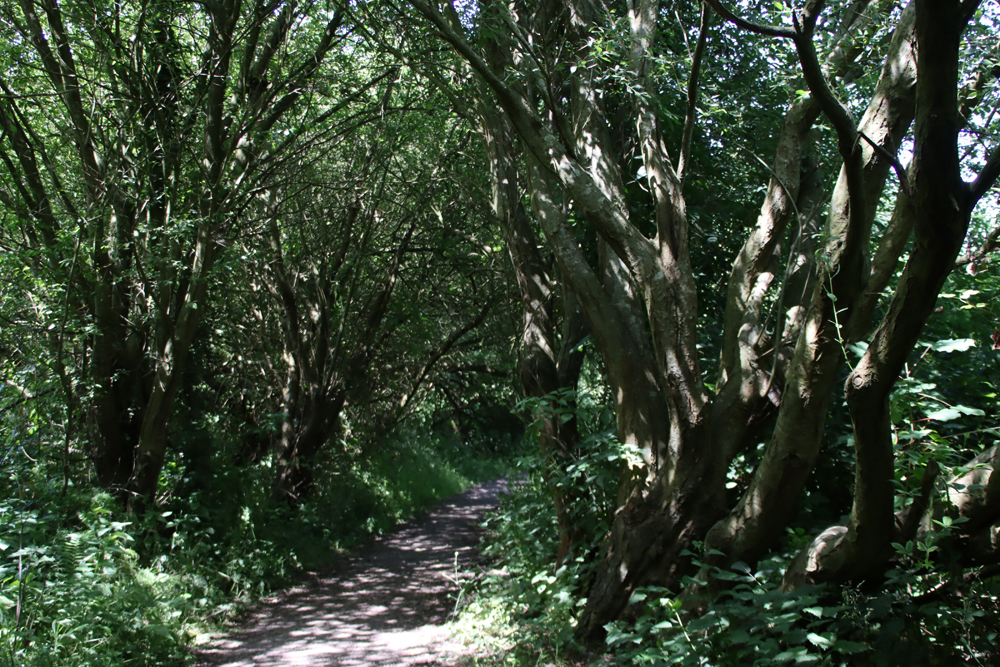
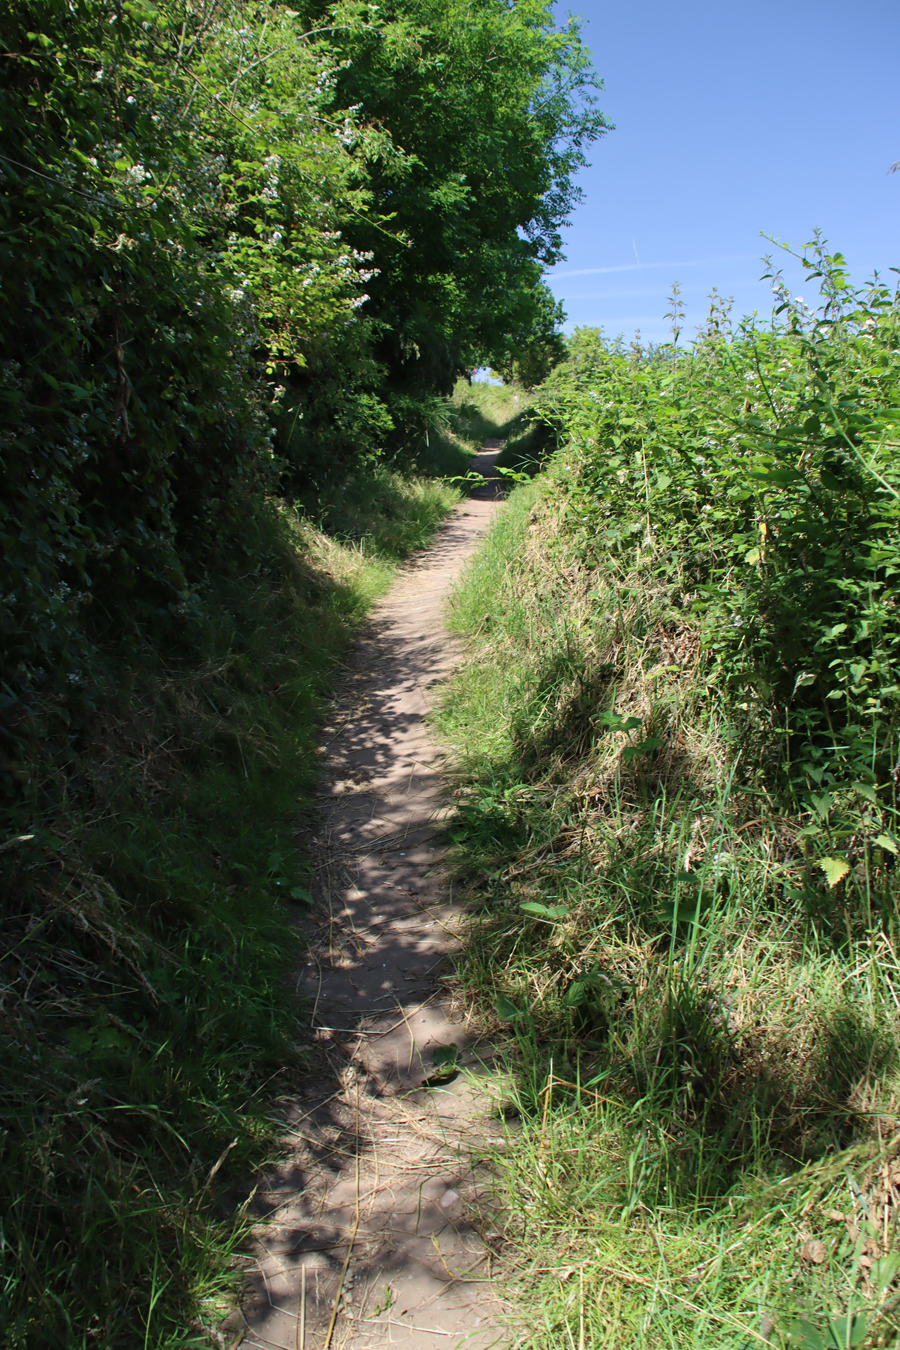
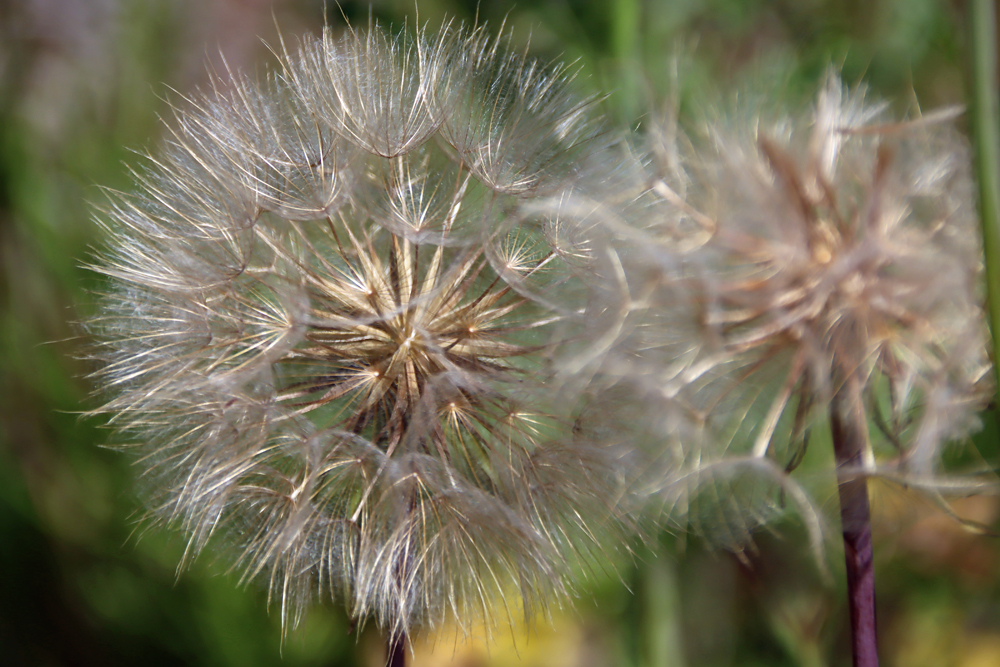
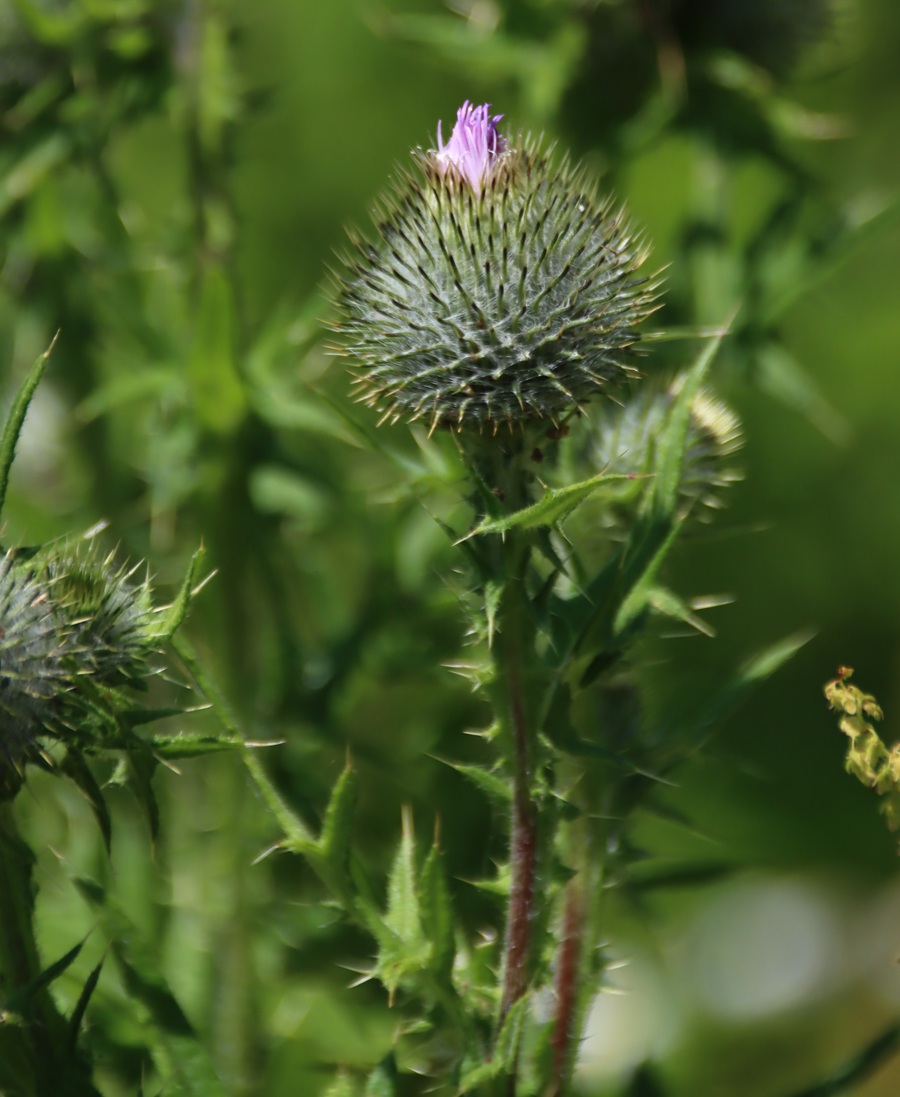

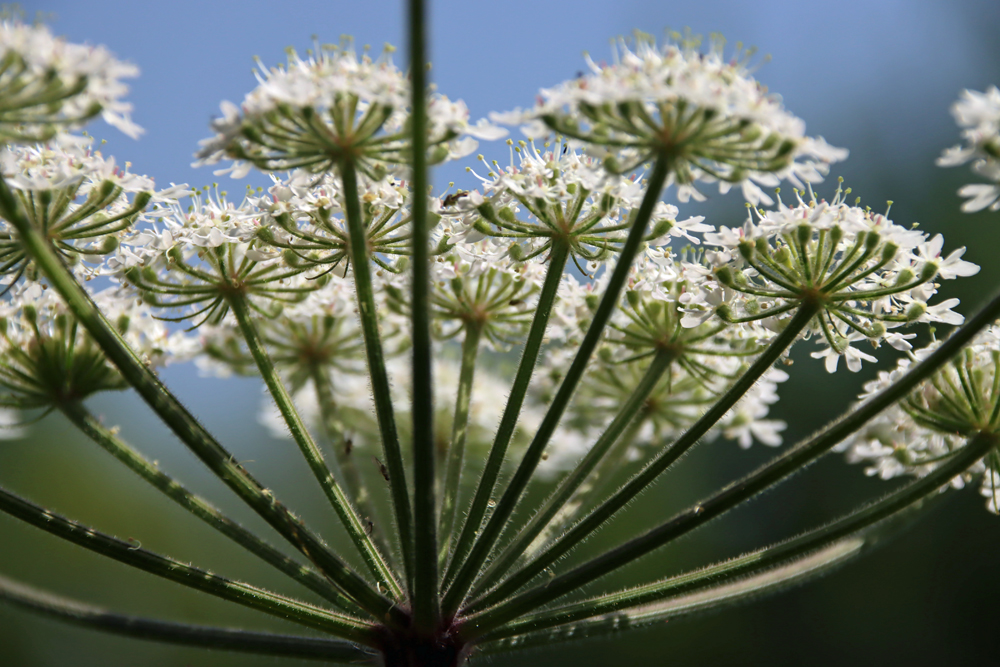
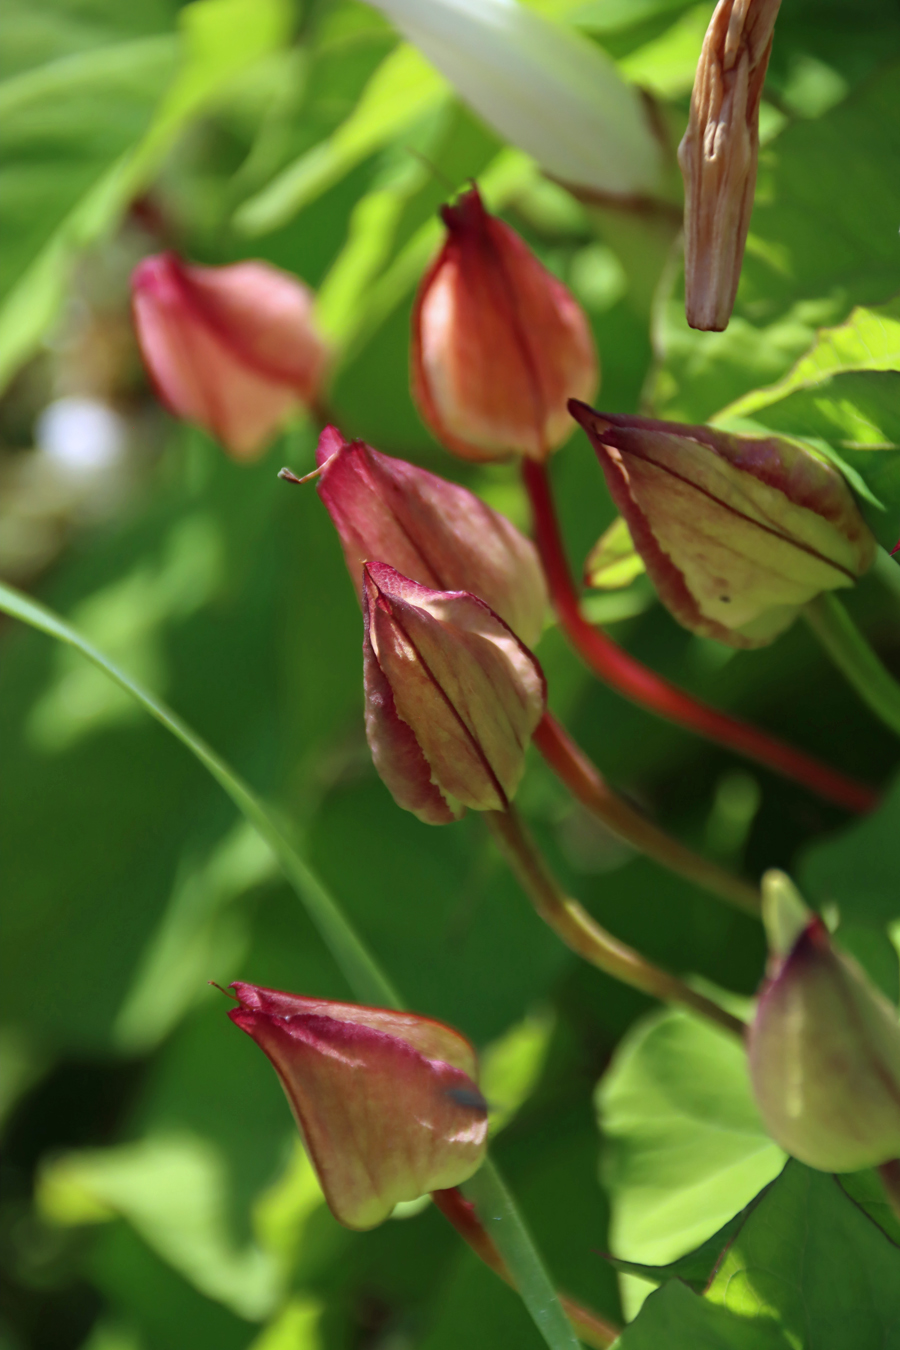
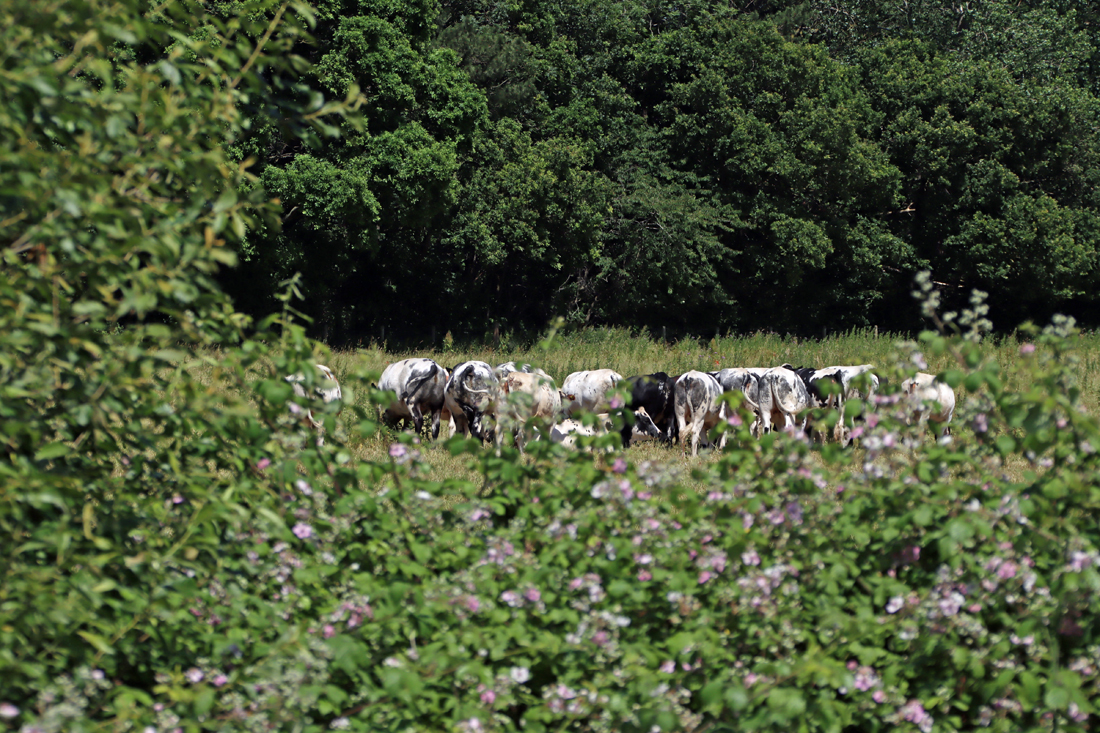
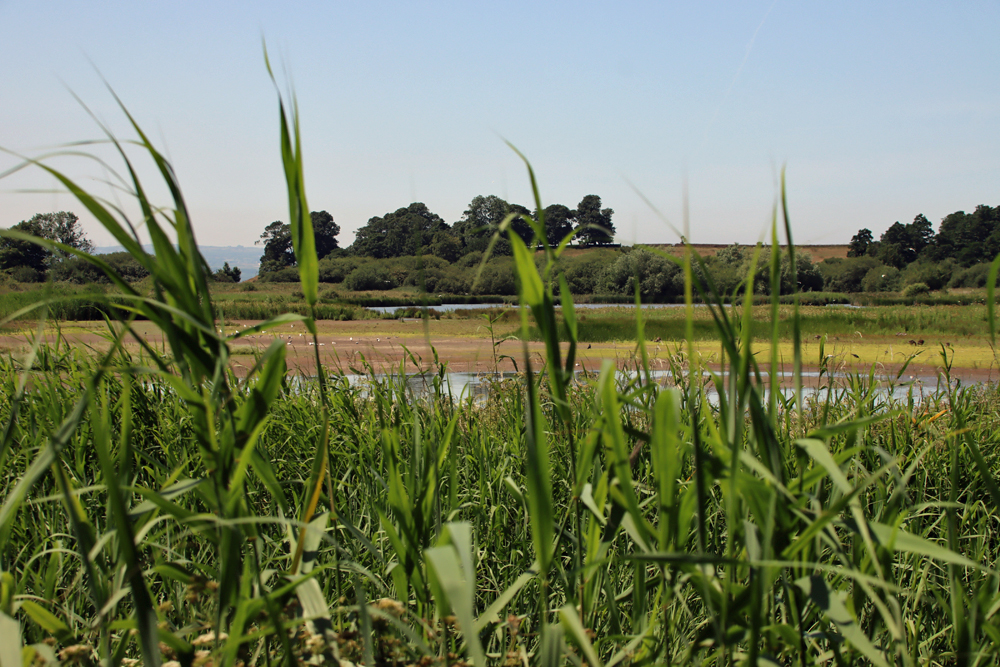
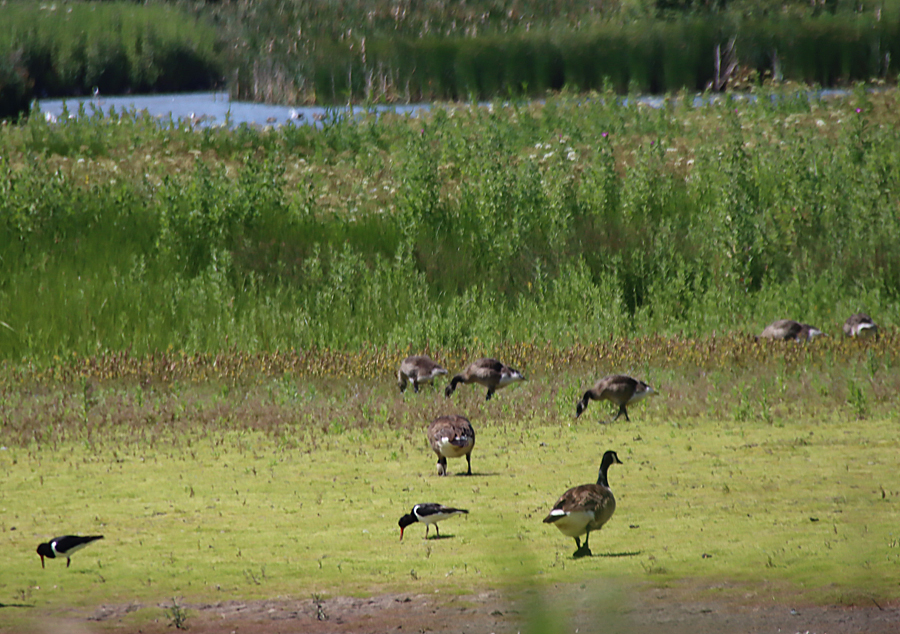
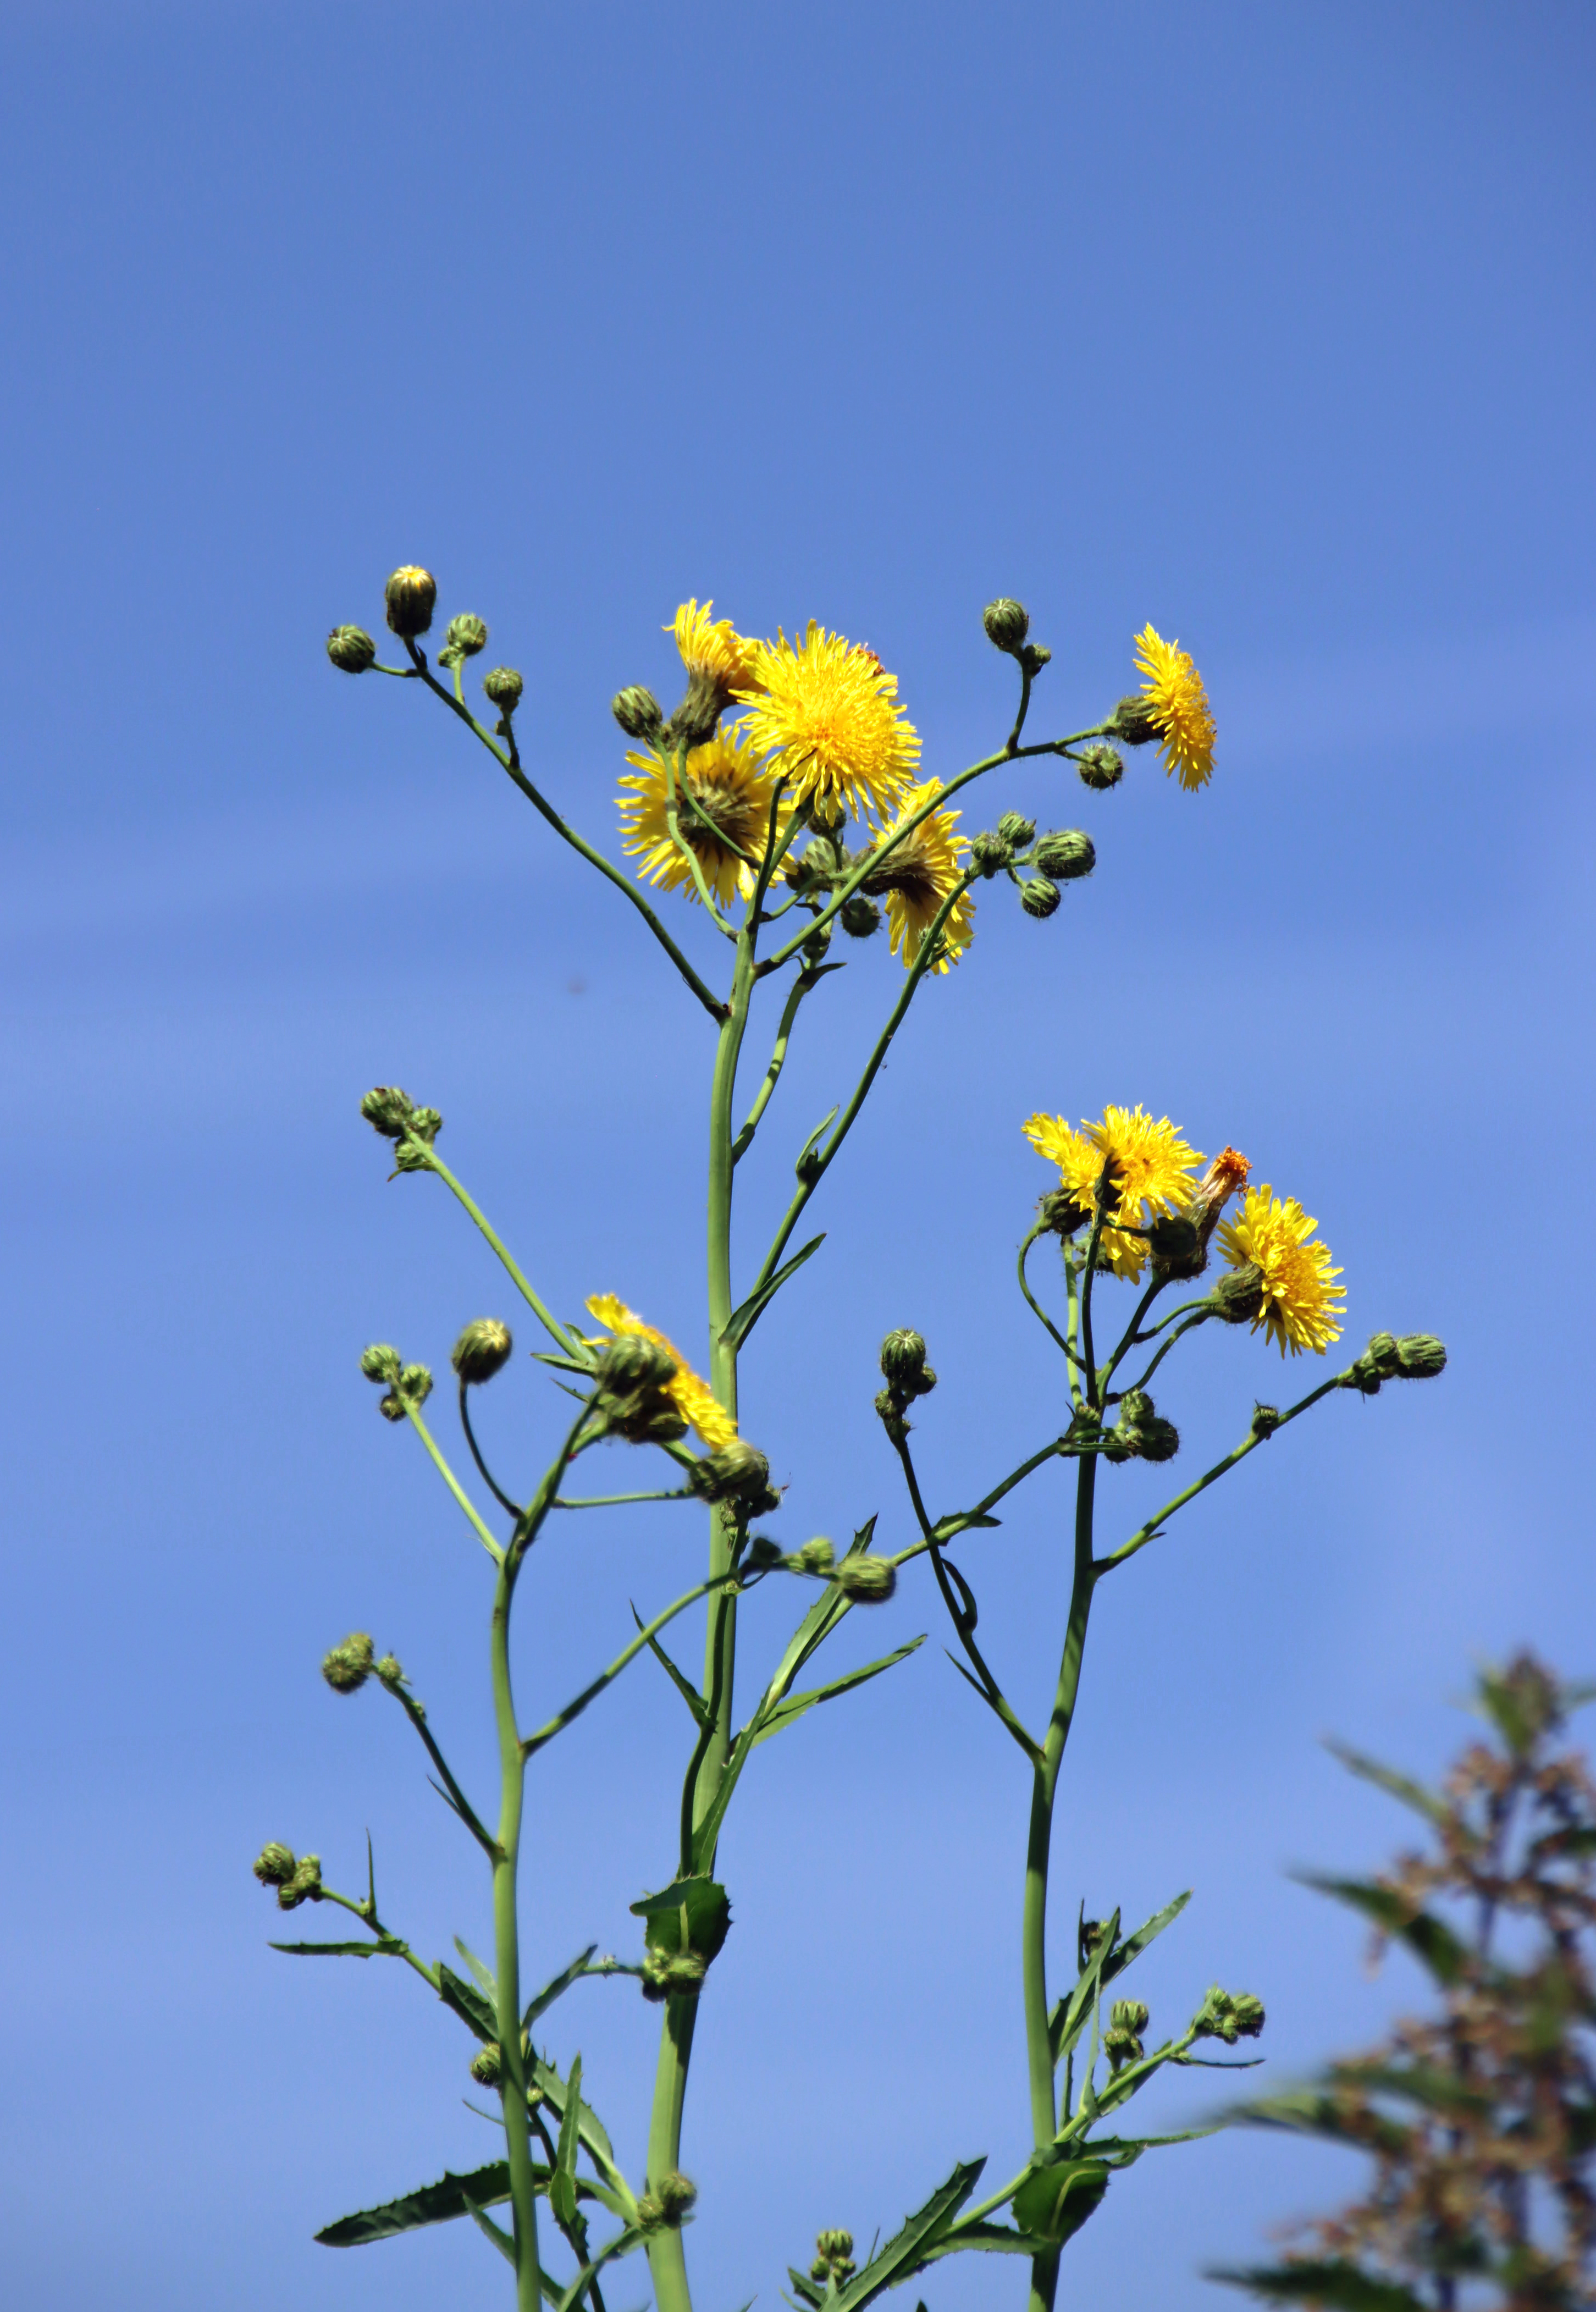
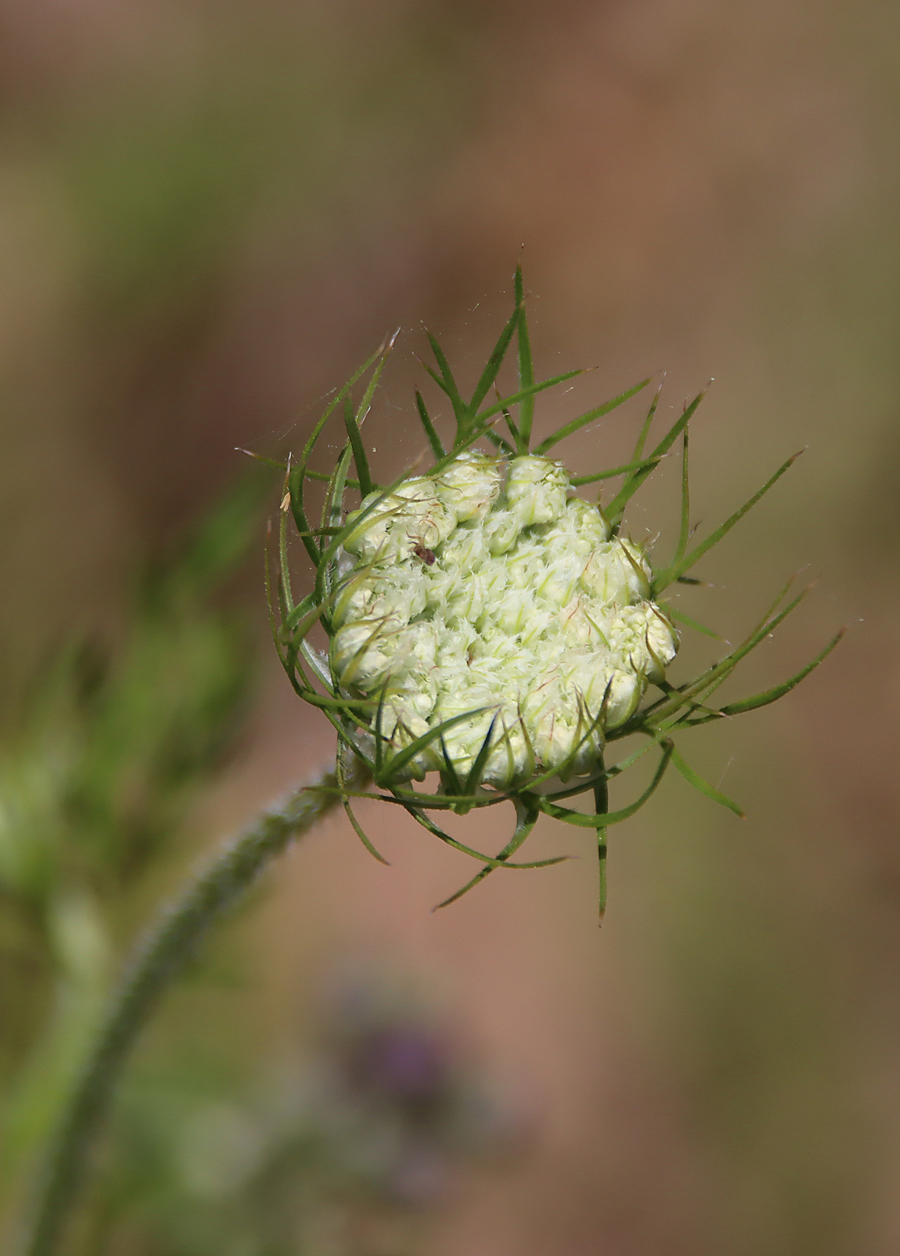
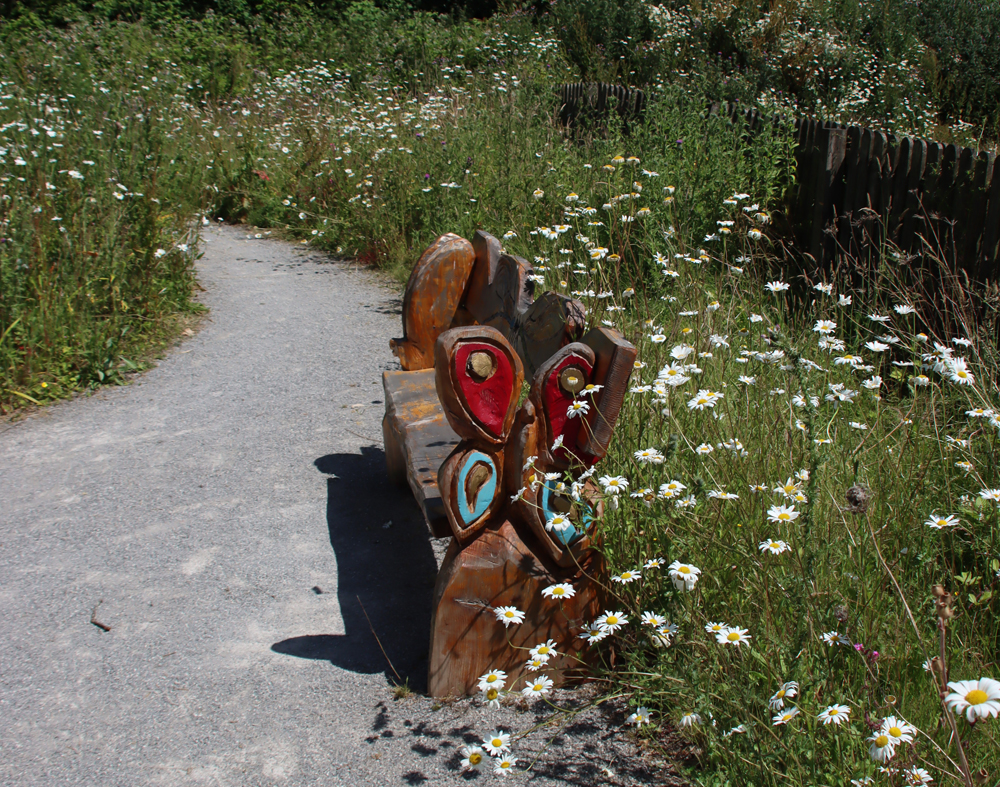
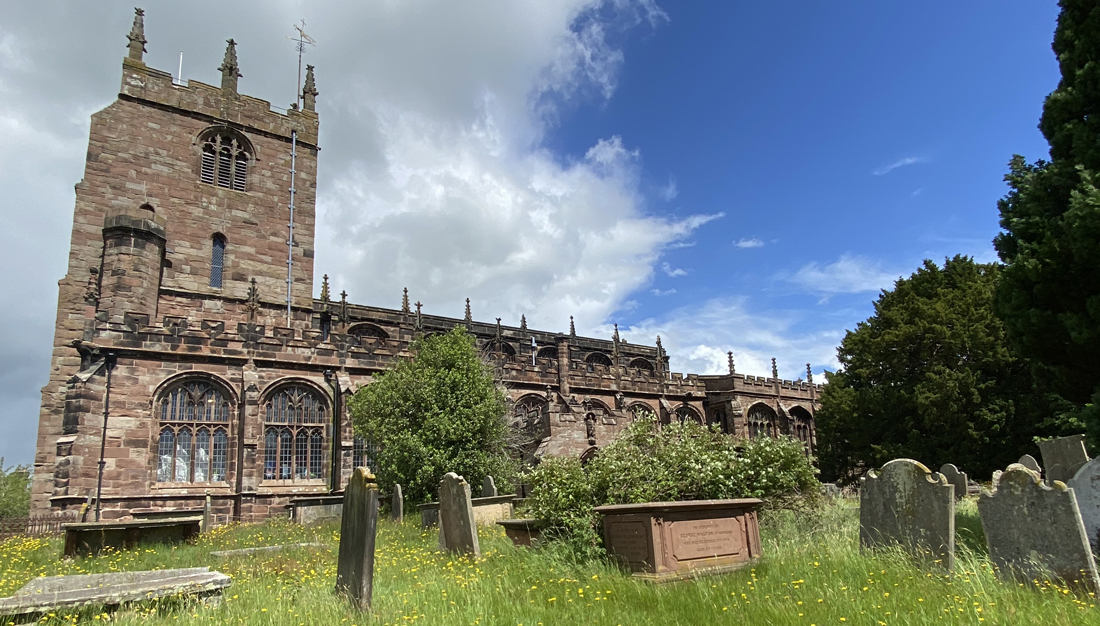
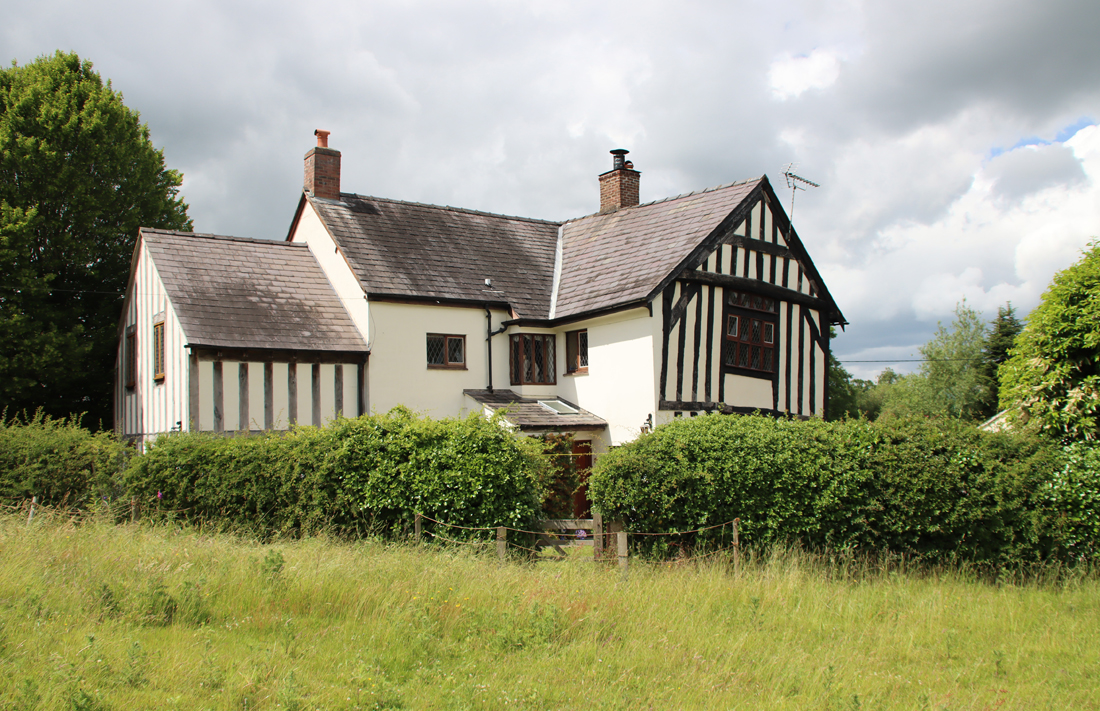
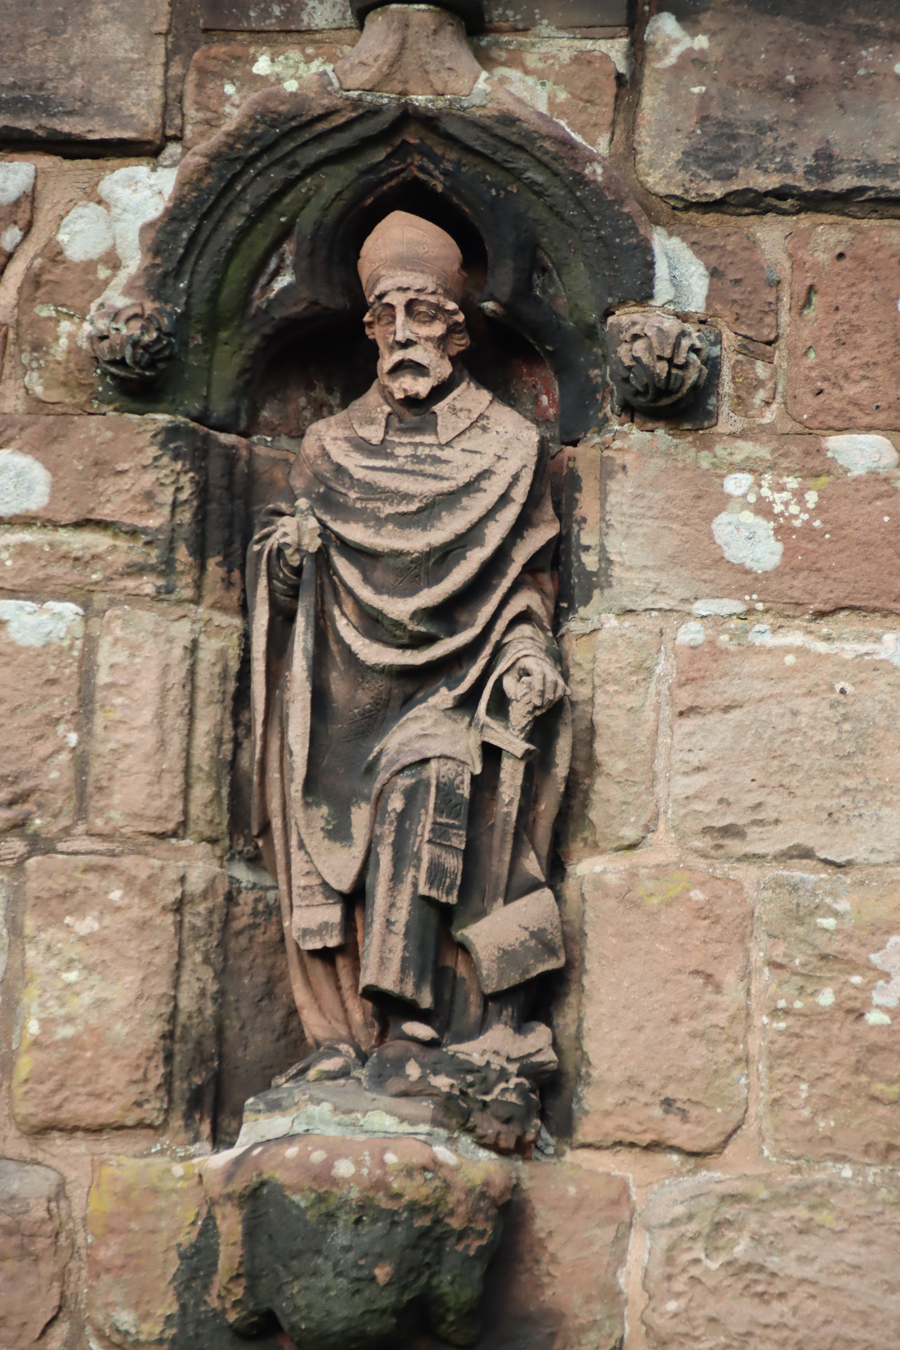

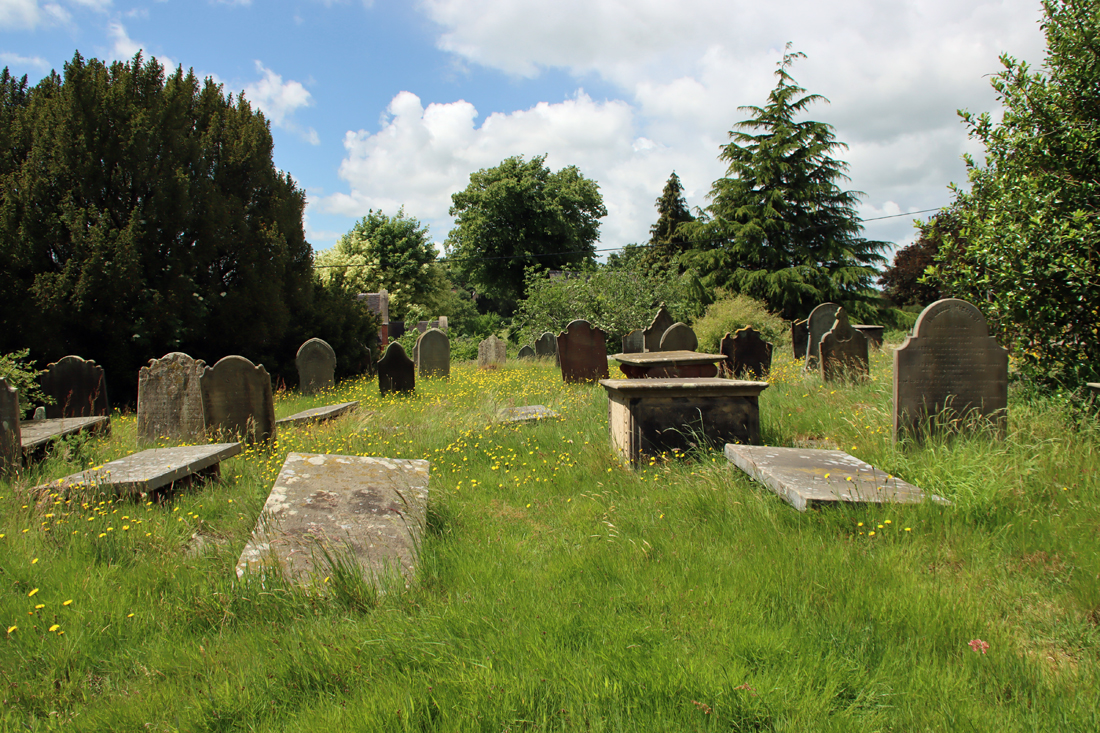
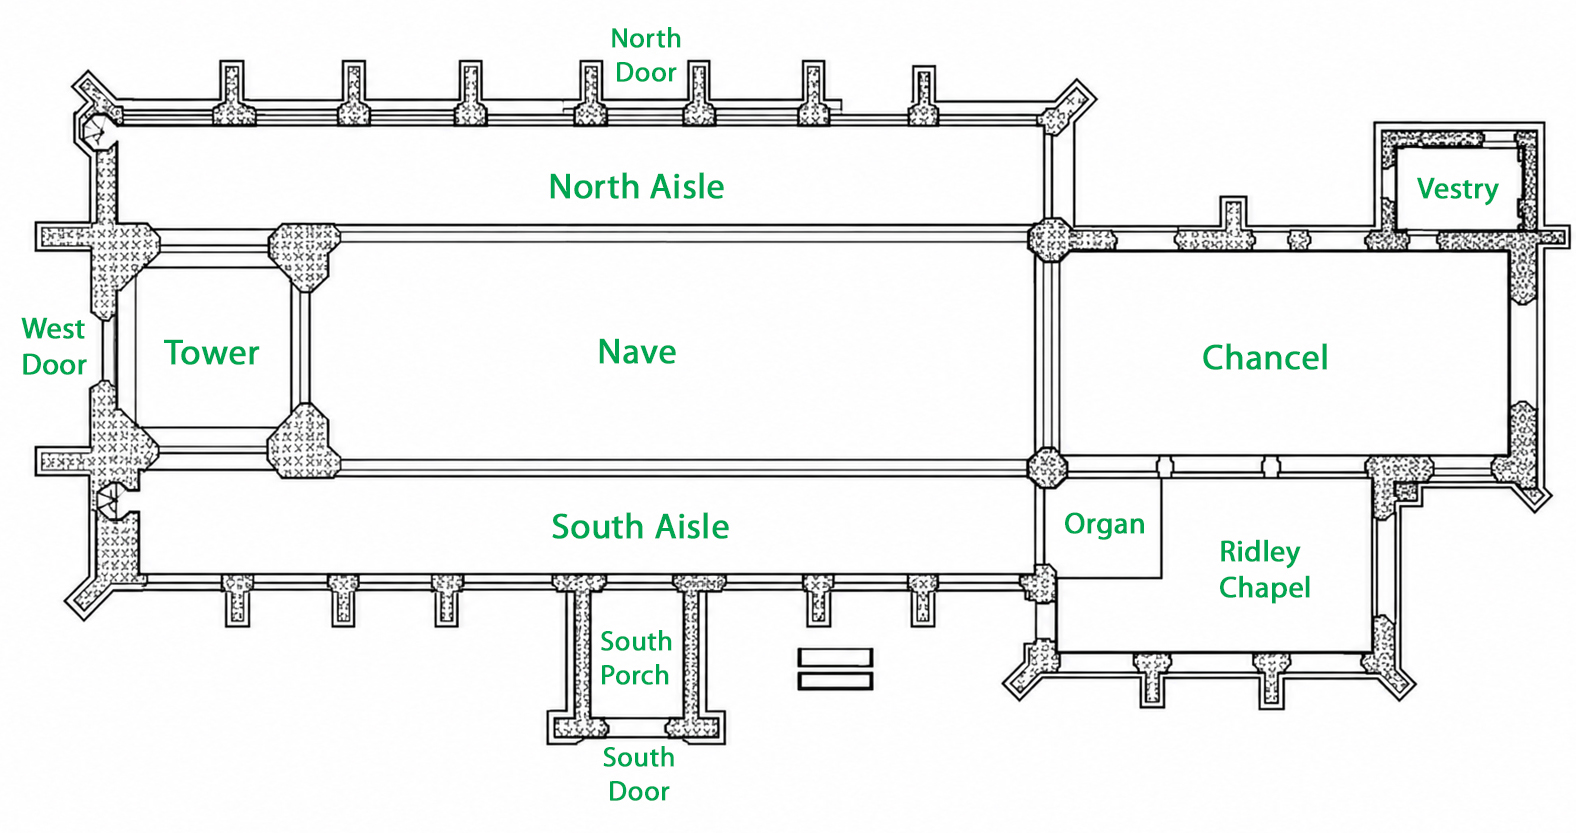
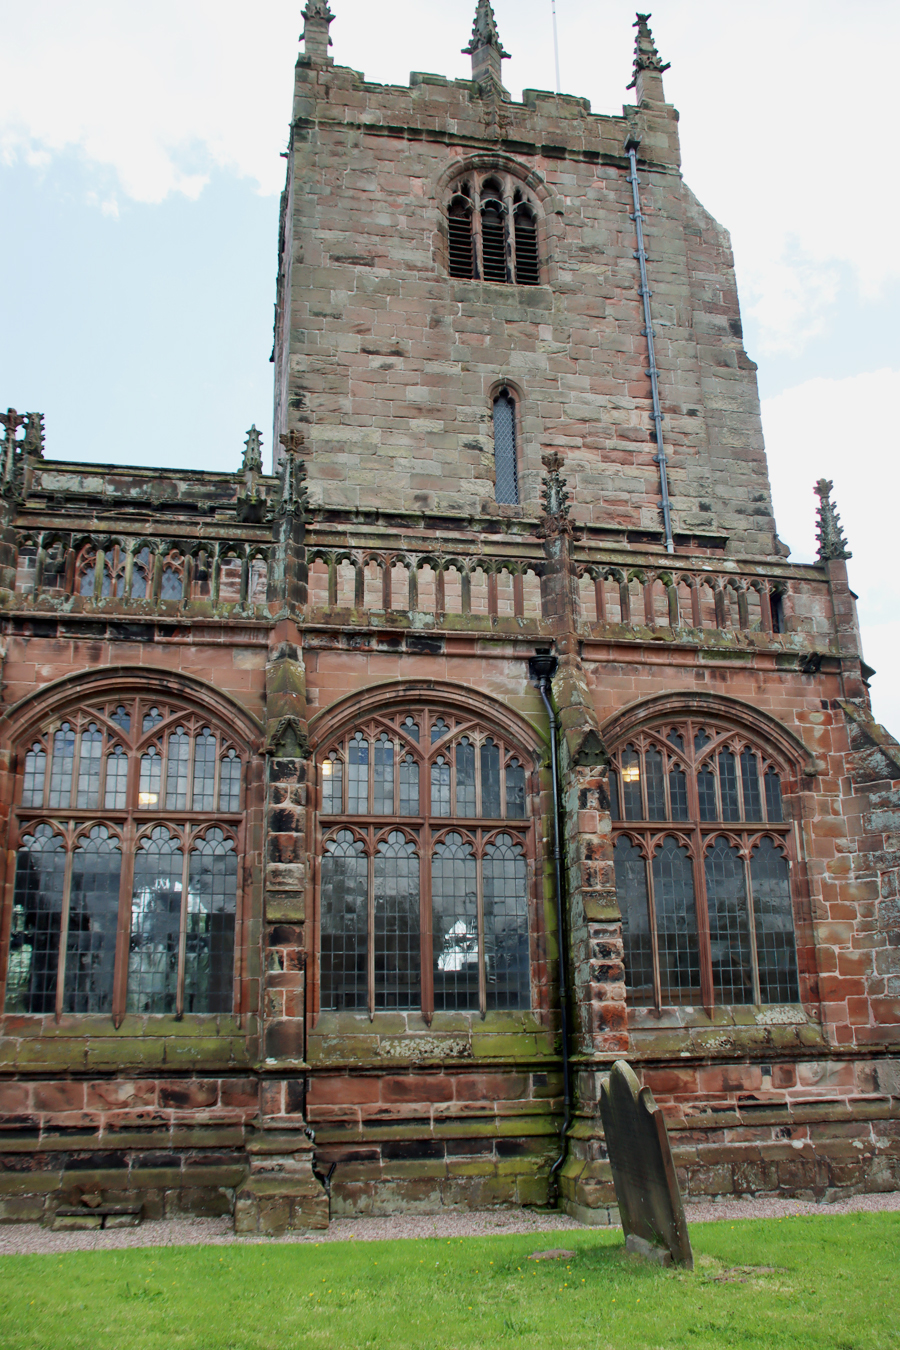

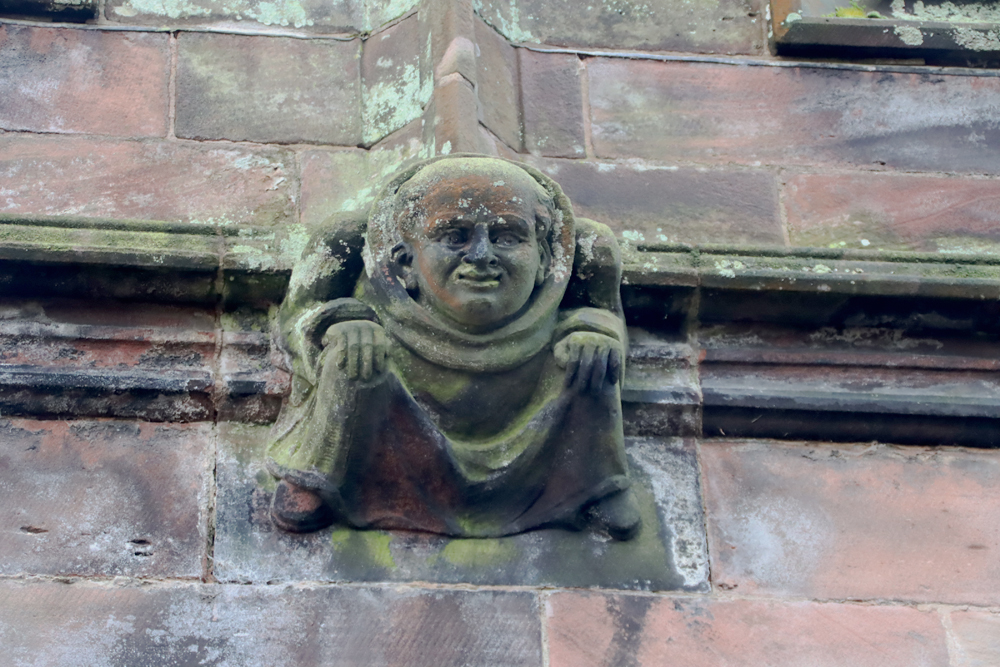
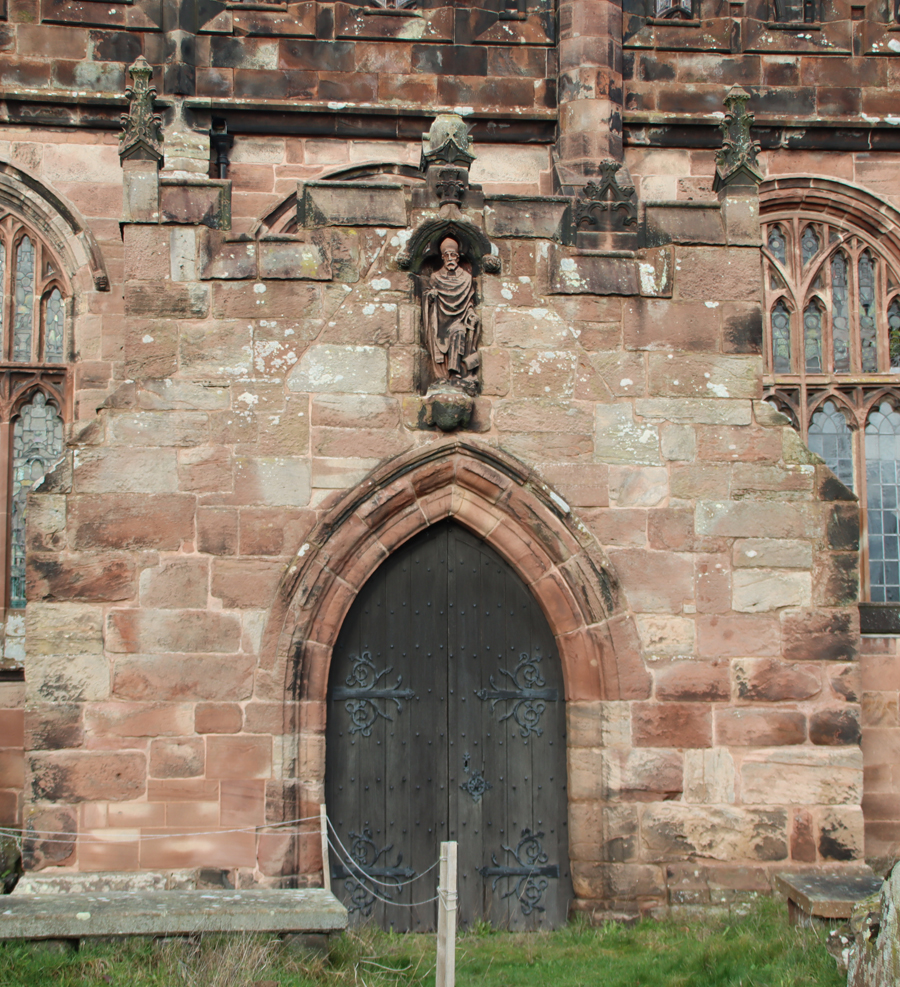

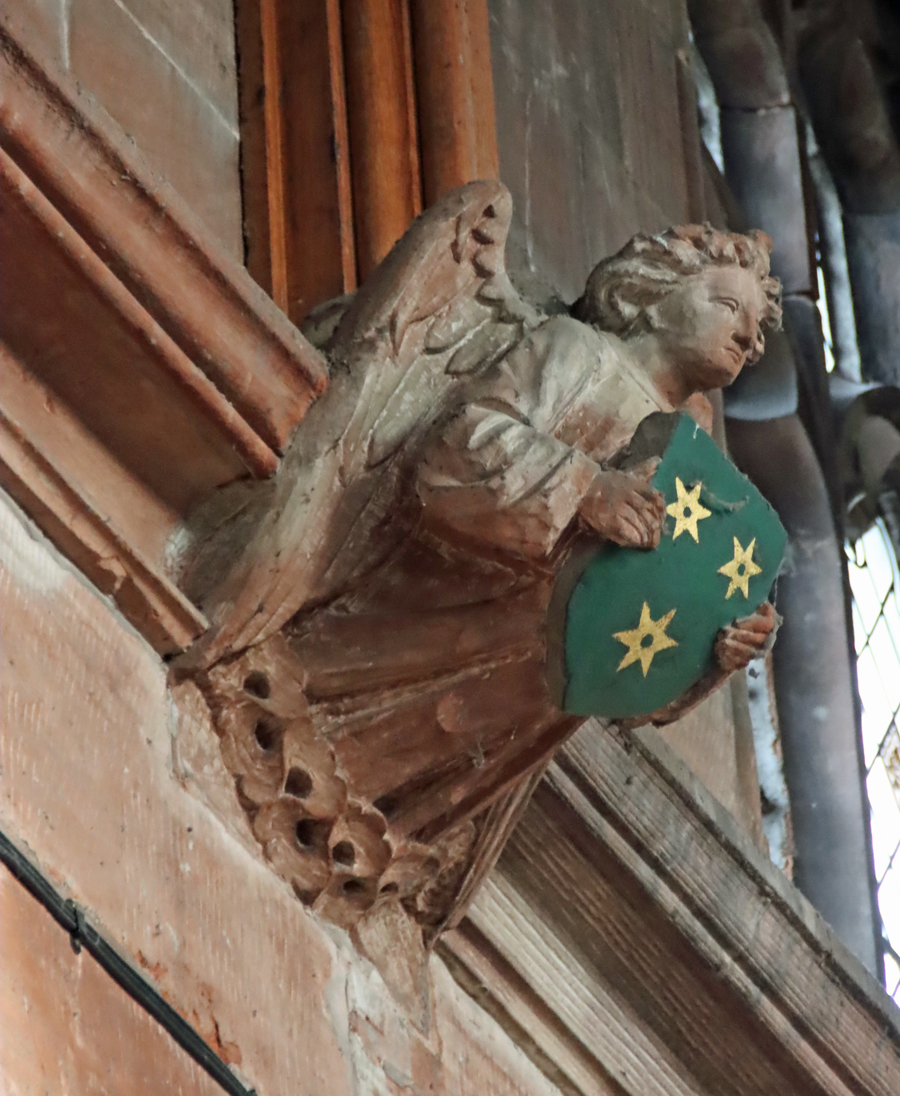
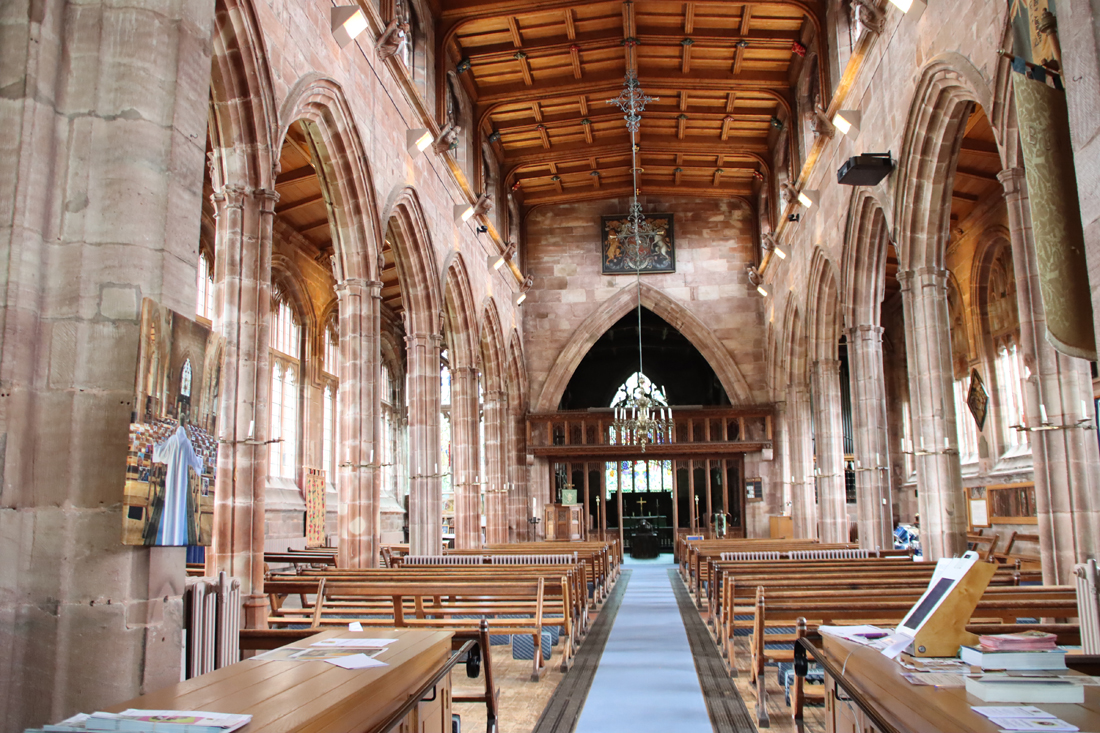
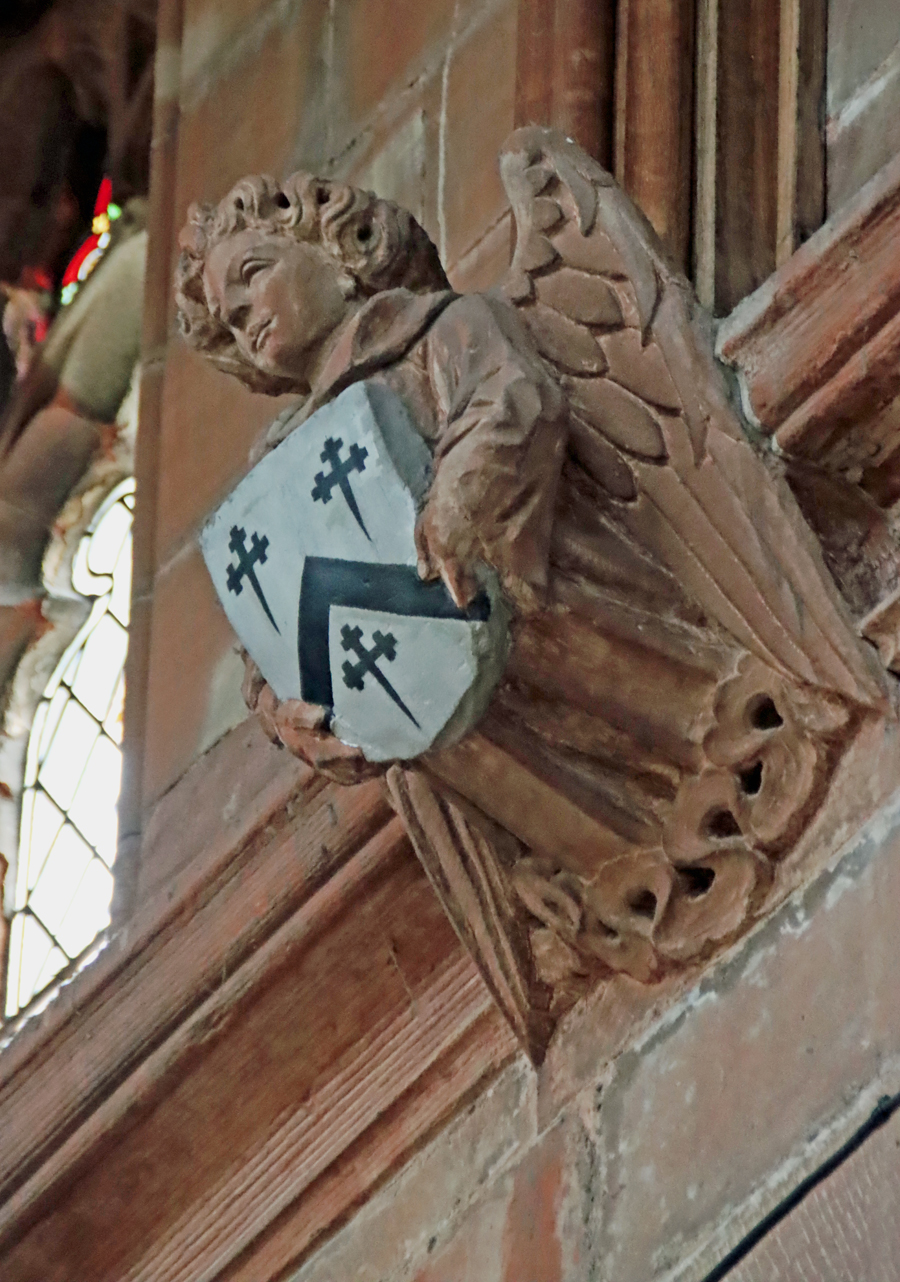
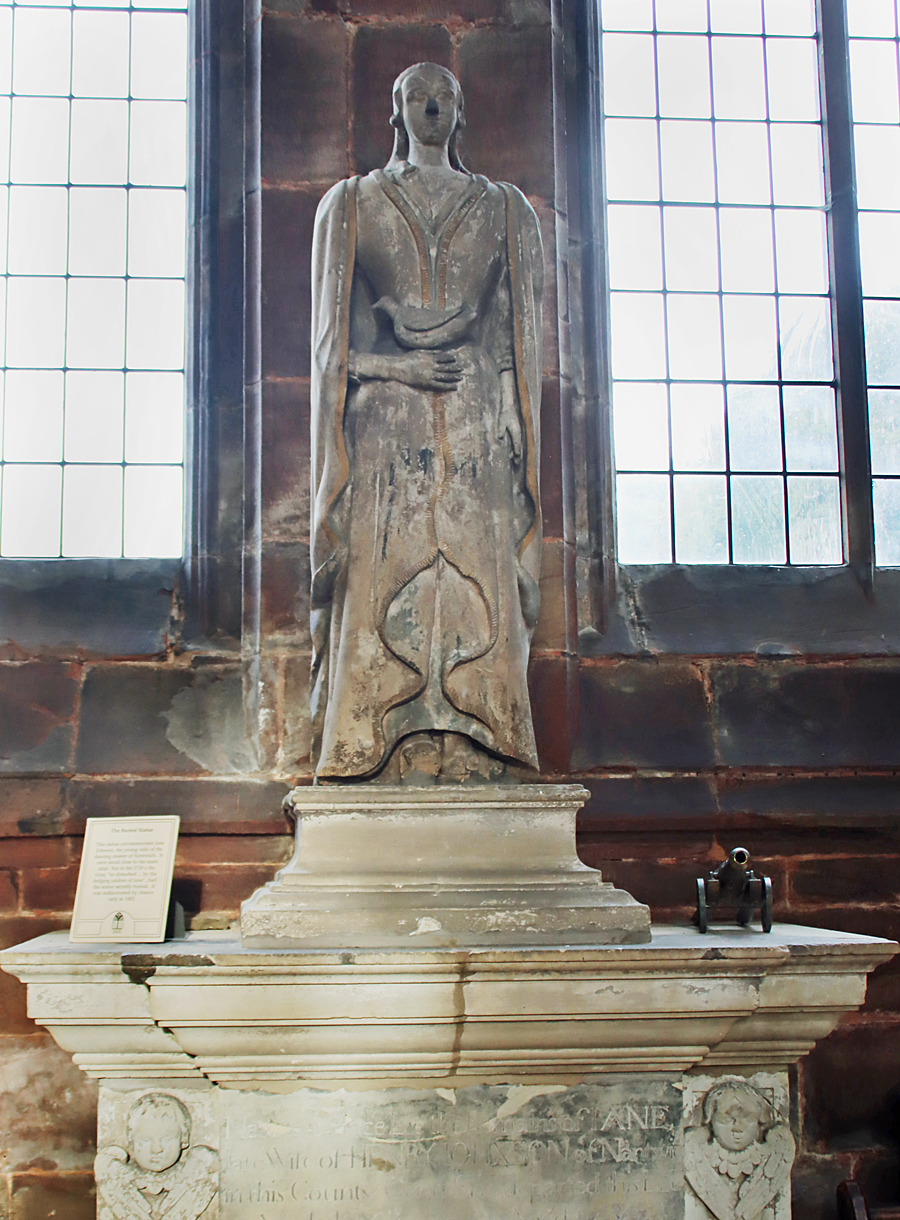
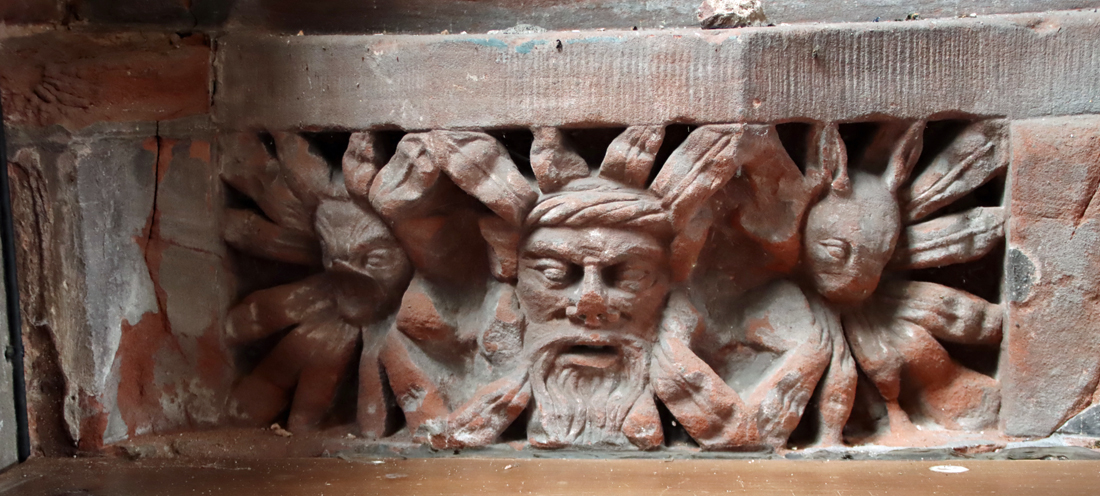
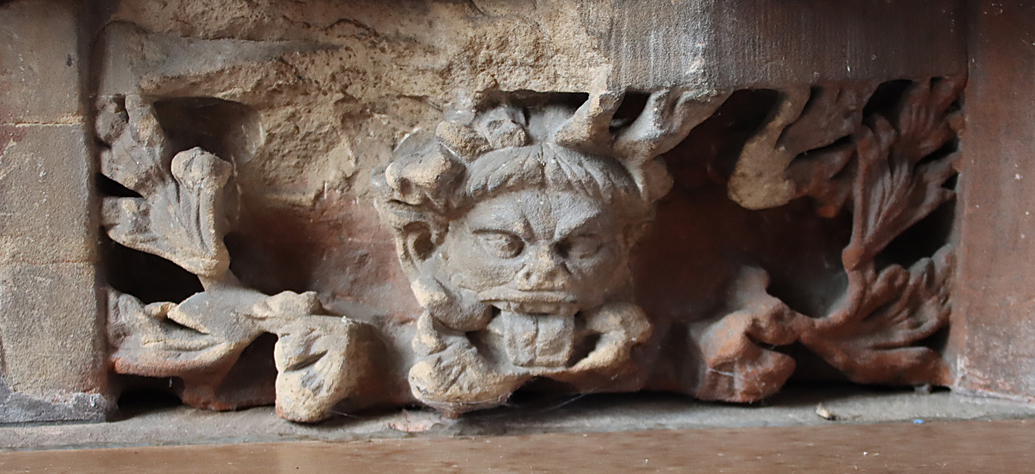
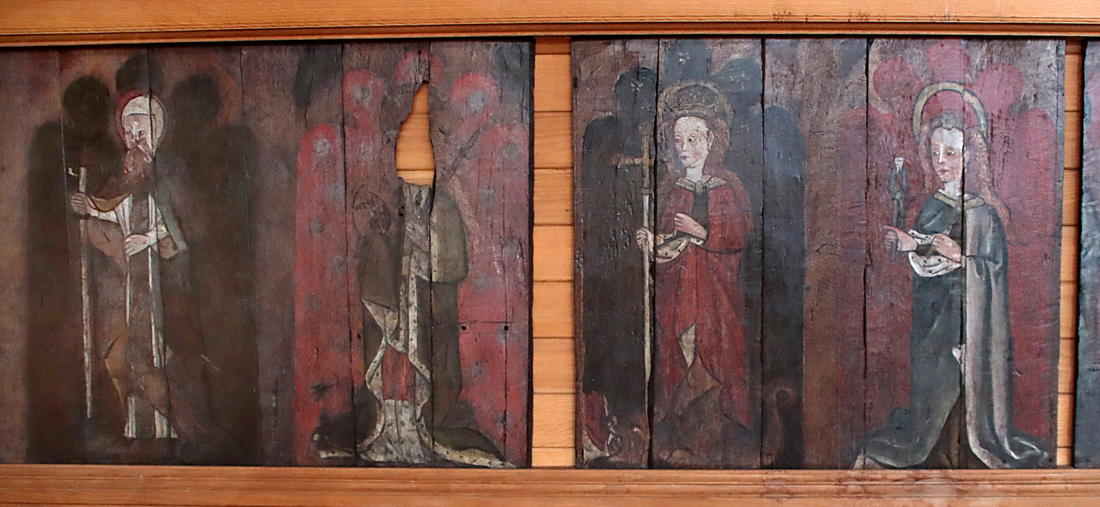
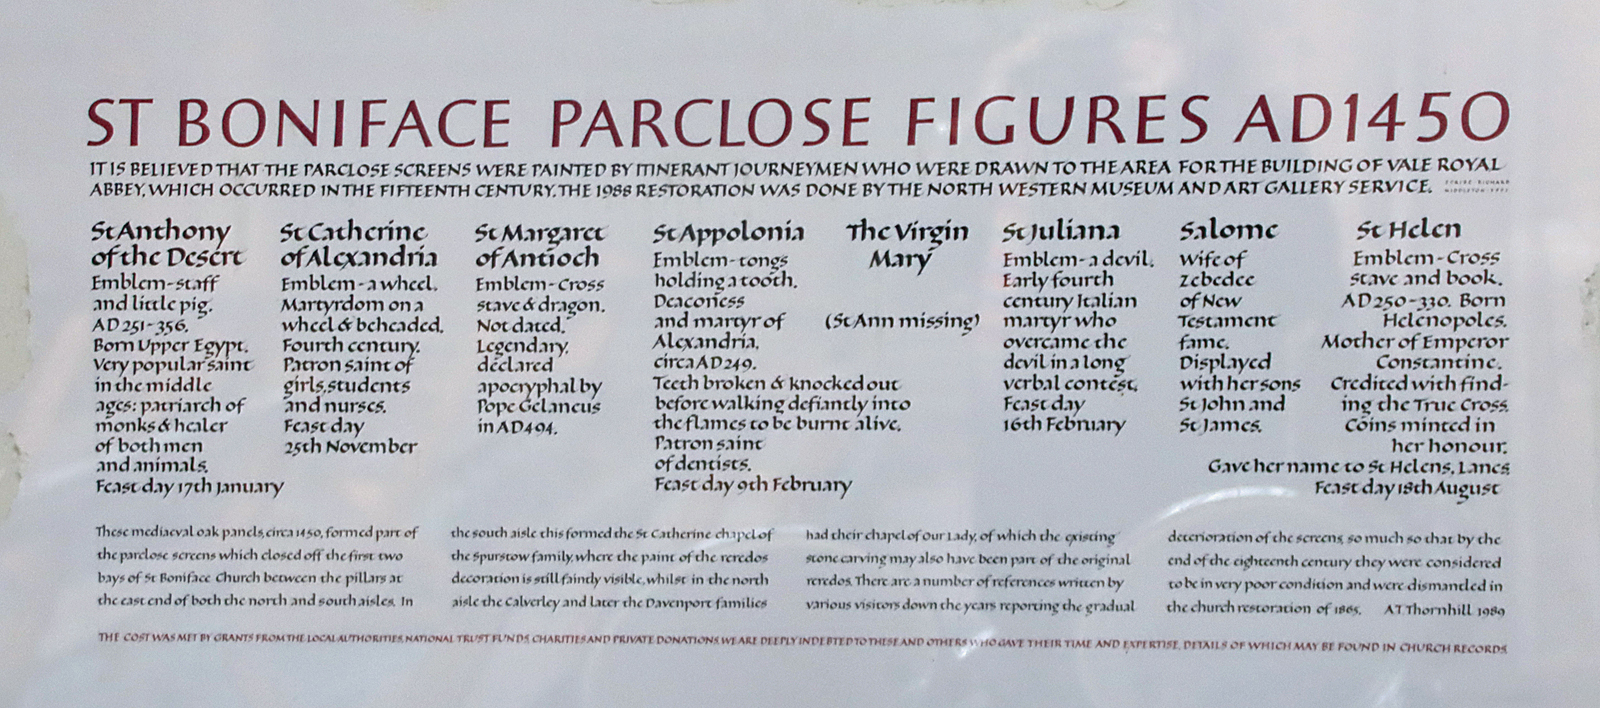
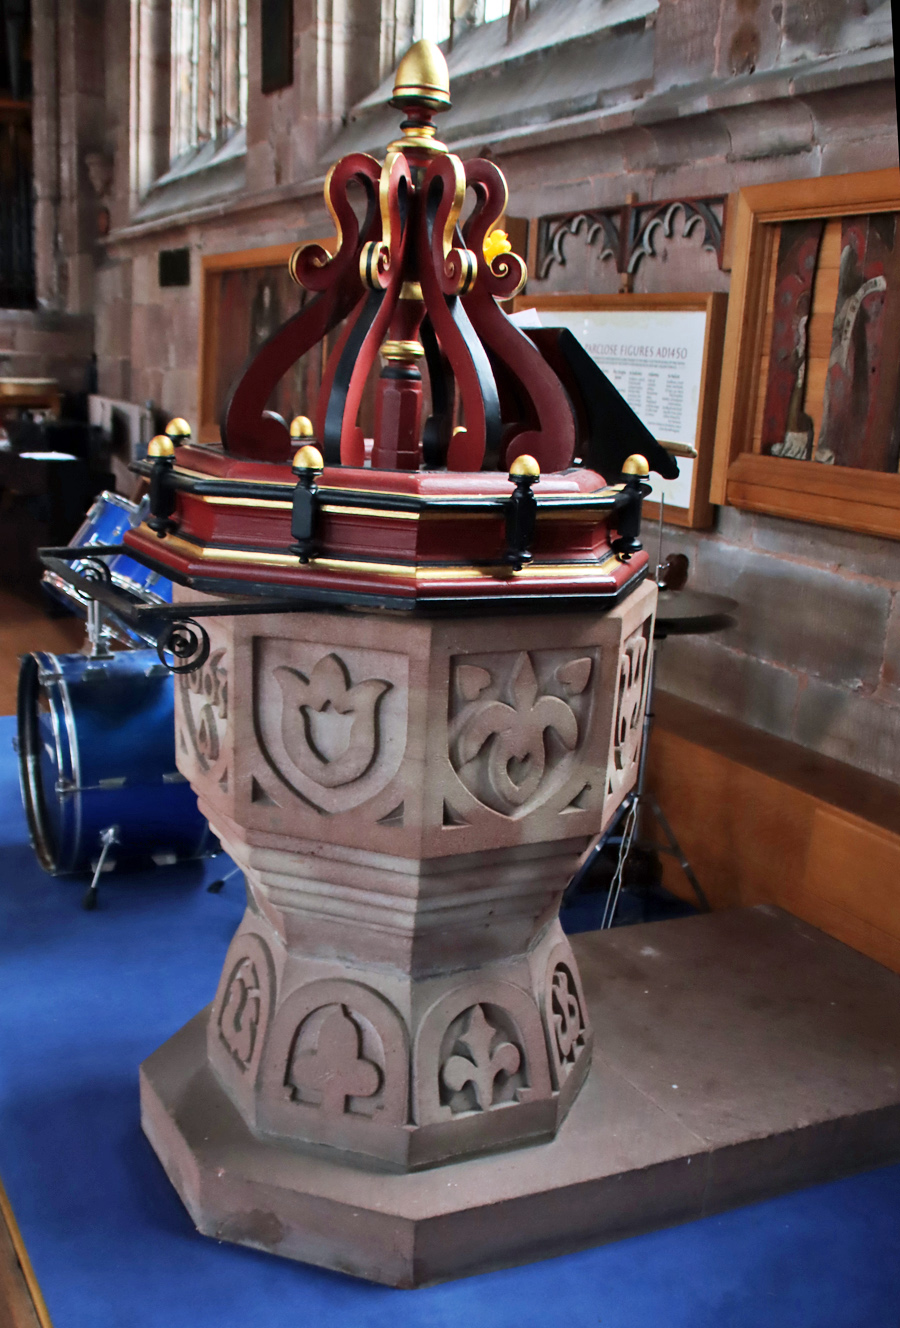
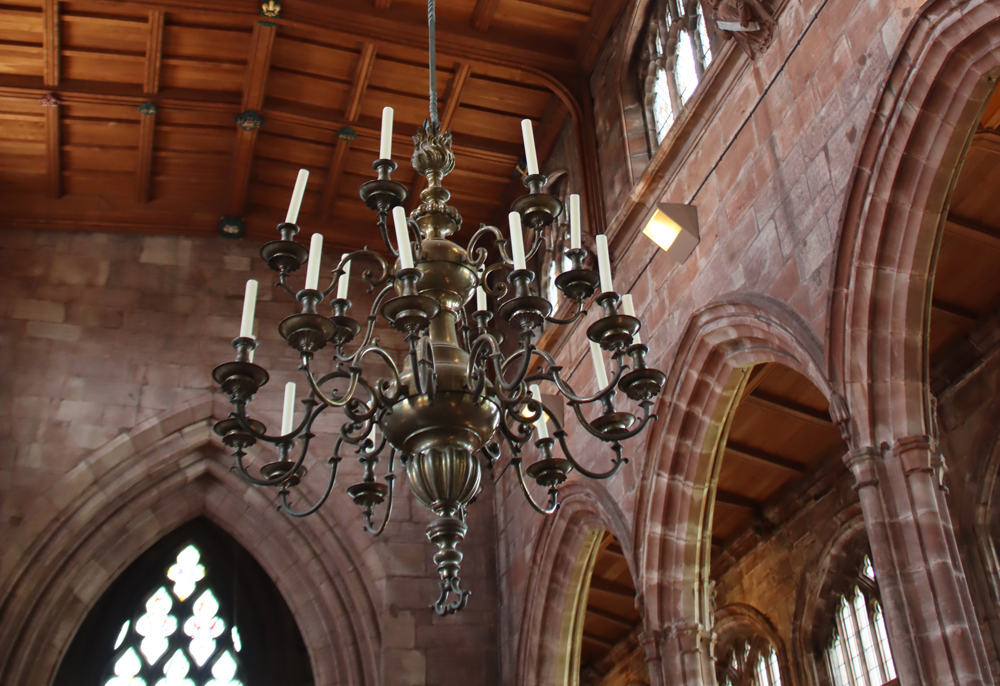

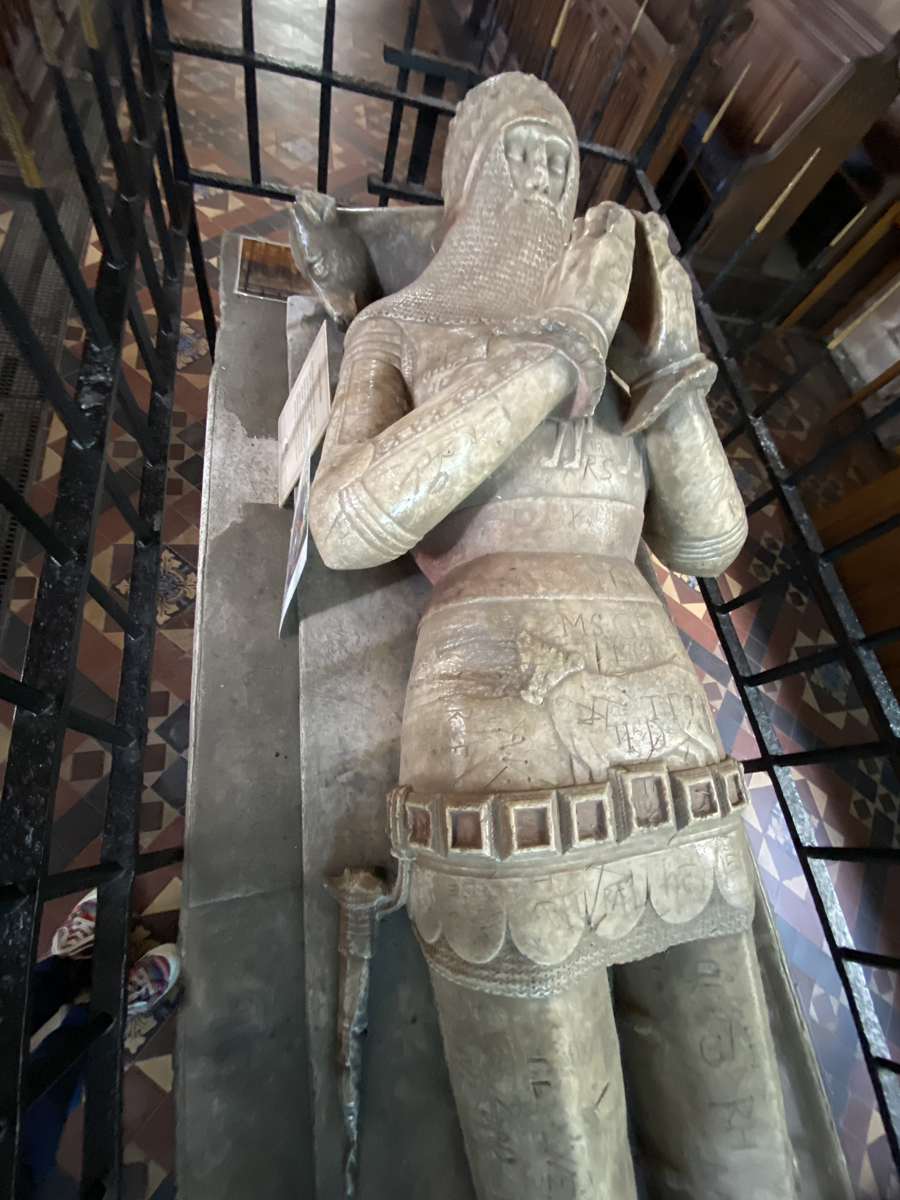
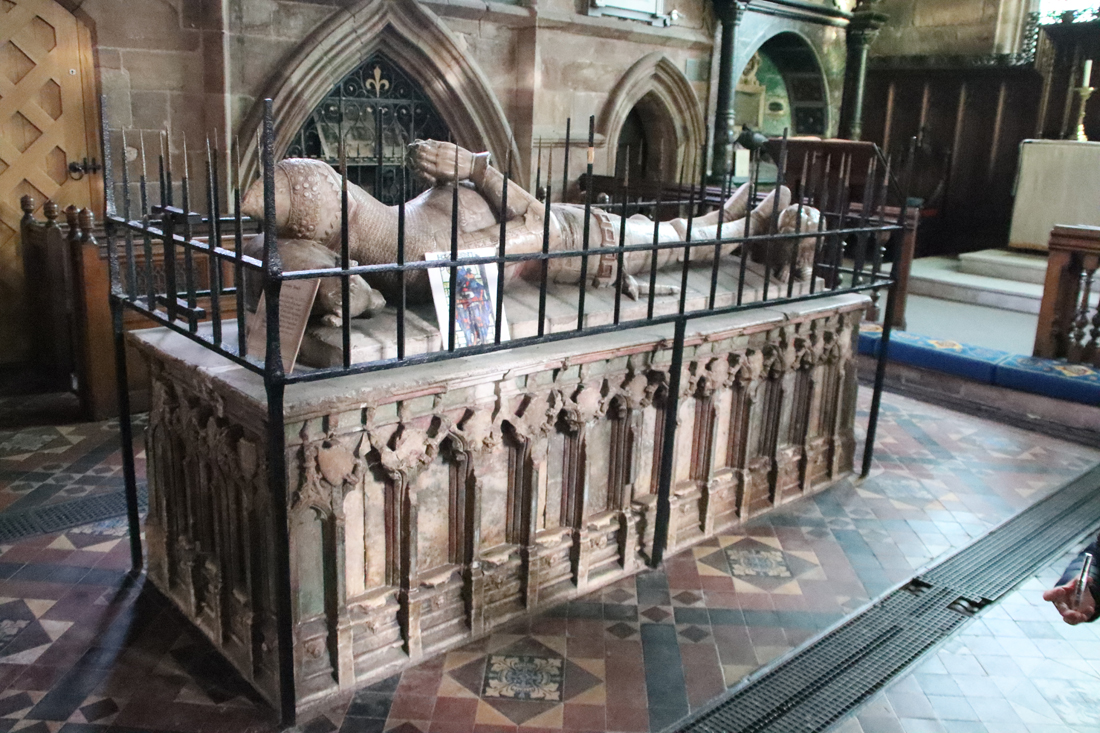
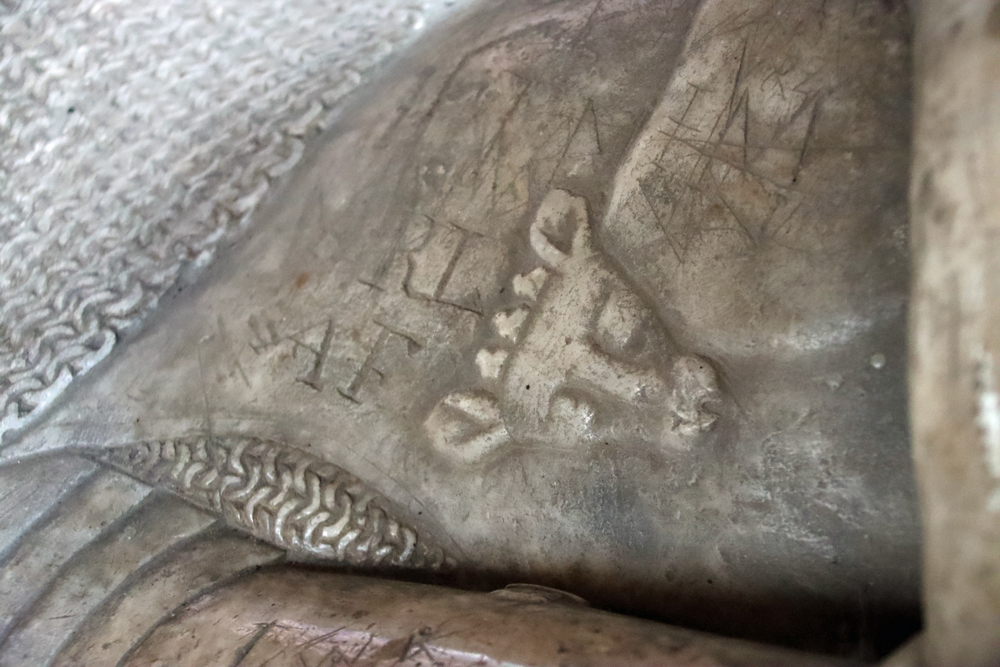
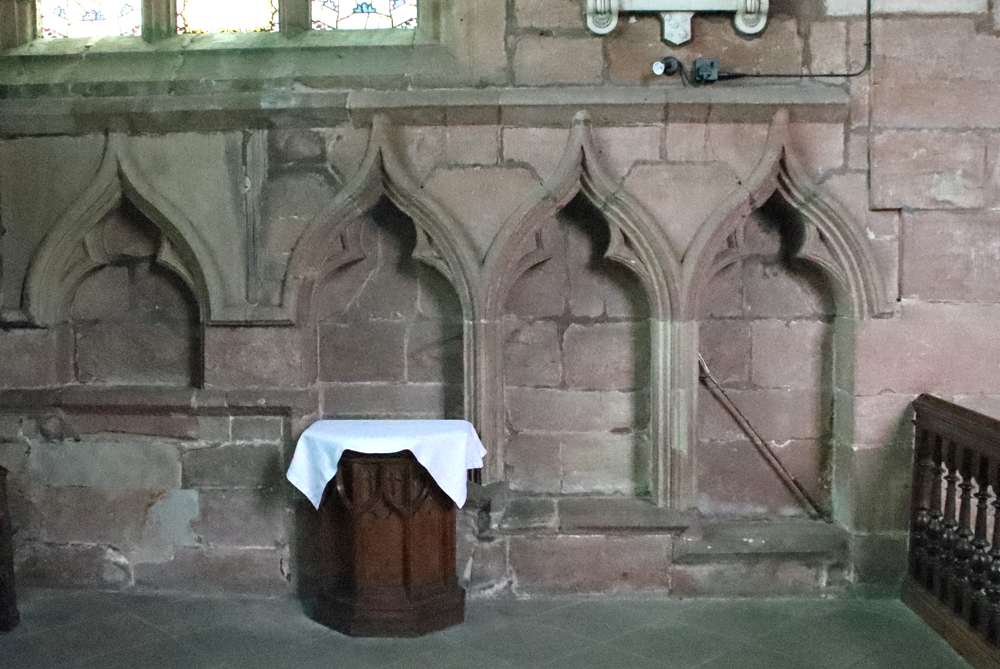
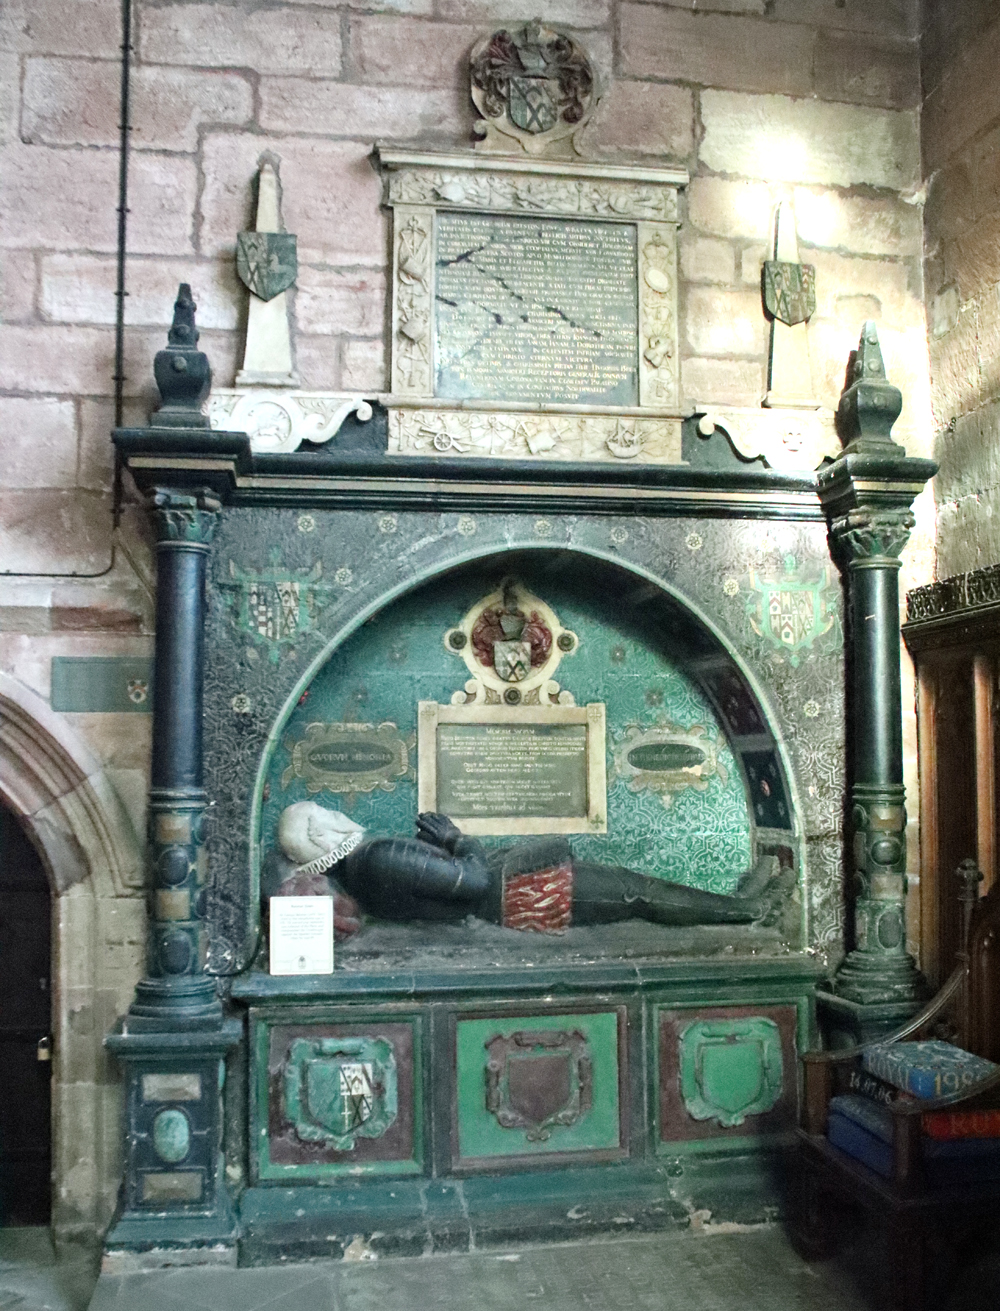
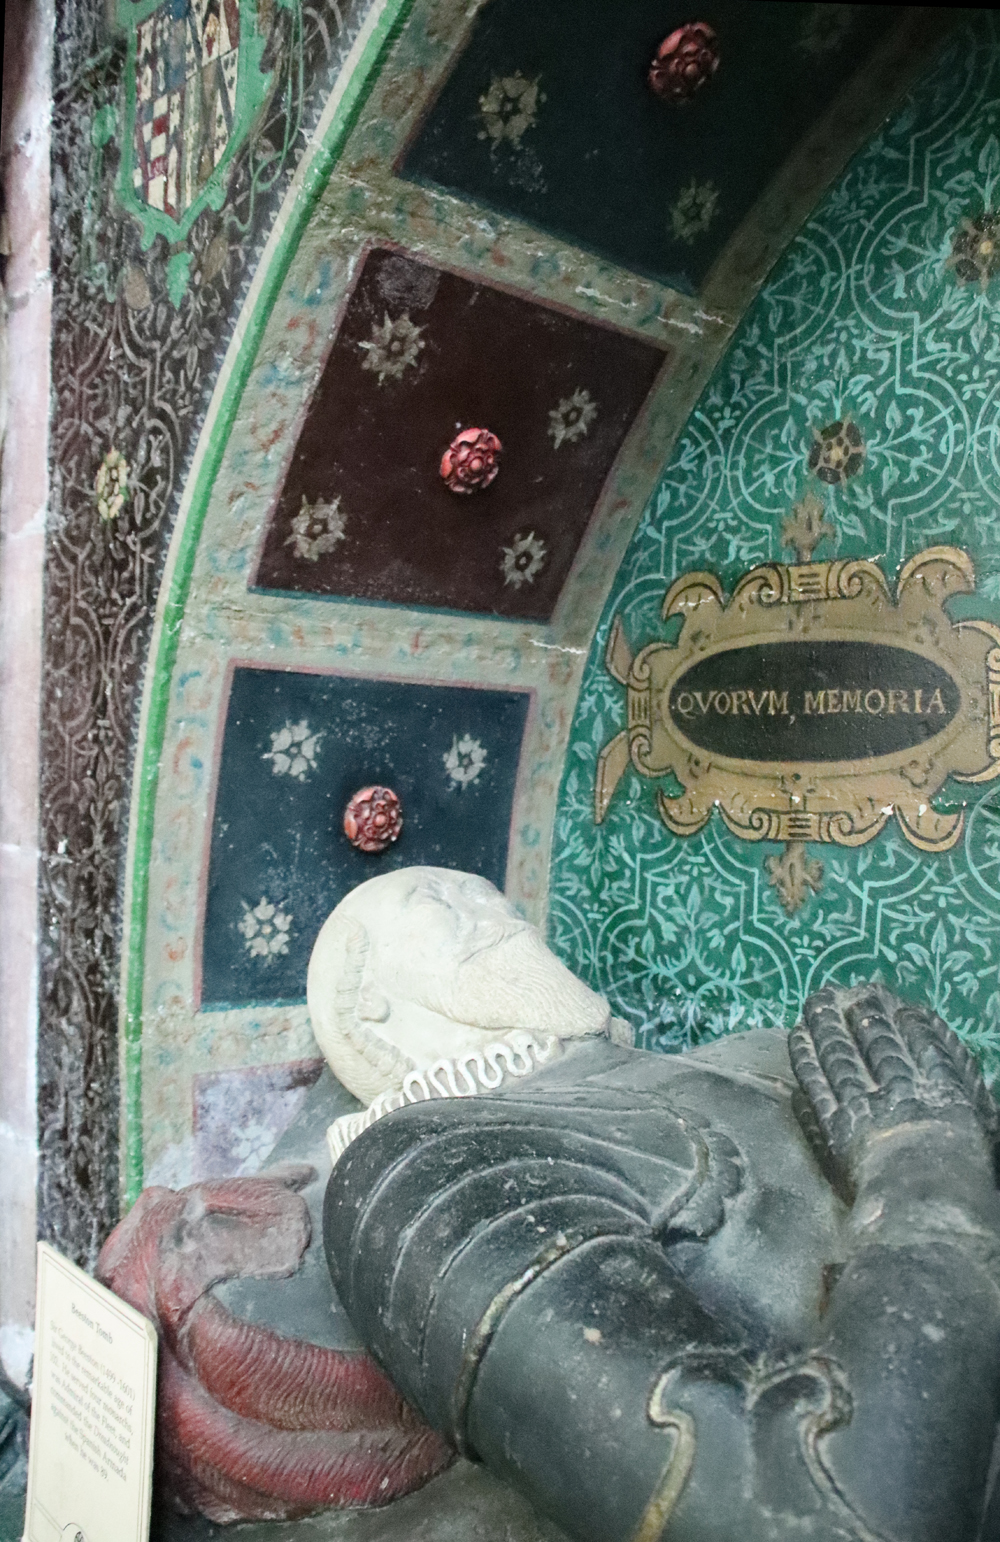
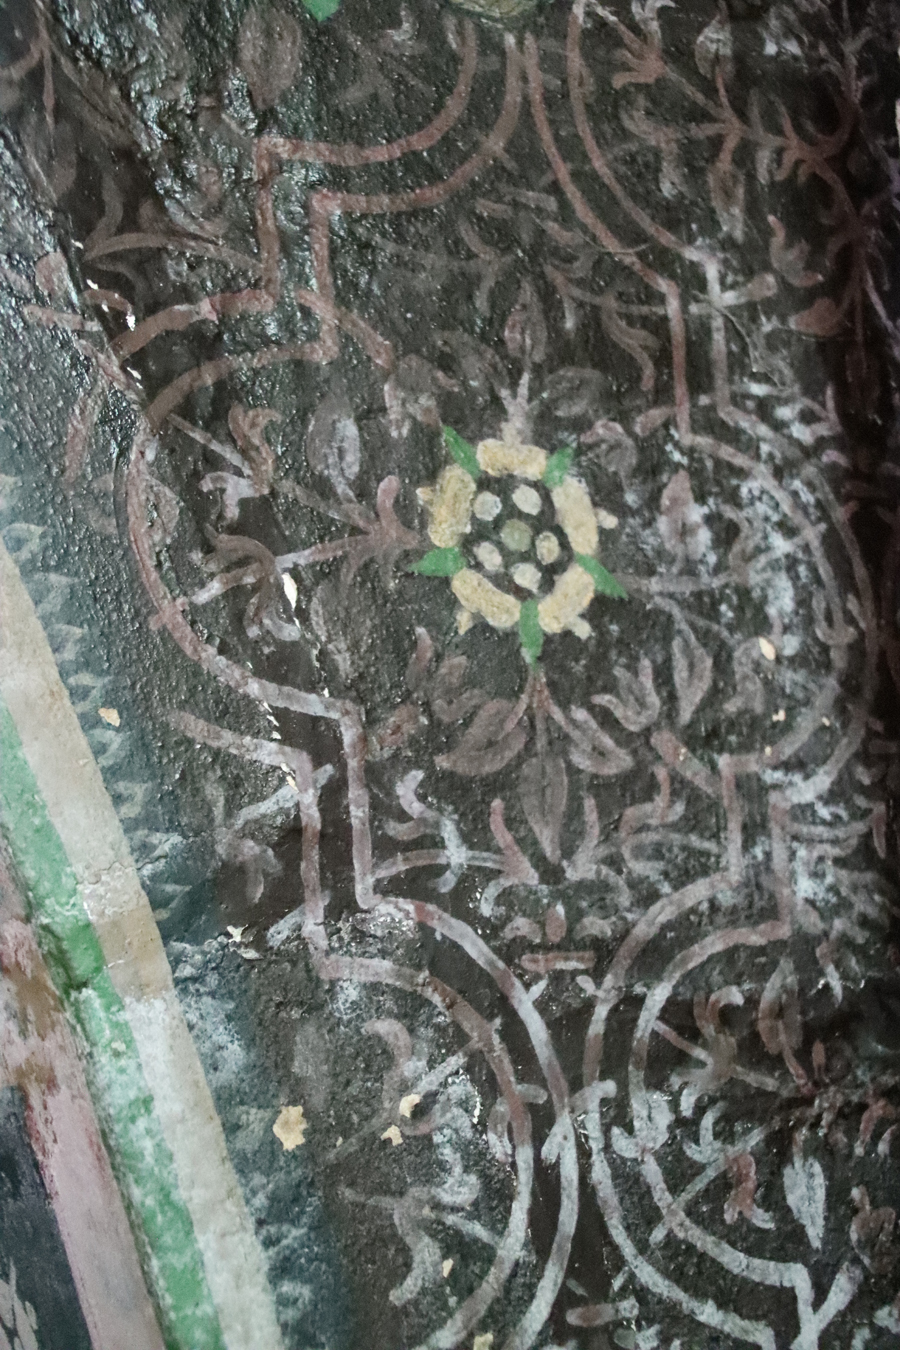
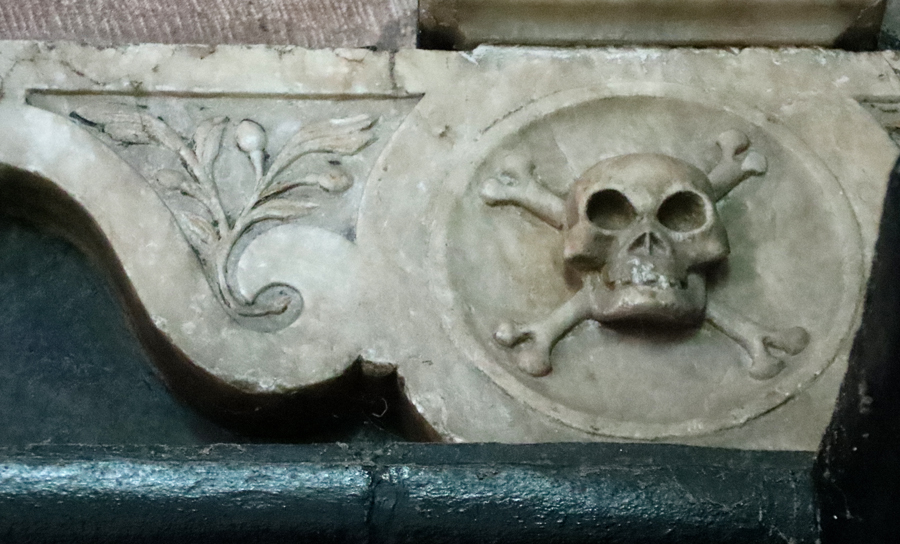
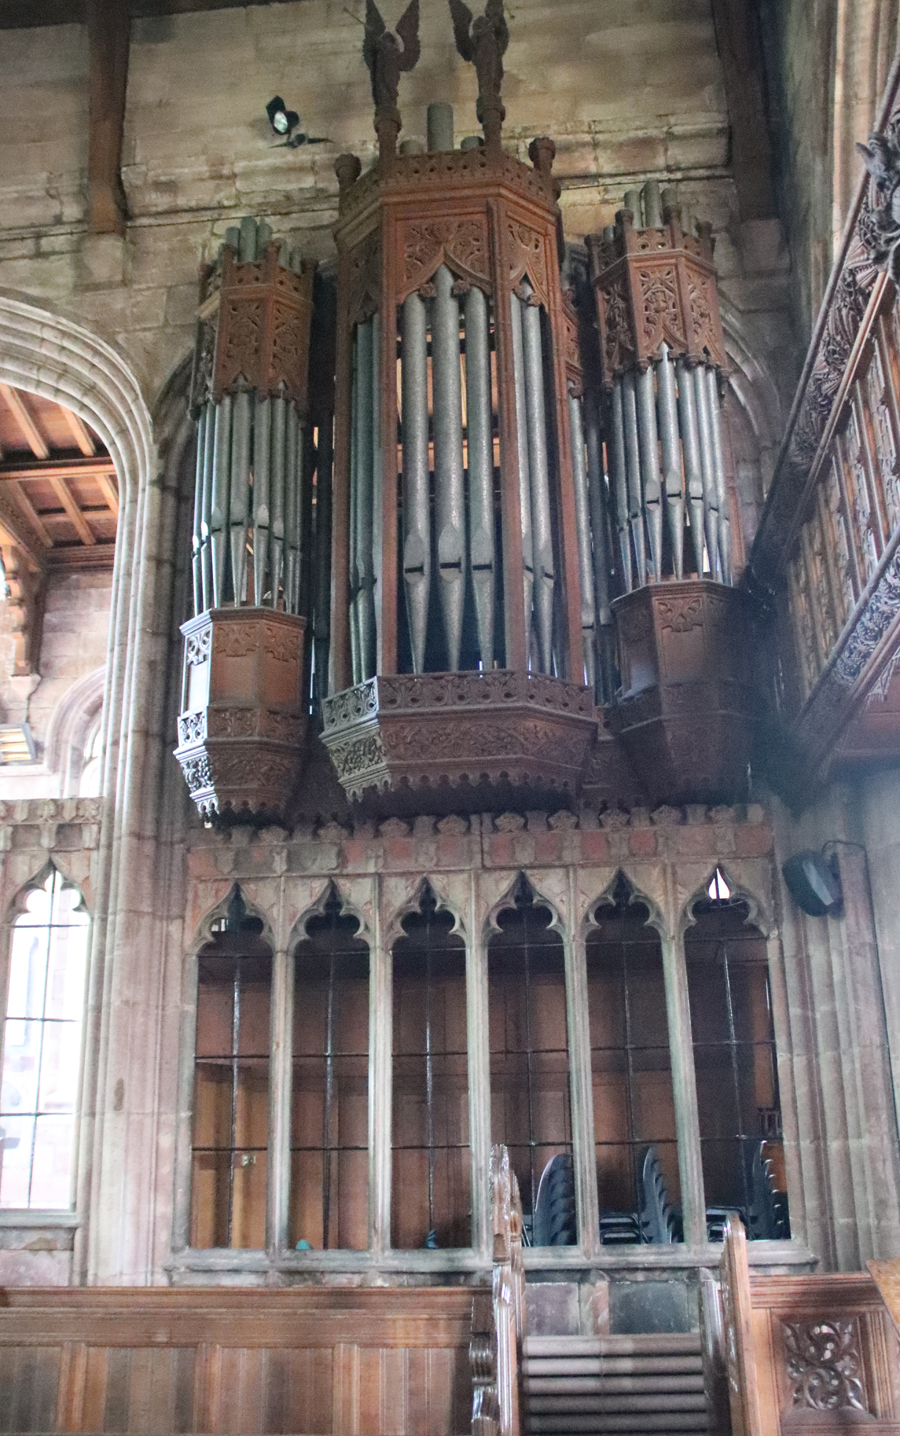

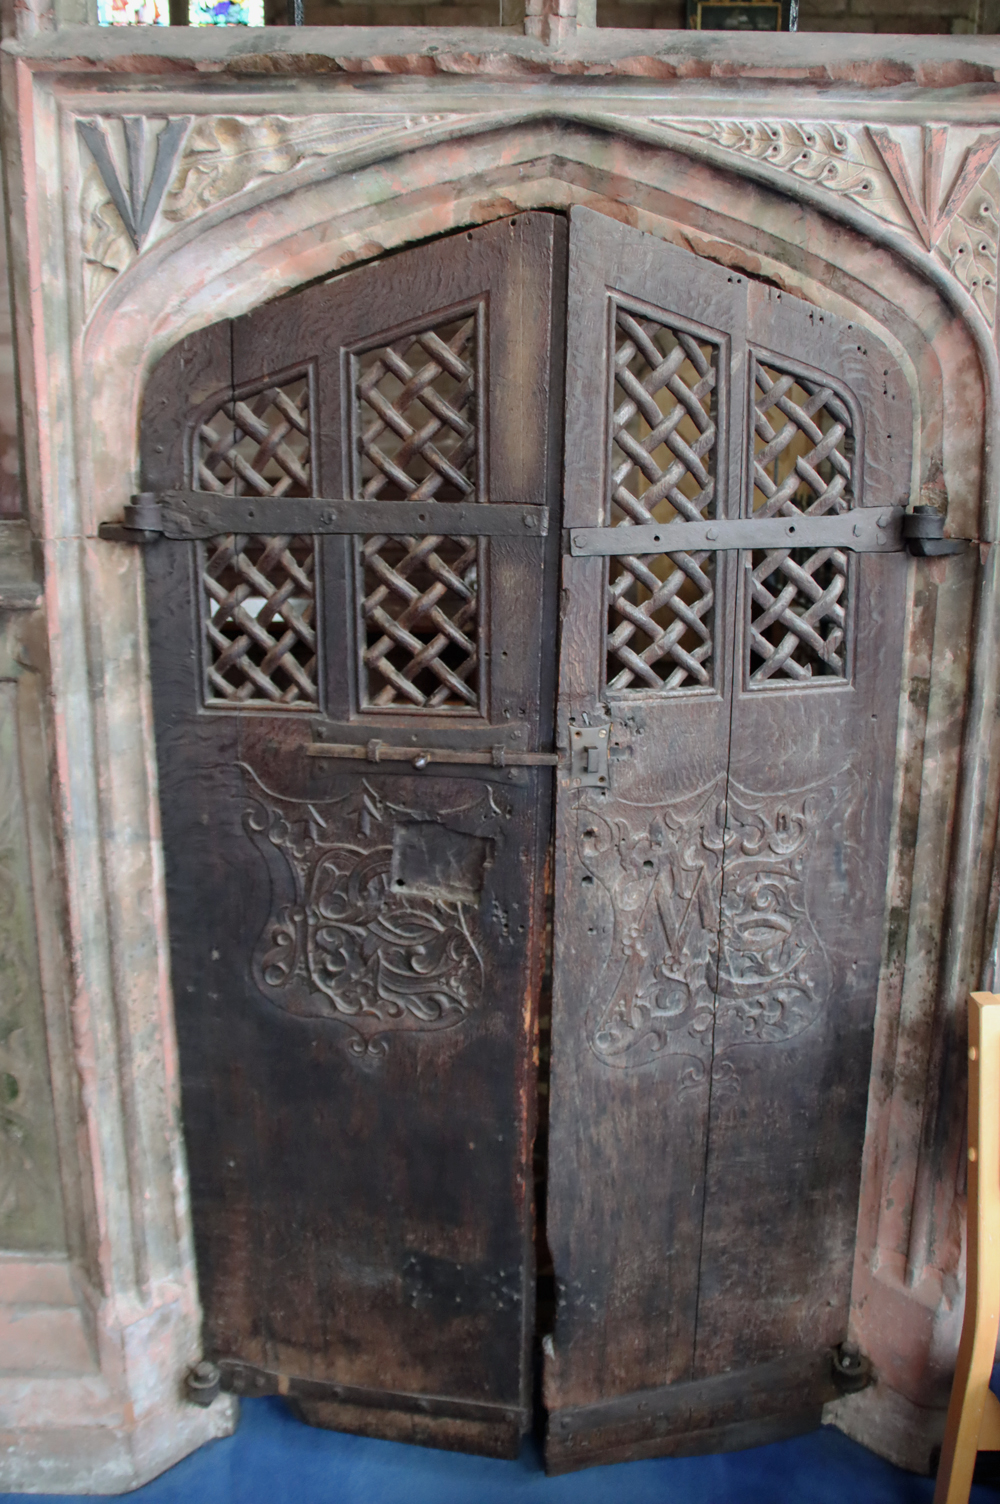
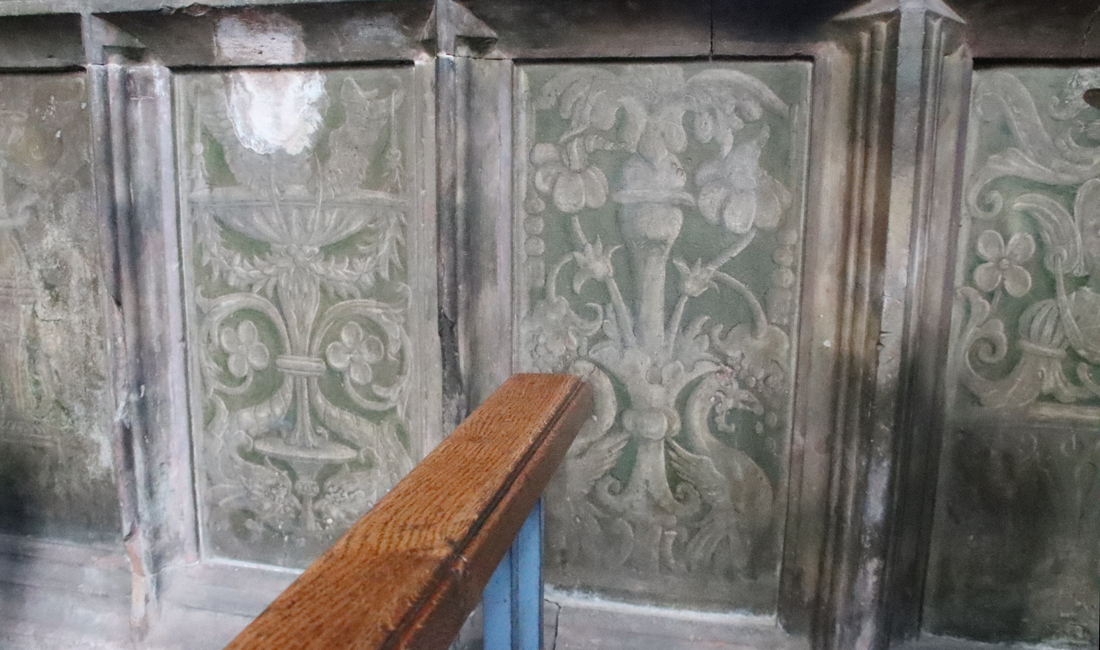
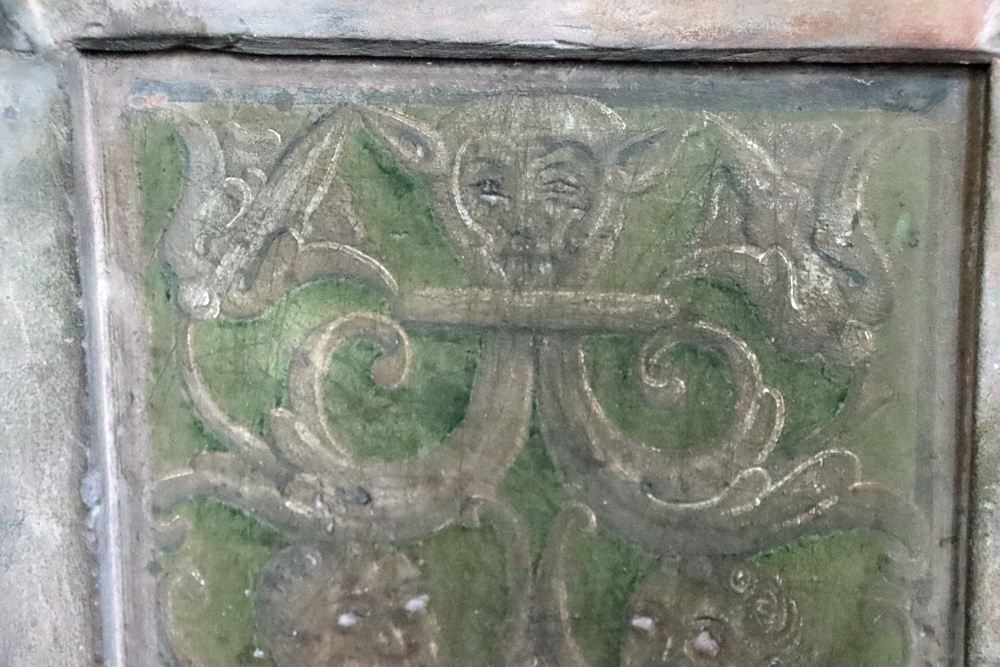
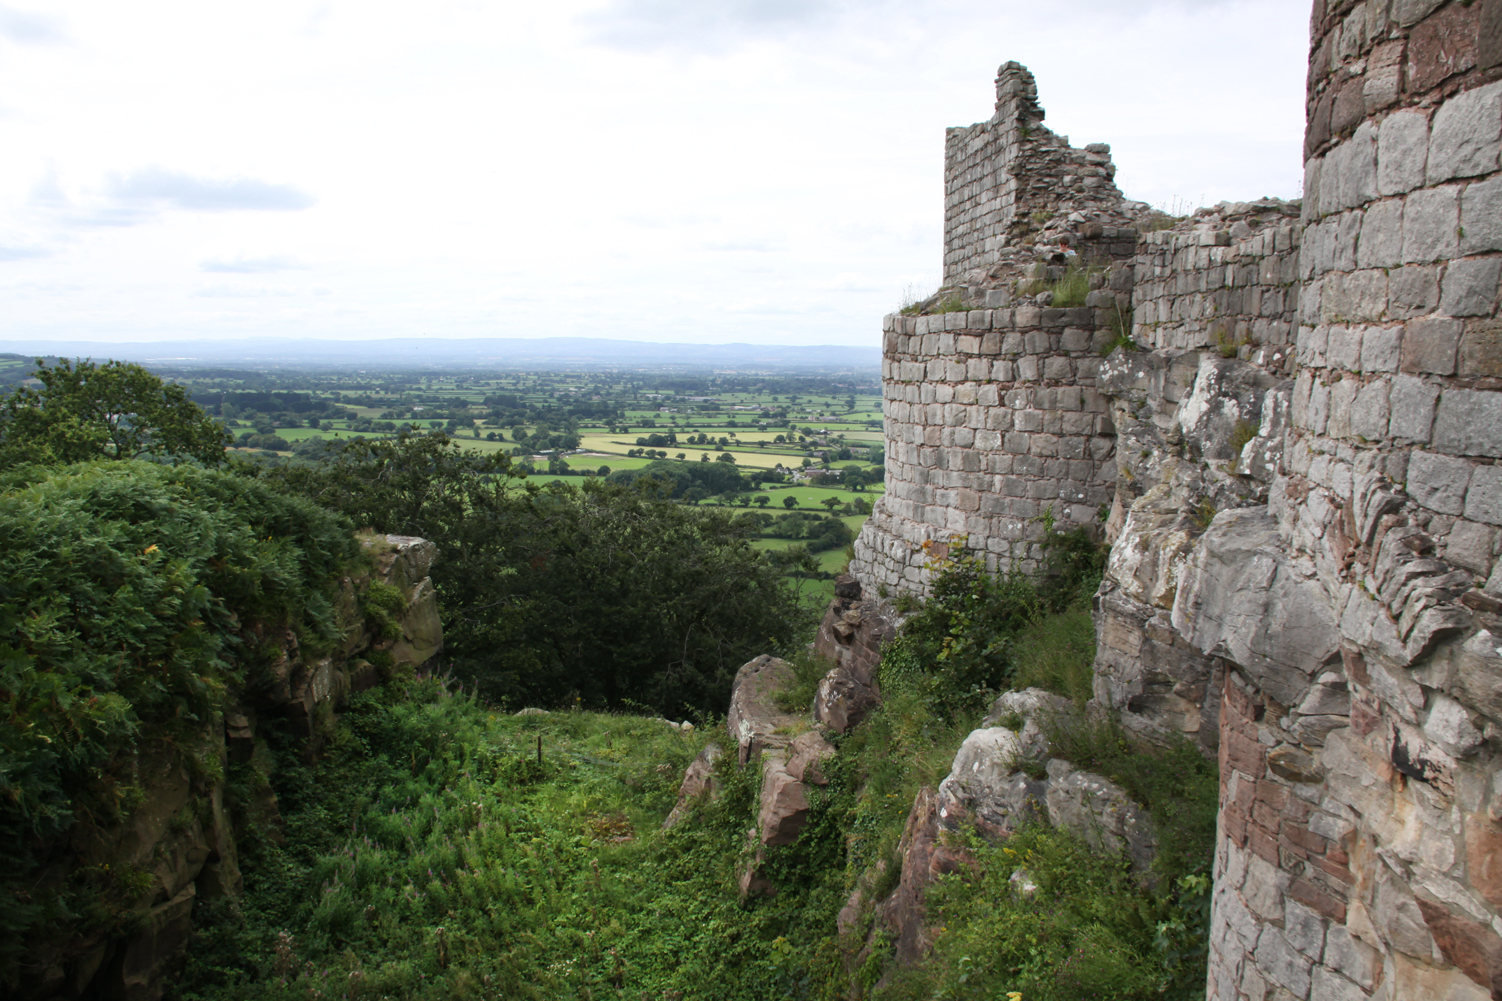
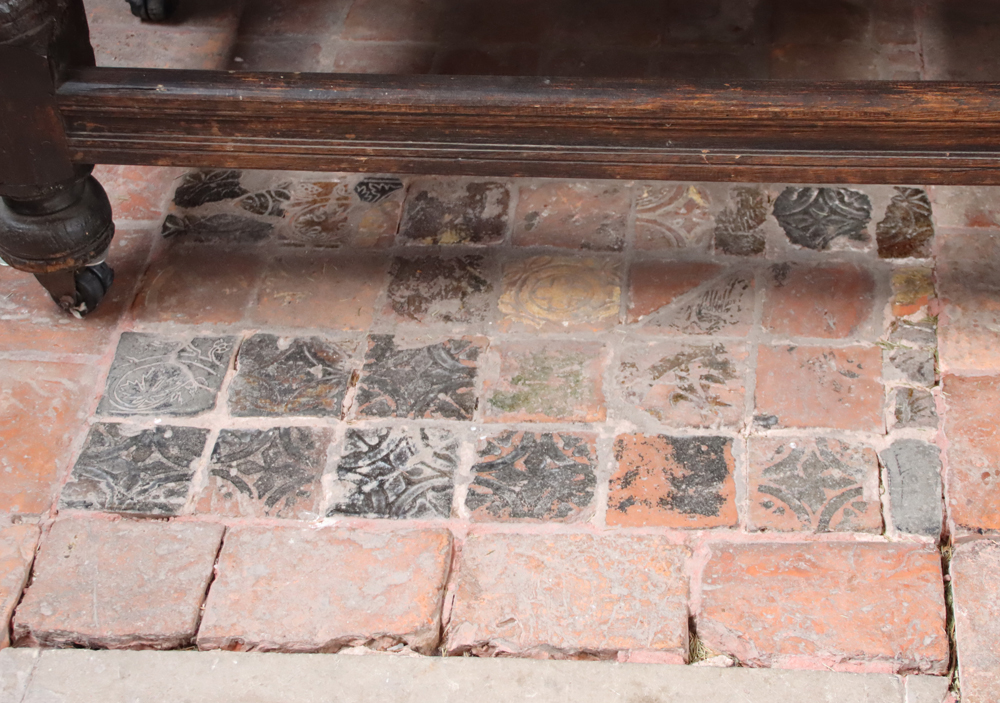
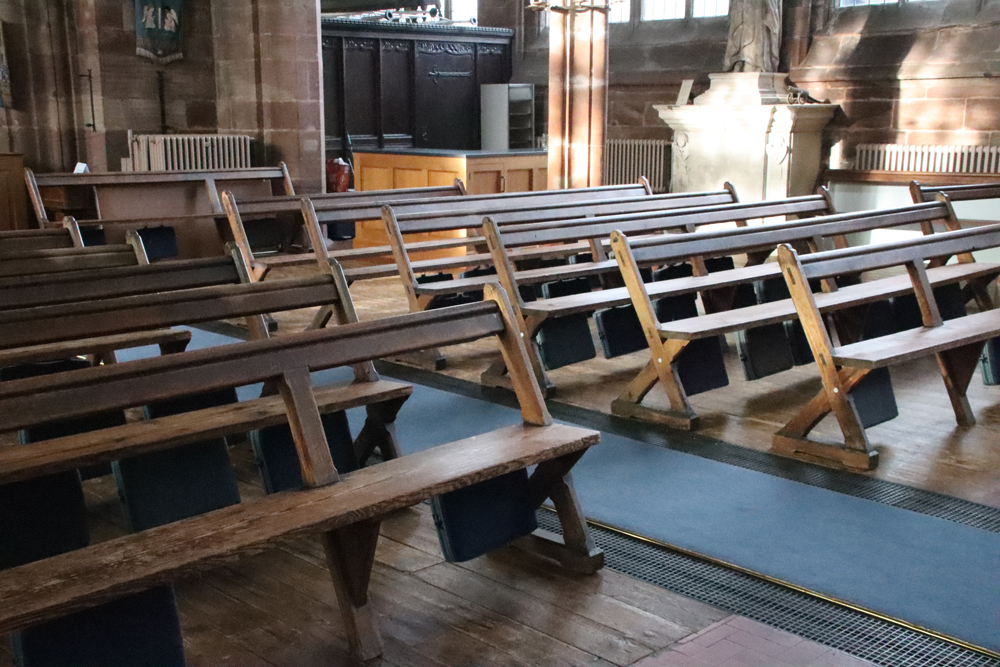

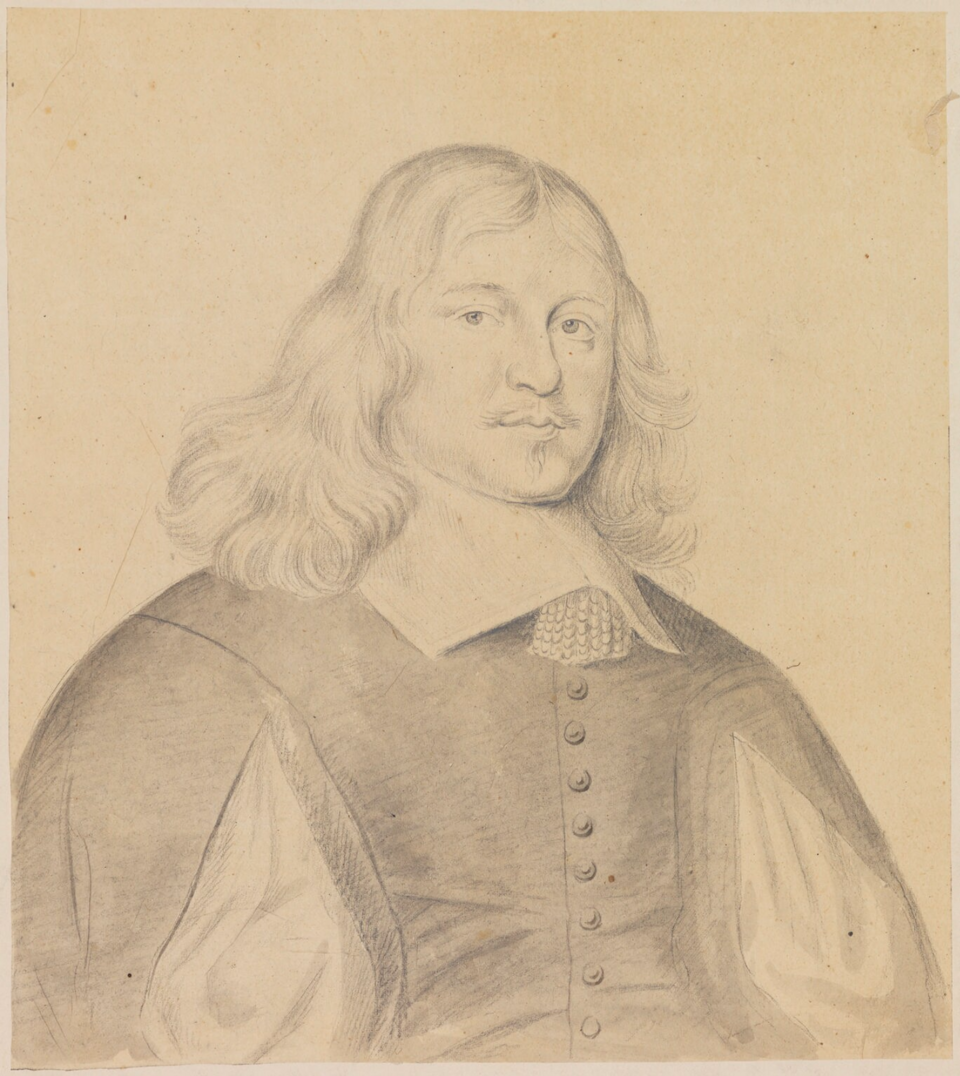


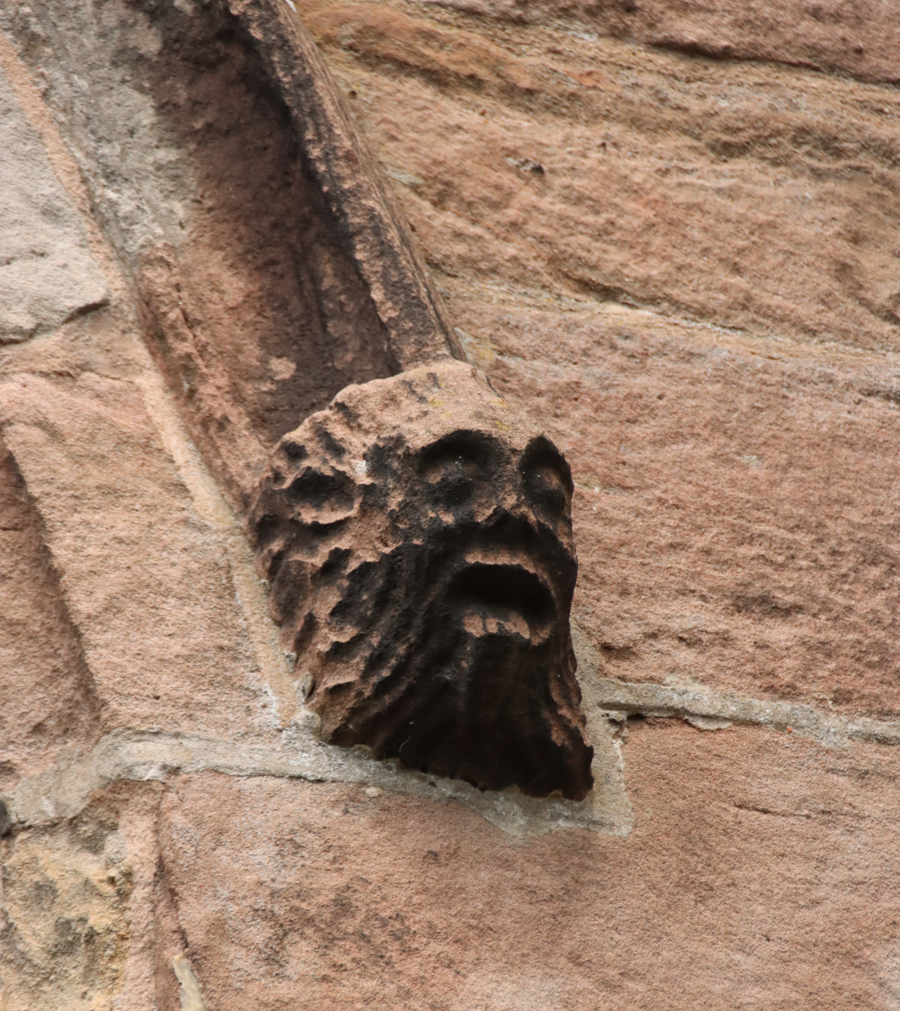

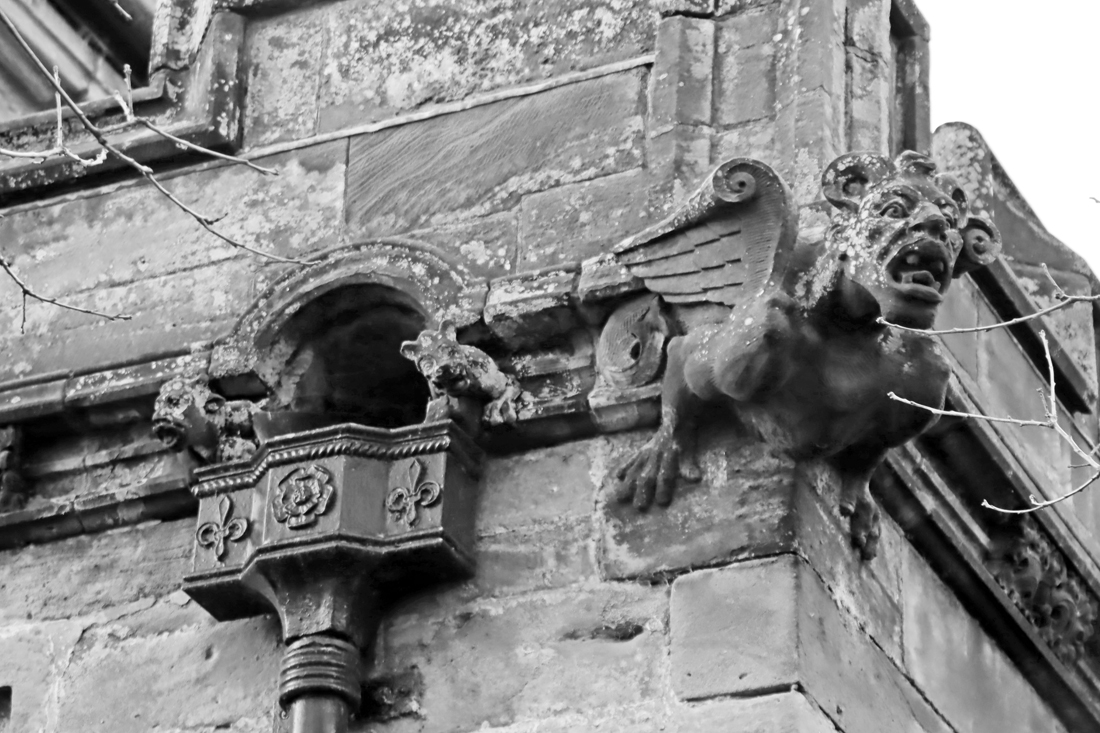
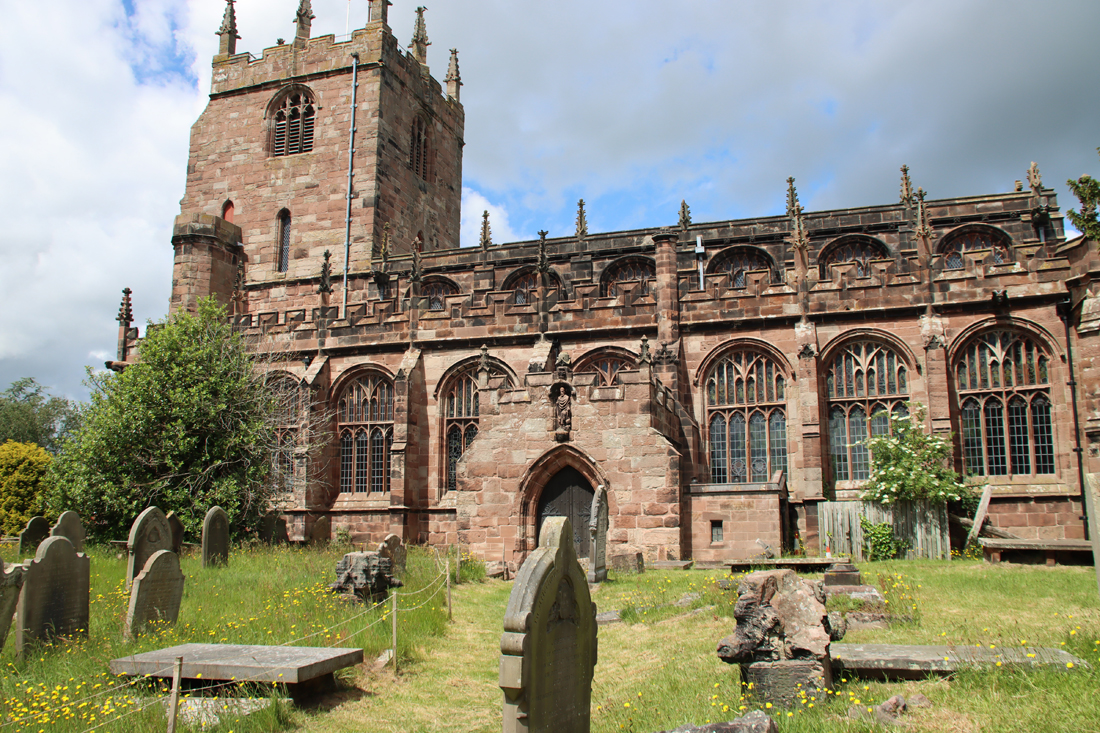
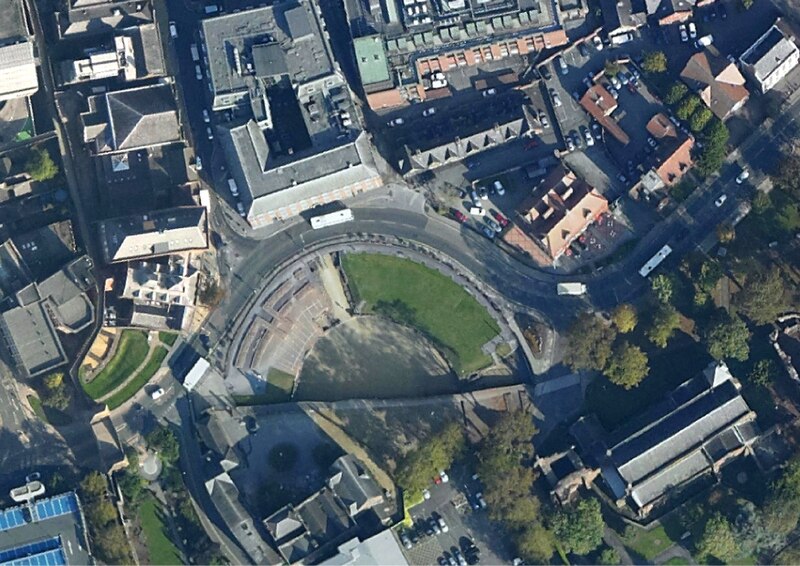

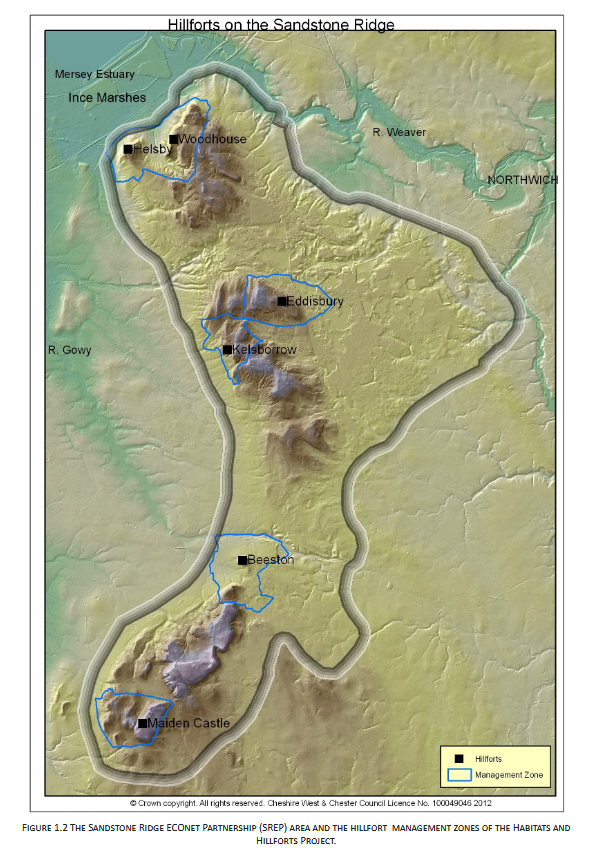
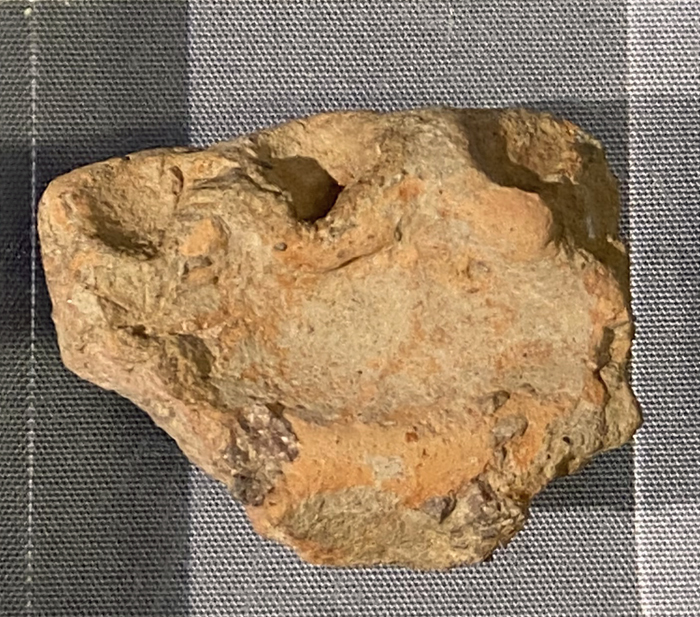
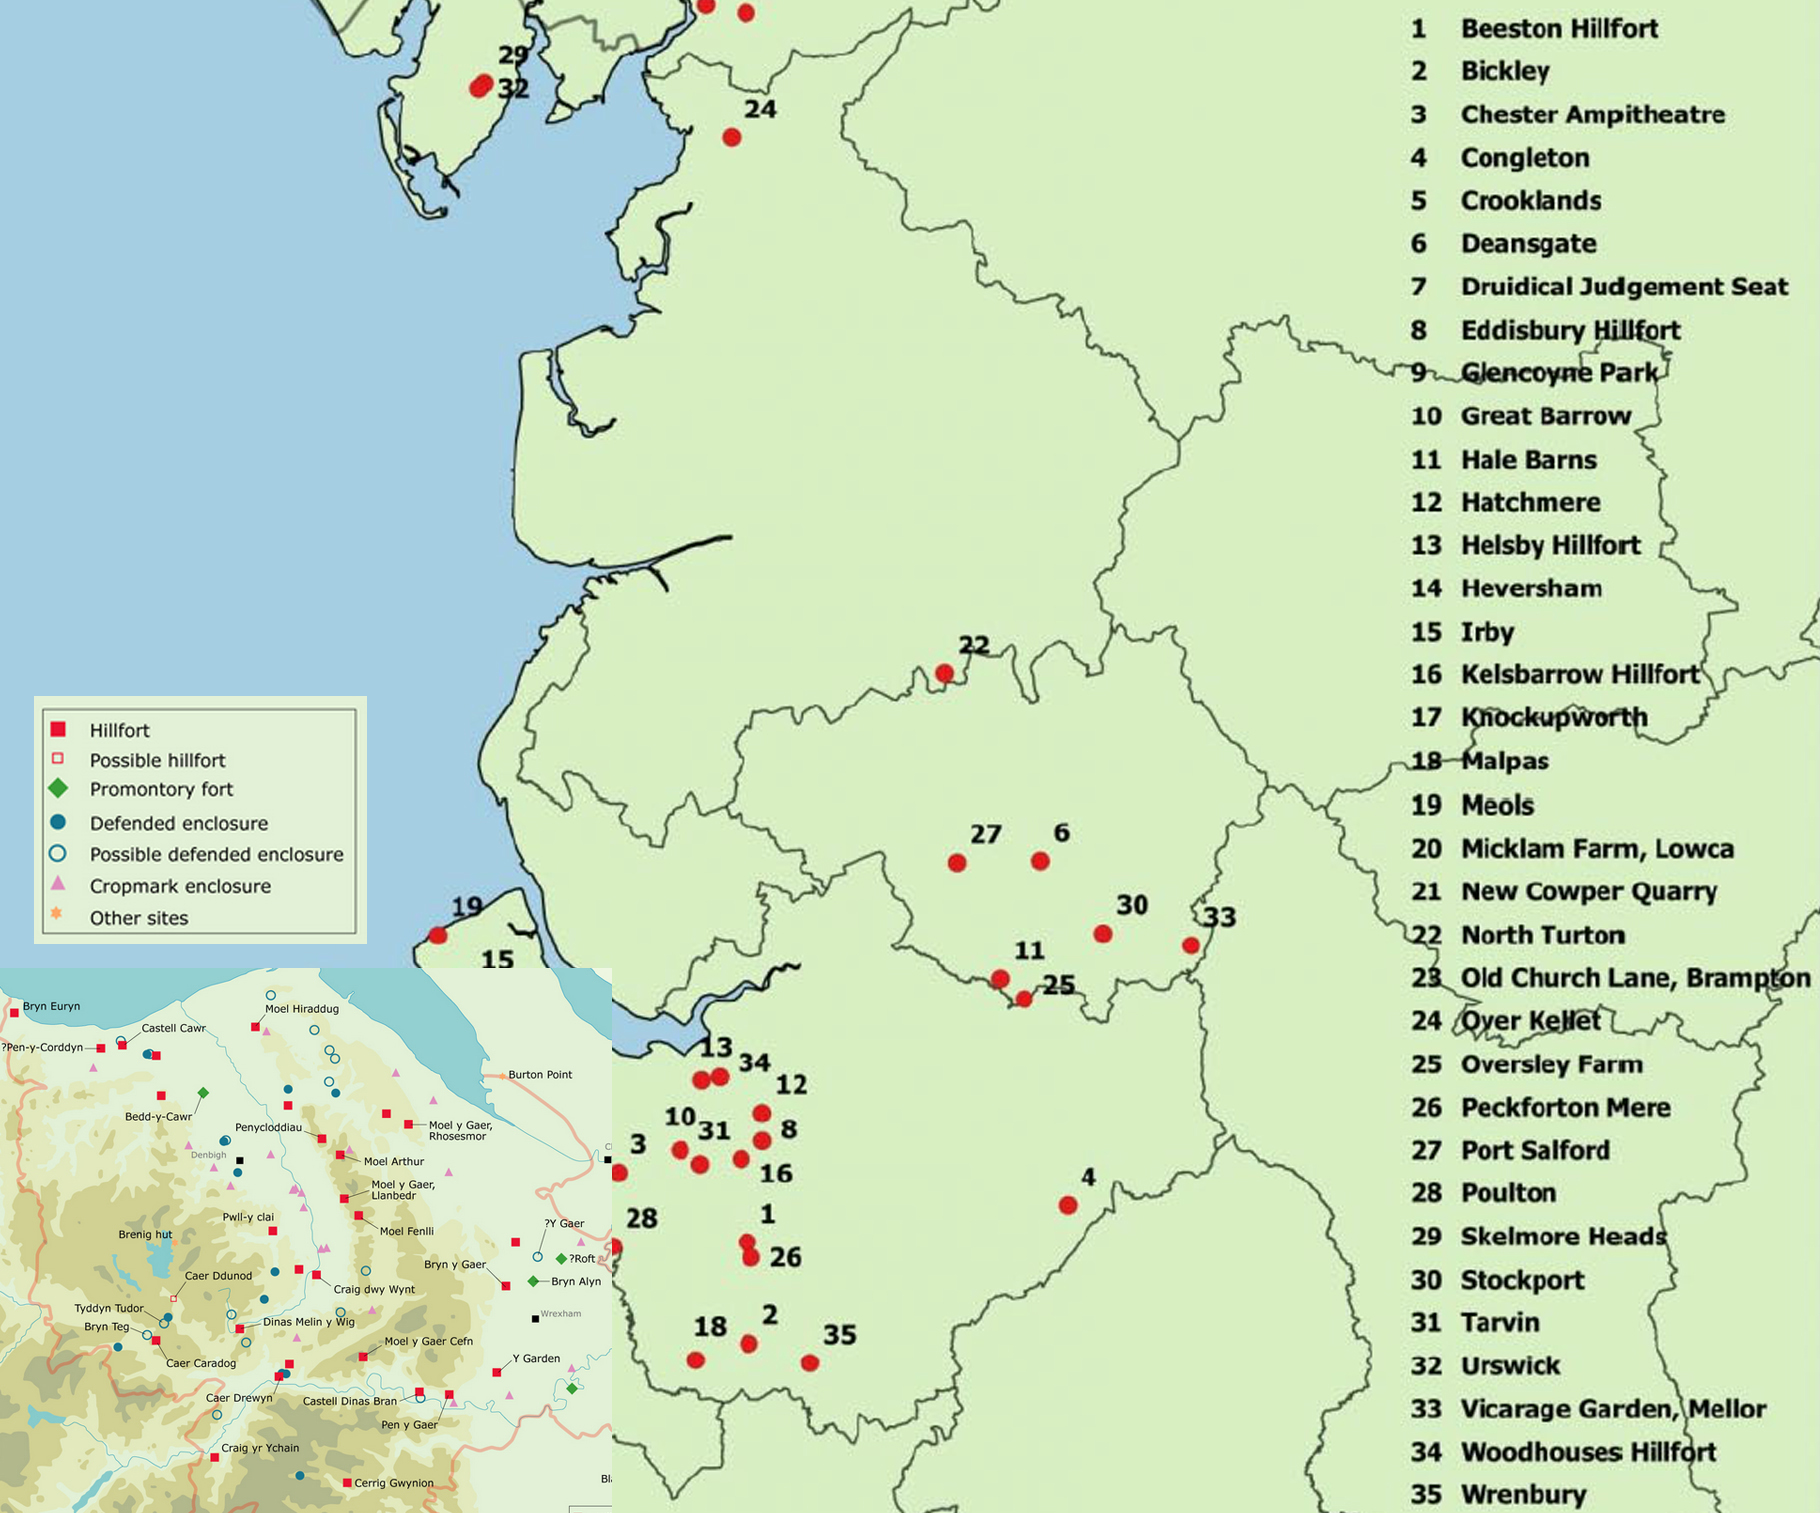
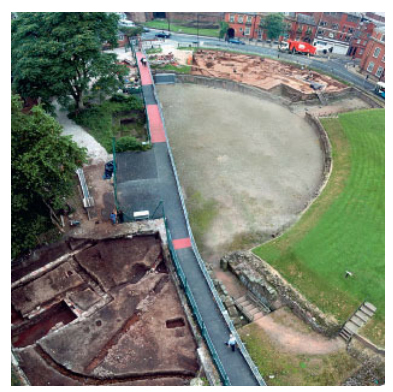
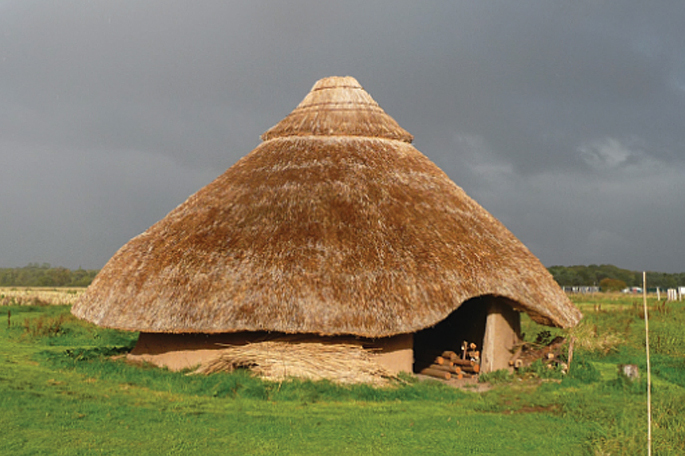
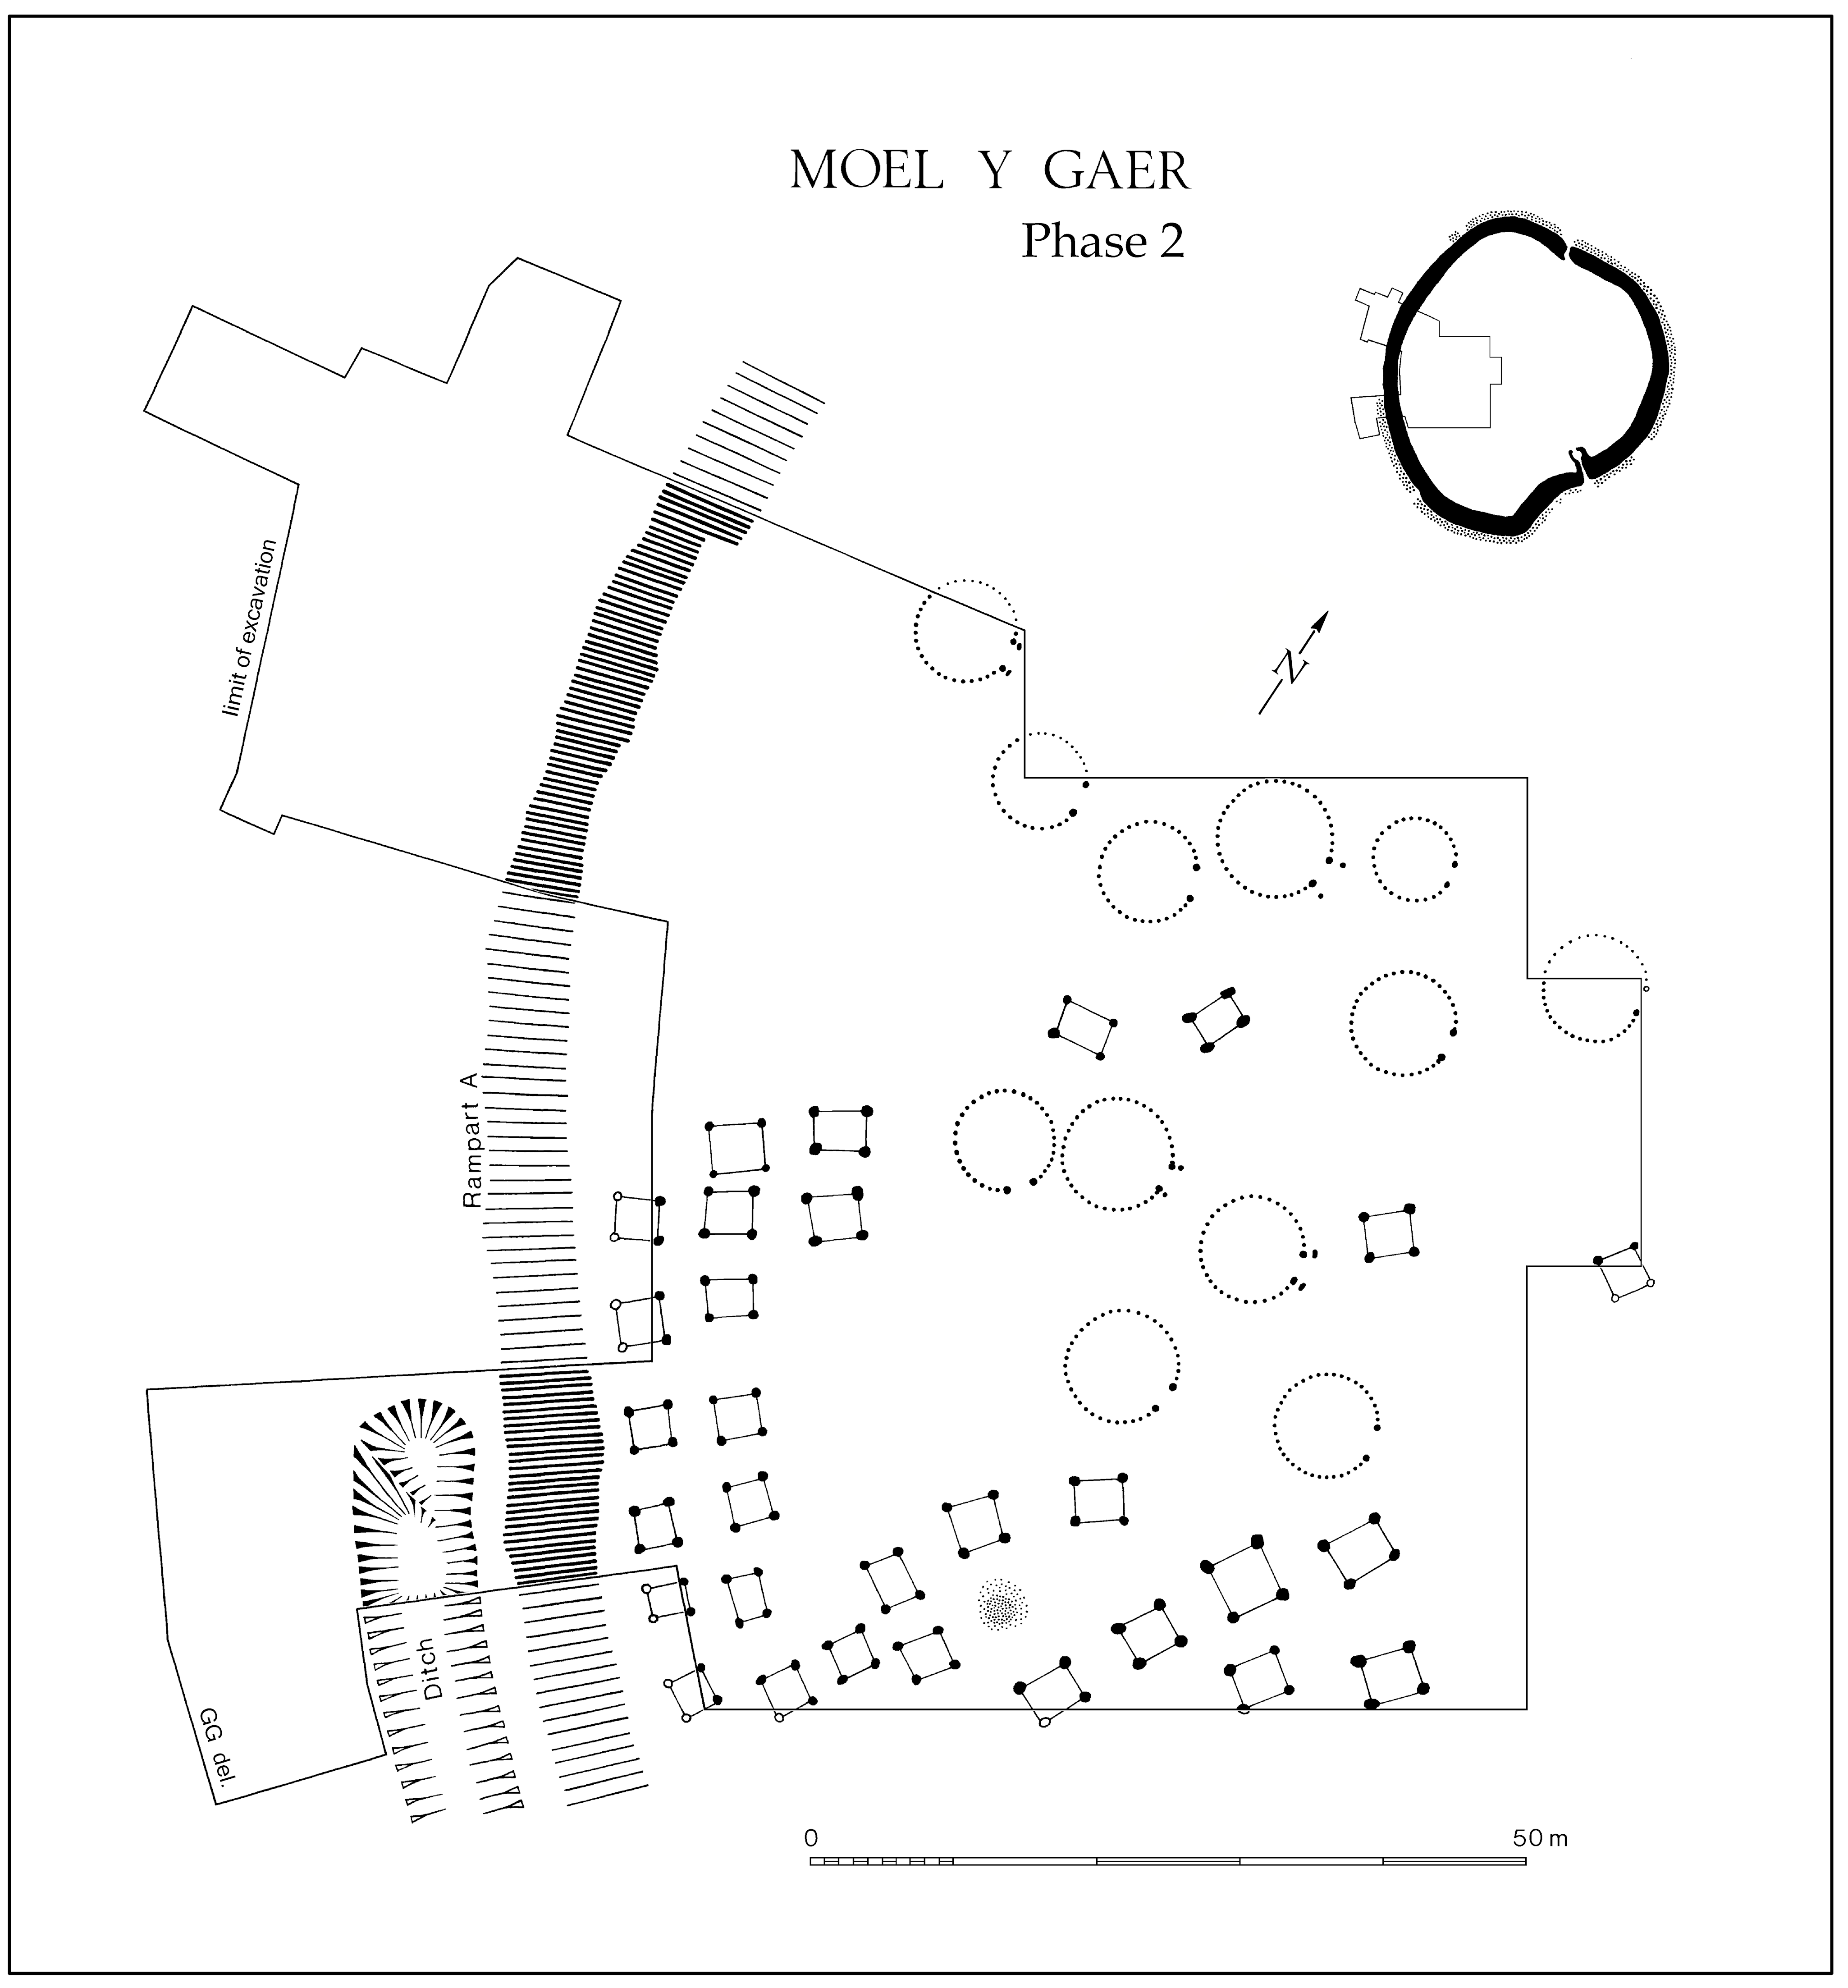
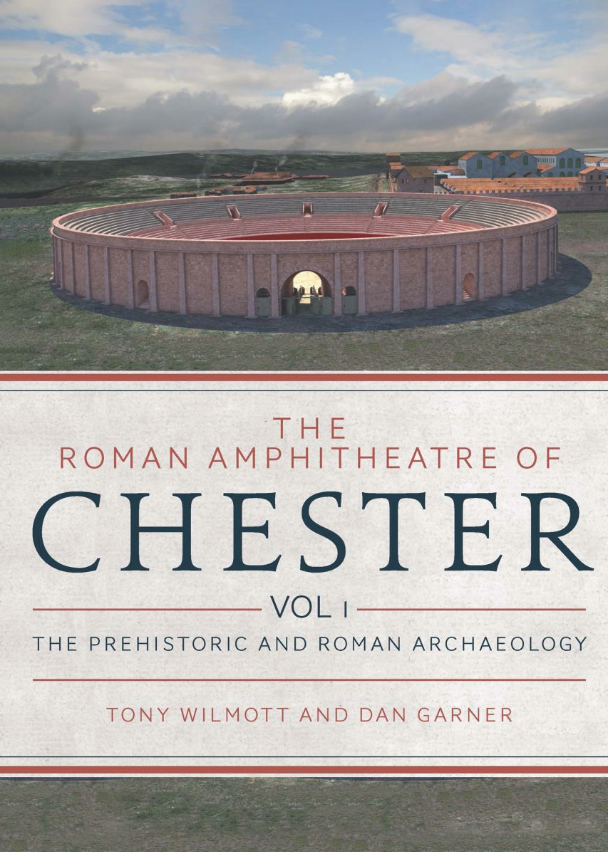
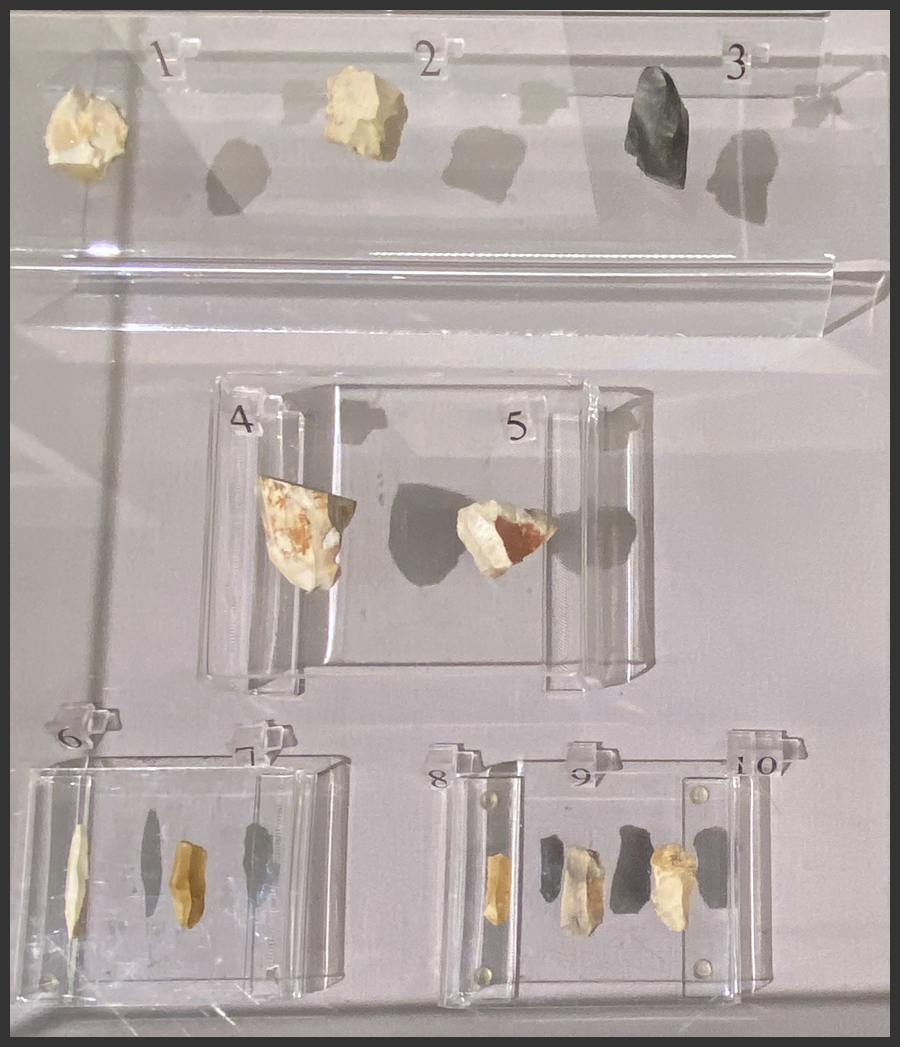
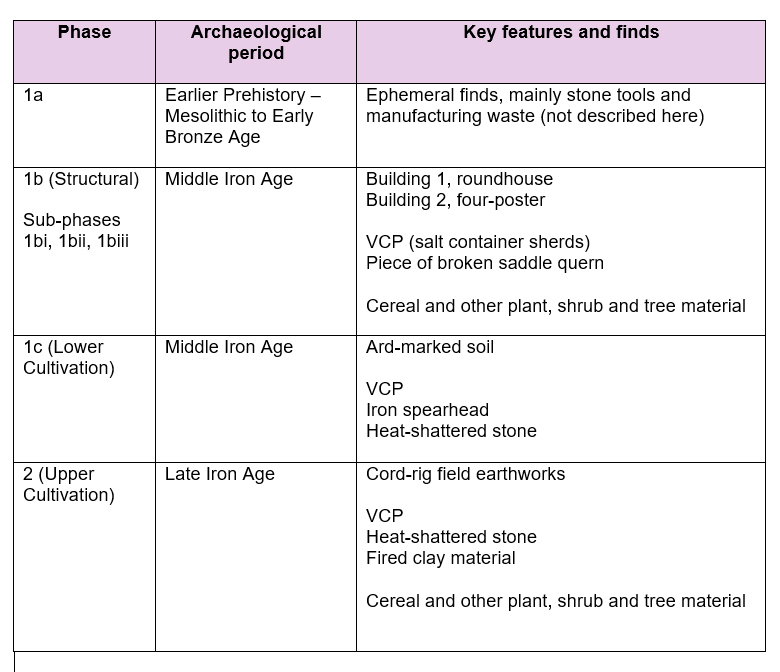
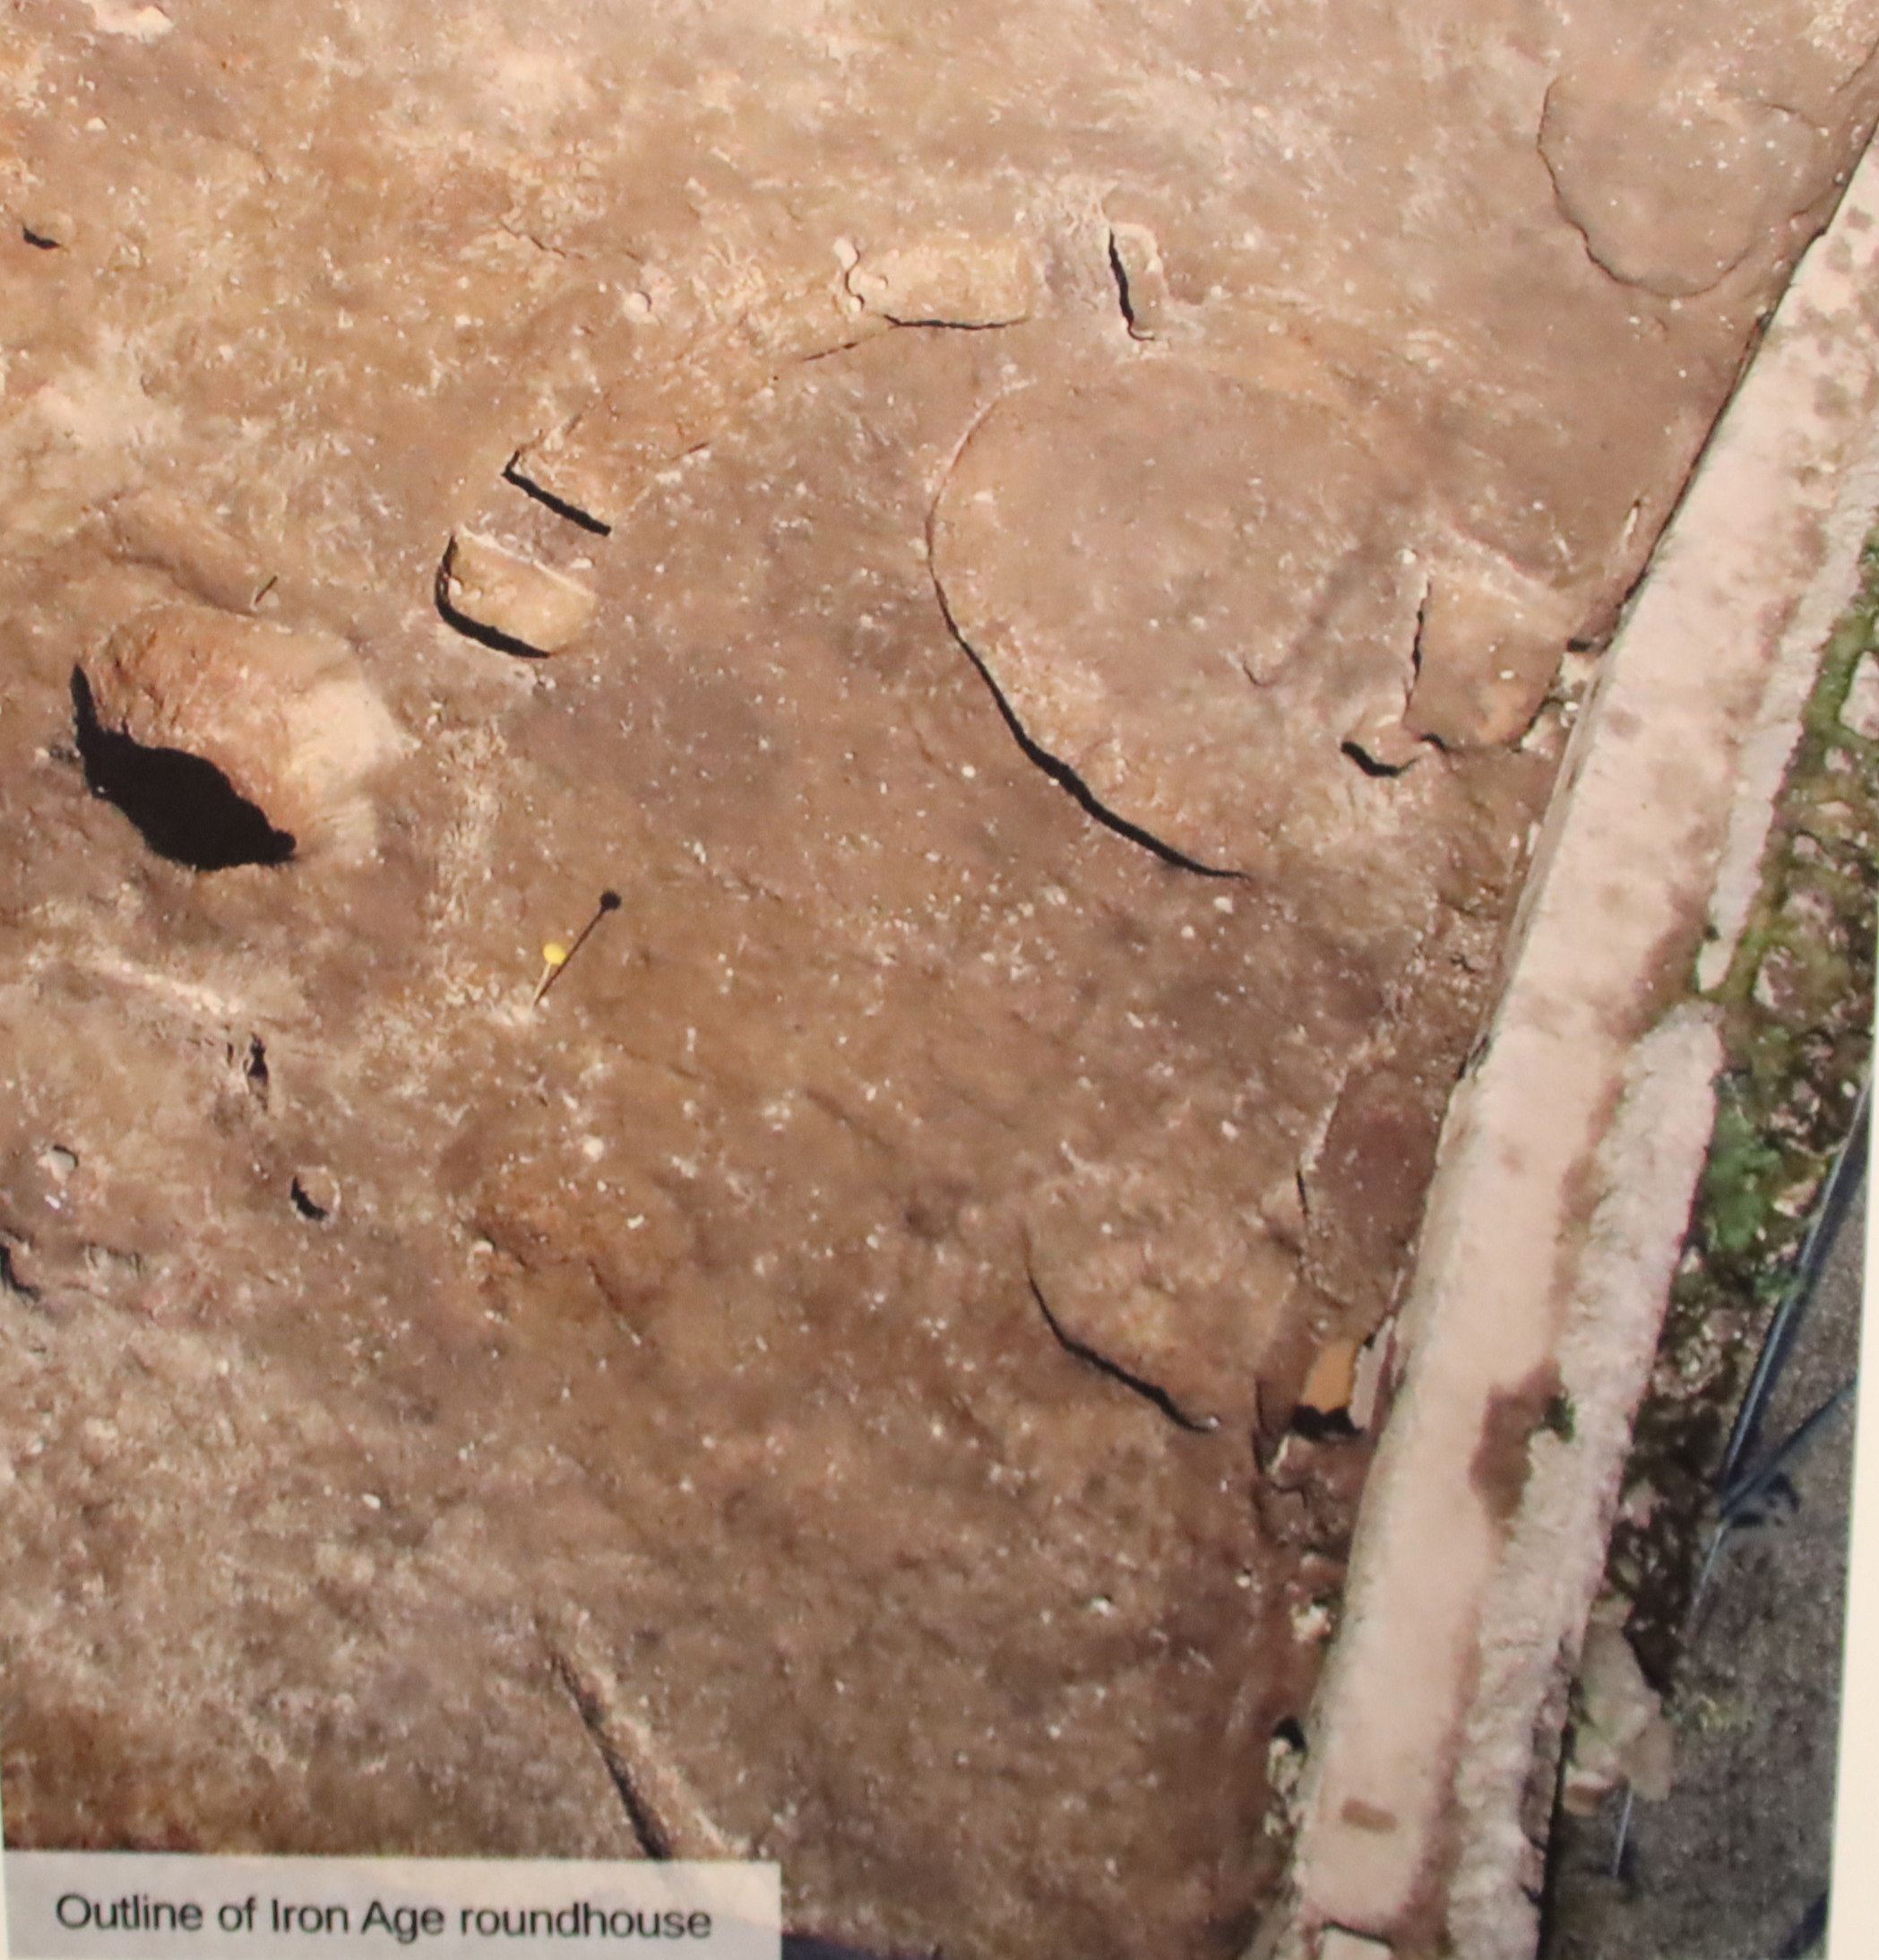
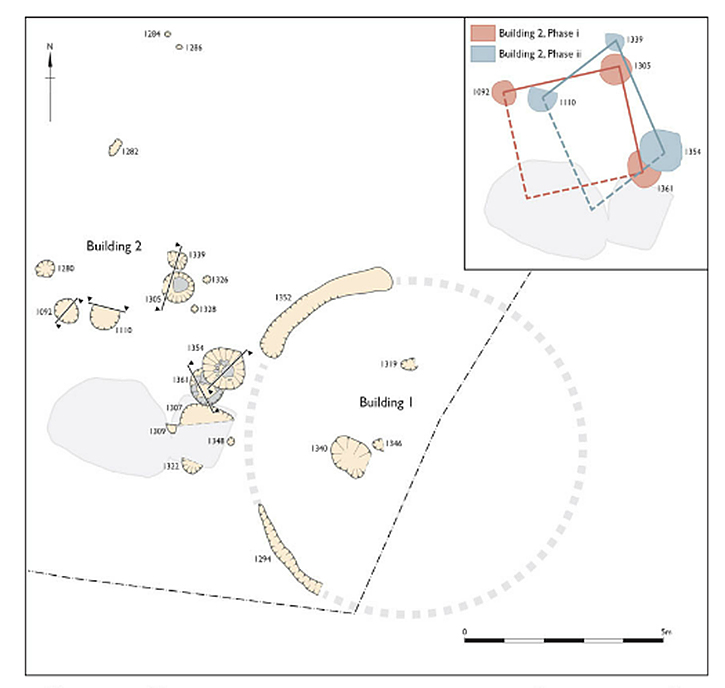
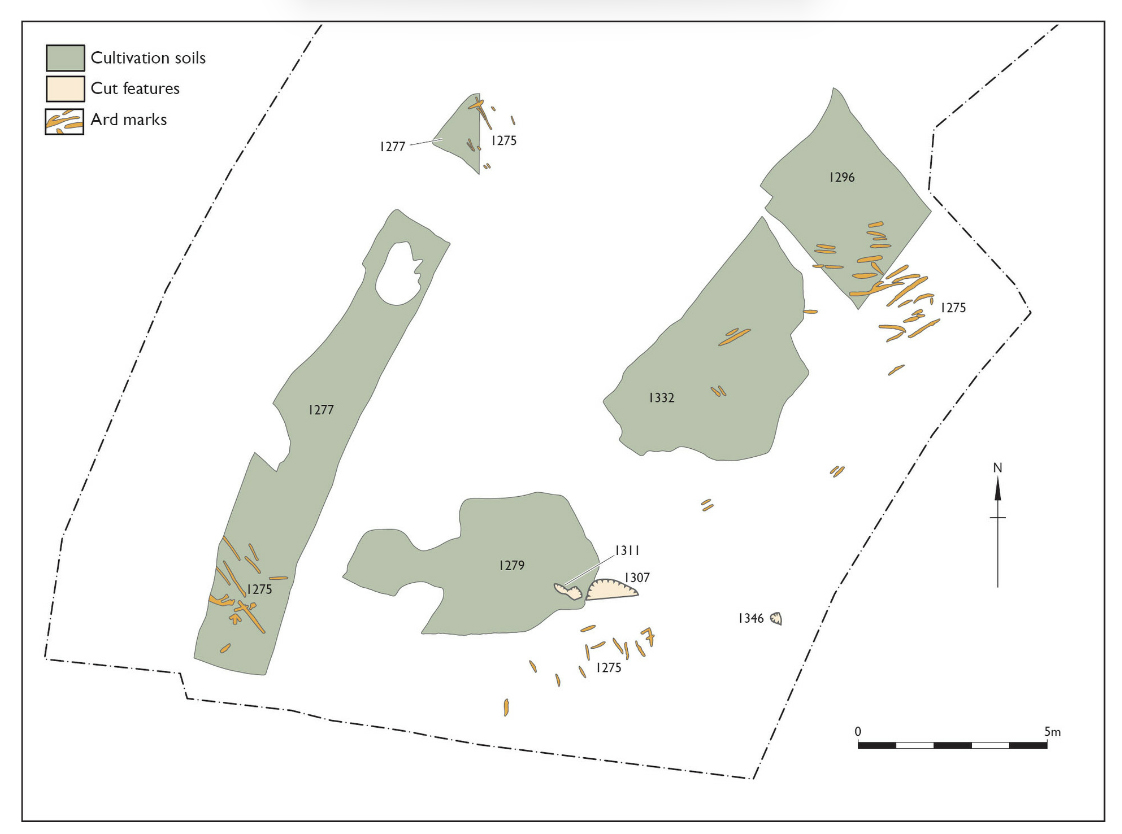

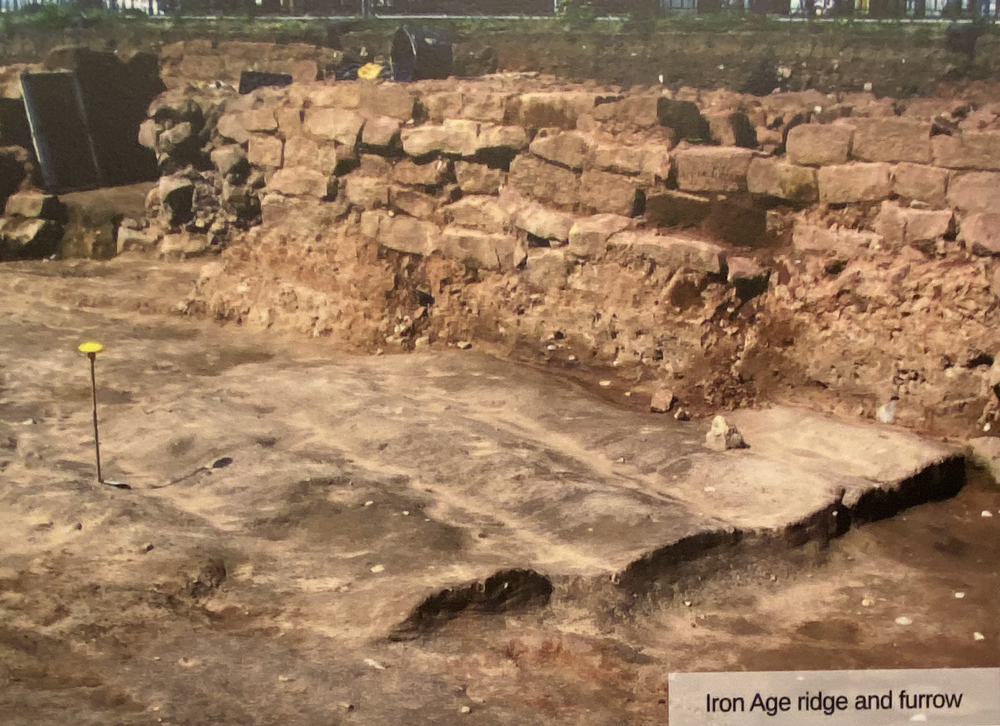


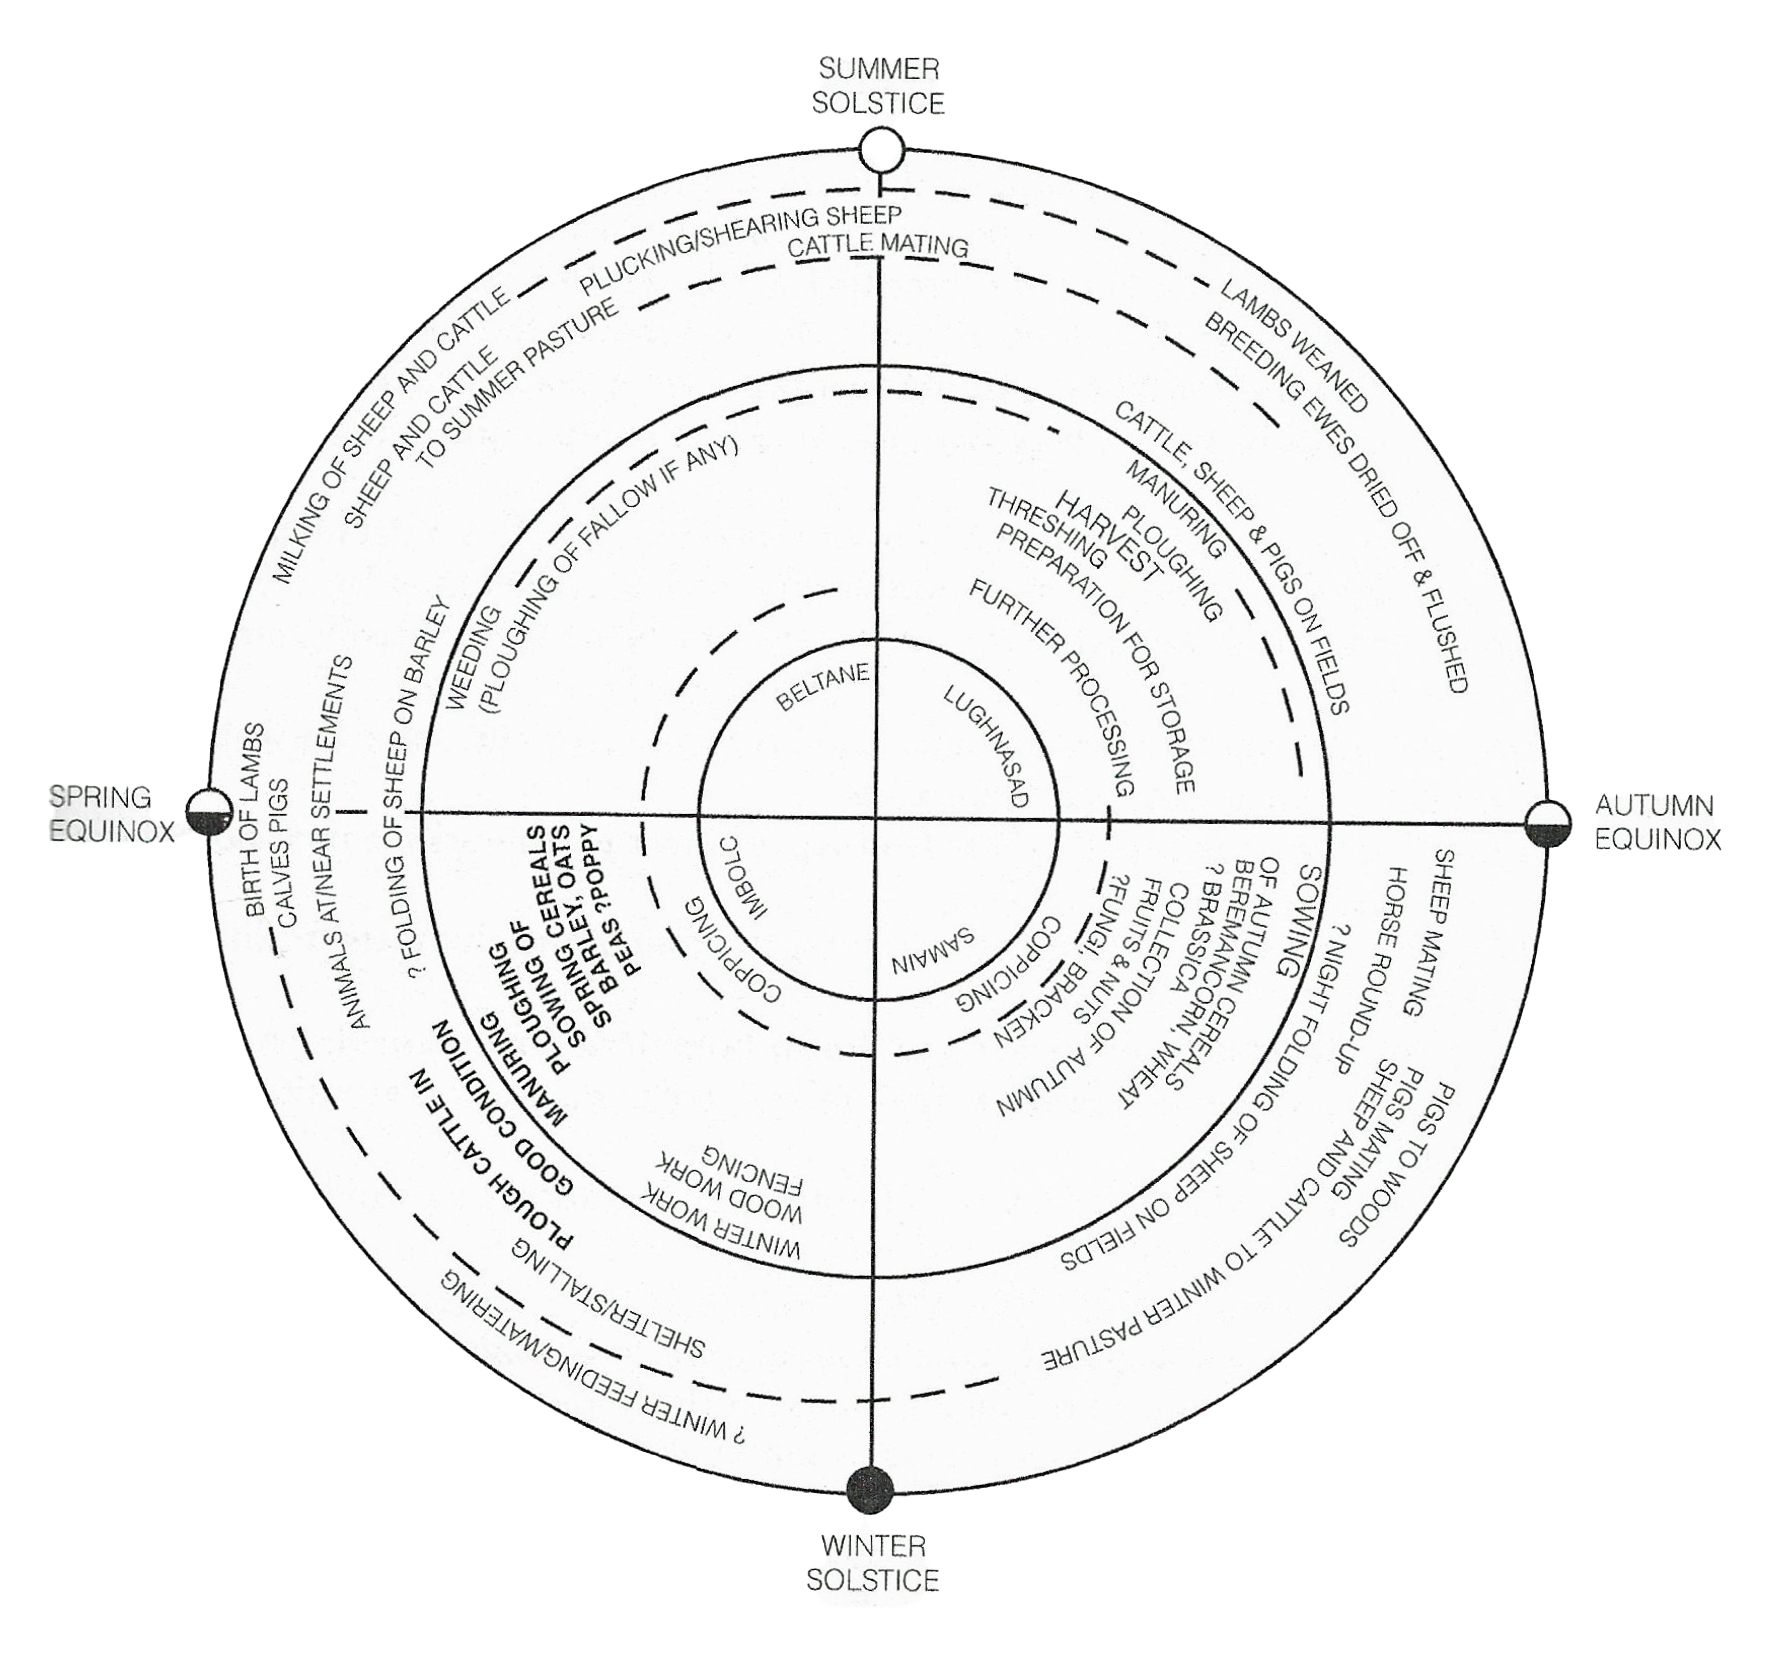
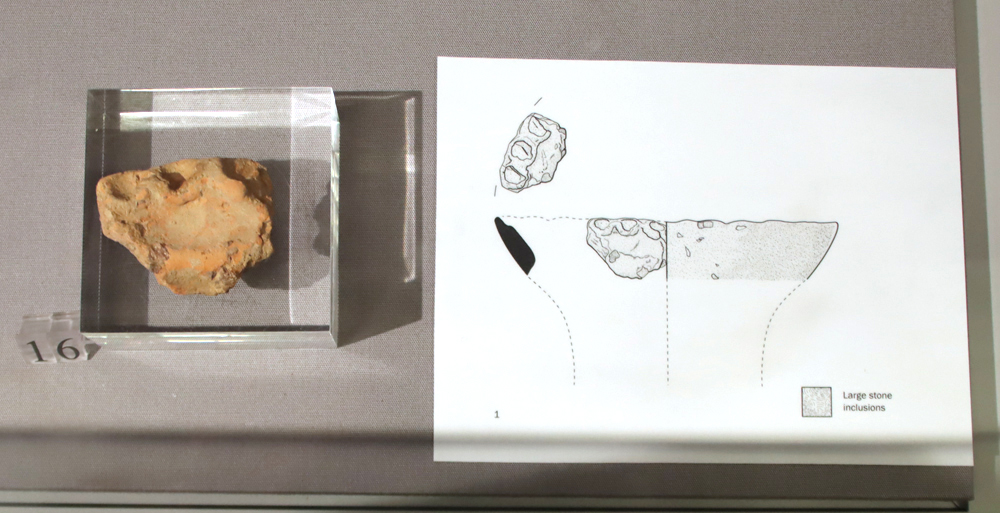
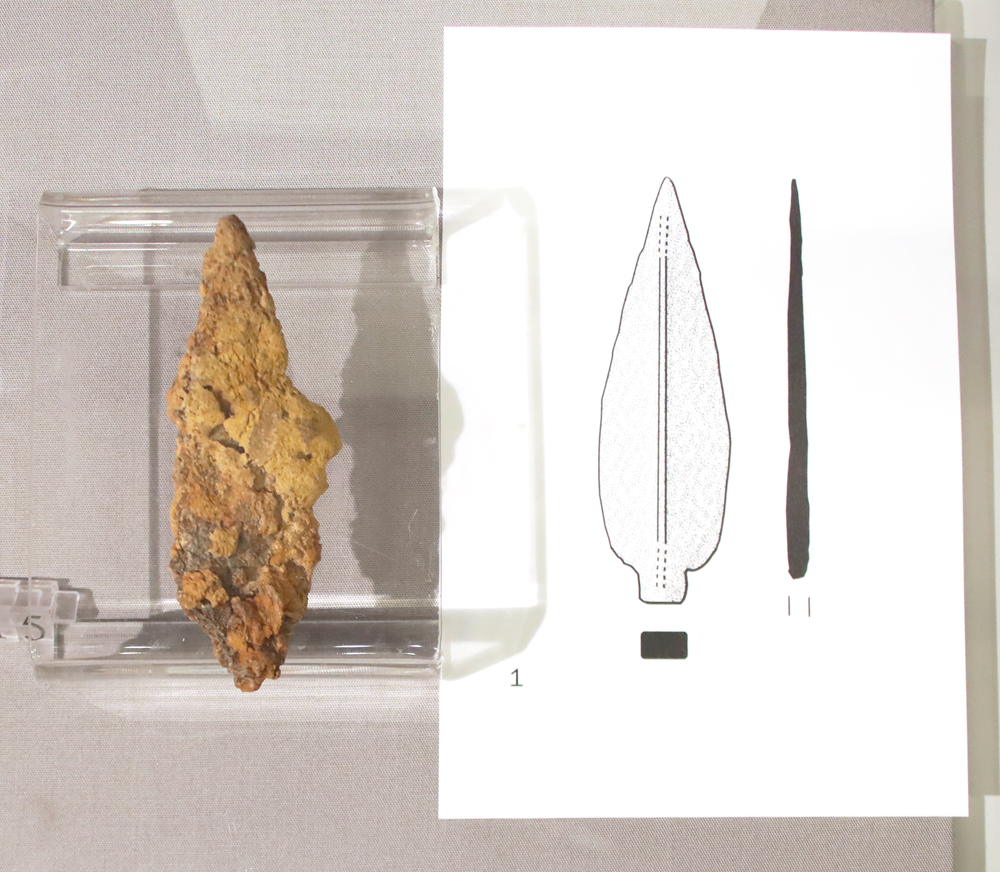
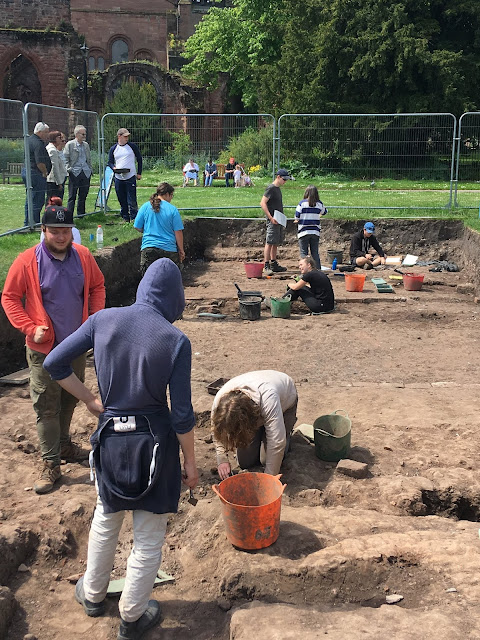

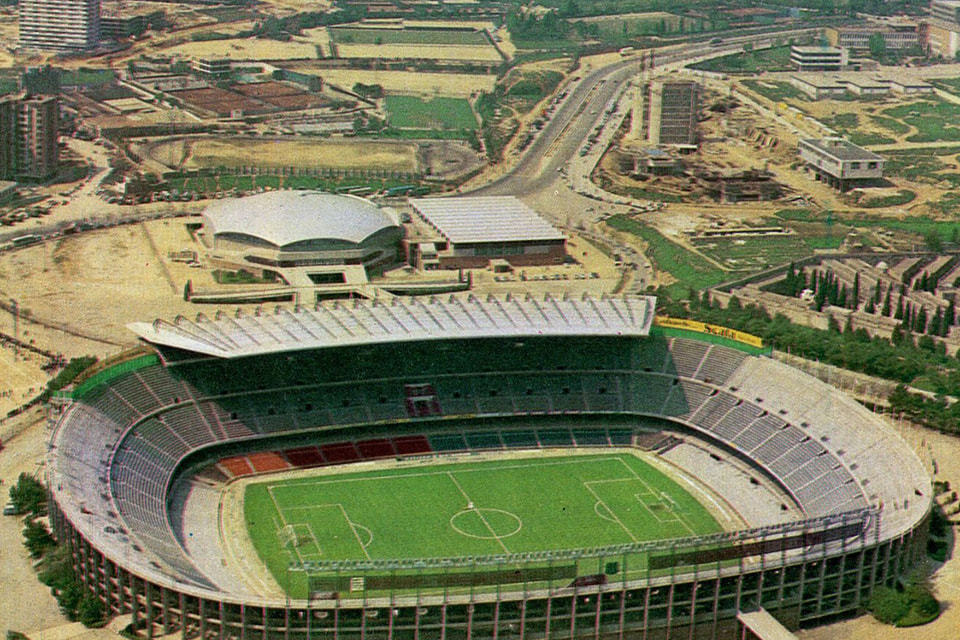
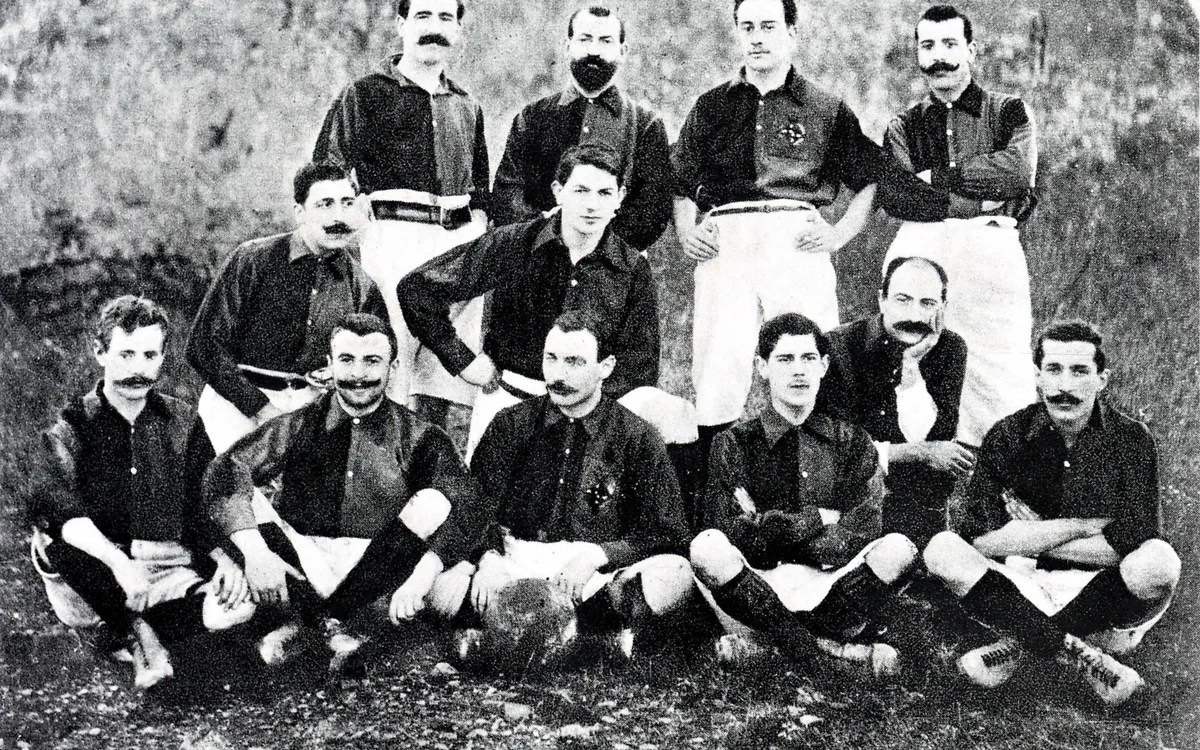


#/media/File:John_Bradshaw,_George_Perfect_Harding.png)
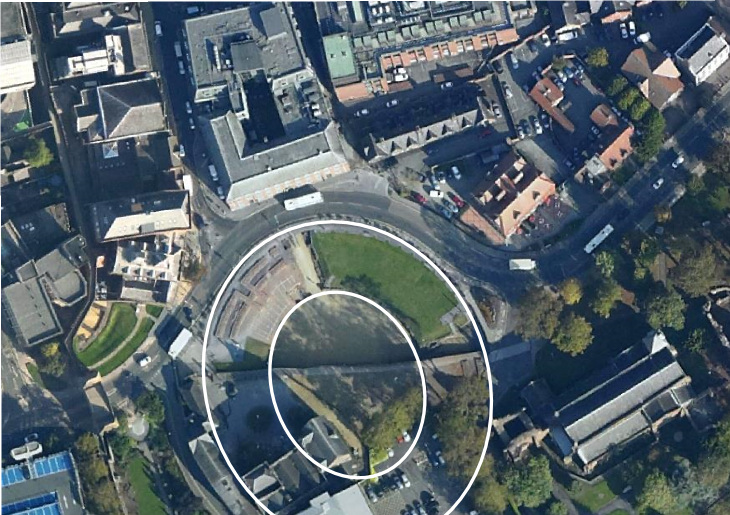