
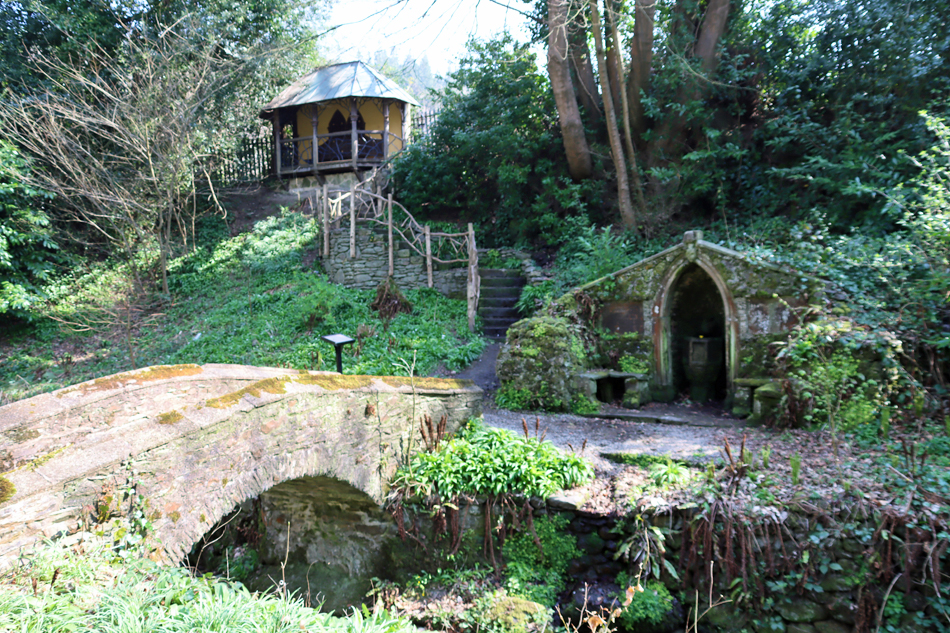
Introduction

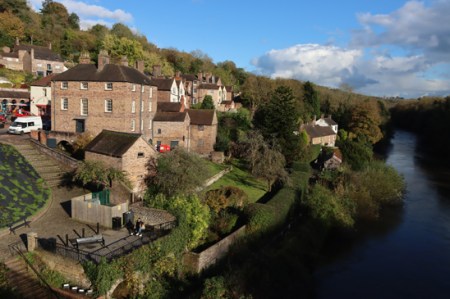
Plas Newydd after 1814. People’s Collection Wales
The local Llangollen builder of the unassuming little cottage of Plas Newydd could not have envisaged the cultural extravaganza that emerged from the plain and simple 5-room unembellished cottage rented by Lady Eleanor Butler and Miss Sarah Ponsonby from 1780. The transformations introduced by the ladies was embellished by General John Yorke, who had known the ladies as a boy and built a new extension to the house, running Plas Newydd as a museum. This was in turn elaborated by George Robertson, who built his own extension. Both extensions eventually had to be demolished due to dry rot, but the remaining cottage was saved. Plas Newydd was eventually sold to Denbigh County Council, which now does an excellent job of caring for it.
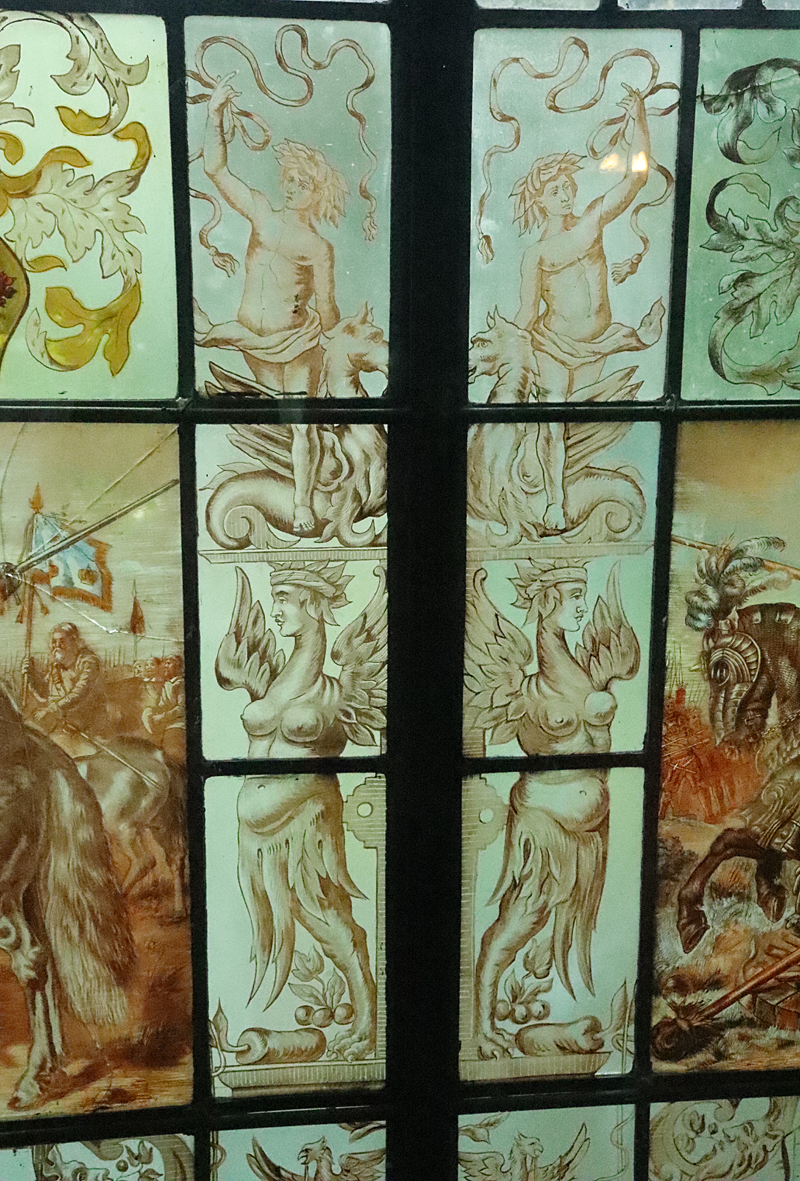
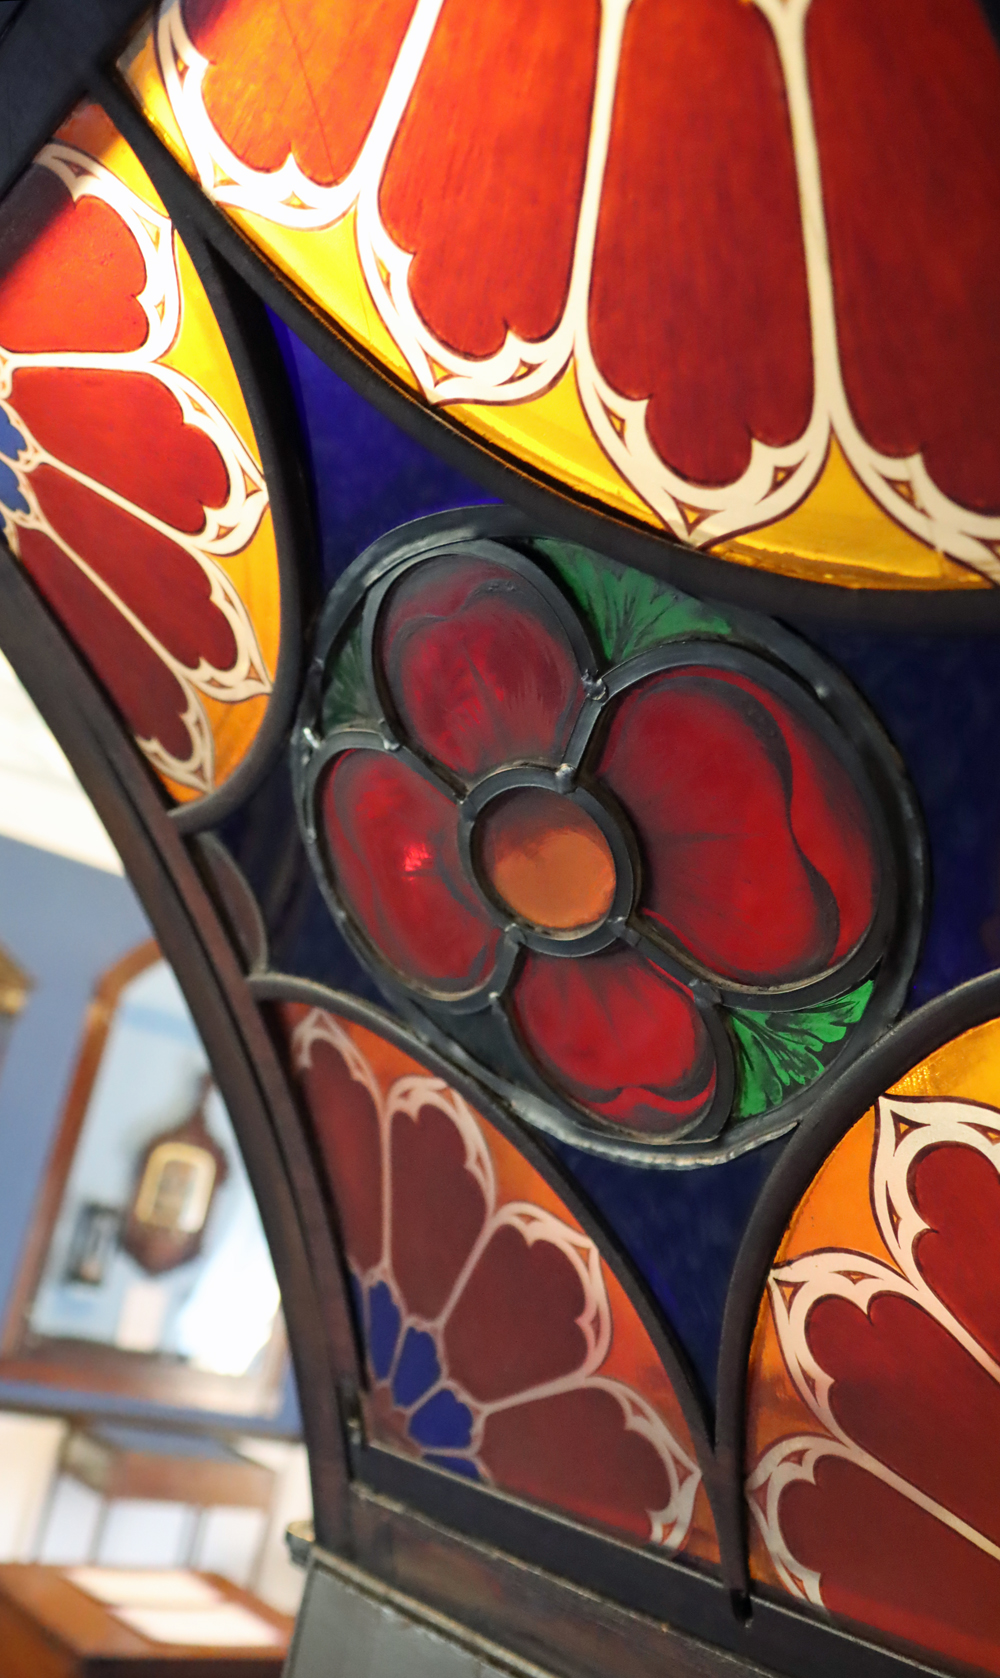
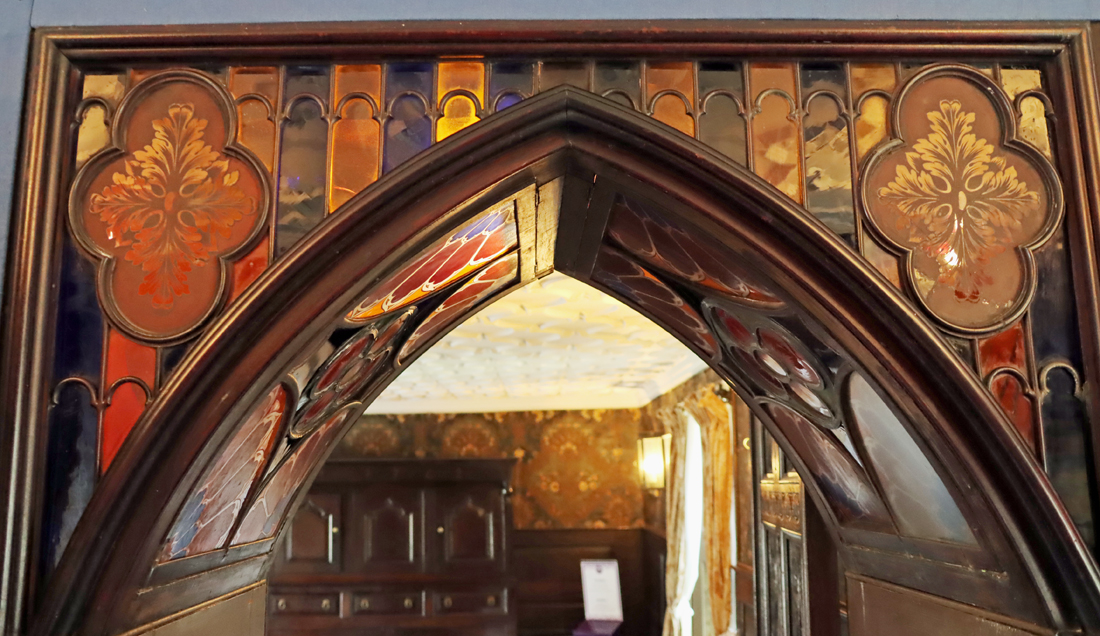
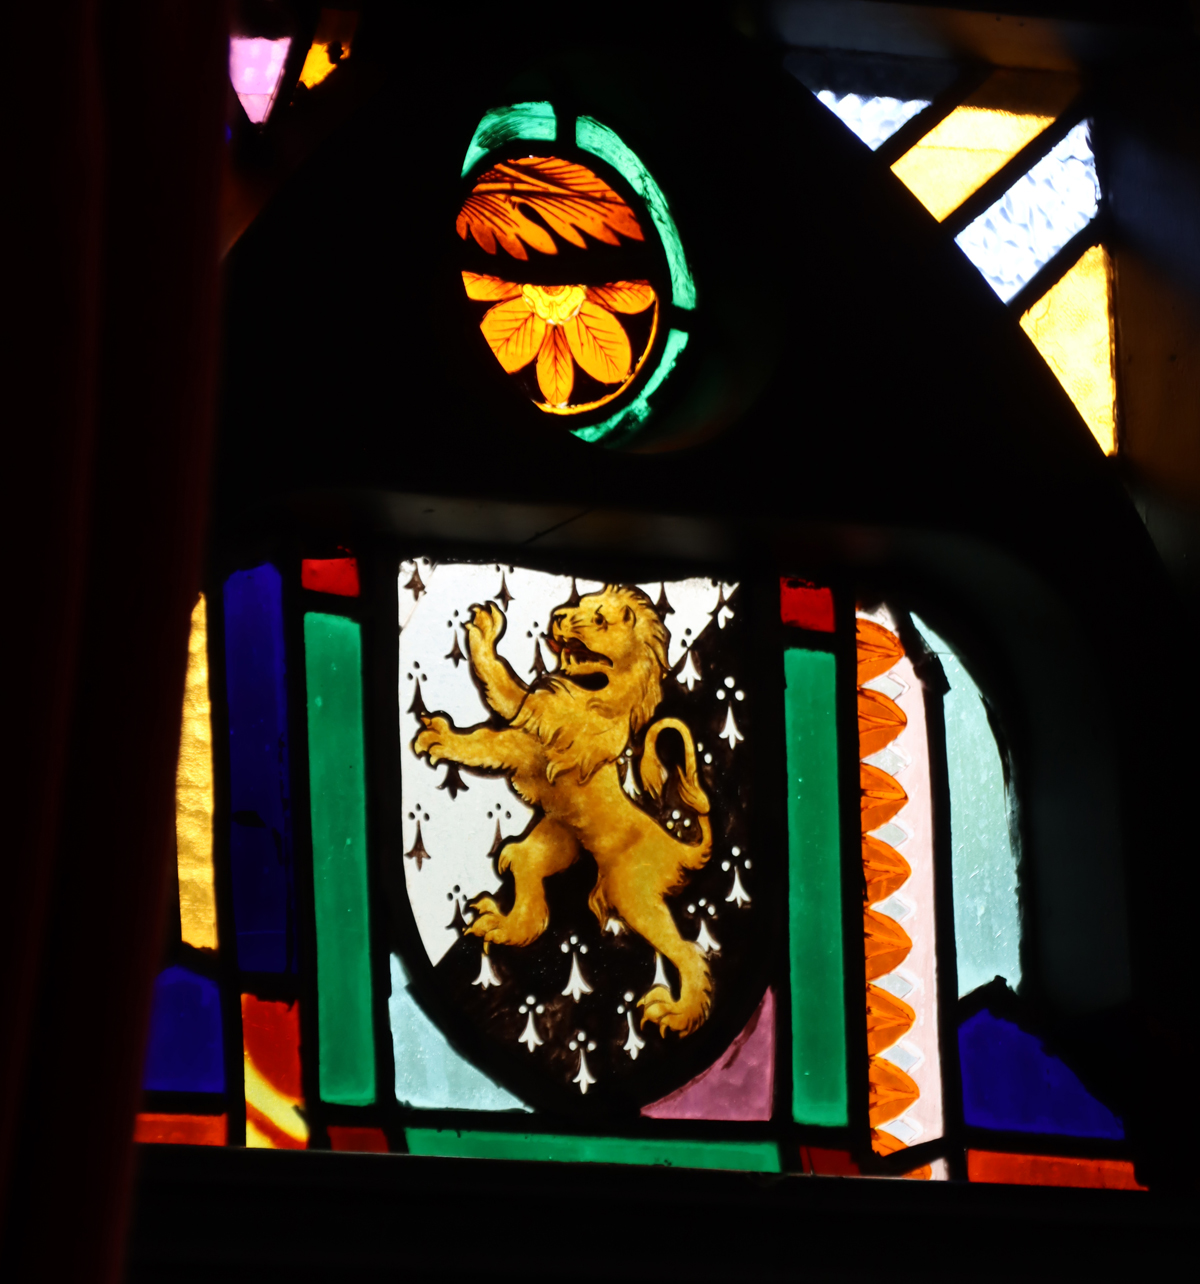
The story of Plas Newydd is covered in Part 1, providing a general introduction to the house and its most notable owners. Part 2 looked specifically at the stained glass. Although the house is particularly noted for its fabulous carved wood (not yet discussed) and stained glass composites (discussed in part 2) it also features traditional delftware tiles in fireplaces, embossed leather wall hangings, Lincrusta wallpaper and elegant plasterwork ceilings. These make up the subject of this post.
It is not always at all clear which of the various owners added which decorative features. Even more difficult, dating the different elements is not at all straight forward. Whilst the stained glass and wood carvings represent a wide chronological range (from the medieval to the late 19th century), the tiles could date from the 17th to the 18th centuries, whilst the embossed leather could belong to the 16th to the 18th centuries. Lincrusta wallpaper was invented and marketed only from the 1877. The plaster ceilings are probably Victorian in date, rather than having been imported from older buildings, as they seem to have been made for the rooms in which they are installed.
xxx==
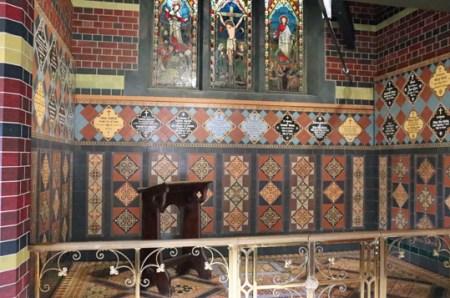
Dutch delftware tiles

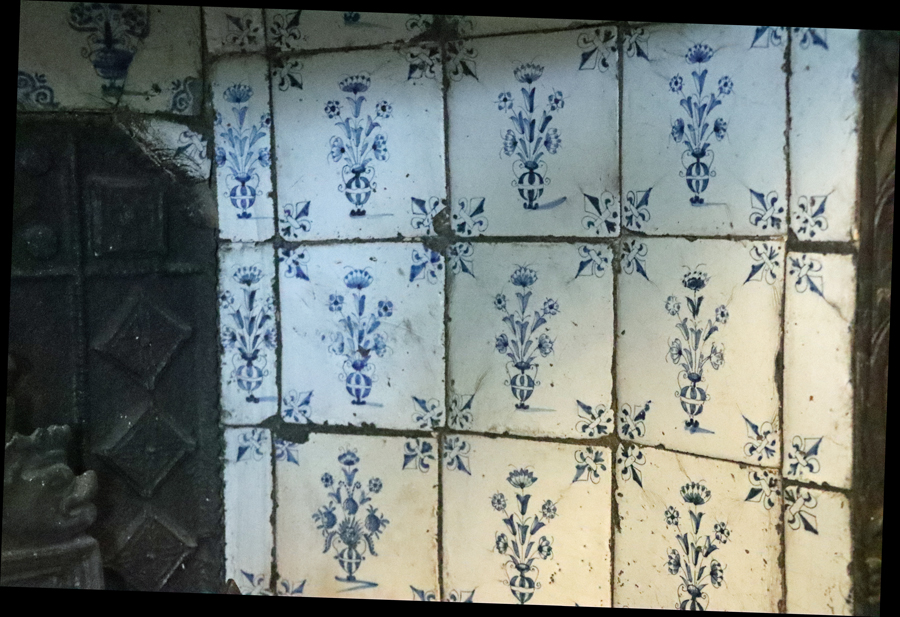
Fireplace in the Oak room with floral themes in Green and red, with blue corner motifs
The Dutch tiles in the fireplaces at Plas Newydd are sometimes said to have been installed by General Yorke, but it slightly concerns me that the General does not mention the tiles in his Catalogues of 1884 and 1888, and it is possible that it was Mr Robertson who installed them.
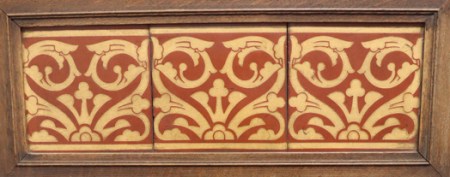
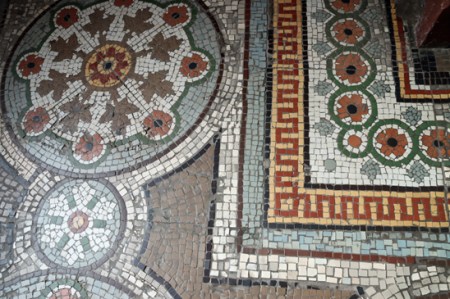
Tiles, being ornamental and installed into the fabric of a building, are categorized with other installed decorative arts including plasterwork, wall coverings, decorative stonework, wooden craftwork, and stained glass. The Plas Newydd tiles include some really lovely examples, showing characteristic themes including sailing boats, windmills, rural scenes and flowers. Whoever acquired them had a good eye. The tiles work splendidly well with the medley of other styles, shapes, textures and colours, providing an elegant, cooling and quiet balance to some of the darker and more exotic elements. Most are blue and white but some have delicate reds and greens to pick out the natural shades of the flowers depicted.
Delftware (“delftware” when not at the beginning of a sentence) is a collective term for tin-glazed earthenware, both functional and ornamental pottery, that became synonymous with the Netherlands. Although named for the potteries in Delft, which were the first in the Netherlands to produce this particular blue and white glazed earthenware, the style of ceramics takes its inspiration from Italian maiolica, also known as majolica, ware, which was imported into the Low Countries (today the Netherlands and Belgium) in the early 16th century, where it began to be copied. The relationship between maiolica and delftware is very obvious. Maiolica had a brighter and more colourful palette but a very similar emphasis on blue, white and small painted scenes.
Delftware is made using a tin glaze. The importance of this is that unlike a plain lead glaze, which is clear and rather glossy after firing, tin oxide can be added to a lead glaze to provide an opaque, white glaze, which can then be painted with designs and re-fired. This was a technique imported via the Mediterranean from the Middle East.

It is clear from the variety of corner motifs, and the absence of them in many cases, that these were not a single batch, but they shared familiar delftware themes – human everyday activities, rural scenes and shipping. Dining room
Although Delft became the most important centre for tile production, for both local consumption as well as for export, the tiles were amongst the most utilitarian products that did not require specialist techniques to form them and were made at a variety of locations, including Rotterdam. As well as being highly decorative, they were easy to clean and durable. The tiles, typically measuring 13cm x 13cm, were commonly used internally for lining walls and fireplaces, where they could withstand heat, and basements and cellars where they were largely impervious to chill and damp. To ensure that they could withstand these conditions they were fired twice, first at 950-1000 degrees and after they had dried and were glazed and painted, were fired again at c.1000 degrees, which also fixed the glaze.

The Oak Room
The tiles soon became popular in prosperous middle-class homes but, like all fashions that emerged in the upper echelons, eventually trickled down to the general population, finding particular favour amongst the newly wealthy class of prosperous farmers in rural areas of the Netherlands. Fashions in the countryside tended to lag behind those in more urban areas, meaning that factories continued to produce particular styles some decades after they had been replaced in the homes of towns and cities.
Although delftware is often thought of as blue and white, due to the popularity of this minimalist palette following the import of Chinese blue and white china by the Dutch East India Company (VOC) in the 17th century, a palette of pastel shades was also used. Although China-inspired scenes were used for a while, there were soon replaced by the classic themes on delftware, including birds, flowers, rural scenery, people (including children) engaged in everyday activities and sea-going vessels. Corner motifs (hoekmotiefs) became an important part of the overall design in many tiles, and the same motifs appear repeatedly on many of the tiles. The corner motifs help to provide focus and act as a substitute frame. Amongst the most popular of these were the ox-head motifs, as shown in the polychrome floral example from the Oak Room.

Different types of ox-head corner motifs. Source: Kamermans 2014

I have no idea what is going on in this scene, but would love to know! Do get in touch if you can explain it! Dining room
As they were easy to transport by road and water, making them an ideal export product, and there was a ready demand for them, tiles became a popular item in England, where they were imported in large numbers. In the 16th and 17th centuries Dutch and Flemish potters migrated into England to escape religious persecution and began to manufacture delftware pottery and tiles, which they could sell directly to English markets, helping to spread their popularity. An area of London now known as Potters Fields was named for the Dutch potters who, in around 1620, established the earliest delftware production in England, but others were slightly further afield, such as the 17th century factory established in Edward III’s ruined manor on the eastern edge of Bermondsey on the Thames in the shipbuilding area next to today’s Angel public house.
In the 18th century English potters began to open their own tile-works and this became an increasingly important industry centred on London, Bristol and Liverpool. Until the middle of the century designs were typical of those from the Netherlands but soon began to become increasingly diverse to suit local demand. Local production reduced costs, and when Sadler and Green of Liverpool developed transfer printing for tiles from the late 18th century, costs dropped even further, ensuring that delftware spread to lower income households.

Fireplace in the library
Detail of the fireplace in the library. Every tile has the same decoration: a formal flower arrangement in a vase, with fleur de lys corner motifs.

A mixture of decorative topics are shown on the tiles in the main bedroom.
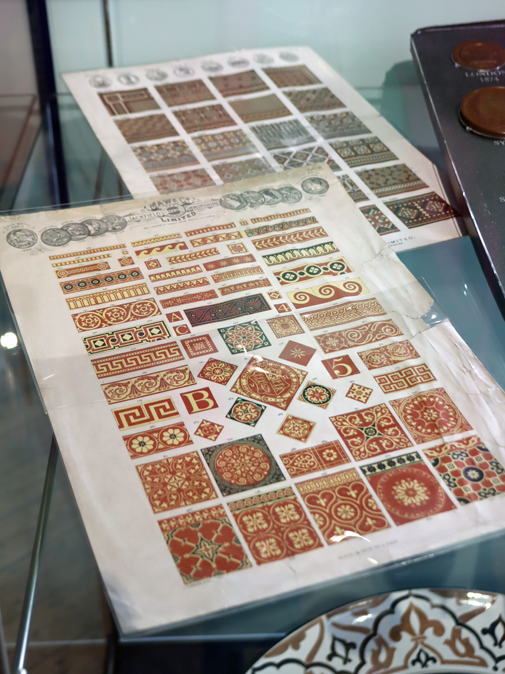
Trying to pin a date to any of the tile sets at Plas Newydd is not possible for a non-expert. The most useful guide to the chronological development of delftware that I have found to date was produced by the Philadelphia Museum of Art by van Dam and Tichelaar in 1984, and provides an excellent overview of how delftware originated and how its popularity was split into urban and rural settings within the Netherlands, with different trends in each. For example, with particular reference to the tiles at Plas Newydd, tiles with frames such as those shown below tend to be earlier than those with only small corner motifs. Tile thicknesses reduced from earlier tiles that were as much as 18m mm thick to only 6-7mm in the 18th century. Polychrome examples such as those in the Oak Room were popular in the Netherlands in the mid-17th century but but went out of fashion in urban homes, surviving in rural homes for a while until here too they went out of fashion in around 1700. Other chronological clues are the themes that made up collections of tiles. For example, the number of landscapes and pastoral scenes increased at the expense of ships and sea monsters, whilst there was an increase of wide landscapes, and the production of many more Biblical themes often framed in circles. Finally, amongst various other clues, the Dutch tile was usually 13mm sq, and this was emulated by English artists, but some manufacturers began to produce 152mm sq tiles for the English market. However, whether any of this is chronological direction is applicable to trends in English tile art I simply have no idea, and at the moment it is unknown whether the tiles are Dutch or English.
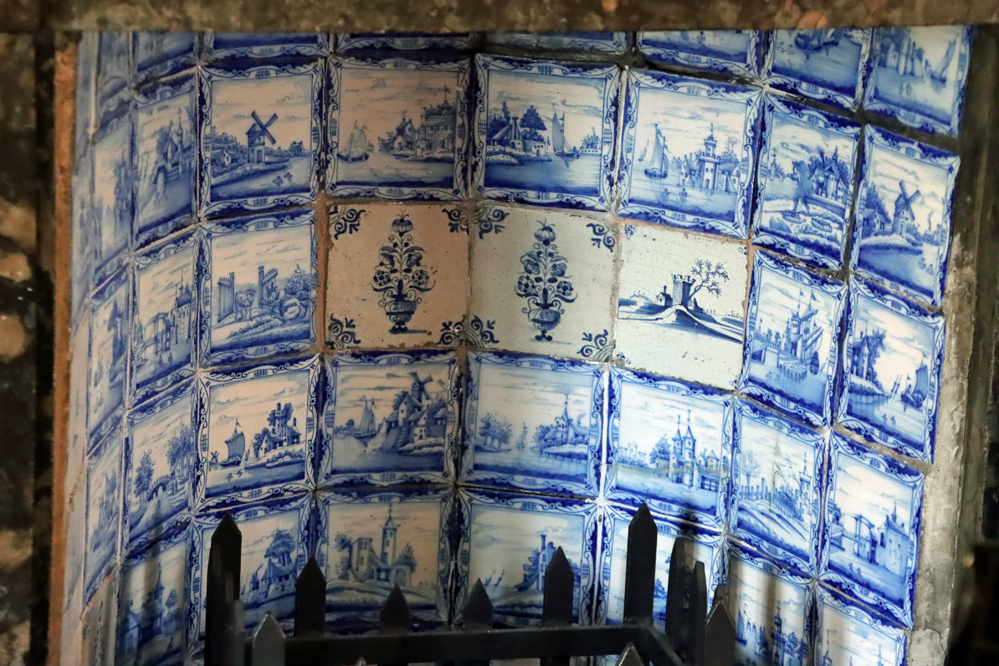
Main bedroom, including rural scenes and two identical floral arrangements in vases, fixed into position side by side. The tower next to them is also anomalous; the others are all provided with a decorative frame and are rather more painterly in conception
xxx
Delftware pottery continued to be made into the 19th century, and indeed are still made today, but were replaced in popularity towards the end of the 18th century in England by new fashions. Tiles continued to be used, but English manufacturers in Stoke on Trent and Jackfield began to innovate new styles of tile design, which soon became very popular. In hearths backings of iron and brick were soon preferred. At the same time other types of decoration became fashionable on other types of domestic pottery, such as willow pattern.

Dining room
When it became unfashionable delftware was removed and replaced, soon entering the salvage market, making it easy for dealers to scoop up and sell as collectibles. At the same time, English imitations of the Dutch examples, remained lower in cost. There is no reason why General Yorke or Mr Robertson, both wealthy collectors, should not have been able to source Dutch tiles if so desired, but at the same time the more inexpensive and more easily accessible English tiles might have been preferred.
fdsfds
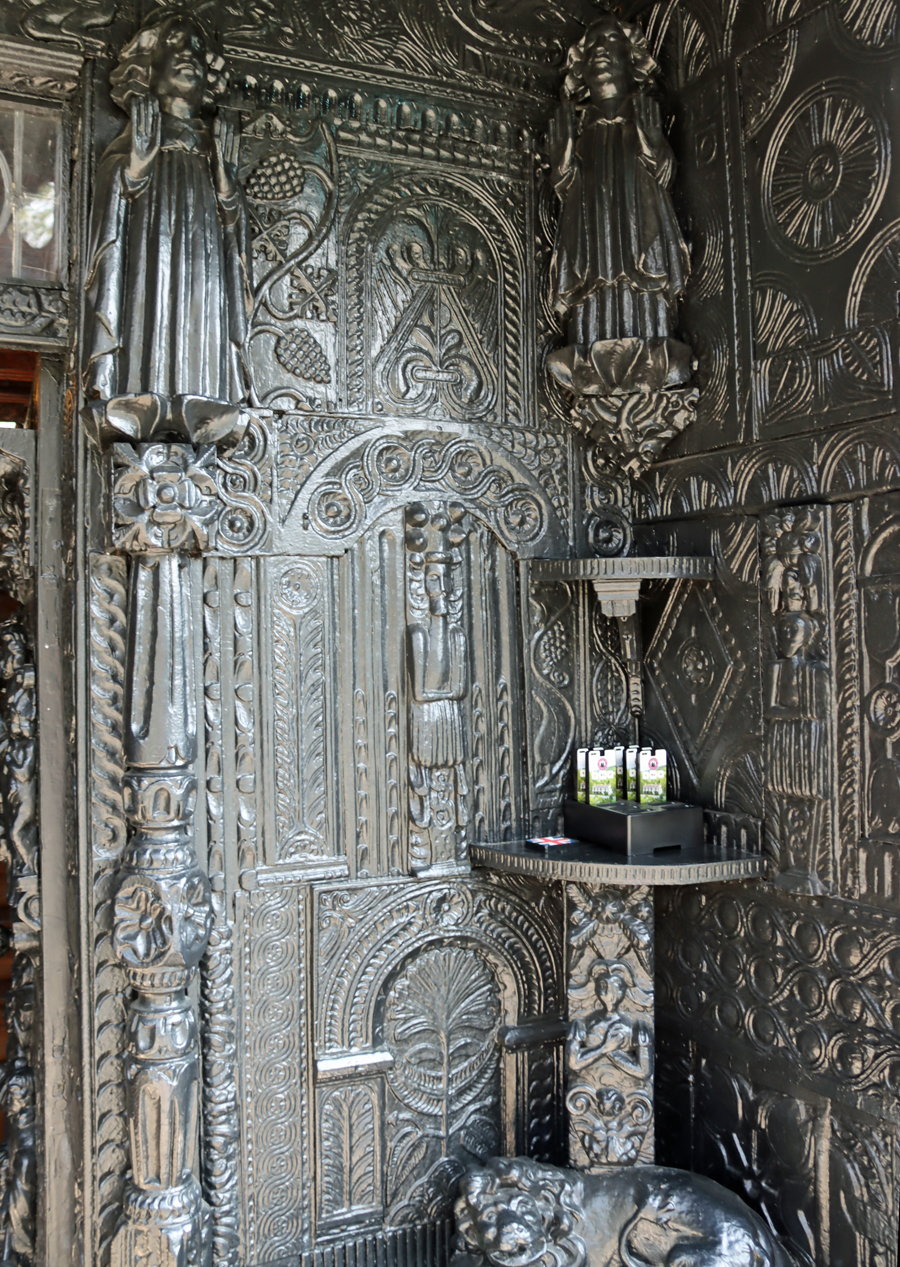
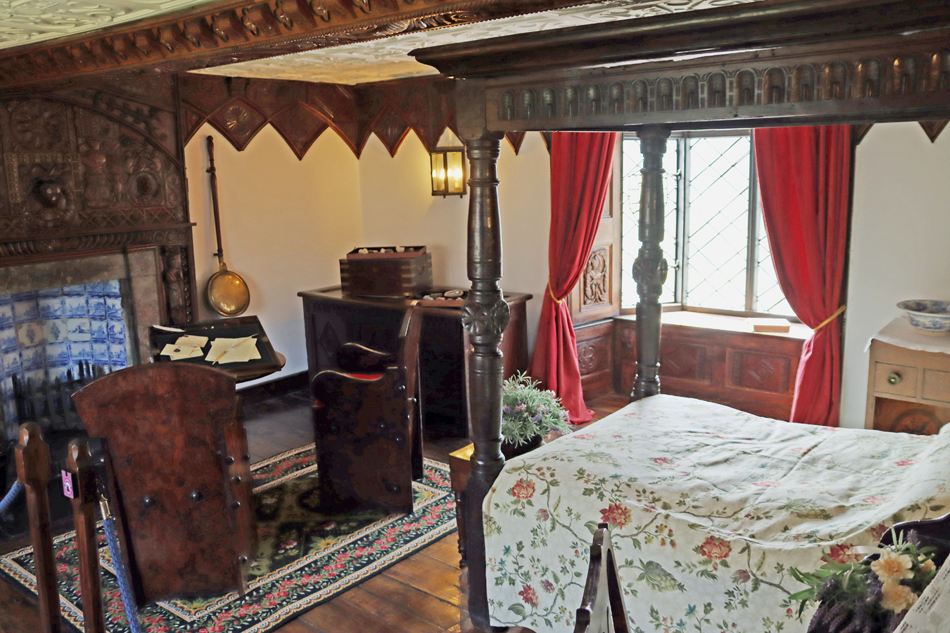
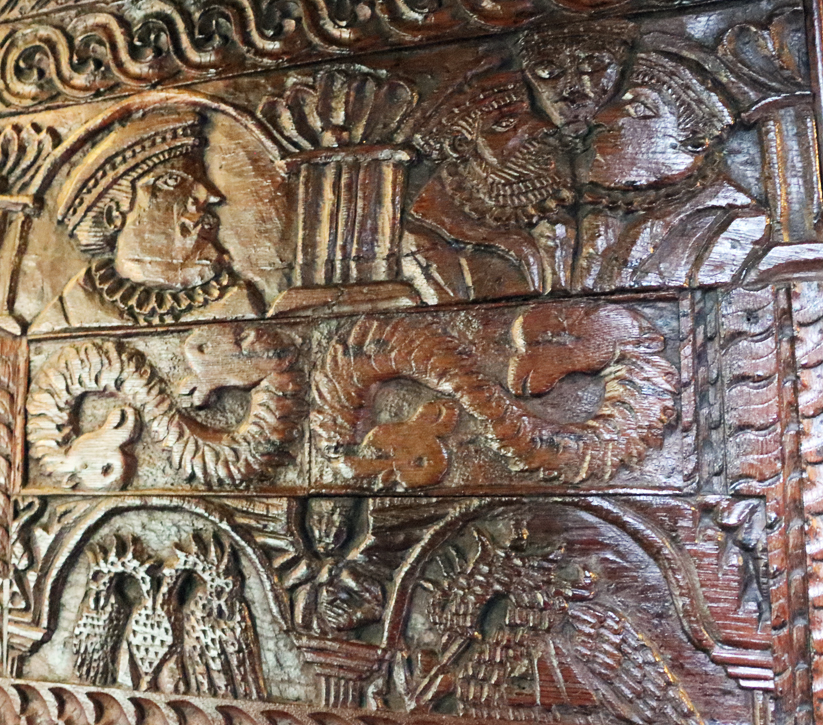
The Impressed, Gilded and Painted Leather

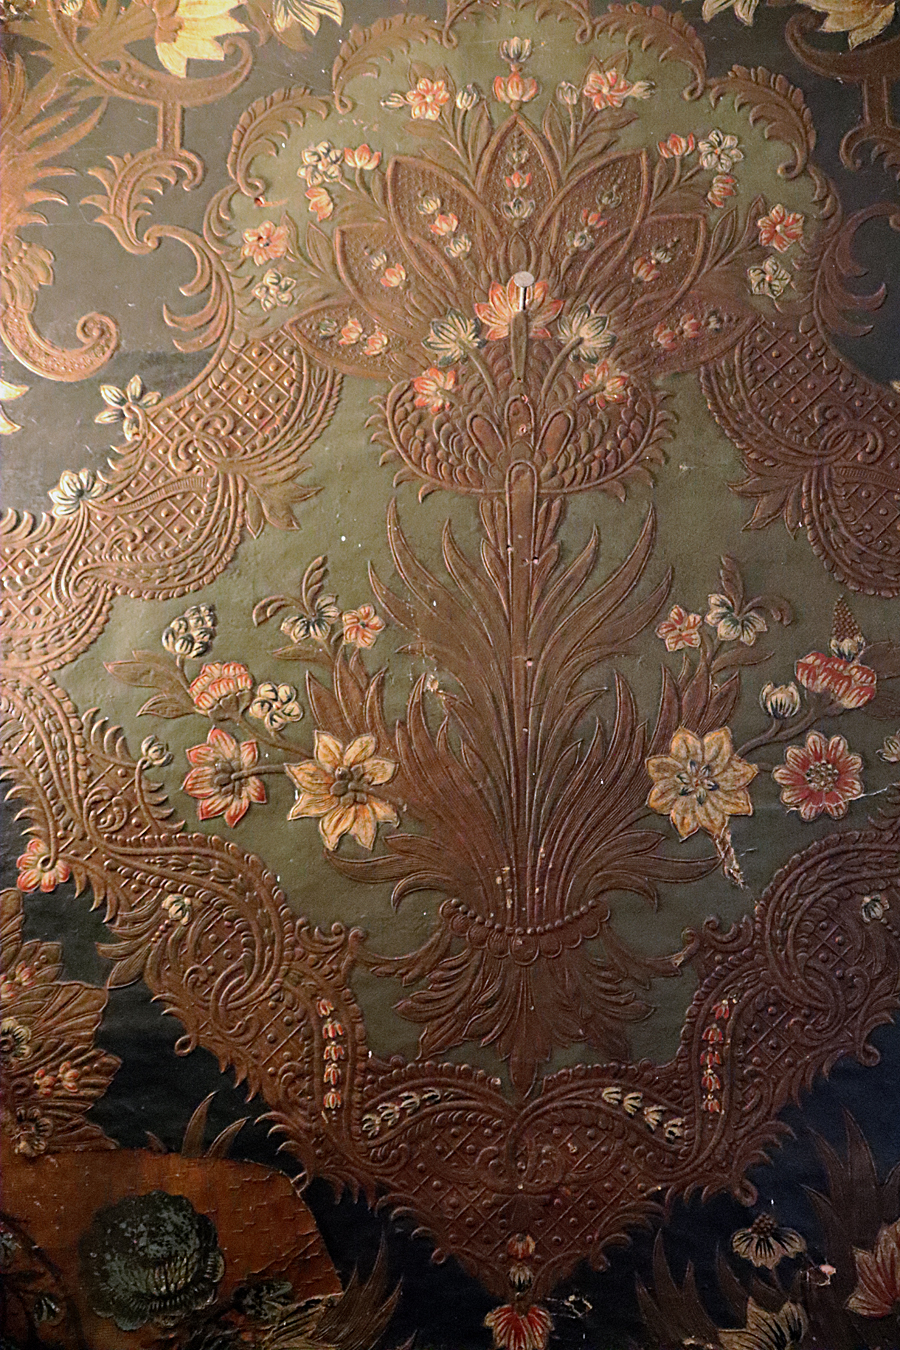
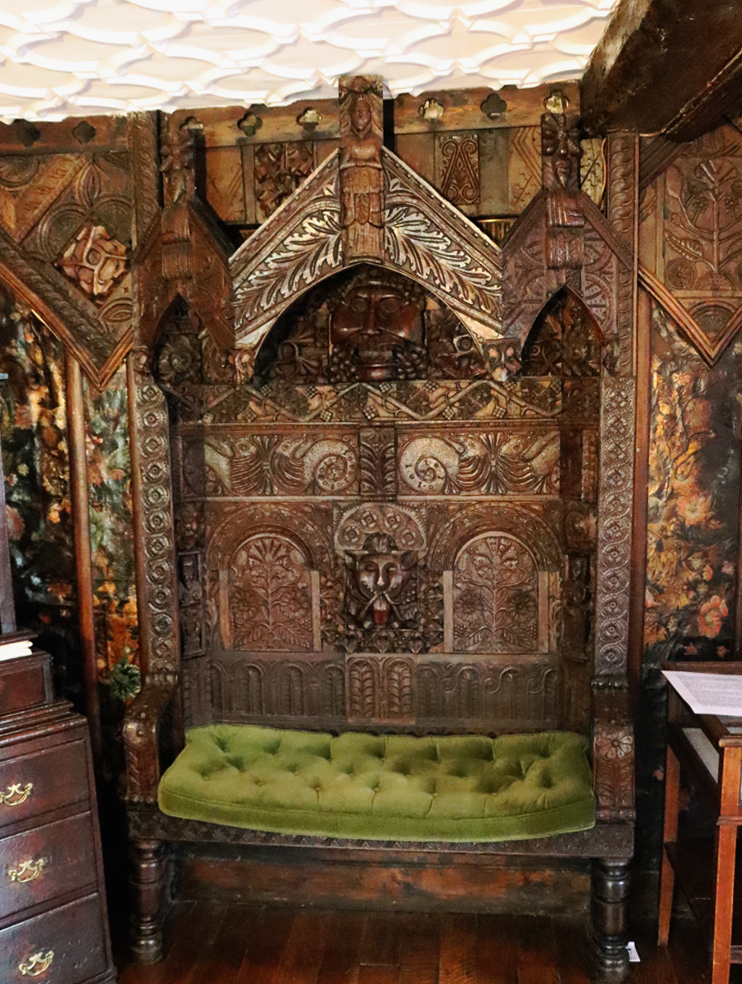
Detail of the Oak Room showing both carved oak, on the left and gilded and painted leather work on the right, with newer wood components fitted to tie in the wooden section, aesthetically, with the leather hangings.
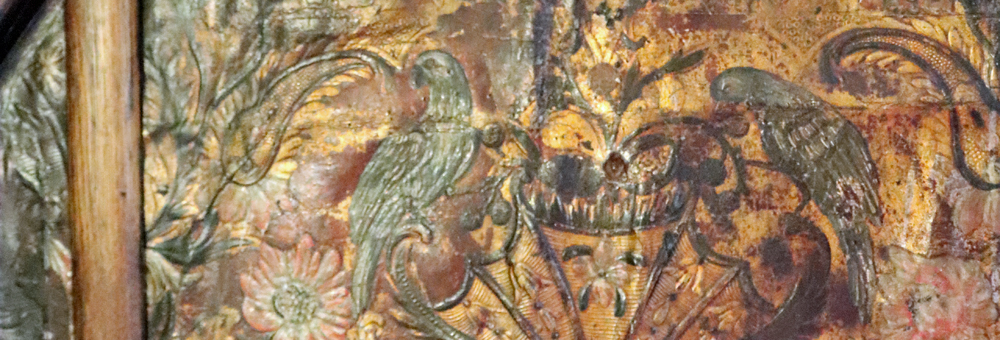
The ornamental richness of the antique leather wall hangings installed in Plas Newydd by General Yorke are defined by bright colour and ornamental richness. Sometimes referred to as Spanish leather or gilt leather (Dutch goudleer, Flemish goudleder, and French cuir doré), they are impressed or embossed and painted, and they combine many elements of wood carving, oil painting and tapestry, with themes that were all popular in the 17th century, but in a medium that is far less frequently preserved in British museums and period homes. General Yorke, in his catalogues of the house dating to 1884 and 1888, puts them in the 16th century, but does not explain why he assigns this date to them.

Parrots, such as the two green ones shown in this scene in the Oak Room at Plas Newydd, were very popular in Dutch art of the 17th century of all kinds, reflecting the exotic discoveries of the Dutch East India Company and representing the excitement of exploration and the luxuries, of which parrots are an example, that they returned to the Netherlands, associated with wealth, prestige and status.
Some of the best work was produced in the Netherlands, where the most accomplished gilt leather craftsmen, such as Martinus van den Heuvel the Younger (c.1647-1711), were recognized and celebrated as masters of the art. There may have been many more leather wall hangings, also referred to as panels, in the new wing that General Yorke built adjacent to the original Plas Newydd cottage, but the examples that survive in the Oak Room and on the upper staircase are remarkable in their own right, surrounded by ornamental panelling, each distinctive piece retaining a character of its own. The majority of examples in Britain are actually from the Netherlands, which was the main producer of gilt leather, and even where it was produced in other countries, it was strongly influenced by Dutch examples.
Tapestry and leather hangings were the most expensive of all of the decorative arts used as wall coverings, far more labour-intensive than wood panelling and wainscotting. Sadly, there are remarkably few easily accessible sources of information about this extraordinarily rich medium. The art work is often glorious, emulating tapestry, embroidery and oil painting, but with the added splendour of the three-dimensional embossing, with often intense colours, including silver and gold, contributing a real sense of luxury and wealth. As well as its considerable visual impact, it was also practical, offering a durable layer of insulation. The V&A adds the interesting thought that in dining rooms it had a particular value over tapestry, as leather hangings did not retain any of the smell imparted by food. The examples at Plas Newydd demonstrate its value as a form of decorative art.

Gilt leather wall hanging. The Oak Room with a Flemish and Dutch style still life of flowers typical of the 16th to late 17th centuries.
Embossed and painted leather wall hangings became popular in the wealthiest households in the 16th century, first in Europe and then via the Low Countries into England. Its popularity was rejuvenated once again during the 18th century, when it was particularly influenced by Indian and Oriental examples. The success of Dutch and Flemish gilt leather work is comparable to delftware and oil painting, and like both, there was a large export market for embossed leather. In situ examples are still to be found throughout Europe and beyond and are an important component of museums specializing in the decorative arts. Although leather wall hangings were considered to be durable when compared with tapestries, which were vulnerable to insect incursions and damp, their long-term survival rate has not been poor, and what remains represents a tiny percentage of what was produced.
The so-called gilding, which is incredibly convincing, is apparently not gold, but a cleverly devised concoction developed to resemble it:
The shiny surface on gilt leather is not real gold. The golden surface is created by silver leaves coated with an oil-resinous varnish intensely coloured with yellow substances such as aloe and saffron. These ‘gilded’ leather panels are subsequently decorated with fashionable ornamental patterns. The designs and decorative motives are either directly transferred to the silver leaf (or the gold varnish) with inked wooden moulds, or they are directly impressed on moist leather, after the gilding, with wooden or metallic moulds, adequate to give the surface a more or less sharp relief. The transferred designs are often painted with covering pigments, but mostly with transparent organic colours, lacquers and coloured varnishes in an oil medium. [Gilt Leather Society]
The Gilt Leather Society also describes the steps that followed:
Gilt-leathers with a flat surface are further impressed with punches which border and enhance the scenes and motifs, often complete them, and make vibrant the unpainted gold or silver surfaces. The decoration obtained with plates and moulds is repeated skin after skin, or divided over a few skins, which once connected form a continuous design. The assembly of artefacts is completed by sewing or by gluing the decorated skins.

A design reminiscent of the Italian style of grotteschi pioneered by Raphael after the discovery of the Roman wall paintings in the Domus Aurea in Rome
Utterly fascinating. The Netherlands Institute for Conservation, Arts and Science (NICAS) divides gilt leather into three principal types: flat with decorative repetitive patterns, embossed with decorative or illustrative or representational depictions (figures 11-13), and lastly flat with painted scenes. Although initially following designs developed in textile production, particularly silk brocades, in the 1620s Dutch leather craftsmen began to emboss leather to produce a three-dimensional element to their work, and they began to explore designs that were not derived exclusively from textiles, as described by NICAS:
Designs in the very fashionable auricular style were introduced. Exuberant naturalistic motifs, such as foliage, garlands, flowers, insects, birds and other animals, elegantly covered the whole surface, without a defined orientation. Allegorical or mythological figures were often used, with themes such as the five senses, the four seasons, the four elements and vanitas symbols. This renewed gilt leather was in great demand, both inside and outside the Netherlands. By the end of the seventeenth century designs underwent a change in style. Patterns became symmetrical, the embossments diminished and subsequently disappeared, patterns again began to mimic textile designs. This reflected the French influence in the decorative arts and in architecture at the time. [Posthuma de Boer et al 2016 (NICAS), p.21]

Detail of floral still life shown further up the page
It seems remarkable that the leatherwork has survived as well as it has, given its inherent fragility over long periods of time, and its construction, which the Gilt Leather Society describes as “a delicate sandwich of materials.” Unsurprisingly, given the complexity of production and the resulting costs, gilt leather was gradually replaced by wallpaper after the mid 17th century, undergoing a brief revival in the 18th century.
I have been unable to find any analysis of the leather work at Plas Newydd, so have no idea what sort of date/s could be assigned to them. All the examples in Plas Newydd are impressive for their richness and detail, although they represent a variety of styles, and possibly span more than one period. Although leather panels were used in churches and other ecclesiastical institutions, they were also frequently employed in wealthy homes and high status civic settings, with themes appropriate to those contexts, used in a similar way to tapestries and later wallpaper. There is nothing in the Plas Newydd wall hangings to suggest a religious connection.
xxx
Lincrusta wall coverings
Lincrusta wallpaper in the dining room at Plas Newydd
The dining room at Plas Newydd was remodelled by General Yorke who panelled the room and provided it with its Lincrusta wallpaper, which is not unlike the rich colour of the gilt leather wall hangings in the Oak Room, but was far less expensive and was designed specifically to cover large areas.
In the 1860s Frederick Walton (1834 – 1928) created Linoleum as a floor covering, water-resistant and hard wearing. In 1877 he followed this success with a patent for Linoleum Muralis (wall Linoleum) but it was marketed as Lincrusta-Walton. The Lin was from the Latin Linum for linseed, from which Linoleum and Lincrusta were made, and Crusta meaning relief. It was employed, as the Lincrusta website puts it “from royal homes to railway carriages,” replacing wainscotting, plasterwork and leather hangings, and is still sold today. Not only was it was a new, attractive and durable solution to decorating walls, but it was water resistant too. The manufacturing process combines gelatinous linseed oil and powdered wood, which is combined to form a paste that is first spread onto paper and then passed through steel rollers, one of which has the required pattern embossed on it. At Plas Newydd it does a good job of emulating the leather wall hangings and providing a suitable background for carved furniture.
xxx
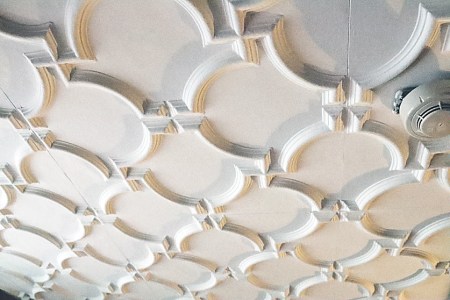
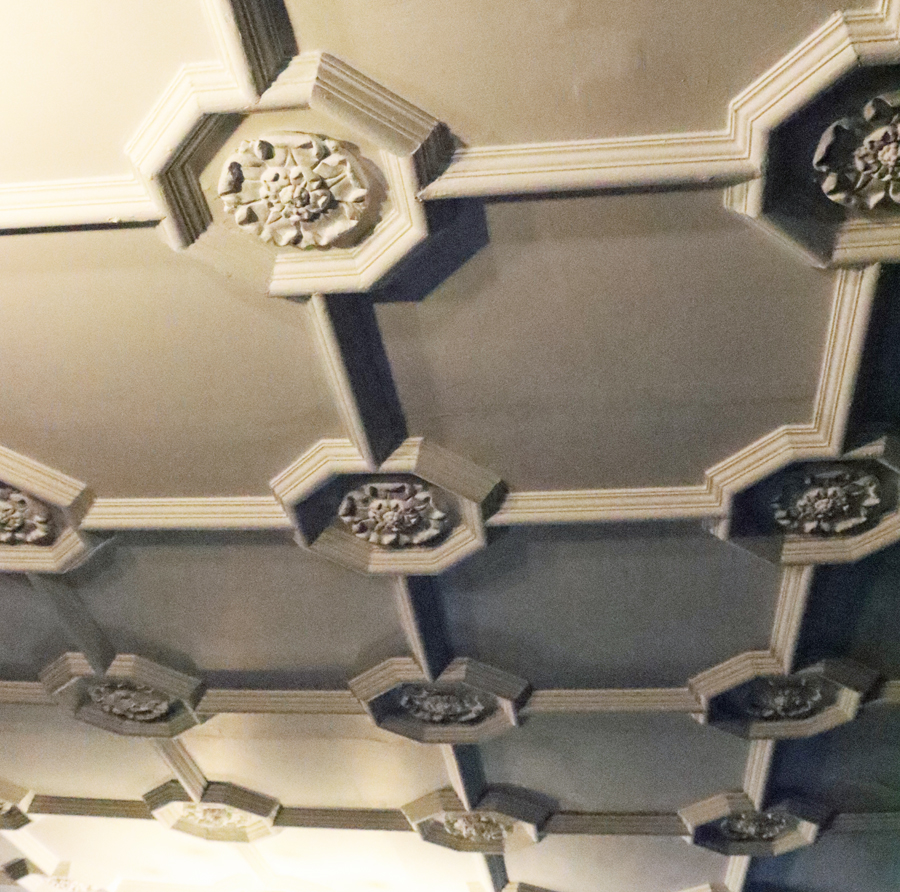
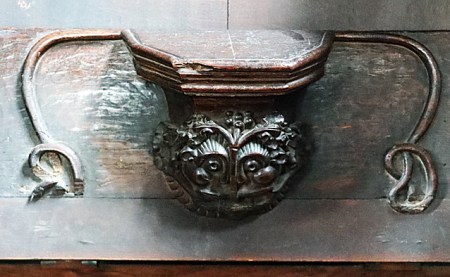
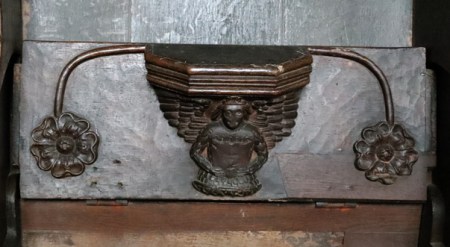
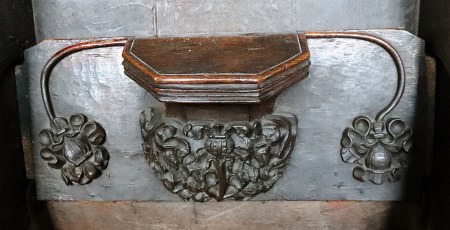
Plaster-work ceilings
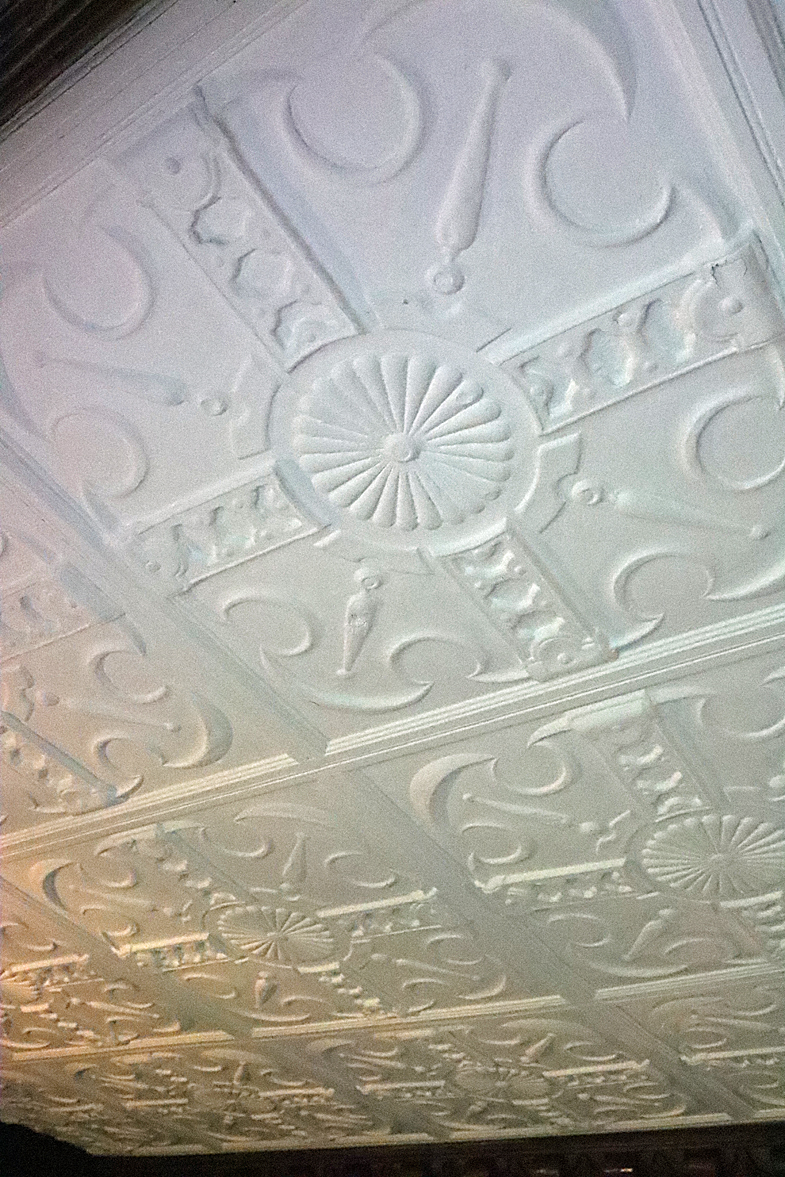
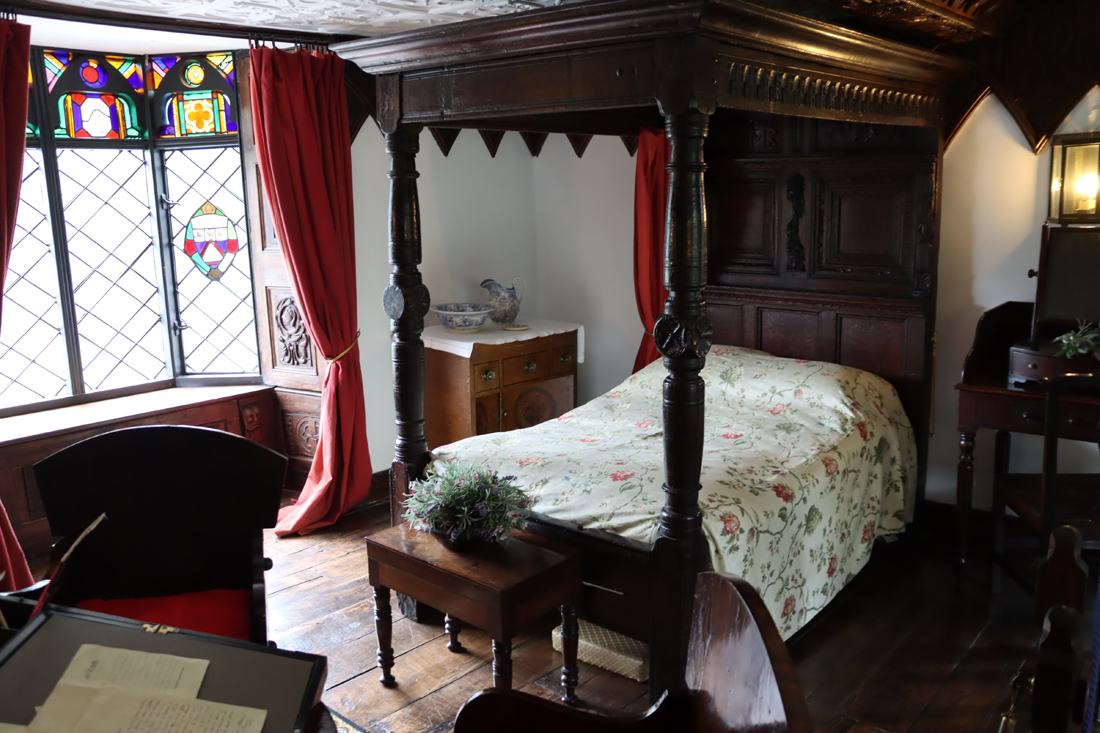
The main bedroom ceiling
Unlike the stained glass and the wooden panelling, it seems inconceivable that Lady Eleanor and Miss Ponsonby could have afforded even one plasterwork ceiling, but it was certainly not beyond the means of General John Yorke, whose purchase of the house was followed by elaborate additions of his own, including the decorative half-timbering of the original cottage that remains today as well as the addition of an entire new wing. The same can be said for Mr Robertson. I have not seen any record of what fitted in either General Yorke’s or Mr Roberston’s wings, so the ceilings in the cottage and the new wing cannot be compared. Given that most of the interior wood and glass of Plas Newydd was assembled from decorative arts installed at other locations, the first question with the plasterwork ceilings is when were they added?
Removing ceilings from one building and transferring them to another sounds ambitious but was occasionally carried out. For example, at Emral Hall near Worthenbury (Wrexham), the ceiling, together with panelling and stone carvings, were lifted from a room and transferred in their entirety to Portmeirion when Emral Hall was scheduled to be demolished. An example from Hyde Abbey House in Hyde in Winchester had been curtailed to fit its new home, making it obvious that it had been transferred from another location because the design had had to be curtailed to fit its new home. Most of the plasterwork ceilings at Plas Newydd, however, look as though they were designed for the rooms in which they were installed, rather than having been cut out of another building. This means that at least some of the ceilings were probably custom-made for Plas Newydd and probably date to the latter half of the 19th century. Even if this assumption is correct, it is unknown which company might have been responsible for the work.
Ceiling in the second bedroom
In the 19th century a number of innovations were made in the manufacturing of ceiling plaster. Gelatine moulds were introduced in the mid 1800s, and hessian began to be added to plaster with timber laths to make it simultaneously more light-weight and much stronger. This resulted in a product that was both a lot easier to move from a workshop and to install. At the same time, the introduction of ornate wall papers created a demand for much simpler geometric ceiling plaster. Without professional insights into the Plas Newydd ceilings, it is impossible to go much further, except to observe that the plaster ceilings are all very nicely made and consist of several different designs. The pattern in the Oak Room is repeated in the second bedroom and the dining room, but the examples in the library and the main bedroom are unique to those rooms. That in the main bedroom is particularly ornate. If anyone has any expertise in this area and have an opinion about the Plas Newydd ceilings, I would be very interested in hearing from you.
xxx

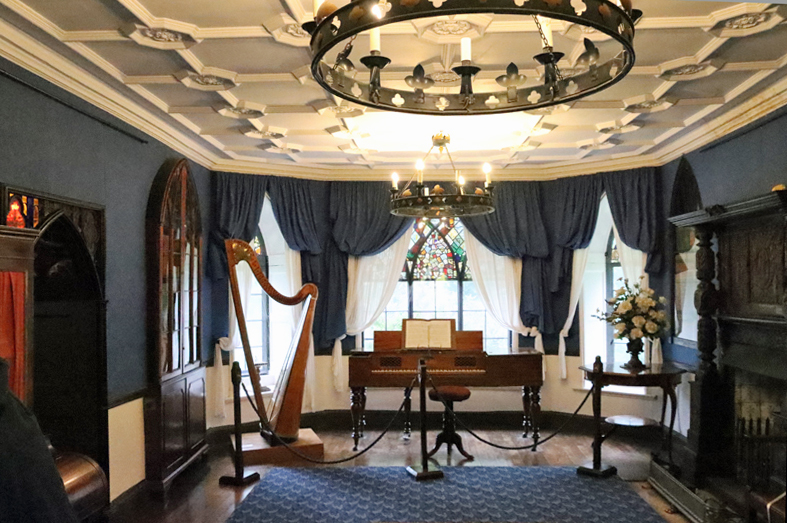
The library

The library
Final Comments
I have not found anything published on the subject of the Plas Newydd decorative arts that have been covered in this post, so the above information is regrettably very short on details relating to the examples in the house. If you are reading this and have an opinion about any of the subjects covered here, it would be great to hear from you.
Although the two wings added by the General and Mr Robertson respectively were demolished due to dry rot in the 1960s, the original cottage with all its embellishments has been beautifully preserved, and this provides insights not only into the achievements of Lady Eleanor and Miss Ponsonby but also into types of decorative art that were favoured by their successors and, in the case of Lincrusta, only became available long after the deaths of the ladies.
The sheer intensity and concentration of the decoration, even without furnishings and collected objects, would probably have stunned Elizabethan and Jacobean audiences, and would certainly have impressed 18th and early 19th century visitors, but although every item is divorced from its original context, each individual piece has a very distinctive voice of its own. The resulting kaleidoscope of colours and textures is remarkable and very satisfying. An amazing visual experience and, as described in the Visiting Details in Part 1, a great day out.

Sources
My thanks again to Michael Freeman for the Plas Newydd pages on his excellent Early Tourists in Wales website.
The audio guide for Plas Newydd, free with your ticket, is a useful introduction to all the different aspects of the house as you are walking around.
Books, booklets and papers
Brazil, Helena 2018. Lincrusta 1877-1887: The development, designs and character of Lincrusta-Walton. Unpublished M.A. thesis. University of Lincoln for the degree of MA by Research, September 2018
https://repository.lincoln.ac.uk/articles/thesis/Lincrusta-Walton_1877_-1887_The_Development_Design_and_Character_of_Lincrusta-Walton/24325975/1
Bostwick, David 1993. Decorative Plasterwork of the Yorkshire Region 1570-1670. Unpublished PhD Thesis, University of Sheffield
https://etheses.whiterose.ac.uk/id/eprint/1895/
van Dam, Jan Daniel and Pieter Jan Tichelaar 1984. Dutch Tiles in the Philadelphia Museum of Art. Philadelphia Museum of Art
https://ia800201.us.archive.org/18/items/dutchtilesinphil00phil/dutchtilesinphil00phil.pdf
Durbin, Lesley 2005. Architectural Tiles. Conservation and Restoration. From the Medieval Period to the Twentieth Century. Elsevier Butterworth-Heinemann
https://www.academia.edu/34465762/Architectural_Tiles_Conservation_and_Restoration
Fleming, John. and Honour, Hugh 1977, 1989 (2nd edition). The Penguin Dictionary of Decorative Arts. Viking
Gapper, Claire, Karen Parker and Edward Roberts 2002. Elizabethan and Jacobean Decorative Features at Hyde, Winchester. Proceedings of the Hampshire Field Club and Archaeological Society (Hampshire Studies), 57, 2002, p.59-80
https://www.hantsfieldclub.org.uk/publications/hampshirestudies/digital/2000s/vol57/Gapper%26others.pdf
Kamermans, John 2014. Developments in Research on Dutch Tiles. In Susanna Varela Flor (ed.) A Herança de Santos Simōes Nova Perspectivas para o Estudo da Azuleraria e da Cerâmica.
van Lemmen, Hans. 2005. Delftware Tiles. Shire Album
Osborne, Harold (ed.) 1970. The Oxford Companion to Art. Oxford University Press
Osborne, Harold (ed.) 1975. The Oxford Companion to the Decorative Arts. Oxford University Press
Posthuma de Boer, Martine, Eloy Koldeweij, Roger M. Groves 2016. Gilt Leather Artefacts: White Paper on Material Characterization and Improved Conservation Strategies within NICAS, Delft. Netherlands Institute for Conservation, Arts and Science (NICAS)
https://www.academia.edu/32424868/Gilt_Leather_Artefacts_White_Paper_on_Material_Characterization_and_Improved_Conservation_Strategies_within_NICAS_Delft_2016
Pratt, Nigel 2020. Decorative Plasterwork in South-West England, c. 1550-1640, Unpublished PhD Thesis, University of Exeter
https://ore.exeter.ac.uk/repository/handle/10871/121309
Volume 1 https://ore.exeter.ac.uk/repository/bitstream/handle/10871/121309/PrattN%20Vol%201.pdf?sequence=1&isAllowed=y
Volume 2 https://ore.exeter.ac.uk/repository/bitstream/handle/10871/121309/PrattN%20Vol%202_TPC.pdf?sequence=3&isAllowed=y
Wells-Cole, Anthony 1997. Art and Decoration in Elizabethan and Jacobean England. Paul Mellon Centre for Studies in British Art / Yale University Press
Veysey, A. Geoffrey and David Freeman 1988. Plas Newydd and the Ladies of Llangollen. Glyndwr District Council. (Based on the booklet by Veysey, County Archivist for Clwyd County Council, published in 1980. Two sections were substantially updated by Freeman in 1988 – the Oak Room and the Ladies’ Bedchamber).
Websites
Adorares
The History and Modern Revival of Spanish Leather Wallpapers
https://www.adorares.com/exploring-european-crafts/the-history-and-modern-revival-of-spanish-leather-wallpapers
British Listed Buildings
Lleweni Hall, including Stables to the NE. A Grade II* Listed Building in Denbigh, Denbighshire
https://britishlistedbuildings.co.uk/300001060-lleweni-hall-including-stables-to-the-ne-denbigh
British Renaissance Plasterwork – The web site of Dr Claire Gapper, based on her PhD research
British Renaissance Plasterwork
https://clairegapper.info/
Building Conservation
Lincrusta-Walton and Other 19th-century Raised Relief Wall Coverings, Building Conservation. By Helena Brazil and Paul Croft
https://www.buildingconservation.com/articles/lincrusta-walton/lincrusta-walton.html
Repairing Lime Plaster Ceilings. By Sean Wheatley
https://www.buildingconservation.com/articles/lime-plaster-ceilings/lime-plaster-ceilings.htm
Brynkinalt Estate
https://www.brynkinalt.co.uk/
Coflein
Emral Hall, Worthenbury
https://coflein.gov.uk/en/site/35805/
Town Hall, Portmeirion
https://coflein.gov.uk/en/site/407060/
Delfts Aardewerk (trans. Delft pottery – articles in English)
https://delftsaardewerk.nl/en
The city of Delft in the seventeenth and eighteenth centuries. By Céline Ariaans, 17th March 2020
https://delftsaardewerk.nl/en/learn/6691-the-city-of-delft-in-the-seventeenth-and-eighteenth-centuries
Driehaus Museum
“The Most Perfect and Beautiful of All Wall Decorations” October 16th, 2016
https://driehausmuseum.org/blog/view/the-most-perfect-and-beautiful-of-all-wall-decorations
Gilt Leather Society
What is gilt leather?
https://giltleathersociety.org/gilt-leather/what-is-gilt-leather/
Gallery
https://giltleathersociety.org/gilt-leather/gallery/
Heritage Plaster Services
Architecture & Plaster Design in the Victorian Period
https://www.heritageplasterservices.co.uk/blog/architecture-plaster-design-in-the-victorian-period
Historic England
Historic Fibrous Plaster in the UK Guidance on its Care and Management
https://historicengland.org.uk/advice/technical-advice/buildings/inspection-and-maintenance-of-fibrous-plaster-ceilings/
Or – https://cadw.gov.wales/sites/default/files/2019-07/Historic%20Fibrous%20Plaster%20Eng_0.pdf
Internet Archive
Catalogue of designs of Lincrusta-Walton manufactured by Fr. Beck & Co., branch of National Wall Paper Co. 1900
https://archive.org/details/gri_33125000661575/mode/2up
The Leiden Collection
Young woman in a niche with parrot and cage
https://www.theleidencollection.com/archives/artwork/GD-105_young-woman-in-a-niche-with-a-parrot-and-cage_2023.pdf
Lincrusta
Home page
https://lincrusta.com/
Brand Story
https://lincrusta.com/about-us/#brand-story
Lincrusta Heritage
Lincrusta-Walton
https://www.lincrustaheritage.co.uk/lincrusta-walton
Homes&Antiques
Tiles of style: why both antique and new Delftware will always be in fashion
https://www.homesandantiques.com/antiques/collecting-guides-antiques/delftware-tiles-collecting-guide
Netherlands Institute for Conservation, Art and Science
Project: Gilt Leather Artefacts
https://www.nicas-research.nl/projects/gilt-leather-artefacts/
Regts Delft Tiles
FAQ
https://www.regtsdelfttiles.com/faq#delfttiles
Where do you still find those antique Dutch Delft tiles?
https://www.regtsdelfttiles.com/blog/where-do-you-still-find-those-antique-dutch-delft-tiles.html
The Stained Glass Museum
Glossary
The Development of Stained Glass in England
https://stainedglassmuseum.com/glossary
V&A
‘Delftware’: tin-glazed earthenware tiles
https://www.vam.ac.uk/articles/delftware-tiles?srsltid=AfmBOoqHATTpRhhTIlBSCGJT3g2_qS8-qt5mh3L7xanNqOlu-Pmp2FG4
Gilt-leather Panel ca. 1650-1670
https://collections.vam.ac.uk/item/O370332/panel-martinus-van-den/
The Victorian Emporium
The Origin of Mouldings, August 4th 2011
https://www.thevictorianemporium.com/publications/history/article/the_origin_of_mouldings?srsltid=AfmBOoqiYBY6zNGjHqpghfsYyUY_xhR4TvZfS4t6S4GfZPrud4jOU-Sf


_(cropped).jpg)